Table of Contents
Advertisement
Quick Links
Advertisement
Table of Contents

Related Manuals for AOC breeze MW0812


Summary of Contents for AOC breeze MW0812
-
Page 2: Table Of Contents
Table of Contents CHAPTER 1 PRODUCT OVERVIEW ..................1 1.1 Functions overview....................1 1.2 Notes .........................1 1.3 Packaging list ......................2 1.4 Technical specifications..................3 CHAPTER 2 BUTTONS AND APPEARANCE...............5 CHAPTER 3 EASYCONFIG....................7 CHAPTER 4 BASIC OPERATIONS ..................11 4.1 Booting up ......................11 4.2 Shutdown........................11 4.3 Network ........................11 4.4 Locking key ......................12 4.5 Reset........................12... - Page 3 5.1 Landscape/Portrait display switching ..............15 5.2 Using virtual keyboard to type ................16 5.2.1 Android keyboard..................16 5.2.2 Editing text ....................16 5.3 Notification panel ....................17 5.3.1 Opening notification panel .................17 5.3.2 Closing notification panel ................17 5.4 Recently run applications ..................17 5.5 Changing wallpaper ....................18 5.6 Power control ......................18 CHAPTER 6 MAIN INTERFACE...................19 6.1 Main interface ......................19...
- Page 4 CHAPTER 7 APPLICATIONS....................36 7.1 Moving a program icon of the interface...............36 7.2 Deleting a program icon ..................36 7.3 Restoring a program icon ..................36 7.4 Adding a program icon..................36 7.5 Adding a Widget.....................37 7.6 Creating a folder.....................37 7.7 Renaming a folder....................37 CHAPTER 8 COMMON TOOLS ...................38 8.1 E-mail........................38 8.1.1 Opening e-mail.....................39...
- Page 5 8.7 Uninstall application ....................45 CHAPTER 9 SETTINGS .......................47 9.1 Wireless & network settings .................47 9.2 Settings ........................51 9.2.1 Wireless & networks ...................51 9.2.2 Sound ......................51 9.2.3 Display......................52 9.2.4 Security ......................52 9.2.5 Applications ....................53 9.2.6 Accounts & sync ..................53 9.2.7 Privacy......................53 9.2.8 Storage ......................53 9.2.9 Language &...
-
Page 6: Chapter 1 Product Overview
Chapter 1 Product Overview 1.1 Functions overview 8 inch wide screen True Color TFT touch screen with a high resolution of 800*600 pixels. Surf the Internet wirelessly via Wi-Fi to enjoy the Internet on the go. Support all mainstream e-mail services for more convenient e-mail sending and receiving. -
Page 7: Packaging List
professional servicing personnel. As the workmanship of motherboard manufacturers are different from each other, it is recommend to perform charging using the adapter provided, instead of using the USB port of the motherboard, to ensure charging stability. The long life of a lithium battery is due to its much smaller memory effects than that of the regular Nickel-Cadmium battery. -
Page 8: Technical Specifications
1.4 Technical specifications Basic specifications Model no. AOC Tablet MW0812 Installed OS Android OS 2.3 Processor (CPU) ARM Cortex-A8,Cpu Frequency Up To 1G Hz Memory 512MB WLAN WI-FI IEEE 802.11b/g/n Bluetooth Bluetooth 2.1 + EDR Storage capacity Built-in 4GB Flash Memory Expansion cards Micro SD (TF) card, up to 32 GB. - Page 9 Battery use time Audio: About 18 hours (Under the condition that the battery is fully Video: About 6 hours charged in a normal Web browsing: About 7 hours temperature) External dimensions Dimension (L×W×H) 8.46 x 5.7 x 0.57 in (21.5 x 14.65 x 1.45 cm) Weight 1.16 lbs (0.525kg) (with battery) Port...
-
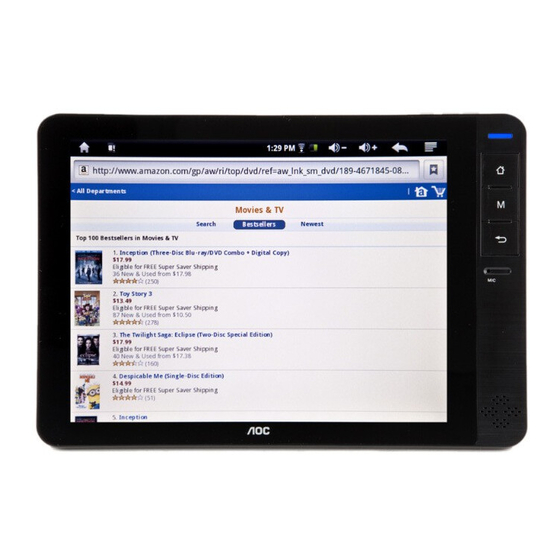
Page 10: Chapter 2 Buttons And Appearance
Chapter 2 Buttons and Appearance A. Power button B. Volume “+” and “-” buttons C. Operation indicator D. Home button: Press to return to the main interface; press and hold to bring out the 8 applications recently run. E. M button (Menu button): Open the F. - Page 11 K. MINI USB port (connecting J. Headset jack to PC) L. OTG port (connecting to USB M. TF card slot drive) N. Power cable jack O. Reset button Note 1: During operation, sounds will be automatically output from the external speaker if there is audio output.
-
Page 12: Chapter 3 Easyconfig
Chapter 3 EasyConfig When first using the tablet breeze,the EasyConfig window will pop up. It includes Language, Date/Time, Calibration and Wi-Fi settings. Tap “Click” to setup language, then choose a language you want. If the settings take effect, the “Default Language” bar will show the choice. - Page 13 Tap “Click” to go to “Date & time settings” interface to setup date, time zone and time. Tap “Click” to setup calibration, then set the touch points according to the steps in the on-screen prompt. When the calibration setting is successful, the wi-fi settings window will pop up.
- Page 14 Press the M button to configure the “Scan” or “Advanced” settings for Wi-Fi network. Scan: Search for the available wireless networks in the vicinity. Advanced settings: 1. Tap “Advanced” to set the network address within the IP locale. 2. Select “Use static IP” to configure the network settings and enter the IP address, gateway,...
- Page 15 network mask, and DNS1 required for Wi-Fi network connection. After configuration, press the M button, tap "Save" to exit to the the wi-fi settings interface with saving. Note: When you use dynamic IP addresses, you do not have select “Use static IP addresses”...
-
Page 16: Chapter 4 Basic Operations
Chapter 4 Basic Operations 4.1 Booting up Press and hold the Power button for about 2 seconds. After the boot screen is shown (for about 1 minute), the unlock interface is shown. Tap and hold the unlock icon at the bottom left corner of the screen and drag it upward to the dot to unlock it. -
Page 17: Locking Key
Note 2: For detailed settings, refer to “8.1 Network Connection” . 4.4 Locking key During use, you can lock the keypad to lock the keys and touch screen to avoid accidental operation. Lock: Press the Power button to lock. Unlock: Press the Power button. After the screen lights up, tap and hold the unlock icon at the bottom left corner of the screen and drag it upward to the dot to unlock it. -
Page 18: Adjusting The Media Volume
4.7.1 Adjusting the media volume There are two ways of going to the “Media Volume” adjustment interface: · In any interface, press or press and hold the Volume +/- button on the top of the product to adjust the media volume. ·... -
Page 19: Touch Screen Operations
level. (example: more than 90%) It is not recommended to charge the product at this time; if charging is performed at this time, the percentage shown may not be 100%. This is normal. Note:Please charge timely to ensure the device works well, when the battery is low. 4.9 Touch screen operations Tip: The display used in this product is a resistive single touch screen. -
Page 20: Chapter 5 Common Features
Chapter 5 Common Features 5.1 Landscape/Portrait display switching 1. In the “Settings” interface, tap “Settings -> Display ->Auto-rotate screen. ” When the “√ ” symbol appeared, the Landscape/Portrait screen display switching is on; when the “√” symbol disappeared, the Landscape/Portrait screen display switching is off. -
Page 21: Using Virtual Keyboard To Type
5.2 Using virtual keyboard to type Tap any text input box to pop up the virtual keyboard as shown below. Use this keyboard to type any text or characters. 5.2.1 Android keyboard A. Show box: Show the text typed. Tap and hold this box to display the Edit Text menu for you to cut, copy, and paste the text. -
Page 22: Notification Panel
Select word Select one word Select all Select all text typed Cut text typed Copy Copy text typed Paste Paste cut or copied text Input method Select the Input method Add “*” to Add the text you type to the dictionary. dictionary 5.3 Notification panel The notification icon appears when a message is received, PC is connected, or music... -
Page 23: Changing Wallpaper
5.5 Changing wallpaper and choose the desire In the main interface, press the M button and tap “Wallpaper,” wallpaper from “Live wallpapers”, “PhotoBrowser” or “wallpapers”. 5.6 Power control In the main interface, tap and hold the space to pop up the “Add to Home screen” menu, and tap “Widgets →... -
Page 24: Chapter 6 Main Interface
Chapter 6 Main Interface Make sure the Wi-Fi wireless network connection is established to use the following functions. 6.1 Main interface After booting and unlocking, you can go to the main interface (as shown below). Tap the space in the taskbar to show the date. Tap and hold this taskbar and scroll down to see A. -
Page 25: Applications Interface
indication the signal indication icon appears. When the Wi-Fi network is disconnected, the icon disappears. G. Battery info Display the current remaining battery level H. Time display Display the system time I/J. Volume Tap to adjust the volume adjustment K. Back Tap to return to the previous level L. -
Page 26: Browser
6.3 Browser Open the browser to enjoy a colorful experience. You can also access news, weather forecast, and sports or traffic information when needed. 6.3.1 Opening browser In the main interface, tap “Browser” to open a webpage. Tip: When you tap a webpage link in an e-mail or message, the browser will be opened automatically. - Page 27 Open new browser window You can open several browser windows, allowing you to browse between several websites easily. Up to 8 browser windows can be opened. To open a new window, press the M button, and tap “New Window” to open a new browser window and go to the preset home page.
-
Page 28: Managing Bookmarks
2. Tap a URL shown in the window list to switch to the selected webpage. Tap “ X ” to close the open window. Selecting link in webpage The selected link will be put in an orange box. · Tap it to open a webpage. ·... -
Page 29: Other Functions
Adding bookmark 1. Open the webpage you want to bookmark. 2. There are three ways of bookmarking: · Press the M button, tap the “Bookmarks” button, and tap “Add” at the top of the bookmark interface. · In the Bookmark tab, press the M button and tap “Bookmark last-Viewed Page”. - Page 30 Setting options: page content settings Text size Tiny, Huge, Small, Normal, and Large are selectable. Default zoom Far, Middle, and Close are selectable. Open pages in overview Show overview of newly opened pages Text encoding Select the encoding type of text Block pop-up windows Select whether the pop-up window should be blocked.
-
Page 31: Video Player
Security settings Remember passwords Save usernames and passwords for websites Clear passwords Clear all saved passwords Show security warning Show warning if there is a problem with a site’s security Advanced settings Set search engine Select a search engine Website settings View advanced settings for individual websites Reset to default Clear all browser data and reset all setting to default... - Page 32 Tap the screen to show the Hide menu: A. Add video bookmark B. Adjust screen brightness C. Tap: Previous video file E. Tap:Next video file Tap and hold: Rewind Tap and hold: Fast forward D. Play/pause G. Return to the video list F.
-
Page 33: Delete Video
Tap any position of the play progress bar to skip to this K. Play position; tap and hold it to move to any position to progress bar continue playing. Note 1: It takes a longer time to play a larger video file. Convert video files that exceed the max. -
Page 34: Playlist
Artists Sort by “Artist” Albums Sort by “Album” Display the all music stored on built-in Songs Flash memory, SD card and USB device Playlists Display the play list Go to the currently played Now playing music file 6.5.1 Playlist In the music file list, tap “playlists” to go to the playlist. Tap and hold “Recently added”... - Page 35 Tap to open the playlist. A. Play list Playing songs at random mode. B. Shuffle A. Stop after the end song is played. C. Play mode B. Repeat playing all songs in the current directory. C. Repeat playing the selected single song. When the network connection is established, tape it to check the link information about the currently File info...
-
Page 36: Sound Effects
6.5.3 Sound effects In the music playing interface, press the M button and tap “Sound effects” to go to sound effects settings interface. Tap “User EQ” to go to User EQ Select interface. Set your favorite sound effects by sliding your finger left and right on the sound effect bar. -
Page 37: Picture Browser
6.6 Picture browser In the main interface, tap “Photo Browser” to go to the picture list. Tip: The system will automatically search for all pictures on Flash memory, SD card and USB device and display them as folders. 6.6.1 Browsing pictures In the directory, tap the pictures you want to browse to open the picture browsing interface. - Page 38 Press the M button to show the menu options -33-...
-
Page 39: Picture File Operation
Share Share the picture through Picasa, Bluetooth or email Delete Delete the current picture. Details Show the name of the picture file, its resolution, etc. Set as Set the picture as desktop background. Crop Cut the picture. Rotate the picture 90° clockwise. Tap this button to Rotate right rotate the picture clockwise in the following order: 90°, 180°, 270°, Restore. - Page 40 Select all the pictures. After select you can share, delete Select All or rotate the selected pictures. X Items Show the number of the selected picture. Deselect All Cancel all the selected pictures. Share the picture through Picasa, Bluetooth, Gmail or Share Email.
-
Page 41: Chapter 7 Applications
Chapter 7 Applications In the main interface, click “ ”on the menu sidebar to go to the “Applications” interface in which the installed applications will be shown. Click the“ “icon to return to the main interface. 7.1 Moving a program icon of the interface To move a program icon to other interfaces, tap and hold the program icon and the screen will switch to another interface. -
Page 42: Adding A Widget
program icon you want to add to the interface; or press the M button on the product to show the menu options and tap “Add” to add program icons. 7.5 Adding a Widget Tap and hold the space of the main interface, tap “Widgets” and tap the icon you want to add to the desktop. -
Page 43: Chapter 8 Common Tools
Chapter 8 Common Tools 8.1 E-mail When you use the e-mail for the first time, you need to create an e-mail account first. 1. Enter the address and password for your e-mail account and tap “Next”. 2. Select an account type. Tap “POP3” for a POP3 account. 3. -
Page 44: Opening E-Mail
5. Enter the account name, and username to finish settings. Note: Since the e-mail service providers may vary, configure the server settings based on the actual e-mail account. This product can support the accounts provided by the popular e-mail service providers, such as yahoo, sohu, etc. 8.1.1 Opening e-mail In the “Tools”... -
Page 45: Receiving And Reading E-Mail
Tip: If you want to send a carbon copy or a blind carbon copy e-mail to other recipients, the M button and tap “Add Cc/Bcc”. 3. Enter the e-mail subject and compose your e-mail. Tip: If you want to add a picture attachment, press the M button, tap “Add attachment,” select the picture you want to attach, and tap it to confirm or tap the “X”... -
Page 46: Managing E-Mail
1. Open an e-mail, and tap “Reply,” “Reply All”. 2. Or open an e-mail, press the M button, and tap “Forward,” “Reply,” “Reply All”. 3. If you select “Reply,” “Reply All,” enter what you want to reply. If you select “Forward,” enter the address of the recipients. 4. -
Page 47: Delete E-Mail Account
frequency options available: Never, Every 5 minutes, Every 10 minutes, Every 15 minutes, Every 30 minutes, and Every hour. Send e-mails form this account by default. Default account Notify in status bar when e-mail arrives E-mail notifications Select ringtone Set the ringtone used when an e-mail is received Incoming settings Display and change the receiving server settings outgoing settings... -
Page 48: Alarm
previously recorded file. Note 1: The recorded file can be automatically saved in the “RECORD” folder so that you can find them in the AudioPlayer “ playlists ->My recordings” to play. Note: The naming rule of the recorded file: recording_Year+Month+Date_Serial Number. -
Page 49: Set Alarm
8.3.1 Set alarm 1. Tap the preset alarm to set the selected alarm, or tap “add alarm” to add new alarm. 2. Tap “Time”, and set the time for the alarm. Tap “+” or “-” to adjust the time, and tap “Set”... -
Page 50: Calculator
“Date and Time”. 8.4 Calculator In the applications interface, tap the “Calculator” icon to go to the calculator interface. You can perform the basic math operations by this calculator. 8.5 Explorer In the main interface, tap “Explorer” to go to the Explorer interface that includes the following options: Home Tap to return to the root directory. - Page 51 2. Select “Settings” to go to the settings menu. 3. Select “Applications”. 4. Select “Manage Application”. 5. Tap the application you want to uninstall. 6. Tap “Uninstall”. 7. Tap “OK” to start uninstalling. Tip: You cannot delete the pre-installed factory default applications on this product. -46-...
-
Page 52: Chapter 9 Settings
Chapter 9 Settings In the main interface, tap the “Settings” icon or press the M button to show the settings button to go to the “Settings” interface. 9.1 Wireless & network settings 9.1.1 Wi-Fi network connection Connection 1. Tap “Wi-Fi” to enable Wi-Fi and this product scans for available wireless networks. 2. - Page 53 Advanced settings 1. Press the M button, and tap “Advanced” to set the network address within the IP locale. 2. Select “Use static IP” to configure the network settings and enter the IP address, gateway, network mask, and DNS1 required for Wi-Fi network connection. After configuration, press the M button, tap "Save,"...
- Page 54 Note: When you use dynamic IP addresses, you do not have select “Use static IP addresses” to configure the network settings. 3. After “IP settings”, go back to the Wi-Fi settings interface and tap the wireless network you want to connect to. After the network connection is successfully established, you can login to the network to surf the Internet.
- Page 55 Tip 2: Not all wireless networks are connected to the Internet. Some wireless networks may be connected to several computers and cannot be connected to the Internet. 9.1.2 Blueto oth connection Turn on Bluetooth 1. Tap “Bluetooth” to en able Bluetooth. 2.
-
Page 56: Settings
input pairing code. Input 0000 or 1234, and the breeze will pop up the “Bluetooth pairing request” window. Input the same paring code and tap “Ok” to finish paring. Connection If you want to use Bluetooth keyboard or headset, tap and hold the name of the device to connect. -
Page 57: Display
9.2.3 Display Adjust the screen brightness. Tap Brightness the brightness bar to adjust the volume level and tap “OK” to sav When unit is turned on/off or rotated, the Landscape/Portrait switching Auto-rotate screen feature is enabled. This product supports 4-direction rotation display. -
Page 58: Applications
9.2.5 Applications Unknown sources After enabled, this allows installation of non-Market applications. Manage and de lete the installed applications: For Installed(or uninstall) software, move applications to Manage applicatio device or SD card, clear data, cache, and default, and force stop. Running services View and con trol currently running services. -
Page 59: Language & Keyboard
Available Show the free space on an SD card. space When an SD card is inserted, its total actual free space will be shown. When a TF card is not inserted, it shows unavailable. Unmount Safely remove the SD card loca lly. -
Page 60: Date & Time
9.2.12 Date & time Set date Set year, month, day. Select time zone Select the time zone of eac h major cities in the world Set time Set hour , minute, second Use 24-hour Show 24-hour or 12-hour form format Select date format Select the format used for date display. -
Page 61: Chapter 10 Using Micro Sd (Tf) Card
Chapter 10 Using Micro SD (TF) Card The external card supported by this product is a Micro SD card, through which the capacity of storage can be expanded. Meanwhile, Insert the silk screen chip out of the Micro SD card into the card slot until it is fully inserted into the product. When you remove it, press the Micro SD card downward to eject it. -
Page 62: Chapter 11 Connecting To Usb Drive
Chapter 11 Connecting to USB Drive Insert your USB drive into the OTG port at the right side of the product. Open Explorer and you can see the “USB” directory. This directory is your USB drive. Tap USB to check the files on USB drive. Note that when this unit is connected to the USB drive, it should shutdown;... -
Page 63: Chapter 12 About The Battery And Power
Chapter 12 About the Battery and Power This product uses a built-in 4800mAh polymer lithium battery to charge the battery. When the product operates individually, power is fed from the lithium battery. When the provided charger is inserted, the charger is powered automatically via the charger. When you charge this product for the first time, it is recommended to shutdown the product and continuously charge it for more than 8 hours for optimal battery use. -
Page 64: Chapter 13 Firmware Updating / Resetting To Factory
Chapter 13 Firmware Updating / Resetting to Factory 1. Go to for the website (www.aoc.com) to download the current /latest firmware for your device, (current-<model-ID>.img). 2. Copy the downloaded firmware to the built-in flash in the product. 3. Safely disconnect the product and PC and the screen shows a prompt similar to one shown below: Tap “Install”. -
Page 65: Chapter 14 Frequently Asked Questions
Chapter 14 Frequently Asked Questions · or boot abnormal Product cannot be turned on Check if the battery is charged Connect the power adapter and check it again. Tap the Reset button on the side of the product and turn it on. Shutdown, then press the “volume + “button and Back button at the same time till insert charger. - Page 66 · Connect to Wi-Fi but cannot surf the Internet Make sure that there is wireless network nearby. If static IP addresses are needed, make to enter a valid IP address. If dynamic IP addresses are used, static IP addresses should be disabled while the network is connected. ·...
-
Page 67: Chapter 15 Troubleshooting
Chapter 15 Troubleshooting When I view JEPG pictures, some cannot be viewed. Why? Some JPEG files may have a non-standard resolution, they may not be viewed in full screen, or zoomed in or out. If an error prompt appears, press the ESC button to exit or tap the Reset button on the side of the product to solve the problem. - Page 68 usually solved. 6. The space available on PC is not consistent with that shown on the tablet. The space on a PC is calculated by 1024 bytes while this tablet’s capacity is calculated by 1000 bytes. So the actual free space of the tablet will be slightly different from indicated capacity, also the operating system uses part of the available space.
Need help?
Do you have a question about the breeze MW0812 and is the answer not in the manual?
Questions and answers