Table of Contents
Advertisement
1050 Fountain St. N., Cambridge, Ontario, Canada N3H 4R7
Bus. (519) 650-5775 or Fax (519) 650-3773
Toll Free Phone 1-800-361-1517
Toll Free Fax 1-800-327-5609
Model 3800-3820
Model 3805-3825
Installation and Operation Guide
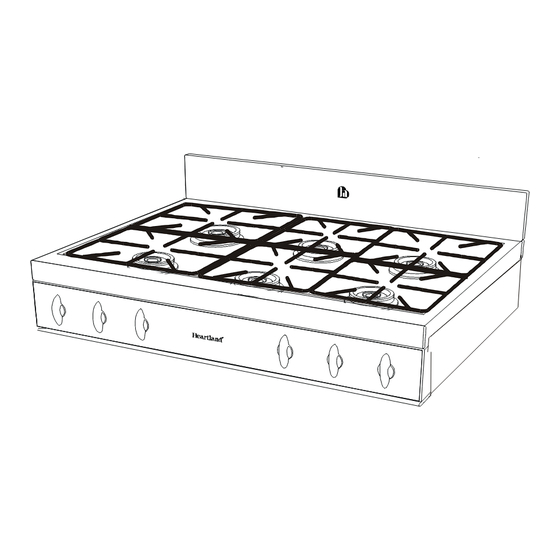
30" and 36" Gas Cooktop
36" cooktop
30" cooktop
Note:
Please
read
these
instructions thoroughly before
attempting to install this unit. Failure
to follow installation instructions
will result in costly service calls.
®
Note: This appliance can only be installed in the state
of Massachusetts by a Massachusetts licensed
plumber or gasfitter.
C
US
Save these instructions for future use
© 2005 HEARTLAND APPLIANCES INC.
032205
ATTENTION INSTALLER: Leave this manual with appliance
#39380
Advertisement
Table of Contents
Troubleshooting

Related Manuals for Heartland Appliances 3805-3825

Summary of Contents for Heartland Appliances 3805-3825
- Page 1 1050 Fountain St. N., Cambridge, Ontario, Canada N3H 4R7 Bus. (519) 650-5775 or Fax (519) 650-3773 Toll Free Phone 1-800-361-1517 Toll Free Fax 1-800-327-5609 Model 3800-3820 Model 3805-3825 Installation and Operation Guide 30” and 36” Gas Cooktop 36” cooktop 30” cooktop...
- Page 2 Person. 2. Warranty applies to product only in the country in which it was purchased. 3. Heartland is not liable for any claims or damages resulting from any failure of the Cooktop or from service delays beyond their reasonable control.
-
Page 3: Table Of Contents
Installation / Clearance Diagrams ... 3-10 Exhaust Hood ... 11 Electrical Installation ... 11 Gas Line Installation ... 11 Preparing the Cooktop for Installation ... 12 Section 2: Cooking Controls ... 13 Cooktop Features... 13 Control Panel Graphic ... 14 Section 3: Burner &... -
Page 4: For Your Safety
Do not attempt to extinguish a grease fire with water. Cover grease fires with a pot lid or baking soda. • Avoid the use of aerosol containers near the cooktop. Note: This unit contains a pre-set regulator. The use of a gas cooking... -
Page 5: Installation And Assembly
Installation Clearances Should the cooktop be installed adjacent to a refrigerator, it is important that there be a minimum of 5” (13 cm) of space between the two appliances for proper air circulation. -
Page 6: Installation / Clearance Diagrams
Figure 1 Clearances • Minimum distance between the cooktop and a side wall above the cooktop surface is 6” (see dim "J" in Table 2 on next page) • Depth of cutout must not exceed 25”. (see dimension G) Air intake slots on underside of control panel or covered. - Page 7 36” hood, however a 30” hood is adequate. Figure 2 Note: If cooktop must stand beside a refrigerator, it is important for proper air circulation that there be at least 5” (13 cm) of space between the two appliances.
- Page 8 Splashback Kit. Responsibility for ensuring that the rear wall is non-combustible lies with the owner or end user. (check local building codes) - if wall behind cooktop is deemed combustible and our splashback kit is not installed, then the minimum spacing from the back of stove to nearest combustible wall is 6”...
- Page 9 42” hood, however a 36” hood is adequate. Figure 2 Note: If cooktop must stand beside a refrigerator, it is important for proper air circulation that there be at least 5” (13 cm) of space between the two appliances.
- Page 10 Figure 1 Clearances • Minimum distance between the cooktop and a side wall above the cooktop surface is 6” (see dim "J" in Table 2 on next page) • Depth of cutout must not exceed 25”. (see dimension G) Air intake slots on underside of control panel must or covered.
- Page 11 36” hood, however a 30” hood is adequate. Figure 2 Note: If cooktop must stand beside a refrigerator, it is important for proper air circulation that there be at least 5” (13 cm) of space between the two appliances.
- Page 12 (see dim "J" in Table 2 on next page) • 0” Clearance to the back of the cooktop may be obtained when installing the appliance against a non - combustible wall or with the installation of our Splashback Kit. Responsibility for ensuring that the rear wall is non - combustible lies with the owner or end user.
- Page 13 42” hood, however a 36” hood is adequate. Figure 2 Note: If cooktop must stand beside a refrigerator, it is important for proper air circulation that there be at least 5” (13 cm) of space between the two appliances.
-
Page 14: Exhaust Hood
A conversion kit may be purchased at a later time and installed on site should the need arise. The cooktop requires a ½” NPT connector. Use minimum 5/8” diameter flexible line. Note: This unit contains a pre-set regulator. -
Page 15: Preparing The Cooktop For Installation
Cooktop Cut-out handles With TWO people, carefuly lift the cooktop top from the box using the card- board support with the cut-out handles for lifting. (See fig. 3) Place cooktop on a solid table for removal of plastic bag and a final inspection of product. -
Page 16: Section 2: Cooking Controls
The cooking controls are located on the front of the cooktop. These controls offer an infinite number of heat settings for ease and accuracy in cooking. They have a range from 15,500 BTU (setting #5) to as low as 450 BTU (setting #1) Refer to page 14 (fig.6) or page 17 (fig.7) for details. -
Page 17: Control Panel Graphic
Control Panel Graphic (fig 6) These illustrations show the control panel layout of each model. The Legacy is shown, however, the Metro has a similar layout. 4 burner - top illustration 6 burner - middle illustration 4 burner & grill - bottom illustration... -
Page 18: Section 3: Burner & Grill Operation
Burner and Grill Operation Lighting the Top Burners and Grill Cooktop is equipped with a spark ignition system that is electrically operated. Pushing in and turning the knob to any position will light the burner. When the knob is turned, a distinct clicking noise will be heard. -
Page 19: Grilling Guide
Grilling Guide (For 36” units with grill feature) Generally we recommend preheating the grill 10 minutes on high. This provides a more even heating of the grill. Then follow the guide below. When grilling roasts and thick meats sear on high then reduce heat to allow food to cook through- out and not burn. -
Page 20: Care And Cleaning
Avoid abrasive cleaners. If any acid based food or liquid, such as lemon juice or tomato juice, is spilled on the cooktop, wipe it at once to prevent staining. Depending on level of acidity, some minor discoloration may occur. -
Page 21: Surface Burners
Windex and a soft cloth. If any acid based food or liquid, such as lemon juice or tomato juice, is spilled on the cooktop, wipe it at once to prevent stain- ing. C ross ring -b ra ss... -
Page 22: Grill
Grill The easiest way to clean the grill is immedi- ately after cooking. First, turn the control valves to the OFF position. ( “O” ) Do not handle the porcelain. Wearing an oven mitt, to protect hands from the heat and steam, dip a barbecue brush in tap water. -
Page 23: Section 5: Trouble Shooting
Burner Set Up and Adjustment The cooktop was carefully set up and inspected at the factory but some final adjustments may be necessary once the unit is installed. Important: ensure burner rings are assembled properly First, check to ensure there are no gas leaks. -
Page 24: Power Failure Operation
Power Failure Operation Electricity to the cooktop only powers the auto ignition. If electrical power is interrupted, meals can still be cooked on the top burners of your cooktop. Follow these simple directions to manually light the burners. Caution: Make sure your hands and clothing... -
Page 25: Gas Trouble Shooting Chart
All burners that are Defective module turned on have lighted but electrodes are still Ground/Earth lead to module sparking disconnected or cooktop chassis not properly connected to ground/earth by ground/earth lead or through third prong of power cord plug, combined with reversed power... -
Page 26: Section 6: Reference
Accessories Wok Ring #3389 Stainless steel 9” diameter ring manufactured to fit standard size woks. The wok ring is designed to fit into the grate fingers of Metro and Legacy series ranges. (fig 11) (fig 11) Legacy/Metro Griddle Kit #3809 Support is stainless steel for long lasting and easy clean up. -
Page 27: Parts Drawing And Description
Parts Drawing & Description (fig 12) 3350 Double cast grate 3364 Grill 3457 Small pot ring 3483 Chrome Control knob 3484 Commercial Knob - Black- W/Screening 3486 Commercial Knob Chrome Bezel 3660 Dual burner inner head D - black 3661 Dual burner inner base D - brass 3662 Dual burner outer head D - black... -
Page 28: Section 7: Safety Guidelines
Safety Guidelines Exhaust Hood Safety Caution: Do not store items of interest to children in cabinet above the cooktop or on top of cooktop cabinet. Children climbing on cooktop to reach items could be seriously injured. -
Page 29: Selecting The Proper Cookware
Selecting the Proper Cookware Utensils will affect the overall safety and performance of cooktop cooking. It is impor- tant to select them carefully. An improperly selected utensil will not cook efficiently or evenly. For best results, follow these guide- lines:... -
Page 30: Safety Precautions
Never block the vents (air openings) of the cooktop. They provide the air inlet and outlet that are necessary for the cooktop to operate properly with correct combustion. Air openings are located on the bottom of the front control panel. - Page 31 Clean the cooktop with caution. Avoid steam burns; do not use a wet sponge or cloth to clean the cooktop while it is hot. Some cleaners produce noxious fumes if applied to a hot surface. Follow manufacturer’s directions.
- Page 32 4 sealed burners and centre grill! Electric convection oven come standard. Also available in stainless steel as model 3635 Metro. Cooktop versions for both Metro 3835 and Legacy 3820 models are available. 9720 (Built-in)- Dual oven, one convection, one standard radiant.
Need help?
Do you have a question about the 3805-3825 and is the answer not in the manual?
Questions and answers