Table of Contents
Advertisement
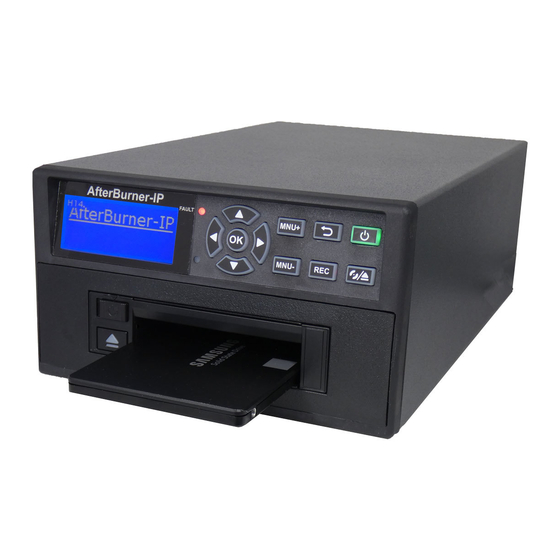
Time-Lapse DVD Recorder
Ovation Systems Ltd.
Springfield Barn
London Road
Milton Common
Oxfordshire
OX9 2JY
UK
Tel:
+44 1844 279 638
Fax:
+44 1844 279 071
Email:
support@ovation.co.uk
Web:
www.ovation.co.uk
Manual Issue 046
Afterburner firmware .046
AfterBurner
Time-Lapse DVD
Video Recorder
User Guide
Ovation Systems Ltd.
www.ovation.co.uk
User Guide
Page 1
Advertisement
Table of Contents

Subscribe to Our Youtube Channel
Related Manuals for Ovation Systems Time-Lapse DVD Recorder

Summary of Contents for Ovation Systems Time-Lapse DVD Recorder
-
Page 1: Video Recorder
User Guide Time-Lapse DVD Recorder AfterBurner Time-Lapse DVD Video Recorder User Guide Ovation Systems Ltd. Springfield Barn London Road Milton Common Oxfordshire OX9 2JY Tel: +44 1844 279 638 Fax: +44 1844 279 071 Email: support@ovation.co.uk Web: www.ovation.co.uk Manual Issue 046 Ovation Systems Ltd. -
Page 2: Table Of Contents
External I/O & Control......................24 Examples of External Control....................26 Rear Panel Configuration Switches..................27 6 Appendix1: AfterBurner Operation Hits & Tips ............28 Reviewing The Unit’s Configuration ..................28 Reset to Factory Defaults ....................... 28 Transferring AfterBurner Configuration to Other Units............28 Join a Number Of Small Files Together ................. -
Page 3: Introduction
(real-time or time-lapse) Figure 1: Typical AfterBurner Application AfterBurner records to a hard-disk which allows the re-burn of disks in the event of a power failure or malfunction and to provide duplicates when required. It is also possible to leave the unit unattended for a week or more, collecting data that can be downloaded to DVD at a later date. -
Page 4: Hardware Installation
1 Connect power to the unit via the 12 V DC supply provided or if using an external supply, AfterBurner requires a 10 to 20 V DC supply, drawing approximately 0.7A at 12 V when recording, 1.2 A when burning DVDs. -
Page 5: Basic Operation & Configuration
AfterBurner is simple to set-up and operate via its front panel LCD and control buttons. Please note: Afterburner is a video (and audio) recorder (not a player). The only way to view the recordings is by burning them onto DVD. -
Page 6: Front Panel Controls
MENU key. Alternatively, the current status will be automatically stored when the screen times-out after 3 minutes. When not recording, AfterBurner automatically enters stand-by when no key is pressed for 5 minutes. At any point when navigating the LCD menus, it is possible to return to the start- Tip: up screen by pressing the MENU key for 2 seconds. -
Page 7: Record Set-Up
Time-Lapse DVD Recorder 3.2 Record Set-up As standard, AfterBurner is shipped configured for 24 hour time-lapse recording (at 2 pictures per second) in medium quality. This may be altered by pressing the “MENU” key 3 times to show the following screen:... -
Page 8: Set The Burn Mode
AfterBurner has enough data, and if there is a suitable blank disk in the DVD tray, AfterBurner will automatically burn a DVD (4.7 GB). For example, if the unit has been set to record in 24 hour mode, it will start burning a DVD 24 hours after recording starts. If a DVD is unavailable to burn, AfterBurner starts a new file on the internal hard disk, which can be burnt when complete. -
Page 9: Start / Stop Recording
Feb 2007. Record-pause mode is selected in the “Set Disk Options” advanced menu, see Section 4.1 page 12. In this mode, pressing the “Record” button whilst recording causes AfterBurner to enter “Record- pause”, indicated by a slowly flashing record button. A short press of the “Record”... -
Page 10: Burning A Dvd
See Section 4.2 page 8, “Set Burn Options” NB: If AfterBurner is recording, the current file will be shown with an end time of “now”. If this file is selected, the resulting DVD contains video up to the point when the burn commenced. -
Page 11: Playing Dvds
12 = 60 minutes. If AfterBurner is set to alarm mode, a chapter marker is inserted at the point of each alarm, up to a maximum of 99. If there are more than 99 alarms, the DVD file on the internal hard disk is closed and a new file opened. -
Page 12: Advanced Menus
User Guide Time-Lapse DVD Recorder 4 Advanced Menus The advanced menus are accessed by pressing the “MENU” key until “Advanced Menus” is shown. Then press ► to enter this option. Advanced Menus =================== ► to enter The advanced Menu items are shown below... -
Page 13: Set Disk Options
AC-3: NB: LPCM and AC-3 may have problems with playback on certain players, especially in “high” and “very high” video quality modes. (default) AfterBurner will stay on unless a timer is active Auto Shutdown: Smart: when it will enter stand-by after 5 minutes of idle operation. -
Page 14: Burn Options
Join files: No/Yes: before burning. With this option “on”, AfterBurner will join as many files as possible (up to a total of 1 GB) starting with the selected file in the “Set Burn File” menu (see Section 3.5) Once used, this option will return to the “off”... -
Page 15: Set Record Timer
NB: Once set-up, the timer is enabled whenever the unit is left on or in standby. NB: If the unit is waiting for the timer activation and the user presses record, AfterBurner will immediately start recording and then stop at the next time off time. Manual Issue 046 Ovation Systems Ltd. -
Page 16: Set Alarm Options
Time-Lapse DVD Recorder 4.4 Set Alarm Options Allows Afterburner to increase its picture record rate under control of external alarms inputs (pins 1 & 2 of the external control I/O connector, see Section 5.1). There are various alarm modes described below which are selected by the ▲ ▼ keys:... -
Page 17: Set Video Options
User Guide Time-Lapse DVD Recorder 4.5 Set Video Options This menu controls the video input configuration. Set Video Options =================== Src: BNC Colour Level: Auto video input source – BNC, S-video (default: BNC) Src: colour or monochrome input mode (default: Colour) -
Page 18: Set Onscreen Display (Osd) Format
User Guide Time-Lapse DVD Recorder 4.6 Set Onscreen Display (OSD) Format This menu controls on -screen display configuration: Set OSD Format =================== OSD: Set A Locale: UNVERSAL NB: it is recommended to use the video monitor output when adjusting the OSD format. - Page 19 User Guide Time-Lapse DVD Recorder User OSD Set-up: Enter by pressing ► at the flashing “User” prompt. There are 5 possible on-screen items that can be set-up to show a number of parameters, along with the position, colour and format.
-
Page 20: Set Time & Date
USA: October) The opposite to European AUS: Pressing ► again configures the external synchronisation of the AfterBurner clock via pin 4 of the external I/O control connector. External time-code radio receiver required. See Section 5.1, page 24. Time-sync disabled Time-sync:... -
Page 21: Set Active Keyes
User Guide Time-Lapse DVD Recorder 4.9 Set Active Keyes Allows “MENU”, “REC” , “DVD” and “STBY” front panel keys to be disabled when the rear panel configuration switch “B” is set to ON. See Section 5.3 for more information about the rear panel configuration switch. -
Page 22: Set Configuration
User Guide Time-Lapse DVD Recorder 4.11 Set Configuration Reset the AfterBurner system configuration to factory defaults and enable load-system- configuration from CD or DVD disk. Set Configuration =================== Factory setup? No Enable setup? if set to “yes” and the ► key pressed, the unit’s system Default values?: configuration will be returned the factory default settings. -
Page 23: Rear Panel Interfaces
SERIAL 1 (to PC) +12V RIGHT RIGHT EXTERNAL DVD POWER AUDIO +12V DC @ 3A(max) Figure 5: AfterBurner Rear Panel Connections. Function Description Mating Connector Power 9 to 18 V DC input 3 Amps max. Reverse Lemo_FGG.1B.302.CLAD62 polarity protected. Lemo FGG.1B.303.CLL... -
Page 24: External I/O & Control
Time-Lapse DVD Recorder 5.1 External I/O & Control AfterBurner has a 14 way external input / output and control interface which have functions based upon the now obsolete Panasonic 6730 S-VHS time-lapse VCR. NB: With the current issue of AfterBurner firmware, the external I/O and control interface has a limited capability. - Page 25 Can be used to synchronise a second AfterBurner unit. Chain-out Asserted when disk is 5 MB from being full. Can be used to start a second AfterBurner recording when connected its “Chain In” input. Fault Active low, open collector output.
-
Page 26: Examples Of External Control
User Guide Time-Lapse DVD Recorder 5.2 Examples of External Control External Alarm Sensor: ● Connect sensor to pin 1, the Alarm-start input. 1 Alarm-start ● In the in the “Set alarm options” advanced menu set “on open” or “on PIR Detector 7 Ground closed”... -
Page 27: Rear Panel Configuration Switches
Front panel backlight. ON = always on, OFF = on for 5 seconds after each key press Aux: Not used. Lock: Front panel lock-out, see Section 4.9 AfterBurner always on, disables the front panel STBY switch. Manual Issue 046 Ovation Systems Ltd. Page 27 Afterburner firmware .046 www.ovation.co.uk... -
Page 28: Appendix1: Afterburner Operation Hits & Tips
4.11, page 22). 6.3 Transferring AfterBurner Configuration to Other Units From version 034 onwards, AfterBurner burns to the root directory of each DVD a file called "aftburn.ini" which contains the configuration of that unit at burn time. Other AfterBurners may be loaded with exactly the same configuration by the following procedure. -
Page 29: Join A Number Of Small Files Together
Create one DVD file per day starting midnight If AfterBurner is being used in 24-hour mode it is often useful to make one DVD per day starting at midnight (ie one disk for Monday, Tuesday and so on). This can be achieved by setting the “Burn at given time”... -
Page 30: Appendix 2: User Firmware Upgrades
From firmware version 34 onwards (September 2005), the upgrade files maybe burnt onto to a CD or DVD. This CD or DVD is then be inserted into the AfterBurner DVD tray, where the upgrade takes place automatically. For firmware versions of 033 and lower, the upgrade files have to be transferred by the RS232 port. - Page 31 User Guide Time-Lapse DVD Recorder 7.2 Menu Map: Manual Issue 046 Ovation Systems Ltd. Page 31 Afterburner firmware .046 www.ovation.co.uk...
-
Page 32: Appendix 4: Specification
User Guide Time-Lapse DVD Recorder 8 Appendix 4: Specification General: Operating temperature range 0 to +40°C Mechanical size 155 x 90 x 260 mm Finish Painted aluminium Weight 2.2 kg approx. Standard accessories Mains PSU, user guide Operating voltage range...
Need help?
Do you have a question about the Time-Lapse DVD Recorder and is the answer not in the manual?
Questions and answers