Table of Contents
Advertisement
Read all instructions BEFORE
assembly and USE of product.
KEEP INSTRUCTIONS FOR
FUTURE USE.
Lea todas las instrucciones ANTES
de armar y USAR este producto.
CONSERVE LAS INSTRUCCIONES
PARA USO FUTURO.
Lire toutes les directives AVANT de
monter et d'UTILISER ce produit.
CONSERVER CES INSTRUCTIONS
POUR UTILISATION FUTURE.
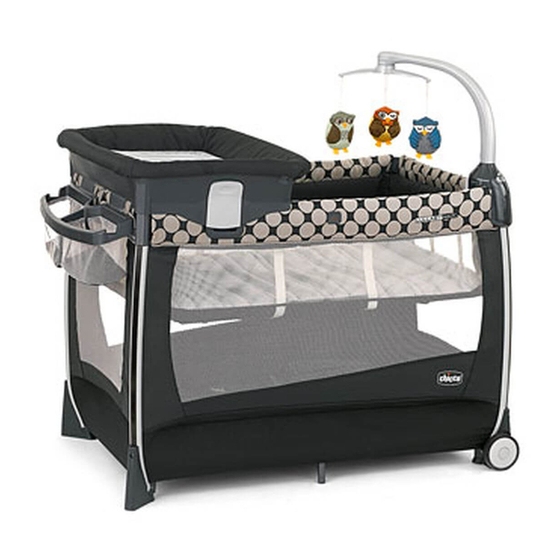
Lullaby Magic
Owner's Manual
Manual del propietario • Manuel du propriétaire
IS0055.7ESF
©2012 Artsana USA, INC. 01/12
Advertisement
Table of Contents

Related Manuals for Chicco Lullaby Magic


Summary of Contents for Chicco Lullaby Magic
- Page 1 CONSERVE LAS INSTRUCCIONES PARA USO FUTURO. Lire toutes les directives AVANT de monter et d’UTILISER ce produit. CONSERVER CES INSTRUCTIONS POUR UTILISATION FUTURE. Lullaby Magic Owner's Manual Manual del propietario • Manuel du propriétaire IS0055.7ESF ©2012 Artsana USA, INC. 01/12...
- Page 2 CHILD. WHEN USED FOR PLAYING, • The bassinet is designed for use ONLY NEVER LEAVE CHILD UNATTENDED. with this Chicco Lullaby Magic Playard. • Playard MUST be fully assembled • Stop using the changing table when with all top rails and center floor hub your child reaches 25lbs (11.4 kg).
- Page 3 WARNING Failure to follow these warnings and the instructions could result in serious injury or death • If a sheet is used with the pad, use • Never leave changing table in place only a fitted playard sheet specifically when child is in the playard. designed to fit snug with at least 2”...
- Page 4 ÚNICAMENTE en este corralito correctamente. El niño puede rodar Lullaby Magic de Chicco. en el espacio entre la almohadilla y • Deje de utilizar el cambiador cuando los laterales de malla floja, y corre el niño pese 25 libras (11.4 kg).
- Page 5 únicamente fabricadas con ese fin. Pueden la colchoneta o almohadilla para provocar asfixia. el piso Lullaby Magic de Chicco • NO use colchón de agua con este proporcionada por el fabricante. producto. NUNCA use colchones o acolchados adicionales.
- Page 6 ADVERTENCIA El incumplimiento de estas advertencias e instrucciones puede ocasionar lesiones graves o la muerte. EVITE EL RIESGO DE • NO cuelgue cuerdas en la cuna o el ESTRANGULAMIENTO: corralito. • NUNCA use colchones, acolchados • NO coloque el corralito cerca de o sábanas adicionales ni otros una ventana donde las cuerdas objetos que permitan que el niño se...
- Page 7 UNIQUEMENT avec ce Parc Lullaby de plancher ne soient solidement Magic de Chicco. verrouillés en place et que le matelas • Cesser l’utilisation de la table à de sol ne soit installé. Un bébé peut langer lorsque l’enfant atteindra 11,4...
- Page 8 Communiquer avec douillette ou coussin. Chicco pour obtenir des pièces de • Si une feuille est utilisée avec le pad, rechange ou un nouvel exemplaire du utilisez uniquement une feuille de mode d’emploi.
- Page 9 MISE EN GARDE Ne pas se conformer à toutes les mises en garde et directives peut causer des blessures graves ou même la mort. ÉVITER LES DANGERS DE • NE PAS suspendre de cordons dans la STRANGULATION : couchette ou le parc. •...
-
Page 10: Liste Des Pièces
Parts List Lista de las piezas Liste des pièces A. - Lullaby Magic Frame A. - Estructura de Lullaby Magic A. - Cadre du parc Lullaby Magic B. - Mattress Pad B. - Colchoneta B. - Matelas C. - Bassinet C. - Page 11 Parts List Lista de las piezas Liste des pièces E. - Changing Table Frame End - Left E. - Extremo de la estructura del cambiador (izquierdo) E. - Extrémité du cadre de table à langer; gauche F. - Changing Table Frame End - Right F.
- Page 12 Parts List Lista de las piezas Liste des pièces I. - Accessory Caddy I. - Bolsillo para accesorios I. - Support d’accessoires J. - Mobile J. - Móvil J. - Mobile K. - Mobile Toy Hanger K. - Soporte colgante para juguetes del móvil K.
- Page 13 Parts List Lista de las piezas Liste des pièces M. - Storage Bag M. - Bolsa de almacenamiento M. - Sac de rangement...
-
Page 14: Installation Du Parc
Setting Up the Playard Instalación del corralito Installation du parc MISES EN GARDE WARNING ADVERTENCIA Avant utilisation, retirer Before use remove and Antes del uso, saque y tout sac de plastique et dispose of any plastic deseche las bolsas de placer hors de portée des bags and keep them out plástico y manténgalas... - Page 15 Magic Frame (A) from the Storage Bag. 1. Abra las correas sujetadoras de velcro del colchón y saque la estructura de Lullaby Magic (A) de la bolsa de almacenamiento. 1. Détacher les courroies autoagrippantes du matelas et retirer le cadre du parc Lullaby Magic Frame...
- Page 16 Setting Up the Playard Instalación del corralito Installation du parc 2. With the Lullaby Magic Frame (A) standing upright, pull the corners apart as shown. The center floor hub must be pulled up to allow the top rails to lock. If needed, pull up on the center floor hub release strap to lift the floor.
- Page 17 Setting Up the Playard Instalación del corralito Installation du parc “CLICK!” 3. With the center hub even (or level) “CLIC” “CLICK!” with the 4 corners. Pull up on the top « CLIC » “CLIC” rail center joint to "Click" lock them «...
- Page 18 Setting Up the Playard Instalación del corralito Installation du parc 4. Push down on the center floor hub until the bottom of the playard is flat. 4. Empuje la base central del piso hacia abajo hasta que la base del corralito esté...
- Page 19 Setting Up the Playard Instalación del corralito Installation du parc 5. Install Mattress Pad (B), padded side up. Do not use playard without Mattress Pad and make sure to fold strap underneath Mattress Pad 5. Instale la colchoneta (B), con el lado acolchado hacia arriba.
- Page 20 Setting Up the Playard Instalación del corralito Installation du parc 6. Locate 4 Mattress Pad strap holes on the floor of the playard. Thread the 4 hook and loop straps through to the floor of the playard as shown. 6. Ubique los 4 orificios para las correas de la colchoneta en el piso del corralito.
- Page 21 Setting Up the Playard Instalación del corralito Installation du parc 7. Turn the playard on its side and pull the straps through the floor of the playard. Thread the straps through the slot on the playard foot as shown. Pull hook and loop strap tight and then attach toghether to secure Mattress Pad.
-
Page 22: Installation Du La Couchette
Setting Up the Bassinet Instalación del la cuna Installation du la couchette 8. Undo the hook and loop straps from the frame and remove Mattress Pad from playard. 8. Afloje las correas sujetadoras de velcro de la estructura y saque la colchoneta del corralito. - Page 23 Setting Up the Bassinet Instalación del la cuna Installation du la couchette 9A. Unfold the Bassinet (C) sides as shown. 9A. Abra los lados de la cuna (C) como se muestra. 9A. Déplier les côtés de la couchette (C), tel qu’illustré.
- Page 24 Setting Up the Bassinet Instalación del la cuna Installation du la couchette 9B. Unfold the Bassinet ends over the playard frame. Fit the 4 corners of the Bassinet over the 4 corner Bassinet Supports on the Lullaby playard as shown 9C. Once the Bassinet is resting on the supports push down on the center joints on the long sides of the Bassinet 9D.
- Page 25 Setting Up the Bassinet Instalación del la cuna Installation du la couchette WARNING ADVERTENCIA MISE EN GARDE Do not place Bassinet No coloque la cuna en Ne pas placer la couchette on unit if a child is in the la unidad si hay un niño dans le parc lorsqu’un playard.
- Page 26 Setting Up the Bassinet Instalación del la cuna Installation du la couchette 10. La colchoneta es ligeramente más grande que la apertura de la cuna. No abra la colchoneta completamente. Inserte la colchoneta en un ángulo y deslícela hacia el lado opuesto a donde usted se encuentra.
-
Page 27: Installation Du Support D'accessoires
Attaching Accessory Caddy Cómo fijar el bolsillo para accesorios Installation du support d’accessoires 11. Attach the Accessory Caddy (I) to the side top rail of the playard as shown. 11. Fije el bolsillo para accesorios (I) en la baranda lateral del corralito como se muestra. - Page 28 Changing Table Warnings Advertencias para el cambiador Mises en garde relatives à la table à langer MISE EN GARDE WARNING ADVERTENCIA DANGER DE CHUTE FALL HAZARD - To RIESGO DE CAÍDAS: : Afin de prévenir les prevent death or para evitar la muerte o blessures graves ou serious injury, always lesiones graves,...
-
Page 29: Montage De La Table À Langer
Assembling Changing Table Cómo armar el cambiador Montage de la table à langer 12. Locate the opening in the side of the Changing Pad (D) and insert the Changing Table Frame Bar (H). Both ends and snap buttons should be visible after assembling. - Page 30 Assembling Changing Table Cómo armar el cambiador Montage de la table à langer 13. Attach the Changing Table Frame End - Left (E) to the Changing Table Frame Side (G) by lining up the tabs and sliding the Frame End down until it "Clicks"...
- Page 31 Assembling Changing Table Cómo armar el cambiador Montage de la table à langer 14. With the bottom of the Changing Pad (D) facing up, push the ends of the Changing Table Frame Bar (H) into the changing table frame assembly until it "Click"...
- Page 32 Assembling Changing Table Cómo armar el cambiador Montage de la table à langer 15. Pull the fabric of the Changing Pad (D) over and around the edges of the changing table frame assembly as shown. 15. Pase la tela del cambiador (D) por encima y alrededor de los bordes de la estructura del cambiador como se muestra.
- Page 33 Assembling Changing Table Cómo armar el cambiador Montage de la table à langer 16. Flip the changing table over and locate the fabric tabs along the outside of the changing pad. Thread the fabric tabs through the corresponding openings on the frame and pull the fabric tabs through.
- Page 34 Assembling Changing Table Cómo armar el cambiador Montage de la table à langer 17. IMPORTANT: The changing table can only be attached to one end of the playard. Locate the changing table latch pockets on the side of the playard. Assemble the changing table by lining up the corners of the changing table frame with the corners of the playard.
- Page 35 Storing Changing Table Cómo guardar el cambiador Rangement de la table à langer 18. Remove the changing table by pushing in on the release buttons and lifting up. The changing table can be stored by hanging on the Accessory Caddy as shown. 18.
- Page 36 Mobile Assembly and Use Cómo armar y usar el móvil Montage et utilisation du mobile WARNING ADVERTENCIA MISE EN GARDE Do not mix old and new No mezcle pilas nuevas Ne pas utiliser ensemble batteries. Do not mix con pilas usadas. No des piles neuves et alkaline, standard mezcle pilas alcalinas,...
-
Page 37: Fonctionnement Du Mobile
Operate Mobile Cómo hacer funcionar el móvil Fonctionnement du mobile 19. Before attempting to operate the corner electronics unit, install four AA batteries matching the polarity indicated inside battery compartment. Make sure battery compartment is installed correctly in the corner. The battery box contacts must align with the corner unit contacts. - Page 38 Operate Mobile Cómo hacer funcionar el móvil Fonctionnement du mobile 20. Slide the Toy (L) strap through the opening on one of the ends of the Mobile Toy Hanger (K). Fold the hook and loop strap together to secure the toy. Repeat step for the remaining 2 Toys.
- Page 39 Operate Mobile Cómo hacer funcionar el móvil Fonctionnement du mobile 21. Line up the Mobile Toy Hanger (K) with the Mobile (J) and push up until they "Click" lock together. Lightly pull on toys to make sure secure. 21. Alinee el soporte colgante para juguetes del móvil (K) con el móvil (J) y empuje hacia arriba hasta que escuche el clic que indica que...
- Page 40 Operate Mobile Cómo hacer funcionar el móvil Fonctionnement du mobile 22. Attach the mobile by sliding the base of the mobile down over any of the playard corners - DO NOT force. 22. Fije el móvil deslizando la base hacia abajo sobre cualquiera de las esquinas del corralito.
- Page 41 Operate Mobile Cómo hacer funcionar el móvil Fonctionnement du mobile 23. VOLUME: Press the button to increase the sound. Press the button to decrease the sound. There are 4 settings: Mute, Low, Medium and High. LIGHT: You can activate the 10 minute light cycle by pressing the LIGHT button ( ) once.
- Page 42 Operate Mobile Cómo hacer funcionar el móvil Fonctionnement du mobile 23. VOLUMEN: Presione el lado ( ) del botón para aumentar el sonido. Presione el lado ( ) del botón para disminuir el sonido. Hay 4 opciones: silencioso, bajo, medio y alto. LUZ: puede activar el ciclo de luz de 10 minutos si presiona el botón LUZ ( ) una vez.
- Page 43 Operate Mobile Cómo hacer funcionar el móvil Fonctionnement du mobile 23. VOLUME : Appuyer sur le côté ( ) du bouton afin d’augmenter le volume. Appuyer sur le côté ( ) du bouton afin de réduire le volume. Il y a quatre niveaux de réglage : silencieux, faible, moyen et élevé.
-
Page 44: Rangement Du Parc
Packing Up the Playard Cómo guardar el corralito Rangement du parc 24. To Pack up the Lullaby Magic Playard: Remove Changing Table, follow steps 14-18 in reverse. Push in on the snap lock to remove the Changing Table Bar (H). When folding the Changing Table frame. - Page 45 Packing Up the Playard Cómo guardar el corralito Rangement du parc 25. Remove the Bassinet, Mobile, Accessory Caddy and Mattress Pad. Pull up on the center floor hub release strap and lift the center hub up as far as possible. 25.
- Page 46 Packing Up the Playard Cómo guardar el corralito Rangement du parc 26. Lift and squeeze the Top Rails center release lock, then push down. Release all of the Top Rail locks on all 4 sides. If the Top Rail does not unlock pull up on the center hub to release the floor locks.
- Page 47 Packing Up the Playard Cómo guardar el corralito Rangement du parc 27. Pull up on the center floor hub release strap and pull the playard legs towards the center. 27. Tire de la correa de liberación de la base central del piso y lleve las patas del corralito hacia el centro.
- Page 48 Packing Up the Playard Cómo guardar el corralito Rangement du parc 28. Place the Mattress Pad (B) into the Storage Bag (M) - Make sure the padded side of the mattress pad is facing up. Then Place the folded playard into the Mattress Pad. On top of the playard place the Changing Table parts and the Bassinet.
- Page 49 Packing Up the Playard Cómo guardar el corralito Rangement du parc 29. To secure the parts into the Mattress Pad, line up the hook and loop straps and attach them together as shown. 29. Para asegurar las piezas dentro de la colchoneta, alinear los correas que se adjuntarán como se muestra.
- Page 50 Packing Up the Playard Cómo guardar el corralito Rangement du parc 30. Pull up the sides of the storage bag and close the zipper. 30. Levante los lados de la bolsa de almacenamiento y cierre el cierre. 30. Tirer sur les côtés du sac de rangement et fermer la fermeture à...
- Page 51 Packing Up the Playard Cómo guardar el corralito Rangement du parc 31. To keep instructions for future use: Place the manual in the storage sleeve located on the underside of the Mattress Pad. 31. Para conservar las instrucciones para usarlas en el futuro: Coloque el manual en el bolsillo de almacenamiento ubicado en la parte inferior de la colchoneta.
-
Page 52: Troubleshooting Guide
Before top rails can be locked, the center floor hub must be pulled up as high as the 4 corners. If needed pull up on the center floor hub release strap. If necessary, pull the release strap up with one hand and lock rails one at a time. Call Chicco Customer Service (p. 58). -
Page 53: Guía Para Resolver Desperfectos
Las barandas superiores del corralito deben estar completamente rectas y trabadas. El piso del corralito debe estar plano. LA ESQUINA DEL MÓVIL LULLABY MAGIC NO ENCAJA EN LAS TAPAS DE LA ESQUINA: NO haga fuerza para encajar la esquina del móvil en la tapa de la esquina del corralito. La... -
Page 54: Guide De Dépannage
Les traverses supérieures du parc doivent être bien tendues et verrouillées. Le plancher du parc doit être plat. LE MOBILE DE COIN LULLABY MAGIC NE S’INSTALLE PAS SUR LES GARNITURES DE COIN DU PARC : NE PAS forcer l’installation du module de coin électronique sur une garniture de coin du... -
Page 55: Cleaning And Maintenance
Periodically check the lullaby for loose screws, worn parts, torn material or stitching. Replace or repair the parts as needed. Use only Chicco replacement parts. Keep the lullaby in a dry place. If lullaby becomes wet open lullaby and allow to dry completely. -
Page 56: Limpieza Y Mantenimiento
Reemplace o repare las piezas en caso de que sea necesario. Use únicamente piezas de repuesto Chicco. Mantenga el corralito en un lugar seco. Si el corralito se moja ábralo y deje que se seque por completo. -
Page 57: Entretien Et Nettoyage
Remplacer ou réparer ces pièces au besoin. Utiliser uniquement des pièces de rechange Chicco. Afin d’éviter la friction susceptible de nuire au fonctionnement de la parc, s’assurer que toutes les pièces mobiles en plastique sont libres de toute trace de poussière, terre ou sable. - Page 58 Si vous avez des questions ou commentaires, au sujet de ce produit, ou si certaines pièces sont manquantes, veuillez ne pas retourner ce produit au magasin. Communiquez avec nous de l’une des façons suivantes : (800)-667-4111 www.chicco.ca 2260 Rue Guénette Saint-Laurent (Québec) H4R 2M7 Canada...
- Page 60 www.chiccousa.com...
Need help?
Do you have a question about the Lullaby Magic and is the answer not in the manual?
Questions and answers