Table of Contents
Advertisement
Quick Links
Advertisement
Table of Contents

Related Manuals for Akiyama SYNCRON

Summary of Contents for Akiyama SYNCRON
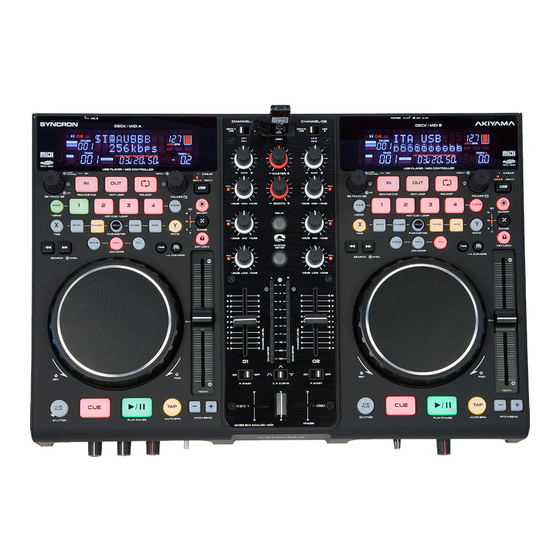
- Page 1 SYNCRON Dual USB MP3 Media Player + Midi controller + Mixer Owner's Manual ...
-
Page 2: Safety Instructions
Syncron user manual. Warnings. The exclamation point within the equilateral triangle is intended to alert the user to the presence important operation maintenance (servicing) instructions literature accompanying this appliance. The lightning flash with arrowhead symbol within the equilateral triangle is intended to alert the user to the presence of un-insulated “dangerous... -
Page 3: First Steps
Syncron user manual. Safe and efficient operation. This product shall not be treated as household FIRST STEPS waste. Instead it shall be handed over to the applicable collection point for the recycling of electrical and electronic equipment. By ensuring this product is disposed of correctly, you will help... - Page 4 Syncron User Manual. Connections. CONNECTIONS ATTENTION. Be sure to unplug the computer before connecting the cables, otherwise it could damage the equipment. 1. Before making or changing connections, turn the device off and disconnect the power cord from the outlet.
-
Page 5: Functions Description
Syncron User manual. Functions description. Top panel. FUNCTIONS DESCRIPTION Top panel 1. VFD DISPLAY. This high-quality VFD display shows all functions - Loop Manual: press IN when you want to start the Loop. Press the are active. The screen icons are explained in the VFD display OUT button when you want to finish it. - Page 6 Syncron User manual. Functions description. Top panel. To find tracks quickly press the TRACK control and turn the wheel >> This search button allows you to quickly scan forwards (Jog Wheel (8)) through a track. c) Autoloop mode 2-speed search is available. One speed only pressing the search buttons.
- Page 7 12. BPM BUTTON TAP. This button is used to replace and adjust BPM manually. Occasionally the automatic BPM cannot detect BPM 8. JOG WHEEL. Syncron has two 105mm-diameter wheels. The properly. This button allows you to replace the rhythm of the timer metal top is "Touch Sensitive"...
- Page 8 Syncron User manual. Functions description. Top panel. active. The LED associated with each USB source will glow when selected. The function can only be selected while in pause mode. 19. CONTROL FOLDER. Turn FOLDER knob to search the desired folder. Turning the control clockwise the clock we forward in the list of folders.
-
Page 9: Volume Knob
Syncron User manual. Functions description. Front panel. 24. TIME BUTTON. This button changes the value of playing time between: "Elapsed" time played. The display will light "Elapsed". (More information on page 11). "Remain" time remaining on track. The display will light "Remain". -
Page 10: Mixer Panel
Syncron User manual. Functions description. Rear panel. Rear panel position, and when using line level input devices be sure the switch is in the “LINE” position. 1. POWER INLET (AC IN). Use the accessory power cord to connect to an AC power outlet. - Page 11 Syncron User manual. Functions description. Mixer Panel and VFD Display. compress music require a power amplifier delivering a power value slightly bigger than the rated maximum power of the speakers. We want the audio signal to fluctuate away from the maximum level However, we recommend the power amplifier rated power be 1.5...
- Page 12 Syncron User manual. Functions description. Mixer Panel. the player to the preset cue point. In OFF mode fader start function is deactivated and we enter in CROSSFADER mode (8). 8. CROSSFADER. This fader is used to blend the output signals of channels 1 and 2 together.
- Page 13 Syncron User manual. Functions description. Mixer Panel. DSP Input 2 — L2/P2 USB Input 2 — L2/P2 USB Input 2 — L2/P2 USB Input 2 DSP Output 1 DSP Output 2 PHONES PHONES PHONES PHONES PHONES PHONES PHONES PHONES PHONES...
-
Page 14: Vfd Display
Syncron User manual. Functions description. VFD Display. FUNCTIONS DESCRIPTION. VFD DISPLAY 1. AUTO CUE. This will indicate if the Auto Cue is on or off. Press 14. ALPHANUMERIC DISPLAY. Indicates the current name of the and hold the SGL/CTN button for one second to turn the Auto Cue track, of the folder. -
Page 15: Internal Menu
Syncron User manual. Functions description. Internal menu. “Playlist Album” Mode You can turn the TRACK knob to select “Normal / Title/ Artist / Album/ Genre” and press the FOLDER knob again to memorize your In the internal menu we have established "Album" as a way to setting and exit the internal menu. - Page 16 Syncron User manual. Database installation. player's "settings" original default settings (made Step 2, press NEXT manufacturer). Being in the "LOAD DEFAULT" menu, "Enter Load " appears in the second row. Press the TRACK control and the default parameters will be charged.
- Page 17 Follow the instructions outlined in each of the graphs will encounter during the creation of the database. The database created will simplify the search for clues through SYNCRON controls. Step 1: Select on your computer the USB device to be sorted for later use on your SYNCRON.
- Page 18 Syncron User manual. Database Operation. In the text line appears the artist whose name starts with the letter of the alphabet next to the initiation, for example the letter "A" or below in alphabetical order. The search may be performed in two ways, A and B A.
-
Page 19: Installation
Syncron User manual. Akiyama ASIO Drivers. B. Press FOLDER and turn the wheel. We move through the albums Select "Next" to start the installation. Then opens the license sorted alphabetically by the "Artist ". agreement. You must select the box in which you accept the license agreement and click "Next". - Page 20 SYNCRON audio USB inputs and outputs, below are examples for use with most popular dj software. Here we do not explain how to set Akiyama ASIO drivers but as the software must be configured once the drivers are configured. More information about the ASIO drivers Akiyama under "ASIO Drivers...
- Page 21 Then explain how to configure Traktor with the Akiyama ASIO Other configurations see the manual for your Virtual DJ. drivers in internal mixer mode. Select Preferences / Audio Setup / Audio Device tab Akiyama ASIO. Traktor As with Virtual DJ, with Traktor we recommend installing ASIO drivers for reducing latency.
- Page 22 For other configurations see the Traktor manual. Mac Configuration Connect your SYNCRON to an USB on your Mac using the supplied cable. Open the MIDI Audio Setup application. You will find it in the Utilities folder within the Applications folder on your Mac. The Audio MIDI Setup window will open.
-
Page 23: Virtual Dj Le Installation
In Output Monitor (Internal) or Output Deck B (External) must select the output "1: Front Left" of SYNCRON for the left channel and the output "2: Front Right" to the right channel. In Output Master (Internal) or Output Deck A (External) must select "3: Back Left" and "4: Right Back"... - Page 24 Syncron User manual. Virtual DJ 7 LE Installation Select “Install” and installation begins. Select "Next" to start the installation. Then opens the license agreement. Once installed you can select whether or not to start Virtual DJ. Select "Launch VirtualDJ" to start the program.
- Page 25 Once Virtual Dj started, selects CONFIG and below image appears. Select “Agree” to continue You only have to select Syncron in "Sound card" to load the default settings. For more information about configuring the sound card to read the point of this manual.
- Page 26 At the end of the installation a message appears reporting that the installation is complete. You only have to select Syncron in "Sound card" to load the default settings. For more information about configuring the sound card to read the point of this manual.
- Page 27 OUT (loop exit). 5. DECK SELECTOR: Pressing this button will select the Virtual DJ deck controlled from the deck of Syncron. The LEDs are at the top Pressing OUT while holding SHIFT entered edit mode end point of the button indicate which deck we are currently handling.
- Page 28 Syncron user manual. Virtual DJ LE functions. correspond to samples 1 to 4. Buttons 1 to 4 from the right deck pressed the current song will be skipped in the mixture if the samples correspond to 5 to 8. automatic mixture is activated.
- Page 29 Syncron user manual. Virtual DJ LE functions. Mixer panel 2 and 3. F. START: If Fader Start is enabled, moving the crossfader from one side to another, on the other side decks with this feature turned on will start playing automatically. To be active is necessary...
-
Page 30: Quick Guide
QUICK GUIDE This point provides two schemas that represent graphically all the functions of Virtual DJ Syncron controls. We recommend that you use them only once you have read the rest of the paragraph and fully understand the operation of all functions. -
Page 31: Midi Section
NOTE: MIDI MAP is expressed in hexadecimal> NOTE or CC. To map various controls of our device. Each control generates a MIDI SYNCRON controls to the DJ Software functions you would need the message that can be found in the MIDI MAP chart on the next page. - Page 32 (TAP). Thus we can assign two different functions of DJ software to the same control. We can configure SHIFT to operate in toggle mode (by pressing once is active and pressing again is disabled) or HOLD (active while being pressed) in the internal SYNCRON menu. ...
- Page 33 Syncron User manual. Midi map. The MIDI Map has been implemented so that SYNCRON is divided into five areas. Each area will send the MIDI messages by a particular channel. The five areas as following: DECK A for MIDI CH1...
-
Page 34: Specifications
Syncron User manual. Specifications. SPECIFICATIONS GENERAL SECTION PRODUCT Dual USB Mp3 Player + Digital Mixer POWER SOURCE AC 100-240V, 60/50Hz POWER CONSUMPTION 21 WATTS DIMENSIONS 420mm (W) X 299mm (D) X 90mm (H) WEIGHT 4,42kg INPUT/OUTPUT IMPEDANCE & SENSITIVITY: (EQ FLAT, MAXIMUM GAIN, LOAD=100K OHM) - Page 35 Syncron User manual. Specifications. SPECIFICATIONS TONE, EQ MIC: -14 +/-3 dB at 100Hz -12 +/-3dB at 10 KHz CHANNEL: 10 +/-2dB, below -30dB at 70Hz 10 +/-2dB, below -30dB at 1 KHz 10 +/-2dB, below -30dB at 13 Khz CHANNEL BALANCE...
- Page 36 C/ Praga, nº 11. Pol. Cova Solera 08191. Rubí - Barcelona (Spain) www.akiyamadj.com info@akiyamadj.com ...
Need help?
Do you have a question about the SYNCRON and is the answer not in the manual?
Questions and answers