Advertisement
Advertisement
Table of Contents

Summary of Contents for DigiTech HARDWIRE HT-6
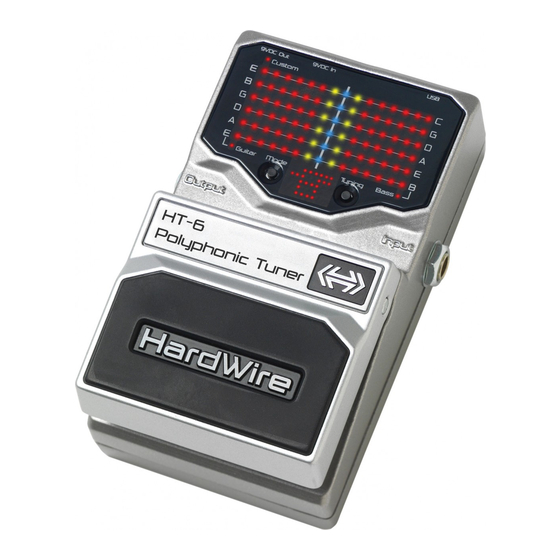
- Page 1 HARDWIRE HT-6 POLYCHROMATIC TUNER OWNER’S MANUAL...
-
Page 2: Declaration Of Conformity
Sandy, Utah 84070, USA Date: March 1, 2011 EMC: EN 55022:2006 EN 55024:1998 European Contact: Your local DigiTech Sales and Service Office FCC Part 15 Supplementary Information: Harman Signal Processing 8760 South Sandy Parkway The product herewith complies with the requirements... -
Page 3: Electromagnetic Compatibility
WARNING If you want to dispose of this product, do not mix it with general household waste. There is a separate collection system for used electronic products in accordance with legislation that requires proper treatment, recovery, and recycling. For your protection, read the following: Private households in the 25 member states of the EU, in Switzerland and Norway may return their used electronic product free of charge to designated collection facilities or to a retailer (if you Important Safety Instructions... - Page 4 7. The foregoing is in lieu of all other warranties, expressed or implied, and DigiTech neither assumes nor authorizes any person to assume any obligation or liability in connection with the sale of this product. In no event shall DigiTech or its dealers be liable for special or consequential damages or from any delay in the performance of this warranty due to causes beyond their control.
-
Page 5: Included Items
Introduction More than a remarkable achievement, DigiTech’s HardWire series represents ® a collection of significant improvements in guitar effects pedals. The HardWire series pedals provide a suite of well-known effects, each with superior tone and control. But these pedals go above and beyond their peers to provide such... - Page 6 Features • Polyphonic Tuning (tune all strings at once) • Single Note Tuning (accurately tune single strings for any note) • Automatically detects between capo tuning, flat tuning, and standard tuning (+/- 6 semitones) • Unified Polyphonic/Single Note display • Muted output when tuner is engaged •...
- Page 7 Amplifier In-Line Setup Harman Power Supply (optional) 9VDC Out 9VDC In Custom Guitar T uning Mode Bass NOTE: Use unbalanced mono instrument cables only with the HT-6. Any effects devices placed in the signal chain before the HT-6 should be bypassed before tuning an instrument with the HT-6.
- Page 8 Pedal Interface 9VDC Out 9VDC In Custom Guitar T uning Mode Bass...
- Page 9 What Does This Do? 1. DC Power Output - This jack is a power output for providing additional power to other pedals. Connect the HardWire HV-5 five pedal power cable to this jack and use the Harman PS0913DC power adapter to power 5 additional HardWire pedals. NOTE: Do not power other pedals with the HT-6 Tuner when using battery power! 2.
- Page 10 4. LED Display Matrix - This area features 90 LEDs in six rows that are used to display both polyphonic and single note tuning states of your instrument. When strumming all strings on your guitar or bass, the six rows will begin lighting and show the tuning state of each independent string (for bass, 4 –...
- Page 11 7. Mode Button - When the tuner is on, this button is used to select between the two Display Modes: Normal and Strobe. 8. Note Display - This series of LEDs is used to show the note played when tuning strings individually and to display the guitar Fret Offset feature when using a capo or lowered tunings.
- Page 12 Output Jack - Connect this output to your amp or the input of the next pedal in the signal chain. The signal from this output connection will be muted when the tuner is enabled. Guitar LED - This LED lights when Guitar Standard (G ST) tuning is selected.
- Page 13 Tuner Display Modes Pressing the Tuning Button multiple times toggles between the below modes: • Guitar Standard (EADGBE) – This mode is indicated when the Guitar LED is lit and “G ST” appears in the Matrix Display. Guitar Drop D (DADGBE) – This mode is indicated when the Custom •...
- Page 14 Selecting A Tuner Reference The HT-6 Tuner has multiple tuning references to select from: • A=436 - 445 (including A=440 standard tuning) • A=A♭ • • A=G♭ • • *Half step to 5 half steps below standard A440.
- Page 15 To set the HT-6 Tuner’s tuning reference, follow these steps: 1. Press the Foot Switch to turn on the tuner. 2. Press and hold the Tuning Button for 2 seconds. The currently saved tuning reference will appear in the LED Display Matrix. Successive presses of the Tuning Button will select the next tuning reference.
- Page 16 Polyphonic Tuning The main benefit of the HT-6 Tuner is the ability to see and tune all six strings simultaneously. To do this, follow these steps: 1. Press the Foot Switch to turn the tuner on. The output signal will be muted while the tuner is on.
- Page 17 3. If a string is in tune, the three center LEDs (yellow-blue-yellow) will light on the corresponding string’s row. If a string is flat, LEDs to the left of the center blue LED will light. If a string is sharp, LEDs to the right of the center blue LED will light.
-
Page 18: Normal Mode
Display Modes (Single Note Mode Only) The HT-6 Tuner has two different tuning display modes when using Single Note tuning mode: Normal and Strobe. Normal Mode When Normal mode is selected, single or groups of LEDs will be lit on the row corresponding to the string that is played, indicating tuning status. -
Page 19: Selecting Display Modes
the LEDs will be in motion to the right meaning the note needs to be tuned down. The speed of the motion indicates how far out of tune the note is. The speed will gradually slow down as the note is brought in tune. When the note is in tune, the cycling LEDs will stop moving indicating the note is in tune. - Page 20 Single Note Tuning - Normal Mode To tune your guitar or bass, one string at a time, follow these steps: 1. Press the Foot Switch to turn the tuner on. The output signal will be muted while the tuner is on. 2.
- Page 21 4. If the displayed note’s pitch is sharp, LEDs to 9VDC Out 9VDC In Custom the right of the center blue LED will be lit. A set of red LEDs on the right side of the LED Guitar T uning Mode Bass Display Matrix will also form an arrow pointing...
- Page 22 SINGLE NOTE TUNING TIP: For the best results when tuning individual strings, try to mute any strings that are not being tuned. TROUBLESHOOTING TIP: If the tuner is not responding as expected, it may be that the Tuning Display Mode (i.e. Bass, Guitar or Custom), the Tuning Reference, or the Fret Offset is set incorrectly.
- Page 23 Single Note Tuning - Strobe Mode To tune your guitar or bass, one string at a time, follow these steps: 1. Press the Foot Switch to turn the tuner on. The output signal will be muted while the tuner is on. 2.
- Page 24 the LED movement will slow down. When the LED array stops moving, the note is in tune. 4. Continue to tune the rest of your strings in the same fashion. 5. When tuning is complete, press the Foot Switch to bypass the tuner. SINGLE NOTE TUNING TIP: For the best results when tuning individual strings, try to mute any strings that are not being tuned.
- Page 25 Setting the Fret Offset The Fret Offset mode works by setting the expected notes for each string to be a fixed offset (in semitones) from a standard setting. This is a useful feature for guitarists who occasionally use a capo or a guitar tuned down 1/2 or a whole step during a performance.
- Page 26 3. Strum your guitar while holding down the Foot Switch. The offset will be detected and will show in the Note Display (-6 to 6). 4. Releasing the Foot Switch will put you back into “Ready to Tune” mode.
- Page 27 Setting The Fret Offset Manually 1. Hold down the Foot Switch until the LED Matrix Display shows “FRET” and the Note Display shows the current offset (usually 0 if being set for the first time). 2. While holding down the Foot Switch, press the Tuning Button or Mode Button to set the fret offset (-1 to -6 for drop tune, 0 for no offset, or 1 to 6 for capo).
- Page 28 Using the HT-6 to Power Other Pedals The HT-6 Tuner has the ability to power other pedals in your pedalboard using an optional multi pedal power cable. To use this feature, follow these steps: 1. Connect the optional power adapter to the HT-6 Tuner’s DC Power Input jack.
-
Page 29: Battery Operation
Battery Operation In the event that battery power is completely depleted, DigiTech HardWire pedals automatically switch into bypass. This eliminates the need to remove the pedal from your pedal chain if the battery is dead. To replace the battery, do the following: 1. - Page 30 into place over the depressed pin. Release the pin. When the Foot Switch is properly fastened, both release pins are flush with the outer side of Foot Switch the pedal. Pedal Switch 9VDC Battery Foot Switch Release Pin Battery Compartment Foot Switch Spring Release Pin...
-
Page 31: Low Battery Message
Low Battery Message When using the HT-6 PolyChromatic Tuner with a battery, the display will flash BATT approximately 30 minutes before the end of the battery’s life. This low battery message will only be displayed while the tuner is enabled and not when it is bypassed. - Page 32 Performance Accessories The performance accessories make integrating a HardWire pedal into any pedal board a snap. The following accessories are included: • Hook-and-loop Pedalboard Pad (designed to attach to the surfaces found on most commercial pedalboards) • Foot Switch Glow Sticker (easily visible on dark stages)
- Page 33 Hook-and-loop Pedalboard Pad To attach the Pedalboard Pad, do the following: 1. Peel off the existing rubber skid pad from the bottom of the pedal. 2. Peel the adhesive protector from the back of the Pedalboard Pad. 3. Apply the Pedalboard Pad to the bottom of the pedal.
- Page 34 Foot Switch Glow Sticker To attach the Foot Switch Glow Sticker, do the following: 1. Peel the adhesive backing from the Foot Switch Glow Sticker. 2. Apply the Glow Sticker to the top of the Foot Switch.
-
Page 35: Specifications
Specifications Controls: On/Off Foot Switch, Mode Button, and Tuning Button Jacks: Input, Output Tuning Range: 27.5 Hz - 1320 Hz Tuning Accuracy: +/- 1 cent Input Impedance: Tuner On: >1 MΩ Tuner Off (Bypass): True hardwire bypass Power Supply: 9 V Alkaline dry battery or Harman power supply Current Draw: Tuner On: 45 mA (typical at 9 VDC) Tuner Off (Bypass): 15 mA (typical at 9 VDC) - Page 36 8760 South Sandy Parkway Sandy, Utah 84070 PH (801) 566-8800 FAX (801) 566-7005 DigiTech and HardWire ® ® registered trademarks of Harman Designed in the USA Copyright - Harman Printed in China HardWire HT -6 Owner’s Manual 5024338-B Please visit our website at: www.digitech.com...
Need help?
Do you have a question about the HARDWIRE HT-6 and is the answer not in the manual?
Questions and answers