Table of Contents
Advertisement
®
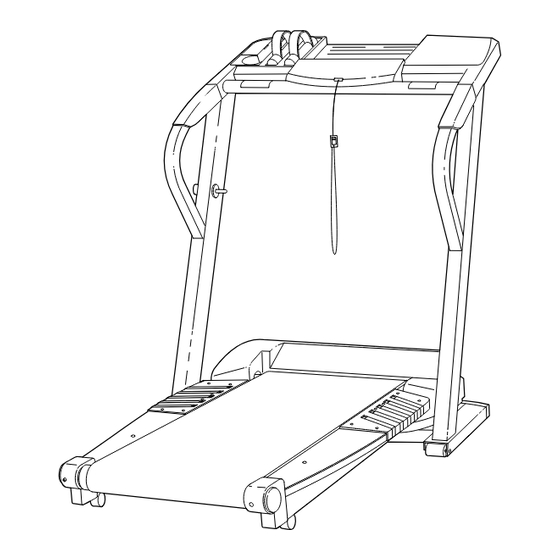
Model No. HRTL05910
Serial No.
Write the serial number in the space
above for future reference.
Serial Number Decal
QUESTIONS?
As a manufacturer, we are
committed to providing com-
plete customer satisfaction. If
you have questions, or if there
are missing parts, we will guar-
antee complete satisfaction
through direct assistance from
our factory.
TO AVOID UNNECESSARY
DELAYS, PLEASE CALL DIRECT
TO OUR TOLL-FREE CUSTOMER
HOT LINE. The trained techni-
cians on our customer hot line
will provide immediate assis-
tance, free of charge.
CUSTOMER HOT LINE:
1-800-999-3756
Mon.–Fri., 6 a.m.– 6 p.m. MST
CAUTION
Read all precautions and instruc-
tions in this manual before using
this equipment. Save this man-
ual for future reference.
USER'S MANUAL
Visit our website at
www.healthrider.com
new products, prizes,
fitness tips, and much more!
Advertisement
Table of Contents

Subscribe to Our Youtube Channel
Related Manuals for Healthrider SoftStrider HRTL05910


Summary of Contents for Healthrider SoftStrider HRTL05910
- Page 1 ® Model No. HRTL05910 Serial No. Write the serial number in the space above for future reference. Serial Number Decal QUESTIONS? As a manufacturer, we are committed to providing com- plete customer satisfaction. If you have questions, or if there...
-
Page 2: Table Of Contents
HOW TO FOLD AND MOVE THE TREADMILL ........ -
Page 3: Important Precautions
450 joules. The surge suppressor must be electrically rated for 120 volts AC and 15 amps. To purchase a surge suppressor, see your local HealthRider dealer or call 1-800- 999-3756 and order part number 146148. 12. Keep the power cord and the surge suppres- sor away from heated surfaces. - Page 4 SAVE THESE INSTRUCTIONS The decals shown below have been placed on your treadmill. If a decal is missing, or if it is not legible, please call our Customer Service Department toll-free at 1-800-999-3756 to order a free replacement decal.
-
Page 5: Before You Begin
To help us assist you, please note the product model number and serial number before calling. The model number is HRTL05910. The serial number can be found on a decal attached to the tread- mill (see the front cover of this manual for the location). -
Page 6: Assembly
This does not affect treadmill performance. If there is lubricant on top of the walking belt or on the sides of the walking platform, wipe off the lubricant with a soft cloth and a mild, non-abrasive cleaner. -
Page 7: Operation And Adjustment
(see drawing 1 at the right). To purchase a surge suppressor, see your local HealthRider dealer or call toll-free 1-800-999-3756 and order part number 146148. Use only a single- outlet surge suppressor that is UL 1449 listed as a transient voltage surge suppressor (TVSS). -
Page 8: Features Of The Console
The console will also show your heart rate when the handgrip pulse sensor or the optional chest pulse sensor is used. - Page 9 Q. Program profiles—These profiles show how the tar- get heart rate will change during pulse programs and how the speed and incline of the treadmill will change during preset programs. Note: The console can display exercise feedback in either miles or kilometers (see SPEED DISPLAY on page 11).
-
Page 10: How To Use The Manual Mode
0.5%. The incline range is 1.5% to 10%. Note: After the buttons are pressed, it may take a mo- ment for the treadmill to reach the selected incline setting. button button. To stop the walking belt and... - Page 11 Step onto the foot rails, press one of the Stop but- tons, and adjust the incline of the treadmill to 1.5%. The incline must be at 1.5% when the treadmill is raised to the storage position or the treadmill will be damaged.
- Page 12 Step onto the foot rails and make sure that the in- button cline of the treadmill is at 1.5%. The incline must be at 1.5% when the treadmill is raised to the storage position. Next, remove the key from the console and put it in a safe place.
- Page 13 As you exercise, the speed and/or incline of the treadmill will automatically change as needed to keep your heart rate near the current target heart rate setting.
- Page 14 When the program has ended, remove the key. Step onto the foot rails and make sure that the in- cline of the treadmill is at 1.5%. The incline must be at 1.5% when the treadmill is raised to the storage position. Next, remove the key from the console and put it in a safe place.
- Page 15 B. A. Plug one end of the audio cable into the jack on the front of the treadmill near the power cord. Plug the other end of the cable into the LINE OUT jack on your CD player.
- Page 16 B. A. Plug one end of the audio cable into the jack on the front of the treadmill near the power cord. Plug the other end of the cable into the included adapter. Plug the adapter into the LINE OUT jack on your stereo.
- Page 17 CONNECT YOUR HOME STEREO on page 16. A. Plug one end of the audio cable into the jack on the front of the treadmill near the power cord. Plug the other end of the cable into the included adapter. Plug the adapter into the AUDIO OUT jack on your VCR.
- Page 18 CD or video program, press a Stop button or re- move the key and go to step 1 on page 17. Note: If the speed or incline of the treadmill does not change when a “chirp” is heard: • Make sure that the iFIT.com indicator is lit and that the Time/Segment Time display is not flashing.
- Page 19 Our new internet site at www.iFIT.com allows you to access a selection of programs that interactively con- trol your treadmill to help you achieve your specific ex- ercise goals. In addition, you can play iFIT.com audio and video programs directly from the internet. By adding an optional upgrade module to the console, you can use virtually endless features on our internet site.
- Page 20 THE INFORMATION MODE/DEMO MODE The console features an information mode that keeps track of the total number of hours that the treadmill has been operated and the total number of miles that the walking belt has moved. The information mode also al- lows you to switch the console from miles per hour to kilometers per hour.
-
Page 21: How To Fold And Move The Treadmill
2. Move your right hand to the position shown and hold the treadmill firmly. Using your left hand, pull the latch knob to the left and hold it. Raise the treadmill until all parts of the treadmill are past the latch pin. Release the latch knob. -
Page 22: Troubleshooting
3 to 4 inches off the walking platform. Be careful to keep the walking belt centered. Plug in the power cord, insert the key and run the treadmill for a few minutes. Repeat until the walking belt is properly tightened. - Page 23 Magnet and the Reed Switch is about 1/8”. If necessary, loosen the Reed Switch Screw (20) and move the Reed Switch slightly. Retighten the Screw. Re-attach the hood, and run the treadmill for a few minutes to check for a correct speed reading. 1/8” View...
-
Page 24: Conditioning Guidelines
For maximum fat burning, adjust the speed and incline of the treadmill until your heart rate is near the middle number in your training zone. Aerobic Exercise If your goal is to strengthen your cardiovascular sys- tem, your exercise must be “aerobic.”... -
Page 25: Suggested Stretches
SUGGESTED STRETCHES The correct form for several basic stretches is shown at the right. Move slowly as you stretch—never bounce. 1. Toe Touch Stretch Stand with your knees bent slightly and slowly bend forward from your hips. Allow your back and shoulders to relax as you reach down toward your toes as far as possible. -
Page 26: Part List
PART LIST—Model No. HRTL05910 To locate the parts listed below, refer to the EXPLODED DRAWING attached in the center of this manual. Qty. Description Motor Hood Hood Screw Platform Screw Roller Adjustment Washer Latch Catch Latch Catch Screw/Hand Grip Screw... - Page 27 Qty. Description 12” Audio Wire Large Warning Decal Upright Base Shock Lift Frame Spacer Static Decal Latch Assembly iFIT.com CD 109** 1 iFIT.com Module 8” Green Wire, F/Ring 7” Green Wire, M/Ring 4” Black Wire, 2 Female 8” White Wire, 2 Female 8”...
- Page 28 EXPLODED DRAWING—Model No. HRTL05910 R0801A...
- Page 29 EXPLODED DRAWING—Model No. HRTL05910 R0801A...
-
Page 30: How To Order Replacement Parts
Friday, 6 a.m. until 6 p.m. Mountain Time (excluding holidays). Before calling, please note the following information: • The MODEL NUMBER of the product (HRTL05910) • The NAME of the product (HealthRider • The SERIAL NUMBER of the product (see the front cover of this manual) •...
Need help?
Do you have a question about the SoftStrider HRTL05910 and is the answer not in the manual?
Questions and answers