
Related Manuals for Linksys WAP54G v2


Summary of Contents for Linksys WAP54G v2
-
Page 1: User Guide
® A Division of Cisco Systems, Inc. Wireless-G 802.11g User Guide Access Point WIRELESS WAP54G v2 Model No. - Page 2 Wireless-G Access Point Copyright and Trademarks Specifications are subject to change without notice. Linksys is a registered trademark or trademark of Cisco Systems, Inc. and/or its affiliates in the U.S. and certain other countries. Copyright © 2004 Cisco Systems, Inc. All rights reserved.
-
Page 3: Table Of Contents
Chapter 4: Connecting the Wireless-G Access Point Hardware Installation Chapter 5: Setting Up the Wireless-G Access Point Setup Wizard Linksys Wireless Guard Setup Chapter 6: Linksys Wireless Guard Client Software Installation Network Access Your Account Chapter 7: Configuring the Wireless-G Access Point... - Page 4 Wireless-G Access Point Appendix C: Upgrading Firmware Appendix D: Windows Help Appendix E: Glossary Appendix F: Specifications Appendix G: Warranty Information Appendix H: Regulatory Information Appendix I: Contact Information...
- Page 5 Figure 5-9: The WPA-PSK Screen Figure 5-10: The Congratulations Screen Figure 5-11: The Attention Screen Figure 5-12: The Linksys Wireless Guard Setup Screen Figure 5-13: The Securing your Access Point Screen Figure 5-14: Note the New Password Screen Figure 5-15: The Adding Authorized Users Screen...
- Page 6 Wireless-G Access Point Figure 6-11: Network Administration Figure 6-12: Modify Access Control Figure 6-13: Add Guest Figure 6-14: Add Member Figure 6-15: Welcome Figure 6-16: Subscriber Information Figure 6-17: Account Finances Figure 6-18: Credentials Information Figure 6-19: Congratulations Figure 7-1: Password Screen Figure 7-2: The Basic Setup Screen Figure 7-3: WPA Pre-Shared Key Settings Figure 7-4: WPA Radius Settings...
-
Page 7: Chapter 1: Introduction
Wireless-G Access Point Chapter 1: Introduction Welcome Thank you for choosing the Wireless-G Access Point. This Access Point will allow you to network wirelessly better network: a series of computers or devices than ever. connected together How does the Access Point do all of this? An access point allows for greater range and mobility within your 802.11g: a wireless networking standard that wireless network while also allowing you to connect the wireless network to a wired environment. -
Page 8: What's In This Guide
Access Point for the Linksys Wireless Guard. • Chapter 6: The Linksys Wireless Guard This chapter explains how to install the client software for Linksys Wireless Guard and other information on the service. • Chapter 7: Configuring the Wireless-G Access Point This chapter explains the use of the Access Point’s Web-based Utility. - Page 9 This appendix supplies the Access Point’s warranty information. • Appendix H: Regulatory Information This appendix supplies the Access Point’s regulatory information. • Appendix I: Contact Information This appendix provides contact information for a variety of Linksys resources, including Technical Support. Chapter 1: Introduction What’s in this Guide?
-
Page 10: Chapter 2: Planning Your Wireless Network
Linksys wireless adapters also provide users access to a wired network when using an access point, such as the Wireless-G Access Point, or wireless router. An integrated wireless and wired network is called an infrastructure infrastructure: a wireless network network. -
Page 11: Network Layout
When you wish to connect your wired network with your wireless network, the Access Point’s network port can be used to connect to any of Linksys's switches or routers. With these, and many other, Linksys products, your networking options are limitless. Go to the Linksys website at www.linksys.com for more information about wireless products. -
Page 12: Chapter 3: Getting To Know The Wireless-G Access Point
Button, for approximately ten seconds, or restore the defaults from the Password tab in the Access Point's Web-Based Utility. With these, and many other, Linksys products, your networking options are limitless. Go to the Linksys website at www.linksys.com for more information about products that work with the Access Point. -
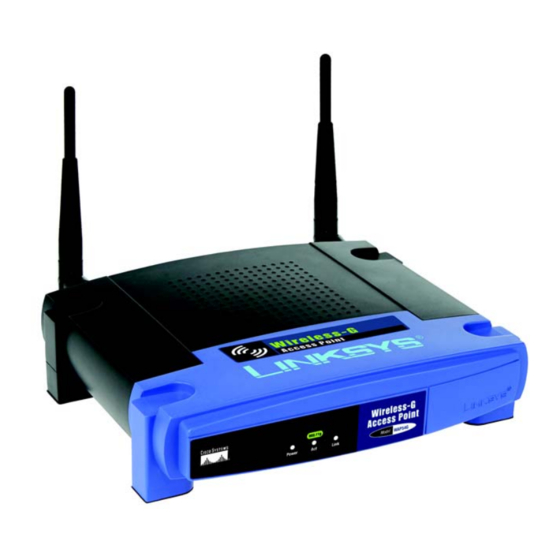
Page 13: The Front Panel
Wireless-G Access Point The Front Panel The Access Point's LEDs, where information about network activity is displayed, are located on the front panel. Figure 3-2: Front Panel Power Green. The Power LED lights up when the Access Point is powered on. Green. -
Page 14: Chapter 4: Connecting The Wireless-G Access Point
Wireless-G Access Point Chapter 4: Connecting the Wireless-G Access Point Hardware Installation hardware: the physical aspect of computers, telecommunications, and 1. Locate an optimum location for the Access Point. The best place for the Access Point is usually at the center other information technology devices of your wireless network, with line of sight to all of your PCs and wireless accessories. -
Page 15: Chapter 5: Setting Up The Wireless-G Access Point
Access Point wirelessly, the wireless computer will require you to use the Linksys default 1. Insert the Setup Wizard CD into your PC's CD-ROM drive. Your PC must be on your wired network to set up the settings. -
Page 16: Figure 5-2: Connecting The Access Point
Wireless-G Access Point 3. The next screen displayed displays how the Access Point should be connected while running this Setup Wizard. Optimally, you should perform this setup through a PC on your wired network. Click the Next button to continue or Exit to exit the Setup Wizard. Figure 5-2: Connecting the Access Point 4. -
Page 17: Figure 5-4: Enter The Password
Wireless-G Access Point 5. You will be asked to sign onto the Access Point you've selected. Enter the Password you've assigned. If none has been assigned, enter the default password: admin. Then, click the OK button. (This password can be changed from the Web-based Utility's Password tab.) Figure 5-4: Enter the Password ip (internet protocol): a protocol used to send data over a... -
Page 18: Figure 5-6: The Wireless Settings Screen
8. The Security Settings screen will appear next. From this screen, you can set the level of security you desire for your network. Select from WEP, WPA-Personal, WPA Enterprise, and Linksys Wireless Guard. All points in your wireless network must use the same security method. -
Page 19: Figure 5-8: The Wep Settings Screen
Refer to Chapter 7: Configuring the Wireless-G Access Point. • Linksys Wireless Guard. With this subscription service, you get the highest security of WPA RADIUS, but without having to build your own RADIUS network. If you select this option, follow the step-by-step instructions in the next section, Linksys Wireless Guard. -
Page 20: Figure 5-10: The Congratulations Screen
Wireless-G Access Point 9. At this point, the configuration performed with the Setup Wizard is complete. To configure any other Access Points in your network, you can run this Setup Wizard again. Click the Exit button to exit the Setup Wizard. For more advanced configuration, you can go to Chapter 7: Configuring the Wireless-G Access Point. -
Page 21: Linksys Wireless Guard Setup
• Must be connected to the Internet through a broadband connection (DSL, cable, other) Figure 5-11: The Attention Screen If you meet these requirements, click Continue to sign up for the Linksys Wireless Guard service, or click Cancel to cancel the setup. -
Page 22: Figure 5-13: The Securing Your Access Point Screen
Access Point later. After writing down the new password, select I have noted the new password, then click OK. Figure 5-14: Note the New Password Screen Chapter 5: Setting Up the Wireless-G Access Point Linksys Wireless Guard Setup... -
Page 23: Figure 5-15: The Adding Authorized Users Screen
6. The Access Point is now configured for Linksys Wireless Guard. To finish configuring your wireless network, you will need to install the Linksys Wireless Guard client software for each PC that will have access. Click Main Menu, then click Linksys Wireless Guard Client. -
Page 24: Chapter 6: Linksys Wireless Guard
Wireless-G Access Point Chapter 6: Linksys Wireless Guard This chapter is only for users who have signed up for Linksys Wireless Guard to secure their network and have IMPORTANT: Make sure that you have signed up configured the Access Point for Linksys Wireless Guard. (Refer to Chapter 5: Setting up the Wireless-G Access for Linksys Wireless Guard and that you have Point.) -
Page 25: Figure 6-3: Exit Applications
4. A license agreement will appear next. Scroll down or press PAGE DOWN to read the entire agreement. To accept the terms and continue the installation, click Yes. To quit the installation, Click No. Figure 6-4: License Agreement Chapter 6: Linksys Wireless Guard Client Software Installation... -
Page 26: Figure 6-5: Destination Location
Wireless-G Access Point 5. On this screen, you will be informed where the Linksys Wireless Guard will be installed. To install to the folder, click Next. If you want to choose a different location for the folder, click the Browse button and select the location. -
Page 27: Network Access
Remove any disks that are in their drives, then click Finish. 8. After the Linksys Wireless Guard is installed, a key icon will be installed on the right-side of the system tray at the bottom of your screen. The color of the key will change with the status of the network connection. The most common colors are described below. -
Page 28: Your Account
Right-click on the green Wireless Guard Network key icon, then click View Membership and Network Administraton Website to log in to the Linksys Wireless Guard website. You can also click on your computer’s Start button, select the Linksys Wireless Guard folder, then click Membership and Network Administration Website. -
Page 29: Figure 6-10: Home
1. On the Wireless Guard Member Website home screen, Figure 6-10, click the Network Admin tab. Figure 6-10: Home 2. The screen in Figure 6-11 will appear. Under Network Administration, click Modify Access Control. Figure 6-11: Network Administration Chapter 6: Linksys Wireless Guard Your Account... -
Page 30: Figure 6-12: Modify Access Control
Access Duration. Enter the length of time that the guest will be on the network in hours. 5. The guest will need to install the Linksys Wireless Guard Client software on his PC. The software can be Figure 6-13: Add Guest downloaded from the Setup CD-ROM or from Linksys.com/support. -
Page 31: Figure 6-14: Add Member
To register as a member for Linksys Wireless Guard, refer to the following instructions, then when finished with registration, return to this screen. The member will need to install the Linksys Wireless Guard Client software on his PC. The software can be downloaded from the Setup CD-ROM or from Linksys.com/support. Refer to Client Software Installation at the Figure 6-14: Add Member beginning of this chapter. -
Page 32: Figure 6-16: Subscriber Information
If the administrator will be paying for the account, click Another member will be paying for my subscription. Click Next. Click Back to return to the previous screen. Click Cancel to cancel the member registration. Figure 6-17: Account Finances Chapter 6: Linksys Wireless Guard Your Account... -
Page 33: Figure 6-18: Credentials Information
Click Back to return to the previous screen. Click Cancel to cancel the member registration. Figure 6-18: Credentials Information 6. When the congratulations screen appears you will be successfully registered for Linksys Wireless Guard. Click Finish. 7. You should now ask the administrator to add you to his Wireless Guard Protected Network’s Access Control List. - Page 34 Wireless Guard security. For example, if you take your laptop to another location to give a presentation, and connect to a network that is running 802.1x security, the Linksys Wireless Guard software on your laptop will prevent you from logging in to another network. You will need to manually unprotect your network connection so you can log in.
-
Page 35: Chapter 7: Configuring The Wireless-G Access Point
Wireless-G Access Point Chapter 7: Configuring the Wireless-G Access Point Overview Have You: Enabled TCP/IP on your PCs? PCs communicate over the network with this The Access Point has been designed to be functional right out of the box, with the default settings in the Setup protocol. -
Page 36: Navigating The Utility
Wireless-G Access Point Navigating the Utility There are four main tabs: Setup, Status, Advanced, and Help. Additional screens will be available from the main tabs. Setup • Basic Setup. Enter the Internet connection and network settings on this screen. • Password. Change the Access Point’s Password and change its settings back to their defaults from this screen. -
Page 37: Accessing The Utility
Wireless-G Access Point Accessing the Utility To access the Web-based Utility of the Access Point, launch Internet Explorer or Netscape Navigator, and enter the Access Point’s default IP address, 192.168.1.245, in the Address field. Press the Enter key. Open your web browser and type the IP Address you entered in the Setup Wizard. (The default IP address is 192.168.1.245.) (Should you need to learn what IP Address the Access Point presently uses, run the Setup Wizard Figure 7-1: Password Screen again. -
Page 38: The Setup Tab
Wireless-G Access Point The Setup Tab Basic Setup The first screen that appears displays the Basic Setup screen. This allows you to change the Access Point's general settings. Change these settings as described here and click Save Settings to apply your changes or Cancel Changes to cancel your changes. - Page 39 It is case-sensitive and must not exceed 32 alphanumeric characters, which may be any keyboard character. Make sure this setting is the same for all points in your wireless network. For added security, you should change the SSID from the default name, linksys, to a unique name.
-
Page 40: Figure 7-3: Wpa Pre-Shared Key Settings
Point and the server. Last, enter a Key Renewal Timeout, which instructs the Access Point how often it should change the encryption keys. If you want to get the security of WPA RADIUS, but without having to build your own RADIUS network, Linksys offers Linksys Wireless Guard, a subscription service. For more information, click CLICK HERE. -
Page 41: Figure 7-5: Radius Settings
WEP encryption process by automatically generating the WEP encryption keys for Linksys products WEP. WEP is a basic encryption method, which is not as secure as WPA. To use WEP, select a Default Transmit Key (choose which Key to use), and a level of WEP encryption, 64 bits 10 hex digits or 128 bits 26 hex digits. -
Page 42: Figure 7-7: The Password Screen
Wireless-G Access Point Password The Password screen allows you to change the Access Point's password and restore factory defaults. Changing the sign-on password for the Access Point is as easy as typing the password into the AP Password field. Then, type it again into the second field to confirm. To restore the Access Point's factory default settings, click the Yes button beside Restore Factory Defaults. -
Page 43: Figure 7-8: The Ap Mode Screen
Access Point, the remote access point must be a LAN MAC Address second Linksys Wireless Network Access Point. The Access Point will not communicate with any The Access Point offers five modes of operation: Access Point, AP (Access Point) Client, Wireless Repeater, and other kind of remote access point. -
Page 44: Figure 7-10: Wireless Repeater Diagram
Wireless-G Access Point Wireless Repeater - When set to Wireless Repeater mode, the Wireless Repeater is able to talk to one remote access point within its range and retransmit its signal. (This feature only works with Linksys WAP54G and WRT54G.) To configure a Wireless Repeater environment, click Wireless Repeater and enter the LAN MAC address of the remote access point in the Remote AP MAC Address field. -
Page 45: Figure 7-12: The Log Screen
In the Send Log to field, enter the IP address of this PC. To view these permanent logs, you must use Logviewer software, which can be downloaded free of charge from www.linksys.com. Figure 7-12: The Log screen To see a temporary log of the Access Point’s most recent activities, click the View Log button. -
Page 46: The Status Tab
Wireless-G Access Point The Status Tab The Status tab displays the Access Point’s current status. Firmware Version. This is the version of the Access Point’s current firmware. AP Name. This is the Access Point name specified on the Basic Setup screen. MAC Address. -
Page 47: The Advanced Tab
Wireless-G Access Point The Advanced Tab Filters Wireless access can be filtered by using the MAC addresses of the wireless devices transmitting within your network’s radius. Wireless MAC Filter. To filter wireless users by MAC Address, either permitting or blocking access, click Enable. -
Page 48: Figure 7-15: The Advanced Wireless Screen
Wireless-G Access Point Advanced Wireless Before making any changes to the Wireless tab, please check your wireless settings on other systems, as these changes will alter the effectiveness of the Access Point. In most cases, these settings do not need to be changed. Authentication Type. - Page 49 Wireless-G Access Point Fragmentation Length. This specifies the maximum size a data packet will be before splitting and creating a fragmentation: breaking a packet into smaller new packet and should remain at its default setting of 2,346. A smaller setting means smaller packets, which units when transmitting over a network will create more packets for each transmission.
-
Page 50: Figure 7-16: The Snmp Screen
Wireless-G Access Point SNMP The SNMP screen allows you to customize the Simple Network Management Protocol (SNMP) settings. SNMP is a popular network monitoring and management protocol. The Identification settings let you designate the Contact, Device Name, and Location information for the Access Point. -
Page 51: The Help Tab
CD-ROM drive). New firmware versions are posted at www.linksys.com and can be downloaded for free. If the Access Point is not experiencing difficulties, then there is no need to download a more recent firmware version, unless that version has a new feature that you want to use. -
Page 52: Appendix A: Troubleshooting
This appendix provides solutions to problems that may occur during the installation and operation of the Wireless-G Access Point. Read the description below to solve your problems. If you can't find an answer here, check the Linksys website at www.linksys.com. Frequently Asked Questions Can the Access Point act as my DHCP Server? No. - Page 53 Wireless-G Access Point What is Roaming? Roaming is the ability of a portable computer user to communicate continuously while moving freely throughout an area greater than that covered by a single Access Point. Before using the roaming function, the workstation must make sure that it is the same channel number as the Access Point of the dedicated coverage area.
- Page 54 Can Linksys Wireless products support file and printer sharing? Linksys Wireless products perform the same function as LAN products. Therefore, Linksys Wireless products can work with Netware, Windows NT/2000, or other LAN operating systems to support printer or file sharing.
- Page 55 Wireless-G Access Point How do I resolve issues with signal loss? There is no way to know the exact range of your wireless network without testing. Every obstacle placed between an Access Point and wireless PC will create signal loss. Leaded glass, metal, concrete floors, water and walls will inhibit the signal and reduce range.
-
Page 56: Appendix B: Wireless Security
Dual-Band Wireless Access Point Appendix B: Wireless Security Linksys wants to make wireless networking as safe and easy for you as possible. The current generation of Linksys products provide several network security features, but they require specific action on your part for implementation. - Page 57 This includes hackers. So, don’t broadcast the SSID. Wireless networking products come with a default SSID set by the factory. (The Linksys default SSID is “linksys”.) Hackers know these defaults and can check these against your network. Change your SSID to something unique and not something related to your company or the networking products you use.
- Page 58 These security recommendations should help keep your mind at ease while you are enjoying the most flexible and convenient technology Linksys has to offer. Appendix B: Wireless Security Security Threats Facing Wireless Networks...
-
Page 59: Appendix C: Upgrading Firmware
Appendix C: Upgrading Firmware The Access Point's firmware is upgraded through the Web-Utility's Help tab. Follow these instructions: 1. Download the firmware from Linksys's website at www.linksys.com. 2. Click the Web-Utility's Help tab, and click the Upgrade Firmware button. 3. From the Upgrade Firmware screen, enter the location of the firmware's file or click the Browse button to find the file. -
Page 60: Appendix D: Windows Help
Wireless-G Access Point Appendix D: Windows Help All wireless products require Microsoft Windows. Windows is the most used operating system in the world and comes with many features that help make networking easier. These features can be accessed through Windows Help and are described in this appendix. -
Page 61: Appendix E: Glossary
Wireless-G Access Point Appendix E: Glossary 802.11b - An IEEE wireless networking standard that specifies a maximum data transfer rate of 11Mbps and an operating frequency of 2.4GHz. 802.11g - An IEEE wireless networking standard that specifies a maximum data transfer rate of 54Mbps, an operating frequency of 2.4GHz, and backward compatibility with 802.11b devices. - Page 62 Wireless-G Access Point DSSS (Direct-Sequence Spread-Spectrum) - Frequency transmission with a redundant bit pattern resulting in a lower probability of information being lost in transit. DTIM (Delivery Traffic Indication Message) - A message included in data packets that can increase wireless efficiency.
- Page 63 Passphrase - Used much like a password, a passphrase simplifies the WEP encryption process by automatically generating the WEP encryption keys for Linksys products. Port - The connection point on a computer or networking device used for plugging in cables or adapters.
- Page 64 Wireless-G Access Point TKIP (Temporal Key Integrity Protocol) - a wireless encryption protocol that provides dynamic encryption keys for each packet transmitted. Topology - The physical layout of a network. Upgrade - To replace existing software or firmware with a newer version. WEP (Wired Equivalent Privacy) - A method of encrypting network data transmitted on a wireless network for greater security.
-
Page 65: Appendix F: Specifications
Wireless-G Access Point Appendix F: Specifications Standards 802.11g and 802.11b Channels 802.11g 11 Channels (US, Canada) 13 Channels (Europe) 14 Channels (Japan) Ports/Buttons One 10/100 RJ-45 Port, One Power Port, One Reset Button Cabling Type UTP CAT 5 or better Data Rate Up to 54Mbps Transmit Power... - Page 66 Wireless-G Access Point Operating Humidity 10% to 85% Non-Condensing Storage Humidity 5% to 90% Non-Condensing Appendix F: Specifications...
-
Page 67: Appendix G: Warranty Information
Your exclusive remedy and Linksys' entire liability under this warranty will be for Linksys at its option to repair or replace the Product or refund Your purchase price less any rebates. -
Page 68: Appendix H: Regulatory Information
Canadian regulations. EC DECLARATION OF CONFORMITY (EUROPE) Linksys declares that the Wireless-G ADSL Gateway conforms to the specifications listed below, following the provisions of the European R&TTE directive 1999/5/EC: EN 301 489-1, 301 489-17 General EMC requirements for Radio equipment. - Page 69 Linksys vakuuttaa täten että Wireless-G ADSL Gateway tyyppinen laite on direktiivin 1999/5/EY oleellisten vaatimusten ja sitä koskevien näiden direktiivien muiden ehtojen mukainen. Linksys Group déclare la Passerelle ADSL sans fil-G est conforme aux conditions essentielles et aux dispositions relatives à la directive 1999/5/EC.
-
Page 70: Appendix I: Contact Information
Can't find information about a product you want to buy on the web? Do you want to know more about networking with Linksys products? Give our advice line a call at: 800-546-5797 (LINKSYS) Or fax your request in to:...
Need help?
Do you have a question about the WAP54G v2 and is the answer not in the manual?
Questions and answers