
Subscribe to Our Youtube Channel
Related Manuals for LENCO XEMIO-955


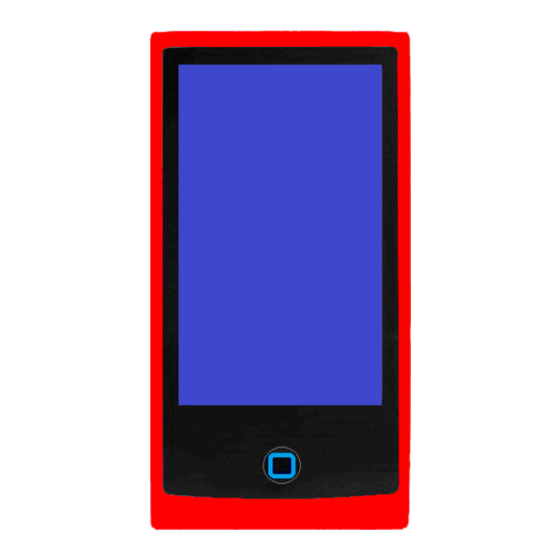
Summary of Contents for LENCO XEMIO-955
- Page 1 Model: XEMIO-955 / 965 / 966 MP4 Player / Touch Screen User manual For information and support, www.lenco.eu...
-
Page 2: Safety Warnings
Lenco suggests retaining the packaging in case for future transport of the product. If at any time in the future you should need to dispose of this product please note that: All batteries and accumulators need to be removed from this product (Removal of Waste Batteries and Accumulators). - Page 3 A. Basic controls and interfaces of the player Internal Battery The player has an internal battery. When using the unit for the first time, charge it for 3 - 4 hours or until the battery icon is show the battery is in full. Battery Is In Full Note: Player continues to use battery power after it’s been turned off, if unit isn’t used for a while, the battery might need to be charged.
- Page 4 mode automatically, as system defaulted, if you do not tap any selection on this screen in 6 seconds. Connection Select Screen Tap “Power & Data / USB Charge / Charge & Play Screen” icon to enter the type of • connection as you desired.
- Page 5 Important: The battery cannot be charged when your computer is in sleep mode. The USB port on most keyboards does not provide enough power to charge the player. Connect player direct to a USB port on your computer only to prevent charging problem. C.
- Page 6 Note: If no external memory card plugged in, it shows Internal Memory only, which includes EBOOK, FLASH, MUSIC, PICTURES, RECORD, SYSTEM, VIDEO and other files. All the files under the folder will be listed. Operations of external “Card Memory” are the same as “Internal Memory”.
- Page 7 application. Desktop Menu Note: In most of the menu and interface screen, you can direct return to desktop menu by Press “EXIT” Button, otherwise press or “Back” icon if existed. This is shortcut function provided by the player. G. Music Tap the “Music”...
- Page 8 Change Next / Previous and Fast-Forward / Fast Backward icon to play next file. • icon to play previous file. • Tap and hold icon to play fast-forward. • Tap and hold icon to play fast-backward. • Change Volume Tap and drag icon left / right at volume bar to adjust the volume levels.
- Page 9 view where the current play music file and the icon is marked at behind the current playing music file. Or, tap the file name to change other music to play. To go the music Now Playing list screen tap icon from the Music Control Interface and •...
- Page 10 When each time goes into the Music Control Interface, the Music Progress Tool will appear at the same time. Then the Music Progress Tool will get concealed after 10 seconds; and it will appear again when you tapping the area where it displays. Music Progress Tool Play Mode Tap “Repeat”...
- Page 11 Choose “Variable Speed Playback” to adjust music playback speed “-4X to 4X”. (For MP3 • format only) Tap “Add Tag” the current music and its current time point will add to tag list, then it returns • to Music Control Interface. You will find the music in the corresponding tag in Tag List. Choose “Delete”...
- Page 12 Play Next / Previous Tap the screen and slide left to play next p file. • Tap the screen and slide right to play previous photo file. • Photo Play Mode Menu icon to switch between Photo Play Mode Menu to “List Mode / •...
- Page 13 Tap the thumbnail list and drag left or right to sliding the thumbnail list to left or right. Tap a thumbnail to Slide Mode view as desired. Tap on the large photo will switch to Photo Browsing Screen. Use Photo Tool Bar You can switch between “Now Viewing / All Photos / Directory Browse”.
- Page 14 Name, Resolution, Created Date. Choose “Screen Size” to set options “Full Screen / Original Size / Scale” as you desired. • Choose “Back” to return to previous menu. • Use Photo Browsing Tool Bar icon to switch between “Manual / Auto” Playing: •...
- Page 15 Use Video Tool Bar : Now Playing; tap this icon to enter the video Now Playing List Menu, you can view • where the current play video file. Or, tap the file name to change other video to play. You will see the icon is marked at behind the current playing video file when you go back to the video Now Playing List Menu by tap...
- Page 16 Call up Video Control Menu In Video Browsing Interface, tap any where on the screen; the Video Control Menu will display • to use for 8 seconds. Play / Pause To play video, tap icon to switch between play and pause. •...
- Page 17 icon to enter the Video Play Setting Menu, option includes “<Playback Mode>, • <Add Tag>, <Display Size>, <Resume>, <Delete>, <Information>, <Back>”. Choose “Playback Mode” to set option for “Sequence / Repeat One / Repeat All / Shuffle, • Shuffle + Repeat” Choose “Add Tag”...
- Page 18 Record Tool Bar icon to switch between Start / Pause during in recording mode. • icon to stop the recording, a confirmation dialog box will appear; tap “OK” to • confirm, the recording is stop and the recorded file will save to the system defaulted folder automatically.
- Page 19 FM Radio Interface Manual Search Station icon and slide up / down slowly to manual Search for the radio frequency, you will • see the frequency number is stepping up / down by 0.1(0.05)MHz. Tune the frequency number to your desired radio station frequency. Save Channel icon to save the current tuned channel in channel list, if it channel is broadcasting and •...
- Page 20 Use FM Radio Tool Bar Auto Search Station and Station Storage icon to enter to auto search and auto preset mode. The radio will searching stations • in the range of frequency “76MHz – 92MHz / 87MHz – 108MHz”, all found radio stations will be stored into “Channel List”...
- Page 21 To change Record Gain, tap “Record Gain”, a submenu list appears then choose “1 / 2 / 3 / 4 / • 5” as you desired. Tap “Save Path” to change the default folder location, for FM Record, options include •...
- Page 22 icon: All EBooks; tap this icon to enter the All Ebooks List Screen, you will see all the • EBook files stored under EBook Directory in the player’s “Internal Memory” by default. icon: Directory Browse; tap this icon to enter the Directory Browse mode, then you will •...
- Page 23 icon to switch between “Manual / Auto” Playing. • Choose icon to select “Manual”, tap and slide the current page to up, left / down, right • to change next / previous page in manual mode. Choose icon to select “Auto” playing, the page will changing next automatically. The •...
- Page 24 Browser function is a file manager; let you know very well that all types of file and folder inside the player, also you can easy manage all types of file, to play or delete them, at those folders Tap “Browser” icon to enter File Navigator menu, a folders list screen appear to choose. •...
- Page 25 Internal Memory / Card Memory, a “Click” icon appears instead. And then tap icon to copy the desired file to Card Memory / Internal Memory, a confirmation dialog box appear; tap “OK” to confirm. Or, tap “Cancel” to exit. (those copied files will be stored into the system default folder) Tap “Click”...
- Page 26 icon to switch to the previous or next Month in year as desired. • Calculator Tap “Calculator” icon to enter the calculator interface. • To exit, tap icon to return to previous directory, or return to desktop menu from root •...
- Page 27 Tap “Flash” icon to enter FLASH game list. • Choose a game file to start the play. • Press “EXIT” button to exit the game and back to desktop menu. • icon to return to previous directory, or return to desktop menu from root directory. •...
- Page 28 Or, Press “EXIT” button Setting Menu Set Display Tap “Display” in Setting Menu to enter the display menu: • Bright Time: Choose this item to set the backlight shutdown time. Tap and drag the icon • to left / right at progress bar to change option “ 0 – 60 seconds” as desired. Brightness: Choose this item to set the backlight level.
- Page 29 the month and day to current date by using the same method. icon to back to previous menu. • Adjust Time: Choose this item to adjust hour, minute and AM/PM, three wheel screens appear • to use; you can adjust hour to current time by tap and sliding the hour wheel up / down. Follow adjust the minute and AM/PM to current time by using the same method.
- Page 30 before formatting, all data will be loss. Tap “Format Card”, a message “Format Card?” dialog box appear; Tap “OK” to confirm. • Or, Tap “Cancel” to abort. R. Use Micro SD Card Slot (T-Flash Card) This player allows you to play those support media files from a Micro SD Memory card (T-Flash).
- Page 31 (Local charges + 1ct p/min) Belgium 02-6200115 (Local charges) France 03-81484280 (Local charges) The helpdesk is accessible from Monday till Friday from 9 AM till 6 PM. When contacting Lenco, you will always be asked for the model and serial number of your product.
- Page 32 Model: XEMIO-955, XEMIO-965 or XEMIO-966 Serial number:_________________________________ Lenco offers service and warranty in accordance to European law, which means that in case of repairs (both during and after the warranty period) you should contact your local dealer. Important note: It is not possible to send products that need repairs to Lenco directly.
Need help?
Do you have a question about the XEMIO-955 and is the answer not in the manual?
Questions and answers