Table of Contents
Advertisement
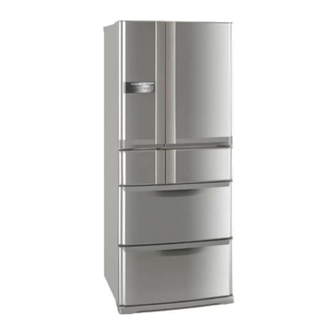
HOME REFRIGERATOR
SERVICE MANUAL
Model
MR-G50J-SS-NZ
Model name
indication
(Inside a door)
NZ············New Zealand
NOTE:
• RoHS compliant products have <G> mark on the spec name plate.
CONTENTS
1. FEATURES ····················································································2
2. SPECIFICATIONS··········································································3
3. WIRING DIAGRAM········································································5
4. OUTLINES AND DIMENSIONS·····················································7
5. REFRIGERANT CIRCUIT······························································8
6. TROUBLESHOOTING ···································································9
6-1 FUNCTION OF OPERATION PANEL ···································9
6-2 FLOWCHART OF SELF-CHECK ········································14
6-3 BLOCK DIAGRAM OF PRINTED CIRCUIT BOARD ·········17
6-4 AUTO ICE MAKER ······························································17
6-5 FLOWCHART OF TROUBLE CRITERION·························19
6-6 TROUBLE CRITERION OF MAIN PARTS··························26
6-7 TEST POINT DIAGRAM OF FILTER BOARD ····················31
6-8 TEST POINT DIAGRAM OF CONTROL BOARD···············32
7. NAMES OF THE PARTS ·····························································33
8. DISASSEMBLY INSTRUCTIONS················································34
9. RoHS PARTS LIST······································································41
No. OA090
Advertisement
Table of Contents

Related Manuals for Mitsubishi Electric MR-G50J-SS-NZ


Summary of Contents for Mitsubishi Electric MR-G50J-SS-NZ
-
Page 1: Table Of Contents
HOME REFRIGERATOR No. OA090 SERVICE MANUAL Model MR-G50J-SS-NZ CONTENTS Model name 1. FEATURES ····················································································2 indication 2. SPECIFICATIONS··········································································3 (Inside a door) 3. WIRING DIAGRAM········································································5 4. OUTLINES AND DIMENSIONS·····················································7 5. REFRIGERANT CIRCUIT······························································8 6. TROUBLESHOOTING ···································································9 6-1 FUNCTION OF OPERATION PANEL ···································9 6-2 FLOWCHART OF SELF-CHECK ········································14 6-3 BLOCK DIAGRAM OF PRINTED CIRCUIT BOARD ·········17... -
Page 2: Features
FEATURES MR-G50J-NZ 1. Vegetable compartment (1)Mechanism Rate of change in amount of polyphenol Two LED lights are mounted on the back and bottom (Cress stored for three days) of the vegetable compartment. The LED (UV LED) emits 375nm light, which is the effective wavelength About 1.2 times more for biosynthesis of polyphenol. -
Page 3: Specifications
SPECIFICATIONS SPECIFICATIONS MR-G50J-NZ Power supply 230V,50Hz V,Hz Total capacity 492 (R:264 F:82 V:97 I:12 S:37) mm (inches) Dimensions (H x W x D) 1798 x 745 x 699 (70-25/32 x 29-11/32 x 27-17/32) Acrylic resin coated steel Cabinet ABS resin Food liner Cabinet Foamed polyurethane (Cyclopentane) - Page 4 ELECTRICAL PARTS SPECIFICATIONS MR-G50J-NZ Model ETI100E 13DAH Power supply 230V,50Hz 45/159 (1620/4800rps) Rated input Compressor Starting current 2.0 (Current limiter) Running current 0.63/2.19 (1620/4800rps) 9.27" Winding resistance (A.T.20 C) Model MM3-71CCV Ambient temperature Motor protector Time Sec. 16 or less Current 17.0 Model...
-
Page 5: Wiring Diagram
WIRING DIAGRAM MR-G50J-NZ ( SKELTON WIRING DIAGRAM ) TEMP. CONTROL BOARD MOTOR DAMPER MOTOR DAMPER MOTOR DAMPER (LIQUID CRYSTAL DISPLAY) ICE GEAR BOX THREE-WAY VALVE CONTROL BOARD, N/F BOARD :10A FUSE FUSE1 : 3A FUSE ON THE BOARD INVERTER WHEN THE DOORS ARE CLOSED. I.THERMISTOR (Ice making compartment thermistor) V.THERMISTOR (Vegetable compartment thermistor) VERSA.THERMISTOR (Versa compartment thermistor) -
Page 6: Control Board
MR-G50J-NZ ( ACTUAL WIRING DIAGRAM ) N/F BOARD FUSE1 CONTROL BOARD INVERTER CN12 Electric SSR5 SSR4 SSR3 SSR2 X1SSR1 CN9D CN4D CN8K CN7S CN3A CN2A CN50G 6 5 4 3 2 1 16151413 11 12 10 9 1110 Refrigerator Compartment Blue Blue Blue... -
Page 7: Outlines And Dimensions
OUTLINES AND DIMENSIONS MR-G50J-NZ Unit : mm (Display) 745 (Display) 740 (Cabinet) 669(Pitch between the rear wheels) 691(Pitch between the adjust bolts) 727(Pitch between the front wheels) 2500 REQUIRED SPACE FOR INSTALLATION R(L) : Refrigerator compartment (Left) R(R) : Refrigerator compartment (Right) : Ice making compartment R(R) R(L) -
Page 8: Refrigerant Circuit
REFRIGERANT CIRCUIT MR-G50J-NZ Muffler Evaporator Suction pipe Capillary tube Capillary tube {1.8 {0.63 2680(mm) {1.6 {0.67 2680(mm) Dryer #150 Cabinet pipe Three-way Charge pipe valve (Low pressure side) {6.35 Charge pipe Radiator (High pressure side) plate Compressor... -
Page 9: Troubleshooting
TROUBLESHOOTING 6-1 FUNCTION OF OPERATION PANEL MR-G50J-NZ (1) Function of normal operation CHILL SOFTF QCK ICE L M H REG ICE F Z R CRL ICE ( STOP ) SELECTION switch MODE switch QUICK MODE switch ECO MODE switch Each compartment can Each compartment The switch functions to set the The switch functions to... - Page 10 (2) Demonstration mode for shop display Demonstration mode is not available when the temperature of freezer compartment is -7: or less even if are simultaneously pressed for about 5 seconds and a “beep” sound is heard. Cooling operation starts instead. 1 1 Setting Within one minute after power supply is turned on, simultaneously press , and...
- Page 11 2 2 Display After the setting is complete, the kinds of thermistor and its temperature are alternately shown on the panel. In case of abnormality, the display returns to current temperature. Please note that the temperature detected by thermistor may be a little different from the real one due to the influence of refrigerator temperature. Kind of Refrigerator Slide chilled...
- Page 12 (7) Damper Operation Mode During damper operation mode, the damper is forcibly opened and closed and the state of damper is shown on the panel. 1 1 Setting With the ice making compartment door left open, simultaneously press for about 3 seconds until a “beep”...
- Page 13 (8) Error history display mode Error history can be observed in the error history display mode. Use this mode when the actual problem of the refrigerator is different from the error which was displayed at the service-call received. 1 1 Setting Open the door of the ice making compartment, and press together for 3 seconds until a “beep”...
-
Page 14: Flowchart Of Self-Check
6-2 FLOWCHART OF SELF-CHECK MR-G50J-NZ (1) Troubleshooting with self-check This refrigerator has self-check feature to clarify and indicate where & what the trouble is. You can perform operation checks and identify malfunction of electric or electronic parts. Error history is recorded and can be displayed by the refrigerator. Self-check Error history mode (Refer to 6.1(8)) Problem may recover automatically. - Page 15 (2) Timing in self-check Trouble of Defrost heater : Self-check is conducted after defrosting. (Make sure to confirm the display before unplugging the power cord because it is automatically reset once the power cord is pulled out.) Trouble of Ice maker : Press the switch on the panel for 5 seconds.
- Page 16 Detecting method Display Error code Trouble Check point Treatment Control (*3) Trouble of ice When there is a short or • 1. Connector CN7S on control board, 6-pin, When ice making compart- Repair the making com- open circuit in the ice 9-pin relay connector ment is used as “refrigera- contact failure.
-
Page 17: Block Diagram Of Printed Circuit Board
6-3 BLOCK DIAGRAM OF PRINTED CIRCUIT BOARD MR-G50J-NZ Operation P.C. board •Setting up temperature, feature, quick mode and eco mode for each compartment •Display of self-check •Outside air thermistor •Buzzer Control board Control circuit of refrigerator Inverter control circuit of compressor •Read/control each compartment tempera- •Inverter control of compressor ture (Neuro-fuzzy) - Page 18 (3) Operation by ice making test Ice stock detective The ice tray is Completion Water pump motor lever detects the rolled over and the When abnormality is operates. amount of ice. Press the switch system is reset. occurs, the error code for 5 seconds or Remove the lid of Detective lever once...
-
Page 19: Flowchart Of Trouble Criterion
6-5 FLOWCHART OF TROUBLE CRITERION MR-G50J-NZ Excessive cooling No cooling, poor cooling Are the temperatures of Are the temperature of Set the temperatures Set the temperatures refrigerator compart- refrigerator compart- to “Low”. to “High”. ment/ set to “Low”? ment/ set to “High”? Open the refrigerator Only food around the Keep the food away... - Page 20 Poor cooling Is the set temperature of freezer compartment set to “High”? Set the temperature to “High”. Proceed to “The refrigerator fan motor does not work.” Does cool air come out of air outlet? The baffles Operate the ice-making test at the place where the operation of do not Replace the motor damper (for freezer com- function.
- Page 21 Inverter-related indication “Compressor does not operate” Error Abnormality Possible cause Symptom Treatment code Trouble of •When there is Compressor Replace the control board. inverter circuit any trouble in the does not circuit which rotate. detects phase current of com- pressor. Bus-bar •Power supply Compressor...
- Page 22 Inverter-related indication “Compressor does not operate” Error Abnormality Possible cause Symptom Treatment code •Defective wiring •Defective connec- (1) or (2) 1.Locate the trouble and deside the treatment continuity tion of connectors (1)Compres •Decide the treatment by checking the followings. sor can •Trouble of the related to com- (1) Defective connector connections.
- Page 23 Poor cooling Short-circuit the terminal of the compulsory Check the following: half-open door, defrosting terminals (CN1M) of the filter board to actuate Yes (heats up) space between gaskets, the amount the compulsory defrosting function and check whether the of ice. defrost heater is working properly.
- Page 24 Excessive cooling poor cooling Is the temperature of Is the temperature of Set the temperature to Set the temperature to vegetable compartment vegetable compartment “Low”. “High”. set to “Low”? set to “High”? (Go to Are the temperatures of Check the thermistor, vegetable compartment Set the temperatures to refrigerator compart- heater, and control board.
- Page 25 Excessive cooling No cooling; poor cooling only applies to versa compartment. Which operation mode is versa compartment set to? Which operation mode is versa compartment set to? It is set to , It is set to “Soft freezing”. “Vegetable • Refrigerator”...
-
Page 26: Trouble Criterion Of Main Parts
6-6 TROUBLE CRITERION OF MAIN PARTS MR-G50J-NZ Components/ Parts Mounted Check Method and Criterion Part Name Position Compressor In the machine ETI100E13DAH Model Black chamber at the rear side of the Rated input 45/159 (1620/4800rpm) frame. Starting current Running current 0.03/2.19 (1620/4800rpm) White Abnormal... - Page 27 Components/ Parts Mounted Check Method and Criterion Part Name Position Measure the resistance with a tester. (Ambient temperature : Room temperature) Water pump Under the water motor tank holder in refrigerator com- partment. Normal Abnormal (faulty) Open (∞ ) or 16' (Approx.) short circuit Measure the winding resistance.
- Page 28 Components/ Parts Mounted Check Method and Criterion Part Name Position Defrost heater At the drip tray Rated input under the evap- The heater is energized while defrosting. Operation method orator of the (Defrosting is finished when the evaporator is 14± 1.5: or more) freezer Measure the resistance with a tester.
- Page 29 Components/ Parts Mounted Check Method and Criterion Part Name Position Measure the resistance with a tester. (Ambient temperature : Room temperature) Divider In partition I/S. heater (I/S) Normal Abnormal (faulty) 9.6k' (Approx.) Open circuit (∞' ) While compressor is operating, the heater is turned on. Operation method When compressor stops, the heater is suspended for the first 20 minutes and then reactivated.
- Page 30 Components/ Parts Mounted Check Method and Criterion Part Name Position Thermistor Measure the resistance with a tester according to the following graph. Defrost (Thermistor resistance values against temperature) thermistor Evaporator •Resistance measured under the ambient temperature from -50: to +50: Ice making 1.
-
Page 31: Test Point Diagram Of Filter Board
Components/ Parts Mounted Check Method and Criterion Part Name Position Vegetable com- In the fan grille. •The pointer of the tester equipped with a diode range shakes partment LED when measuring the resistance between 4-pin connector (12V DC) Normal condition No.3(-) and No.4(+). -
Page 32: Test Point Diagram Of Control Board
6-8 TEST POINT DIAGRAM OF CONTROL BOARD MR-G50J-NZ DC +5V DC+12 ~ 20V Compressor (Inverter circuit) DC280 ~ 330V (Inverter circuit) – – – Compulsory defrosting by short circuit CN2A 230V 3 Defrost heater – DC+5V 1 Refrigerator (Refrige- compartment rator control circuit) -
Page 33: Names Of The Parts
NAMES OF THE PARTS MR-G50J-NZ MODE Fast cooling button Operation panel button SELECTION ECO button button CHILL SOFTF QCK ICE L M H REG ICE F Z R CRL ICE ( STOP ) Refrigerator compartment Two-way flexishelf Height adjustable shelf Free pocket (L) Free pocket (S) -
Page 34: Disassembly Instructions
DISASSEMBLY INSTRUCTIONS MR-G50J-NZ Plug out before work!! Check the automatic ice-maker pressing ice making stop switch. In assembling & disassembling parts seven kinds of screws and rivets are used. Do not mistake to use them. 4 12 5 16 4 12 (Black) 4 16 (White) Specified screw Rivet... - Page 35 OPERATING PROCEDURE PHOTOS Photo 5 Control panel (upper/ lower) Duct R (upper/ lower) (4)Remove rivet E, and pull out the mirror hinge on the lower left of the control panel to remove the connector. (See photo 5) (5)Remove rivet F (two rivets) in the upper left and right side, Catch Catch screw A (two screws) in the lower left and right side, and rivet...
- Page 36 OPERATING PROCEDURE PHOTOS Photo 9 Cover (lower) (7)Remove rivet E (one rivet) to detach the cover (See photo 10) Fan grille Connector Partition V/ F Screws A (8)Remove screw A (four screws) on inner wall and screw A (two screws) at the front. Detach three connectors and lift up the partition.
- Page 37 OPERATING PROCEDURE PHOTOS Photo 12 Parts inside the refrigerator compartment Left rail of the slide compartment Parts inside the ice making compart- Tank holder ment Ice making compartment door Tank holder Door switch Door switch (1)Remove the parts inside the refrigerator compartment. (See procedure [2]) Label (2)Remove the left rail of the slide compartment.
- Page 38 OPERATING PROCEDURE PHOTOS 6. Operation panel How to remove Figure 3 (1)Slide the operation panel in the direction of the arrows, unit it stops. (See figure 3.) (2)Pull out the operation panel as shown in a figure 4. Operation (See figure 4.) panel Note : 1 Please pull it out carefully because it is still wired to the body.
- Page 39 OPERATING PROCEDURE Compressor cover machine chamber fan motor (1)Remove 7 screws for compressor cover at the back of the refrigerator. Machine chamber fan motor (2)Remove screw one fizing screw of bellmouth and connector. Then pull out the bellmouth. (3)Pull out the fan from the fan motor. (4)Remove one lid-fixing screws to take out the fan motor.
-
Page 40: Door Adjustment
Door adjustment <Adjusting refrigerator compartment doors> • Common elements First, check the installation condition. 1 If the adjustment bolt is not in contact with the floor, lower the bolt, and adjust it so that the caster is slightly above the floor. 2 When the refrigerator is installed in the corner of the room, the bolt of the refrigerator may sink into the floor and cause the refrigerator to tilt. -
Page 41: Rohs Parts List
RoHS PARTS LIST ELECTRICAL PARTS Abbreviation MR-G50J-SS-NZ Refrigerator compartment Chilled compartment Freezer compartment Ice making compartment Thermistor (R) Versa compartment Thermistor (C) Thermistor (S) Thermistor (I) Thermistor (DEF) Thermistor (V) Thermistor (F) Motor protector Ice-tray thermistor Bush Part numbers that are circled are not shown in the figures. - Page 42 DOOR PARTS Abbreviation MR-G50J-SS-NZ Refrigerator compartment (Left) Freezer compartment R/ L Ice making compartment Refrigerator compartment (Right) R/ R Vegetable compartment Versa compartment Hinge assembly (Right/ Upper) Hinge assembly (Left/ Upper) Door closer (Right) Door stopper (Right) Door closer (Left)
- Page 43 Part numbers that are circled are not shown in the figures. Spec. MR-G50J Part No. Part name Drawing No. T1W 01W 701 Hinge assembly (Left/ Upper) With hinge assembly (Left/ Upper), w1 T1W 13W 009 Outer door panel (R/L) Operation panel T1W 07W 852 M20 KL1 026 Door closer (Left)
- Page 44 BODY PARTS MR-G50J-SS-NZ Guide Tank pipe Filter cover Light-type bacteria removing filter Water supply port cap Water pump Hinge assembly (Right/ Lower) Water pipe Roller assembly Hinge assembly Bearing (Left/ Lower) Screw label Screw label...
- Page 45 Abbreviation R.V. Between refrigerator compartment and vegetable compartment I.M. Ice maker I.S. Between ice making compartment and versa compartment V.F. Between vegetable compartment and freezer compartment I.S.V Between ice making compartment, versa compartment and vegetable compartment Part numbers that are circled are not shown in the figures. Spec.
- Page 46 ACCESSORY AND UNIT PARTS Abbreviation MR-G50J-SS-NZ Freezer compartment Versa compartment Vegetable compartment Aluminum tray(S) Valve coil U washer Three-way valve Rubber mount Part numbers that are circled are not shown in the figures. Spec. MR-G50J Part No. Part name Drawing No.
- Page 48 HEAD OFFICE: TOKYO BLDG., 2-7-3,MARUNOUCHI,CHIYODA-KU, TOKYO100-8310,JAPAN CCopyright 2006 MITSUBISHI ELECTRIC ENGINEERING CO.,LTD. New publication, effective Jul. 2006 Distributed in Jul. 2006. No. OA090 7 Made in Japan Specifications subject to change without notice.
Need help?
Do you have a question about the MR-G50J-SS-NZ and is the answer not in the manual?
Questions and answers
What is the part number for the piece of plastic which sits in the centre of the top compartment which meshes with closure mechanism on the left door to allow the inside sealing flap to close. It’s broken off. The model is a Mitsubishi MR- G50J-SS-NZ
The part number for the plastic piece in the center of the top compartment that meshes with the closure mechanism on the left door is M20 KL1 026, which is listed as the "Door closer (Left)".
This answer is automatically generated