Table of Contents
Advertisement
Quick Links
Use &
Use &
Use &
Use &
Care Manual
Care Manual
Care Manual
Care Manual
For Customer Service, call 1-800-251-7558
•READ AND FOLLOW INSTRUCTIONS CAREFULLY BEFORE ASSEMBLY OR USE. FAILURE TO
FOLLOW THESE INSTRUCTIONS COULD RESULT IN DEATH, SERIOUS BODILY INJURY AND/OR
!
PROPERTY LOSS.
•FOR HOUSEHOLD OUTDOOR USE ONLY. NOT FOR COMMERCIAL USE.
•SOME PARTS MAY CONTAIN SHARP EDGES-ESPECIALLY WHERE NOTED IN THIS MANUAL!
WEAR PROTECTIVE GLOVES IF NECESSARY.
•THESE INSTRUCTIONS MUST BE KEPT WITH THE CONSUMER AND RETAINED FOR FUTURE USE.
FOR YOUR SAFETY
If you smell gas:
1. Shut off gas to the appliance.
2. Extinguish any open flame.
3. Open lid.
4. If odor continues, immediately call your gas
supplier or your fire department.
TM
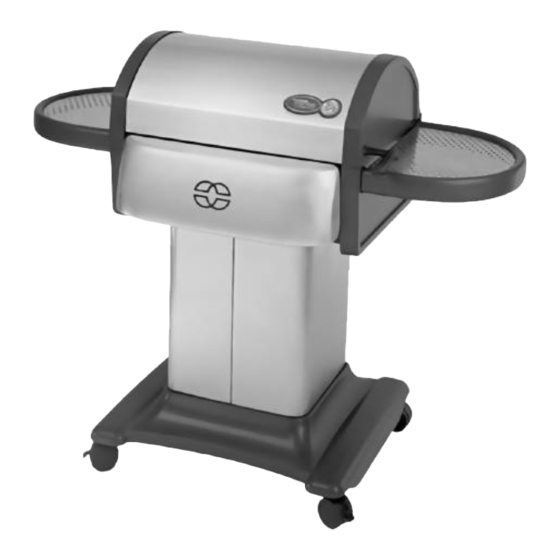
Model No. 8353
This owner's manual is intended for the Calphalon Grill.
FOR YOUR SAFETY
1. Do not store or use gasoline or other flammable
vapors and liquids in the vicinity of this or any
other appliance.
2. An LP cylinder not connected for use shall not
be stored in the vicinity of this or any other
appliance.
Advertisement
Table of Contents

Related Manuals for Calphalon Outdoor Essenials 8353


Summary of Contents for Calphalon Outdoor Essenials 8353
- Page 1 Care Manual Model No. 8353 For Customer Service, call 1-800-251-7558 This owner’s manual is intended for the Calphalon Grill. •READ AND FOLLOW INSTRUCTIONS CAREFULLY BEFORE ASSEMBLY OR USE. FAILURE TO FOLLOW THESE INSTRUCTIONS COULD RESULT IN DEATH, SERIOUS BODILY INJURY AND/OR PROPERTY LOSS.
-
Page 2: Table Of Contents
I. IMPORTANT SAFEGUARDS........2 C) Operating the LP Gas Grill........17 1) Preparation Before Cooking.........18 II. Parts List ..............5 2) Lighting Using Integra Spark Ignition....18 3) Manual Lighting of the Grill........19 III. Assembly Instructions............6 4) Check your Flame..........20 5) Grill Cooking............20 Step 1 - Unpacking the Grilll ........6 6) Roasting...............20 Step 2 - Assemble Pedestal... - Page 3 WARNING! If your grill catches on fire: • If the fire involves the cylinder, leave it alone, DANGER! If you see, smell, or hear the hiss of evacuate the area and call the fire department. escaping gas from the LP cylinder: A.
- Page 4 28. Use of this LP gas grill other than for the intended use, 36. Never leave an LP cylinder inside a vehicle which may or alteration of LP gas grill in any way may not be safe become overheated by the sun. and will void any warranty.
-
Page 5: Parts List
CALPHALON GRILL PARTS LIST OUTDOOR ESSENTIALS 1. 03.4074.00 16. 03.4125.00 31. 03.6010.00 Ctrl Panel Cover Screw, 1/2” Spacer, Body 1 ea. X ea. 8 ea. 2. 03.4100.00 17. 03.4126.00 32. 03.6011.00 Side Table Insert Foil Pan Handle 4 ea. 1 ea. -
Page 6: Assembly Instructions
Assembly Instructions Step 1 - Unpacking the Grill •Open the Carton •Cut the sides of your carton and fold down as shown. •Remove The contents from the grill. •Remove all packing materials from inside the grill. •Set the Grill Body aside for later use. •Use the Packing Blocks to support the grill until ready to assemble. -
Page 7: Step 2 - Assemble Pedestal
STEP 2 - Assemble the Pedestal •With Base upside down, screw Caster Assembly (Item 28) into Caster mounting hole. Rotate clockwise to tighten. •Place Base right side up. •Using Locating Bolts, position half of the Pedestal onto Base and secure into place with 2 M6 X15 bolts as shown. -
Page 8: Step 3 - Assemble Grill Body
Step 2 - Continued •Attach Cylinder Retaining Wire (Item 26) through hole in back of Pedestal as shown in detail. STEP 3 - Assemble the Grill Body •CAUTION: TWO PEOPLE REQUIRED! •Make sure contents of grill have been removed for easy lifting. •Place Body on Pedestal. -
Page 9: Step 4 - Install Heat Shield
Caution: Step 3 - Continued Do not leave grill unattended until bolts are secured. Inside View M6 X 15mm (Item 37) M6 Nut (Item29) Actual Size 4 Pcs. Actual Size 4 Pcs. Fig. 3A •From the inside of the grill, secure Body to Pedestal using 4 M6 X 15 screws through the Fig. -
Page 10: Step 5 - Install Grease Tray
STEP 5 - Install Grease Tray •Place Foil Pan (Item 32) in Grease Tray (Item 33) and slide Grease Tray all the way into brackets. STEP 6 - Assemble Handle and Side Tables •With Handle (Item 2) positioned as shown, place felt Handle Spacer (Item 4) between Handle and Hood, then insert locating pin into top holes of Spacer and Hood. - Page 11 STEP 6 Continued - Assemble Side Tables Item 1 Item 20 Item 29 Body Spacer M6 X 30mm M6 Nut Actual Size Actual Size Actual Size 8 Pcs 8 Pcs 8 Pcs Notice: The control panel cover can be opened by gently pulling down on the top of the cover.
-
Page 12: Step 7 - Install Burners
STEP 7 - INSTALL BURNERS •Remove plastic covering from Burners(3) and remove Cotter Pins(3) from Burner Peg. •Fit venturi end of Burner through hole in the inside firewall of Body (behind Control Panel) and onto Gas Control Valve Nozzle (FIG. 6A.) Be careful not to bend or force Gas Collector Plates. -
Page 13: Step 8 - Install Briquettes And Cooking Grids
STEP 8 - INSTALL CERAMIC BRIQUETTE TRAYS/ COOKING GRIDS COOKING •Remove plastic completely from two GRIDS Ceramic Briquette Trays (Item 36). Place Briquette Trays side by side on middle shoulder of front and rear firewall over the Burners. •Place three Cooking Grids side by side on upper shoulder of front and rear firewall over the Ceramic Briquette Trays. -
Page 14: Step 10 - Leak Testing
Step 10 - LEAK TESTING (TO BE PERFORMED IN A WELL-VENTILATED AREA) 4) Check for leaks by brushing the soap solution on all LP gas connections and fittings. Make sure you generously brush the locations • Perform a leak test before each use. shown below in View A with the soap solution, •... -
Page 15: Operating And Maintaining Your Lp Gas G R I L
• Do not operate the LP gas grill when the LP gas cylinder Calphalon gas grill, must meet the following requirements: is not attached to the grill as shown in the Assembly 1) 12” diameter x 18” tall, 20 lb maximum capacity Instructions. -
Page 16: B) Before Using Your Grill
Precautions • Never connect or disconnect LP gas cylinder or fittings while grill is in use or is hot. • When the LP gas cylinder is connected, the grill must be kept outside in a well-ventilated space. Turn off all of the grill control knobs and the LP cylinder valve when grill is not in use. -
Page 17: Leaktesting
LeakTesting OPERATING THE LP GAS GRILL · Always perform a leak test before each use. · Leak test must be performed in a well ventilated area. · Before proceeding, make certain that you · Never perform a leak test on a grill while in use or understand the Important Safeguards on pages 15 hot. -
Page 18: Preparation Before Cooking
Preparation Before Cooking How to light your LP gas grill (See diagram on next page for illustrations) · Wash the porcelain coated Cooking Grids with a 1) Open Hood and Control Panel Cover. mixture of hot water and soap. 2) Important: Make sure control knobs are turned “off” first. ·... -
Page 19: Manual Lighting Of The Grill
Manual Lighting of the Grill 4) Locate the control knob that corresponds to the match lighting hole that you are using. Push in and turn the control knob counter-clockwise until a click is heard. WARNING: If the burner fails to ignite after ·... -
Page 20: Check Your Flame
Check Your Flame End of Cooking Session Your burners have been preset by the manufacturer for optimal flame performance. A blue flame, possibly with a small yellow tip, is the result of the optimal air and LP gas · Never leave your LP gas grill unattended during use mixture. -
Page 21: Porcelain Coated Cooking Surfaces
Burner Maintenance CARE AND MAINTENANCE (Continued) Regularly clean your LP gas grill between uses and espe- cially after extended periods of storage. Ensure the grill · Check the LP gas grill for gas leaks and burner and its components are cool before cleaning. In order to obstructions before each use. -
Page 22: Troubleshooting
TROUBLESHOOTING Solution Possible Cause Problem Burners will not light Burners not assembled cor- See Step 7 - Install Burners of the Assembly Instructions using the igniter rectly Not pausing long enough When lighting the 1st (Leftmost) Burner, push-in and turn con- before clicking the control trol panel knob counter-clockwise until you feel resistance with panel knob... - Page 23 TROUBLESHOOTING Problem Possible Cause Solution Flames blow out High or gusting winds Turn front of grill to face wind or increase flame height. Check LP gas cylinder. Refill if necessary. Gas in LP cylinder is low Excess flow valve tripped See “Low flame”...
-
Page 24: Important Notice-Lp Cylinder With Opd
IMPORTANT NOTICE IMPORTANT NOTICE The Gas Grill is setup to operate with a LP Gas Cylinder equipped with an OPD (Overfilling Prevention Device). (LP NOT SUPPLIED WITH GRILL) This is a secondary device to prevent the overfilling of your LP Gas cylinder. The proper methods for the filling of your LP Gas cylinder are by weight or volume, as described in NFPA 58. -
Page 25: Limited Warranty
Calphalon Grill LIMITED WARRANTY This product is warranted to the original consumer purchaser against defects in material and workman- ship under normal outdoor household use and correct assembly (if assembled by the consumer-pur- chaser). Cast iron burners and porcelain grids are warranted for a period of five (5) years from the date of purchase.
Need help?
Do you have a question about the Outdoor Essenials 8353 and is the answer not in the manual?
Questions and answers