
Related Manuals for Harman Kardon DVD 37


Summary of Contents for Harman Kardon DVD 37
- Page 1 ® Power for the Digital Revolution ® DVD 37 PROGRESSIVE-SCAN DVD AUDIO/VIDEO PLAYER WITH HDMI ™ OWNER’S MANUAL Open/Close AUDIO/VIDEO...
-
Page 2: Table Of Contents
DVD 37 DVD PLAYER Introduction Safety Information Features & Disc Compatibility DVD Terminology Front-Panel Controls Front-Panel Information Display Remote Control Functions Rear-Panel Connections Setup and Connections Connecting to a TV Only Connecting to a Receiver/Amplifier With a Dolby Digital or DTS Decoder... -
Page 3: Introduction
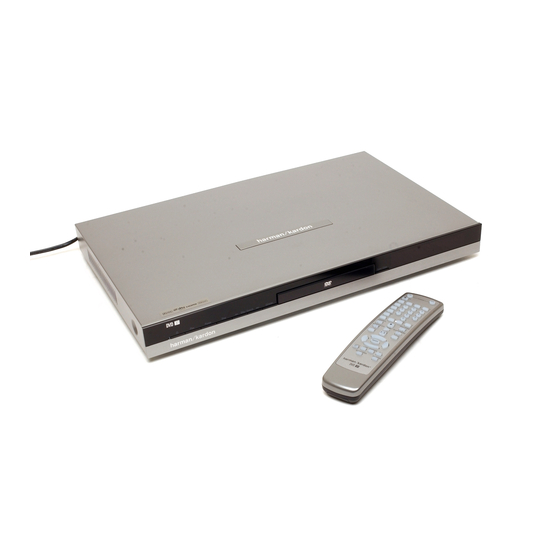
Thank you for choosing the Harman Kardon ® DVD 37. The DVD 37 is a state-of-the-art optical disc player that can play almost every music, movie and still-image disc in your library with the highest fidelity available today. Along with playback of conventional... -
Page 4: Safety Information
Remove Front-Panel Protective Film In order to protect the lens covering the front panel of your new DVD 37, it is shipped from the factory cov- ered by a protective plastic film. Before using the unit, remove this film by grabbing one corner and gently peeling back the plastic sheet. -
Page 5: Features & Disc Compatibility
Disc Formats Supported by This Player The DVD 37 can play the following types of pre- recorded discs: AUDIO/VIDEO 3" (8cm) disc 3" (8cm) disc 5" (12cm) disc 5" (12cm) disc The DVD 37 will also play most recordable discs, but... - Page 6 5 megapixels, and the file size should be no larger than 5Mb. Supplied Accessories The following accessory items are supplied with the DVD 37. If any of these items are missing, please contact Harman Kardon Customer Service at www.harmankardon.com. (1) Remote control...
-
Page 7: Dvd Terminology
The program material on a DVD may be recorded in either format and, in addition, you may configure the DVD 37 to play back in either format, depending on the features recorded on a disc. Chapter: DVD programs are divided into chapters and titles. -
Page 8: Dvd Terminology
WMA files. Note that Windows Media Player uses other file formats; however, the DVD 37 is only capable of playing WMA files that end in the “.wma” extension. See page 5 for more information on WMA file support. -
Page 9: Front-Panel Controls
When the unit is on, the indicator lights blue. Power On/Off (Standby): Press the button once to turn the DVD 37 on. Press it again to put the unit in the Standby mode. Play: Press to initiate playback or to resume... -
Page 10: Front-Panel Information Display
(1/2, 1/4, 1/8 or 1/16). ›› When the DVD 37 is in the Fast Search play mode, two of these indicators will light to show that the unit is in a Fast Play mode. The on-screen banner dis- play indicates the selected speed (x2, x4, x8, x20 or x100). -
Page 11: Remote Control Functions
0 Power On 1 Open/Close 2 Audio Select 3 Clear 4 Playlist 5 Repeat 6 A-B Repeat 7 Random 8 Info 9 Setup A Previous Step/Skip B Search/Slow Reverse C Angle ‹ › Navigation Buttons ⁄ ¤ E Light F Video Off G Audio Mode Selector H HD Mode Selector I Dimmer... - Page 12 Changes made with this button remain active until the DVD 37 or the display is turned off. When either is turned off, and then on again, the DVD 37 will revert to the default setting transmitted by the display.
- Page 13 If you are playing a DVD-Audio disc that con- tains other formats the DVD 37 is capable of playing, such as linear PCM or Dolby Digital 5.1, pressing this button may enable you to switch playback from one audio format to another.
-
Page 14: Rear-Panel Connections
¡ Remote Control Output: Connect this jack to the infrared (IR) input jack of another compatible remote- controlled product to have the built-in Remote Sensor on the DVD 37 provide IR signals to other compatible products. ™ Remote Control Input: Connect the output of a remote infrared sensor, or the remote control output of another compatible product, to this jack. -
Page 15: Setup And Connections
Enter Button K to select it. Connecting to a TV Only When using the DVD 37 with a television but no audio receiver or processor, connect it as follows. Make the Analog Audio Connection å and one of the Video Connections (Composite Video ∫, S-Video ç,... -
Page 16: Connecting To A Receiver/Amplifier With A Dolby Digital Or Dts Decoder
(LFE). NOTES FOR ANALOG AUDIO: • If you wish to use the DVD 37 as the input for a multiroom system, the Analog Audio Outputs ª should be connected to the standard analog left/ right DVD or CD inputs on your digital receiver or processor. -
Page 17: Remote Control Operation
Battery Installation Insert the two AAA batteries supplied while observing the correct positive (+) and negative (–) polarities. Service Life of Batteries • The batteries normally last for about one year, although this depends on how often the remote control is used. •... -
Page 18: Digital Audio Connection
Remember that Dolby Digital or DTS will only play 5.1-channel sound if you’ve connected the optical or coaxial output of the DVD 37 to a DTS or Dolby Digital receiver or decoder (see page 16) and if the disc was recorded in the Dolby Digital or DTS format. -
Page 19: System Setup
System Setup The final step in the installation of the DVD 37 is to establish the system’s configuration. Before proceeding further to make any adjustments, make certain that the DVD 37 is properly connected to a video display and an AC power source. Turn on the DVD 37 by pressing the Power On/Off Switch 2 and the Power Indicator 1 will change from amber to blue. -
Page 20: Setup Menu
Submenus to confirm that the settings are correct and to familiarize yourself with the available options so that you are aware of the flexibility of the DVD 37. System Setup Submenu The SYSTEM SETUP submenu is where you establish the control options, languages and displays. -
Page 21: Audio Setup Submenu
Navigation Buttons n and the Enter Button K. Figure 5 The first time you use the DVD 37, it is recommended that you scroll down to the Change Password line and press the Enter Button K to display the Change Password screen. -
Page 22: Audio Adjustments Submenu
PCM Limit: This setting determines whether the digital audio output of the DVD 37 will be sent to your receiver or processor at its original sampling rate, or whether high-resolution (96kHz or greater) materials will be downsampled to 48kHz. -
Page 23: Video Setup Submenu
1. The Scan Type may only be changed when the Video Output setting has been set to Component. 2. If you have connected the DVD 37 to a video dis- play that is not capable of displaying progressive scan video using the Component (Y/Pr/Pb) Video Outputs §, and you have inadvertently changed... -
Page 24: Video Adjustments Banner
HDMI Settings: This setting displays the characteris- tics of the video output signal at the HDMI Output . When the DVD 37 is connected to a video dis- play using the HDMI Output , the display sends... -
Page 25: Test Screen
In order to make certain that your home theater system is fully optimized to take advantage of DVD’s superb picture quality, the DVD 37 offers a built-in video test signal that makes it easy to calibrate your TV or video display for proper playback. -
Page 26: Playback Basics
PLAYBACK BASICS Loading Discs To load discs in the DVD 37, first turn the DVD 37 on by pressing in the Power On/Off Switch or Power On Button 0. Note that the Power Indicator will turn amber when the unit is con- nected to an AC power source. - Page 27 process the digital audio streams during slow modes. Slow-play is not available for CD discs. • To advance frame by frame while a DVD is playing, first press the Pause Button 4v, then press the Skip/Step (Previous) 6k or Skip/Step (Next) 7` buttons repeatedly.
-
Page 28: Dvd Playback
Stop Button mode) or twice (to enter Stop mode) and remove it from the player. Even if you turn the DVD 37 off, the next time you insert that disc, you will be presented with the option of either starting playback from the beginning, or resuming playback at the point at which you stopped previously. - Page 29 This is a function of the way the disc was created and is not a flaw in the DVD 37. For some discs, press the Title Button U during playback to change the current title or group.
- Page 30 Repeat A-B mode. Video Off Feature During audio-only playback, some listeners may prefer to turn off the DVD 37’s video circuitry. Although the video section is electrically isolated from the audio section, some users may prefer to turn the video dis- plays off during audio playback to prevent any possibil- ity of interference between audio and video.
-
Page 31: Cd Playback
Many functions of the DVD 37 operate the same way for CD playback as for DVD play; however, there are some important differences. When a CD is loaded, the DVD 37 will automatically display the Player Information menu. Status banners are not available during CD play. -
Page 32: Random Play
Random Play The Random Play function will play all of the tracks on a CD in a random order, as selected by the DVD 37. Once the DVD 37 has played all of the tracks on the disc once, it will stop. - Page 33 MP3 codec and the different bit rates used to record MP3 discs, the DVD 37 may not be able to play all discs with MP3 files. We cannot guarantee complete compatibility with MP3 discs, even though they may play on a computer.
-
Page 34: Mp3, Windows Media And Jpeg Playback
For WMA and JPEG files, only the file name will appear. JPEG Playback The DVD 37 is capable of recognizing JPEG still- image files and displaying them. When a disc or folder containing JPEG files is loaded, the JPEG Disc-Type Indicator A will light in the Main Information Display @. -
Page 35: Vcd Playback
CD technology, the playback functions for a VCD disc are similar to CD. To play a VCD disc, place it in the DVD 37 as you would do with any other CD or DVD disc. The unit takes a few seconds to read the disc’s contents;... -
Page 36: Programmed Play
PROGRAMMED PLAY Programmed play allows you to select tracks on a CD for playback in a specific order, skipping tracks you don’t wish to hear and reordering other tracks to suit your tastes. To program a disc for playback, follow these simple steps: 1. -
Page 37: Troubleshooting Guide
VIDEO OUTPUT setting to desired type (see page 23). • Check all audio connections. • Check digital audio settings on DVD 37 and on receiver. • There is no audio playback on DVD discs during fast or slow modes. • Change PCM LIMIT setting in AUDIO SETUP menu to 48kHz (see page 22). -
Page 38: Technical Specifications
DVD 37 TECHNICAL SPECIFICATIONS Applicable Disc: Disc formats: 5-inch (12cm) or 3-inch (8cm) DVD-Video, DVD-Audio, standard-conforming DVD-R, DVD+R, DVD-RW, DVD+RW, VCD, CD, CD-R, CD-RW or MP3 discs Region code: DVD video disc with Code 1 or 0 only DVD layers: Single side/single layer, single side/dual layer, dual side/dual layer... - Page 40 ® 250 Crossways Park Drive, Woodbury, New York 11797 www.harmankardon.com © 2006 Harman International Industries, Incorporated. All rights reserved. Part No. CQX1A1049Z...