Table of Contents
Advertisement
Advertisement
Table of Contents

Related Manuals for Harman Kardon AVR5


Summary of Contents for Harman Kardon AVR5
- Page 1 Harman Kardon AVR5 Audio/VideoReceiver Owner’s Manual...
-
Page 2: Table Of Contents
AVR5 Audio/Video Receiver Introduction......... 1 Safety Information . -
Page 3: Introduction
While complex systems are hard at work within the AVR5 to make all of this hap- pen, hookup and operation are simple. Color-keyed connections and a compre- hensive programmable remote control make the AVR5 easy to use. -
Page 4: Important Safety Information
Important Safety Information Verify Line Voltage Before Use Your AVR5 has been designed for use with 120-volt AC current. Connection to a line voltage other than that for which it is intended can create a safety and fire haz- ard, and may damage the unit. -
Page 5: Typographic Conventions
Cleaning When the unit gets dirty, wipe it with a clean, soft, dry cloth. If necessary, wipe it with a soft cloth dampened with mild soapy water, then a fresh cloth with clean water. Wipe dry immediately with a dry cloth. -
Page 6: Front Panel Controls
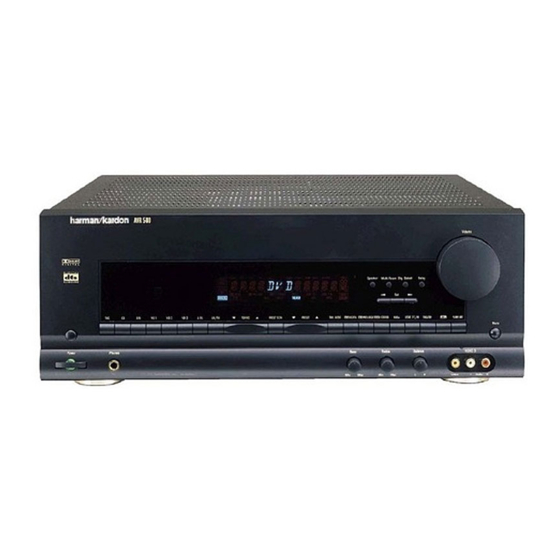
AVR 5 PHONO T•MON Power Phones Speakers 1 Main Power Switch 2 System Power Control 3 Power Indicator 4 Headphone Jack 5 Speakers ON 6 Speakers OFF 7 Bass Control 8 Treble Control 9 Balance Control ) Video 3 Inputs ! Input Selectors Front Panel Controls ˘... - Page 7 2 System Power Control: When the Main Power Switch 1 is “ON,” press this button to turn on the AVR5; press it again to turn the unit off. Note that the Power Indicator surrounding the switch 3 will turn green when the unit is on.
-
Page 8: Front Panel Controls
Ô Test Tone: Press this button to begin the sequence of steps used to set the AVR5’s output levels. When this button is pressed, a test tone will replace the currently selected listening source and the Information Display ¯... -
Page 9: Rear Panel Connections
¢ Pre-Outs ∞ DVD Inputs § CD Inputs ¶ Tape Monitor Out ¡ Remote IR In: If the AVR5’s front panel IR sensor is blocked due to cabinet doors or other obstructions, an external IR sensor may be used. Connect the output of the sensor to this jack. -
Page 10: Rear Panel Connections
ª Phono Inputs: Connect the out- puts of your turntable or tone arm to these jacks. Note that only Moving Magnet (MM) type cartridges may be used. ‚ Phono Ground: Connect the ground wire from a turntable to this terminal to reduce system hum. ⁄... -
Page 11: Remote Control Functions
Remote Control Functions å ∫ MAIN POWER SOURCE POWER ç ∂ ≠ ƒ AM/FM DWN - PRESET - UP PHONO DWN - TUNING - UP TAPE 6 CH. FM MODE © DISC SKIP P. SCAN ˙ SLEEP MUTE SURR./CH. MASTER VOL. DIMMER CLEAR ∆... - Page 12 Device Control Selectors. The descriptions shown here primarily detail the functions of the remote when it is used to operate the AVR5. (See page 24 for information about alternate functions for the remote’s buttons.) å...
-
Page 13: Remote Control Functions
Y Center: Use this button to config- ure the AVR5 for the type of center channel speaker being used. (See page 15 for more information.) Z Secondary Control Cover: This sliding cover normally is in the “up”... -
Page 14: Installation And Connections
“black” wire to the same terminal on the receiver and the speaker. Similarly, the “positive” or “red” wire should be con- nected to the like terminal on the AVR5 and speaker. We also recommend that the length of cable used to connect speaker pairs be identical. -
Page 15: Installation And Connections
System and Power Connections The AVR5 is designed for flexible use with external control components and power amplifiers. These connections are easy to make during an initial installation, or at a later date should you choose to upgrade your system. -
Page 16: System Configuration
When all audio, video and system con- nections have been made, there are a few configuration adjustments to be made. A few minutes spent to correctly configure and calibrate the unit will greatly add to your listening experience. Speaker Selection and Placement The placement of speakers in a multi- channel-home-theater system can have a noticeable impact on the quality of... -
Page 17: Information Display
You are now ready to power up the AVR5 to begin these final adjustments. 1. Plug the to an Power Cable ›... - Page 18 System Configuration 1. Put the AVR5 in the Dolby Pro Logic mode by pressing the Dolby Pro on the front...
-
Page 19: System Configuration
10–5+15=20. Thus, in this example, the delay should be set at twenty milliseconds. To set the delay times, follow these steps: 1. Put the AVR5 in the Dolby Pro Logic mode by pressing the Dolby Pro on the front... -
Page 20: Basic Operation
The follow- ing instructions will provide the steps needed to enjoy the AVR5: • When using the AVR5 for the first time, it is necessary to press the Main Power button on the front panel to turn the unit on. -
Page 21: Surround Mode Selection
Surround Mode Selection The AVR5 offers a choice of surround modes. To select a surround mode press button * ( Ó Surround Mode on the front panel or remote. The choice of which surround mode to use is influenced by the type of program mater- ial being played and the specifics of your listening room setup. -
Page 22: 6-Channel Direct Operation
NONE Phantom modes may be used, as Pro Logic requires a center channel speaker. • The AVR5 is equipped with a memory system that permits a different surround mode to be used with each of the input sources. You may select the mode that is... -
Page 23: Tape Recording
STEREO Preset Tuning Up to 30 stations may be stored in the AVR5’s memory for easy recall using the front panel controls or the remote. To enter a station to the memory, first tune the station using the steps outlined above. -
Page 24: Operation
Information Display ¯ Repeat the procedure as needed until all channels requiring adjustment have been set. When all adjustments have been made, the AVR5 will return to nor- mal operation when no adjustments are made for five seconds. Memory Backup... -
Page 25: Programming The Remote
Auto Search Method. Auto Search Method If the unit you wish to include in the AVR5’s remote is not listed in the code tables in this manual, or if the code does not seem to operate properly, you may wish to program the correct code using the Auto Search method as shown below. -
Page 26: Code Readout
For future reference enter the Setup Codes for the equipment in your system here: Programming the Remote Programmed Device Functions Once the AVR5’s remote has been pro- grammed for the codes of other devices, press the appropriate Device Control to change the remote from Selector ∂... - Page 27 For example, button number 19 is the Test Tone button for the AVR5, but it is the “Display” but- ton for many TV sets. Button number 2 is the Preset Tune Down button for the AVR5, and it is the “Reverse Skip”...
-
Page 28: Function List
No Function No Function No Function No Function No Function No Function Open/Close No Function AVR5 Video 2 Select AVR5 Video 2 Select AVR5 Video 1 Select AVR5 Video 1 Select AVR5 DVD Select AVR5 DVD Select Power On/Off No Function... -
Page 29: Function List
Reference for Function List MAIN POWER AM/FM PHONO TAPE 6 CH. DISC SKIP SLEEP SURR./CH. DIMMER DIRECT CTR. CHAN. AUTO PRESET AVR 5 RC Programming the Remote SOURCE POWER DWN - PRESET - UP DWN - TUNING - UP FM MODE VOLUME P. -
Page 30: Setup Code Tables: Tv
Setup Code Tables: TV Manufacturer/Brand Setup Code Number A MARK AKAI AMPRO AMSTRAD ANAM BLAUPUNKT CANDLE CAPEHART CENTRONIC CITIZEN CLASSIC CONCERTO CONTEC CORONADO CRAIG CROWN CURTIS MATHES DAEWOO DAYTRON DYNASTY DYNATECH ELECTROHOME EMERSON FISHER FUNAI FUTURETECH GOLDSTAR HALL MARK HITACHI INFINITY INKEL J C PENNEY... - Page 31 Setup Code Tables: TV (Continued) Manufacturer/Brand Setup Code Number JENSEN KENWOOD KLOSS LODGENET LOGIK LUXMAN MAGNIVOX MARANTZ MATSUI MEMOREX METZ MINERVA MITSUBISHI NIKEI ONKING ONWA OPTONICA PANASONIC PHILCO PHILIPS PIONEER PORTLAND PROSCAN PROTON QUASAR RADIO SHACK Programming the Remote 063 111 100 108 114 116 059 062...
-
Page 32: Setup Code Tables: Tv
Setup Code Tables: TV (Continued) Manufacturer/Brand Setup Code Number REALISTIC RUNCO SAMPO SAMSUNG SANYO SCOTT SEARS SHARP SIEMENS SIGNATURE SONY SOUNDESIGN SPECTRICON SUPRE MACY SYLVANIA TANDY TATUNG TECHNICS TECHWOOD TEKNIKA TELEFUNKEN TELERENT TERA TOSHIBA TOTEVISION UNIVERSAL VIDEO CONCEPTS VIDTECH WARDS YAMAHA YORK YUPITERU... -
Page 33: Setup Code Tables: Vcr
Setup Code Tables: VCR Manufacturer/Brand Setup Code Number AIWA AKAI AMPRO ANAM AUDIO DYNAMICS BROKSONIC CANON CAPEHART CRAIG CURTIS MATHES DAEWOO DAYTRON DYNATECH ELECTROHOME EMERSON FISHER FUNAI GO VIDEO GOLDSTAR HARMAN KARDON HITACHI INSTANT REPLAY J C PENNEY JENSEN KENWOOD LLOYD MAGIN MAGNAVOX... -
Page 34: Setup Code Tables: Vcr
Setup Code Tables: VCR (Continued) Manufacturer/Brand Setup Code Number OPTONICA PANASONIC PENTAX PHILCO PHILIPS PILOT PIONEER PORTLAND PULSAR QUARTZ QUASAR REALISTIC RICO RUNCO SALORA SAMSUNG SANSUI SANYO SCOTT SEARS SHARP SHINTOM SONY SOUNDESIGN SYLVANIA SYMPHONIC TANDY ATATUNG TEAC TECHNICS TEKNIKA THOMAS TOSHIBA TOTEVISION... -
Page 35: Setup Code Tables: Dvd
Setup Code Tables: DVD Manufacturer/Brand Setup Code Number CALIFORNIA AUDIO DENON GOLDSTAR KENWOOD LOTTE MAGNAVOX MITSUBISHI ONKYO OPTIMUS PANASONIC PIONEER RUNCO SAMSUNG SANYO SHARP SONY TECHNICS THOMSON TOSHIBA YAMAHA Programming the Remote... -
Page 36: Programming The Remote
Setup Code Tables: LD Manufacturer/Brand Setup Code Number CARVER DENON DISCO VISION HITACHI MAGNAVOX MARANTZ MITSUBISHI PANASONIC PHILIPS PIONEER QUASAR SAMSUNG SEGA SONY THETA DIGITAL YAMAHA Programming the Remote... -
Page 37: Troubleshooting Guide
This unit is designed for trouble-free operation. Most problems users encounter are due to operating errors. So, if you have a problem, first check this list for a possible solution. If the problem persists, consult your authorized Harman Kardon Service Center. If the problem is... -
Page 38: Technical Specifications
Audio Section Stereo Mode Continuous Average Power (FTC) 45 Watts per channel, 20Hz–20kHz @ < 0.08% THD, both channels driven into 8 ohms Five-Channel Surround Mode 35 Watts per channel, 20Hz–20kHz @ < 0.08% THD, all five channels driven simultaneously into 8 ohms Input Sensitivity/Impedance Linear (High Level) 200mV/47kohms... - Page 39 Staple or clip original invoice here.
- Page 40 Printed in Korea Part #1111-AVR5OM YIAR-I2000-ZZA...
Need help?
Do you have a question about the AVR5 and is the answer not in the manual?
Questions and answers