Table of Contents
Advertisement
Quick Links
Advertisement
Table of Contents

Related Manuals for Harman Kardon AVR 3600


Summary of Contents for Harman Kardon AVR 3600
- Page 1 AVR 3600 AUDIO/VIDEO RECEIVER OWNER’S MANUAL...
-
Page 2: Safety Information
SAFETY INFORMATION IMPORTANT SAFETY INSTRUCTIONS 1. Read these instructions. 2. Keep these instructions. 3. Heed all warnings. 4. Follow all instructions. 5. Do not use this apparatus near water. 6. The A/V receiver’s cabinet may be cleaned by gently wiping with a soft cotton or microfiber cloth. -
Page 3: Important Safety Information
• Do not obstruct the ventilation slots on the top of the unit, or place objects directly over them. • Due to the weight of the AVR 3600 and the heat generated by the ampli- fiers, there is the remote possibility that the rubber padding on the bot- tom of the unit’s feet may leave marks on certain wood or veneer materi-... -
Page 4: Table Of Contents
Step Five – Connect FM Antenna Step Six – Connect AM Antenna Step Seven – Connect SIRIUS Antenna Module 29 INITIAL SETUP Using the On-Screen Menu System Configure the AVR 3600 Using EzSet/EQ Set Up Sources 33 OPERATION Turning On the AVR 3600 Volume Control... -
Page 5: Features
Harman Kardon products have become easier to use, while offering more features and sounding better than ever. The AVR 3600 multizone 7.1-channel digital audio/video receiver contin- ues this tradition with some of the most advanced audio and video processing capabilities yet, and a wealth of listening and viewing options. -
Page 6: Supplied Accessories
• Zone 2 IR input, Carrier IR Output and A-BUS IR Output • IEC detachable AC power cord for easy installation Supplied Accessories The following accessory items are supplied with the AVR 3600. If any of these items are missing, please contact Harman Kardon customer service at www.harmankardon.com. -
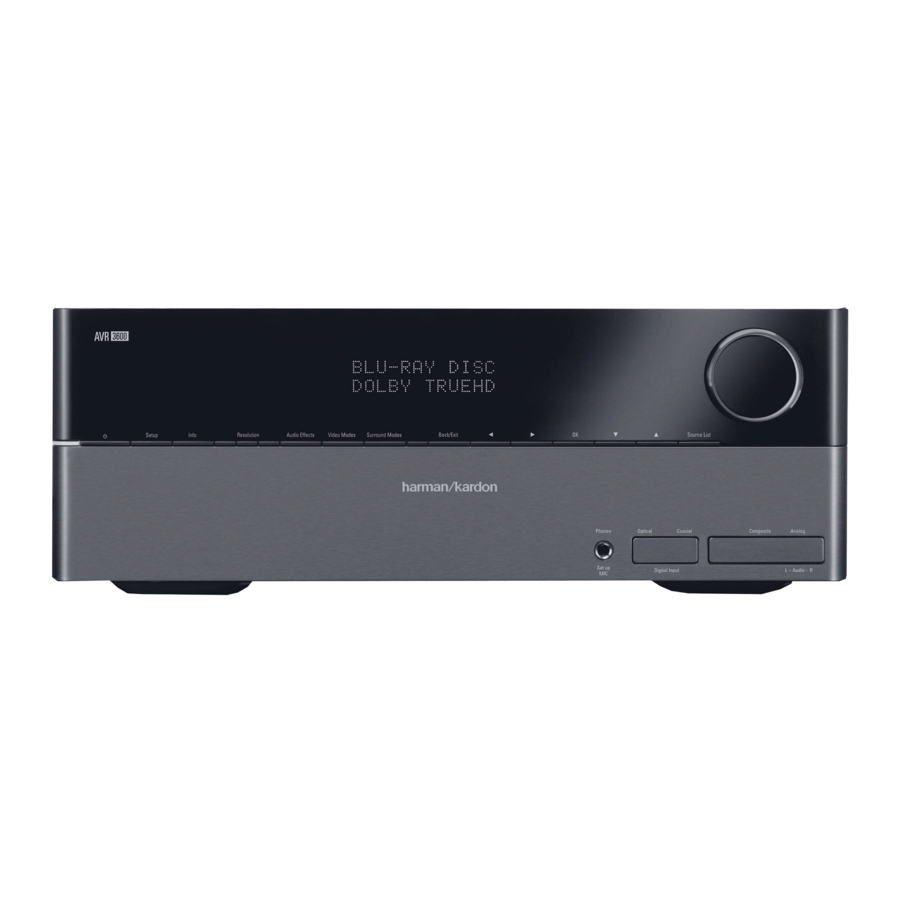
Page 7: Front-Panel Controls
FRONT- PANEL CONTROLS... - Page 8 It is important to ensure that it is not blocked. If covering the sensor is unavoidable, use an optional Harman Kardon HE 1000, or other infrared receiver, connecting it to the Remote IR Input on the AVR 3600’s rear panel.
-
Page 9: Rear -Panel Connections
REAR - PANEL CONNECTIONS... - Page 10 If your video display is equipped with HDMI or component video inputs, this connection is unnecessary, as the AVR 3600 will convert the composite video source signal to the correct format for a single video-cable connection to the TV.
- Page 11 Component Video Monitor Outputs: using one of the Component Video Inputs and your television or video display is component-video-capable (but does not have an HDMI input), connect these jacks to the video display. NOTES: • Due to copy-protection restrictions, there is no output at the Component Video Monitor Outputs for copy-protected sources.
-
Page 12: Main Remote Control Functions
MAIN REMOTE CONTROL FUNCTIONS IR Transmitter Lens AVR Power Off AVR Power On Source Selectors Audio Effects Alphanumeric Keys Last Back/Exit Light Soft keys Volume Mute Record Info Settings Setup Zone Selector Learn Device Power On Device Power Off Video Modes Surround Modes Activity Menu... - Page 13 MAIN REMOTE CONTROL FUNCTIONS The AVR 3600 remote is capable of controlling 8 devices, including the AVR itself and an iPod docked in the included The Bridge III. During the installation process, you may program the codes for each of your source components into the remote. To operate a component, press its Selector button to change the device mode.
- Page 14 Learn: The AVR 3600 remote is capable of “learning” individual IR codes from the original remote that came with a source device. See page 16 in the Installation section.
-
Page 15: Zone 2 Remote Control Functions
ZONE 2 REMOTE CONTROL FUNCTIONS Power Off Not Used Back/Exit Volume Controls Zone Selector IR Transmitter Mute Source Selectors Info Sleep Settings Info Settings Back/Exit Menu Menu Transport Controls Zone Indicator ZR 60 NOTE: To make it easier to follow the instructions throughout the manual that refer to this illustration, a copy of this page may be downloaded from the Product Support section at www.harmankardon.com. - Page 16 Remote IR Outputs or the A-BUS IR Output. The Zone 2 remote may also be used in the main listening room to directly control the AVR 3600 and Harman Kardon DVD, CD or tape players. When the Zone Selector is pressed to switch the remote to Zone 1 mode (the Zone Indicator will turn green), the power, volume and mute controls will only affect the main listening area.
-
Page 17: Typical Home Theater System
DTS-HD High Resolution Audio, DTS-HD Master Audio and Logic 7 (7.1 modes). The surround back speakers are optional, and the AVR 3600 may be set up with a 5.1-channel system in the main listening area, and the surround back channels reassigned to a multizone system, where the surround back channels power loudspeakers located in another room. -
Page 18: Connections
The AVR 3600 uses HDMI (V.1.3a with Deep Color) technology and is capable of processing both the audio and video components of the HDMI data, minimizing the number of cable connections in your system. -
Page 19: Analog Audio
The analog audio connection is required for multizone operation, as the AVR 3600’s multizone system is not capable of converting a digital signal to analog format. Use the analog audio connections even with the Surround Back/Zone 2 speaker outputs, in case another 2-channel digital audio source is in use in the main listen- ing area. -
Page 20: Usb Port
Although you may use a module with standard audio connections, labeled for “car and home use,” you will not be able to enjoy the AVR 3600’s ease of control. USB PORT The USB Port on the AVR 3600 is used only for software upgrades. -
Page 21: Front Speaker Placement
2 feet above or below the left/right speakers. If you’re using only two speakers with the AVR 3600, place them in the front left and right positions. Placement of the surround speakers depends on the number of speakers in your system. -
Page 22: Getting Started
GETTING STARTED Installing the AVR 3600 and connecting it to the other system compo- nents can be complex. To simplify installation, it is suggested that you design your system before you begin connecting wires and cables. Although the rear-panel jacks allow for a variety of audio and video connections to other components, the AVR’s software organizes... - Page 23 6. Decide which audio inputs to connect to each source: Assign only one unique digital audio input to each digital source. Assign analog audio inputs to analog sources, or as secondary connections for digital sources for backup, for recording or to make the source available to the multizone system.
-
Page 24: Installation
STEP EIGHT – Connect Remote IR Inputs and Outputs The AVR 3600 is equipped with a Remote IR Input, a Zone 2 Input, an A-BUS IR Output and both full-carrier and stripped Remote IR Outputs to facilitate use of your system with a remote control in a variety of situations. - Page 25 A. Connect an external amplifier to the Zone 2 Audio Outputs. It is recommended that you place the amplifier in the same room as the AVR 3600 so that a shorter length of inter- connect cable is used with a long run of speaker wire to the remote room.
- Page 26 STEP THIRTEEN – Turn On the AVR 3600 Button Two steps are required the first time you turn on the AVR 3600. 1. Flip the rear-panel Main Power Switch to the “On” position. The Power Indicator on the front panel will turn amber, indicating that the AVR is in Standby mode and is ready to be turned on.
- Page 27 2. There are several ways to turn on the AVR from Standby mode. a) Press the Standby/On Switch on the front panel. b) Using the remote, press the AVR Power On Button or any of the Source Selectors. NOTES: • Any time you press one of the Source Selectors on the remote, the remote will switch device modes.
-
Page 28: Initial Setup
INITIAL SETUP In this section, you will configure the AVR 3600 to match your actual system. A video display must be connected to one of the video monitor outputs on the receiver. USING THE ON-SCREEN MENU SYSTEM Although it’s possible to configure the AVR using only the remote and the front-panel messages, it is easier to use the full-screen menu system. -
Page 29: Set Up Sources
NOTE: The AVR 3600 will automatically set its master volume to – 25dB. STEP FOUR – After you select “Continue”, the screen shown in Figure 22 will appear. Select the number of speakers in your system. Select 5.1 if no surround back speakers are present, or if the surround back channels will be used for multizone operation. - Page 30 AVR to select an analog audio input for the source, leave this setting at its default of Off. The AVR will also select the assigned video source. The only “audio- only” sources on the AVR 3600 are the Radio and The Bridge III, (video may be available; See page 37), which use special on-screen menus.
- Page 31 Resolution From Source: Informational only. Indicates the resolution of the video output by the source device. HDMI Bypass: When an HDMI source signal is in use and the system includes an HDMI-capable display, the HDMI Bypass mode passes the source signal directly to the HDMI output, bypass- ing all video processing within the AVR, including video Output resolution adjustment.
-
Page 32: Operation
Dolby Volume Calibration Offset Calibration Offset is a feature of Dolby Volume processing that allows you to adjust the calibration of the AVR 3600 to optimally match your speakers and listening environment. The AVR 3600 is calibrated with the average speaker sensitivity in mind; however, different speakers may have different sensitivities. -
Page 33: Using The Radio
• Turn on the devices in this order: TV, AVR, source devices. USING THE RADIO To select the AVR 3600’s built-in radio: 1. Press the Source List Button on the front panel. Use the Buttons to scroll to the desired band. -
Page 34: Sirius Satellite Radio Operation
Plug the module into the SIRIUS Jack on the rear of the AVR 3600. Place the tuner module so that it has a clear view through a south- facing window. -
Page 35: Connections
4G and later, and iPhone models (not included). When The Bridge III is connected to its proprietary input on the AVR 3600 and the iPod or iPhone is docked, you may play the audio, video and still-image materials on your iPod or iPhone through your high-quality audio/video system;... -
Page 36: Ipod Manual Mode
While a selection is playing, the song title and playmode icon will appear in the front-panel Message Display. If a video monitor is connected to the AVR 3600 and the system is not in iPod Manual Mode, the Now Playing screen will appear and display the play mode icon, song title, artist and album. - Page 37 Virtual Surround: When only two main speakers are present in the system, Harman Virtual Surround may be used to create an enhanced soundfield that virtualizes the missing speakers. Select between Wide and Reference modes. Stereo: When 2-channel playback is desired, select the number of speakers used for playback: •...
-
Page 38: Advanced Functions
(5.1), 2-channel PCM modes in 32kHz, 44.1kHz, 48kHz or 96kHz, and 5.1 or 7.1 multichannel PCM. When a digital signal is received, the AVR 3600 detects the encod- ing method and the number of channels, which is displayed briefly as three numbers, separated by slashes (e.g., “3/2/.1”). -
Page 39: Dolby Surround Settings
OK Button toggles the setting on or off. MANUAL SPEAKER SETUP The AVR 3600 is flexible and may be configured for most speakers, and to compensate for the acoustic characteristics of your room. The EzSet/EQ process automatically detects the capabilities of each speaker, and optimizes the AVR 3600’s performance. -
Page 40: Number Of Speakers
The setting for the surround back speakers includes a third option: Zone 2. The AVR 3600 is capable of multizone operation, supporting placement of a pair of speakers in another room. The AVR 3600’s assignable surround back amplifier channels make multizone operation easier than ever, since an external power amplifier is not required. -
Page 41: Adjust Crossover Frequencies Menu
The main room will be configured automatically for up to 5.1 channels. See the Multizone Operation section for more information. NOTE: When the Surround Back speakers are set to “Zone 2”, they will not be configured during the EzSet/EQ process. To use the speakers in the main listening area, configure them as “On”... -
Page 42: Audio Effects
0dB, scroll down to this line at the bottom of the menu and press the OK Button. To set your levels using the AVR 3600’s internal test tone, adjust the TEST TONE line as follows: Test Tone: Determines whether the test tone is active. To begin, press the OK Button repeatedly to select the Off, Auto or Manual setting. -
Page 43: Video Modes
jagged edges and moiré patterns seen with less advanced processing. The “Torino” video processing chip generates on-screen graphics in high definition, and blends it with the incoming video, so that you can continue to watch a program while using system menus. The video processor automatically provides the best picture based on the capabilities of your video display and the incoming source video. -
Page 44: How To Adjust The Custom Picture Settings
Reduce the sharpness setting on your television, and the setting on the AVR 3600, if necessary, to minimize the appearance of any white lines between the bars in the gray scale portion of the test screen. -
Page 45: Multizone Operation
Zone 1, or red to operate Zone 2. SYSTEM SETTINGS The AVR 3600 offers system settings for ease of use. These settings may be accessed from the System Settings menu, which is selected by pressing the Setup Button and navigating to the System line. -
Page 46: Advanced Remote Control Functions
AVR. ADVANCED REMOTE CONTROL FUNCTIONS The AVR 3600 remote control also serves as a universal remote that may be programmed to operate other components. Refer to the Function List (Table A14 in the appendix) for assistance in operating your other components. -
Page 47: Resetting The Remote
After a reset, reenter all of these settings from your notes in the appendix worksheets. To reset the AVR 3600, place it in Standby mode (press the front- panel Standby/On Switch so that the Power Indicator turns amber). Then press and hold the front-panel OK Button for at least 5 seconds until the RESET message appears. -
Page 48: Troubleshooting Guide
• Remote is in Zone 2 mode not respond Additional information on troubleshooting possible problems with your AVR 3600, or installation-related issues, may be found in the list of “Frequently Asked Questions” , which is located in the Product Support section at www.harmankardon.com. -
Page 49: Appendix
Appendix – Default settings, worksheets, remote product codes Table A1 – Recommended Source Component Connections Device Type AVR 3600 Source Cable TV, satellite TV, HDTV Cable/SAT or other device that delivers television programs DVD Audio/Video, SACD, Blu-ray Disc, HD-DVD player... - Page 50 APPENDIX Table A3 – Speaker/Channel Setting Defaults Left/Right Speakers Center Speaker Left/Right Surround Speakers Left/Right Surround Back Speakers Subwoofer 1 Subwoofer 2 Left/Right Speakers Crossover Center Speaker Crossover Left/Right Surround Speakers Crossover Left/Right Surround Back Speakers Crossover 100Hz Subwoofer Mode Subwoofer Size Front Left Level Center Level...
- Page 51 Table A5 – Source Settings Cable/Sat Device Type Surround Modes Video Input Audio Input Resolution to Display Adjust Lip Sync Change Name Audio Auto Polling Zone 2 Audio Dolby Volume Table A6 – Audio Effects Settings Default Cable/Sat DVD Dolby Volume See Source Tone Control Treble...
- Page 52 APPENDIX Table A7 – Video Modes Settings Default Cable/Sat DVD Video Mode Brightness Contrast Color Sharpness Picture Adjust Auto Fit Overscan Noise Reduction MPEG Noise Reduction Cross Color Suppressor Black Level Deinterlacing Film Mode Detect Note: These settings are only available when the Video Mode is set to Custom. Note: These settings are only displayed when Advanced Video Settings is selected.
- Page 53 Table A9 – Remote Control Codes Source Input Cable/Sat Media Server Game Table A10 – System Settings Feature Front-Panel Dimmer Volume Units Volume Default Volume Default Level Unit of Measure Language HDMI Audio to TV Dolby Volume Calibration Transparency Volume/Status Messages Menus Setup and Slide-In Menus Screen Saver...
- Page 54 Dolby Pro Logic IIx modes may be selected not only with Dolby Digital bit- streams, but thanks to the AVR 3600’s post-processor, they may also be used with some DTS bitstreams to add a surround back channel to 5.1 modes.
- Page 55 Table A12 – continued Surround Mode Description Dolby Pro Logic IIx This mode is similar to Dolby Pro Logic II Movie, with an added surround Movie back channel. Dolby Pro Logic IIx This mode is similar to Dolby Pro Logic II Music, including the availability Music of center width, dimension and panorama adjustments.
- Page 56 Movie encoding, Logic 7 Movie mode increases center channel intelligibility. Logic 7 The AVR 3600 is programmed at the factory to default to this mode for Music 2-channel signals. Logic 7 Music mode is well suited to conventional 2-channel music recordings.
- Page 57 Refer to the numbered buttons in Figure 40 when using the Function List. Figure 40 – Remote Control Function List Reference APPENDIX...
- Page 58 APPENDIX Table A13 – Remote Control Function List Button Name AVR Power On AVR Power On AVR Power On AVR Power Off AVR Power Off AVR Power Off Device Power On Device Power Off Cable/SAT Input Sel Input Sel Input Sel Input Sel The Bridge Input Sel...
- Page 59 Table A13 – continued Button Name Cable/SAT AVR Power On AVR Power On AVR Power On AVR Power Off AVR Power Off AVR Power Off Device Power On Power On Device Power Off Power Off Cable/SAT Input Sel Input Sel The Bridge Input Sel Radio...
- Page 60 APPENDIX Refer to Tables A14 through A24 when programming the codes for your components into the remote. Table A14 – Remote Control Product Codes: TV TV Manufacturer/Brand Setup Code Number AIWA A MARK ADMIRAL AKAI AMPRO ANAM BLAUPUNKT BROKSONIC CANDLE CAPEHART CENTURION CENTRONIC...
- Page 61 Table A14 – continued TV Manufacturer/Brand Setup Code Number TATUNG TECHNICS TECHWOOD TEKNIKA TELERENT TERA THOMSON TOSHIBA TOTEVISION VIDEO CONCEPTS VIDTECH WARDS YAMAHA YORK YUPITERU ZENITH ZONDA Table A15 – Remote Control Product Codes: AUX - HDTV TV Manufacturer/Brand Setup Code Number MOTOROLA SAMSUNG ZENITH...
- Page 62 APPENDIX Table A17 – Remote Control Product Codes: AUX - CD CD Manufacturer/Brand Setup Code Number ADCOM 063 069 AIWA 072 111 118 AKAI 050 177 184 AUDIO TECHNICA AUDIOACCESS AUDIOFILE CALIFORNIA AUDIO CAPETRONIC CARRERA CARVER 136 140 141 CASIO 117 166 CLARINETTE DENON...
- Page 63 Table A19 – Remote Control Product Codes: SAT SAT Manufacturer/Brand Setup Code Number ALPHASTAR ALPHASTAR DBS ALPHASTAR DSR BIRDVIEW CHANNEL MASTER 320 321 325 CHAPARRAL 315 316 451 CITOH DRAKE 313 317 318 DX ANTENNA 331 352 379 ECHOSTAR 395 397 452 484 485 ELECTRO HOME FUJITSU...
- Page 64 APPENDIX Table A21 – continued CBL Manufacturer/Brand Setup Code Number SAMSUNG 003 072 186 SCIENTIFIC ATLANTA 183 203 221 SEAM SIGNATURE 001 188 SPRUCER 053 081 177 STARCOM 002 011 163 STARGATE TANDY TELECAPATION TEXSCAN TIMELESS TOCOM 170 205 UNITED CABLE UNIVERSAL 033 034 039 VIDEOWAY...
-
Page 65: Technical Specifications
Distortion 1kHz, 50% Mod 0.8% Selectivity ±10kHz, 30dB Please register your AVR 3600 at www.harmankardon.com. You’ll need the product’s serial number. At the same time, you can choose to be notified about new products and/or special promotions. Video Section Television Format... - Page 66 250 Crossways Park Drive, Woodbury, New York 11797 www.harmankardon.com © 2009 Harman International Industries, Incorporated. All rights reserved. Part No. CQX1A1431Z...
Need help?
Do you have a question about the AVR 3600 and is the answer not in the manual?
Questions and answers