Harman Kardon CDR 2 Owner's Manual
Harman-kardon cd recorder cdr 2 owners manual
Hide thumbs
Also See for CDR 2:
- Service manual (117 pages) ,
- Technical manual (99 pages) ,
- Quick manual (4 pages)
Table of Contents
Advertisement
Advertisement
Table of Contents

Related Manuals for Harman Kardon CDR 2


Summary of Contents for Harman Kardon CDR 2
- Page 1 CDR 2 CD Recorder OWNER’S MANUAL ® Power for the digital revolution. ™...
-
Page 2: Table Of Contents
CDR 2 Compact Disc Recorder 3 Introduction 3 Important Information on CD Recording 4 Safety Information 5 Front-Panel Controls 7 Front-Panel Information Display 9 Rear-Panel Connections 10 Remote Control Functions 12 Installation and Connections 14 CD Recording Basics 15 Playback Basics... -
Page 3: Introduction
CDR 2 uses special CD-R and CD-RW discs designed only for audio use. CD-R discs designed for computer use will not work in the CDR 2. See page 14 for more information on which types of discs are used with the CDR 2. -
Page 4: Safety Information
CDR 2 which may not be covered by the war- ranty, be certain that all discs are removed from the unit before it is moved. Once the CDR 2 is placed installed, discs may be left in the unit when it is turned off, but the unit should NEVER be moved with discs left in either deck. -
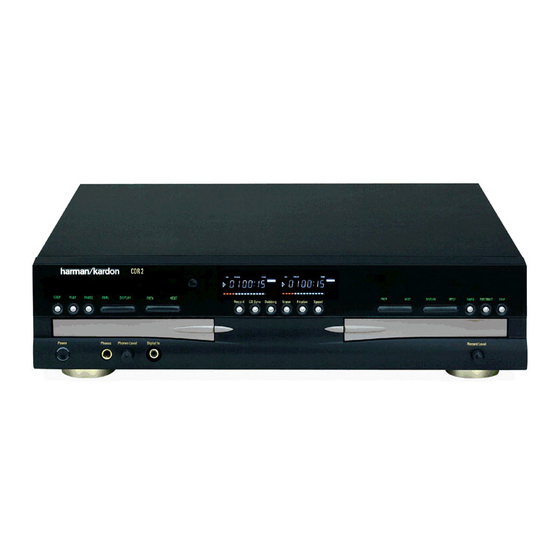
Page 5: Front-Panel Controls
) Dubbing ! Erase 1 Power Switch: Press this switch to apply power to the CDR 2. When the unit is first turned on, the Status-Mode Indicator 2 surrounding the switch will turn green. Once the unit has been turned on with this switch, it may be operated from either the front panel or remote control. - Page 6 Ú Information Display: The indicators in the Information Display provide status reports on the operation of the CDR 2. See page 7 for complete explanations of each indicator. Û Remote Sensor: The IR sensor that receives the commands from the remote control is behind this area.
-
Page 7: Front-Panel Information Display
Status, Time, Total Time and Track Time. In addition, there is a separate Information Display, Play/Pause Indicator and CD Indicator for each deck. As the function of these indicators is identical for both decks, they are described in this manual with a common letter. When the CDR 2 is playing or recording a disc, any indicators that light on the left side of the display describe to the status of the Play Deck, while those that light on the right side of the display describe the status of the Record Deck. - Page 8 L Time Indicator: This indicator lights in con- junction with one of the time indicators OPQ to show which of the time status modes is active. M Remaining-Time Indicator: This indicator lights when the Information Display K shows the time remaining on a disc. N Total Time: This indicator lights when the Information Display K shows the total time of all tracks on a disc.
-
Page 9: Rear-Panel Connections
IR input jack of another compatible Harman Kardon remote controlled product to have the built-in remote sensor Û on the CDR 2 pro- vide IR signals to other compatible products. ¤ AC Power Cord: Connect this plug to an AC outlet. -
Page 10: Remote Control Functions
Remote Control Functions a Power-On Button b Play (CDP)-Deck Display Control c Play (CDP)-Deck Open d Play (CDP)-Deck Select e Program f Reverse Search g Single h Program Check i Previous-Track Skip j Play/Select k Random Play l Dub m Automatic/Manual Track Increment Selector n Track Increment o Finalize p Numeric Keys... - Page 11 Remote Control Functions a Power-On Button: Press this button to turn the CDR 2 on. Note that in order for this control to function, the Front-Panel Power Switch 1 must first be pressed so that the unit is in the Standby mode.
-
Page 12: Installation And Connections
In addition to the safety considerations outlined on page 4, it is also recommended that the CDR 2 not be placed in a location that is sub- ject to direct sunlight or extreme heat or cold, as these conditions may damage the discs used in the player, or the player itself. - Page 13 IR Output jack of another compatible Harman Kardon component or a compatible IR system remote product. You may also use the IR Sensor in the CDR 2 to send commands to other compatible remote products. Connect the Remote IR Out Jack ⁄...
-
Page 14: Cd Recording Basics
Each time a disc of any sort is placed in the CDR 2, you will see a TOC to indicate that the unit is reading this data from the disc. -
Page 15: Playback Basics
When the Status-Mode Indicator 2 goes out, the CDR 2 is off and not drawing any power. When you will not be using the unit for an extended period of time, such as during a vacation, we recommend using the Main Power Switch 1 to turn the unit completely off. -
Page 16: Normal Play
To play a disc, first make certain that the unit is properly installed and that the Main Power Switch 1 is turned on. Turn the CDR 2 on by pressing the Power-On button a on the remote and note that the front-panel display will illuminate. -
Page 17: Dual-Play Mode
Playback Basics Dual-Play Mode Since the CDR 2 has more than one CD deck, you may play a disc in either drawer. When only one deck is playing, the unit is in the Single mode. In the Single mode, the audio output will be fed to all digital and analog jacks for both decks. -
Page 18: Program Play
Repeat Programmed Play The CDR 2’s programming system enables you to repeat either a single track on a disc, the entire disk, or a specially programmed passage that you select. - Page 19 Program Play Repeat A-B The CDR 2 may be programmed to repeat any section within a track, or a complete passage that includes material from a series of consecu- tive tracks. To program the unit for A-B Repeat play, first play the disc and locate the point where you wish to begin the repeated section.
-
Page 20: Cd Recording
CDR 2. In addition, some terms used in the fol- lowing pages may be new to you. The following definitions and information will help you to make CD recordings using the CDR 2’s many... -
Page 21: Cd Sync Recording
CDR 2 receives silence for 3 sec- onds. The recorder will also go into the Pause mode until the input source resumes. To acti-... -
Page 22: Finalizing Cd-R And Cd-Rw Discs
Important Note on Erasure and Finalization Times: Regardless of the speed at which a disc was recorded, the CDR 2 will erase and finalize discs at the 4x speed to mini- mize the length of the process. However, in... -
Page 23: Troubleshooting Guide And Error Messages
• Only CD Audio and DTS discs will play in the CDR 2; replace the disc • Replace the disc. The CDR 2 does not play or dub DVD discs • Use another blank CD-R or CD-RW disc • Erase one or more tracks on a CD-RW disc •... -
Page 24: Technical Specifications
Technical Specifications Signal Format Playback Sampling Frequency D/A Conversion Oversampling Playback Specifications Frequency Response Playback S/N Playback Dynamic Range Playback THD Analog Audio Output Digital-Coaxial Output Headphone Output Record Specifications Digital Input Sample Rates Recording S/N: Analog Recording S/N: Digital Dub Mode Recording S/N: Digital External Source Recording Dynamic Range Recording THD...
Need help?
Do you have a question about the CDR 2 and is the answer not in the manual?
Questions and answers