Advertisement
Quick Links
PLEASE READ ENTIRE INSTRUCTIONS BEFORE PROCEEDING.
PLEASE READ ENTIRE INSTRUCTIONS BEFORE PROCEEDING.
PLEASE READ ENTIRE INSTRUCTIONS BEFORE PROCEEDING.
PLEASE READ ENTIRE INSTRUCTIONS BEFORE PROCEEDING.
PLEASE READ ENTIRE INSTRUCTIONS BEFORE PROCEEDING.
INST
INST
INSTALLA
INST
INST
IMPORTANT:
IMPORTANT:
IMPORTANT:
IMPORTANT:
IMPORTANT: Save these Instructions for the Local Electrical Inspector's use.
INSTALLER:
INSTALLER:
INSTALLER: Please leave these Instructions with this unit for the owner.
INSTALLER:
INSTALLER:
OWNER:
OWNER:
OWNER: Please retain these instructions for future reference.
OWNER:
OWNER:
Safety Warning: Turn off power circuit at service panel and lock out panel,
Safety Warning: Turn off power circuit at service panel and lock out panel,
Safety Warning: Turn off power circuit at service panel and lock out panel,
Safety Warning: Turn off power circuit at service panel and lock out panel,
Safety Warning: Turn off power circuit at service panel and lock out panel,
WARNING - TO REDUCE THE RISK
WARNING - TO REDUCE THE RISK
WARNING - TO REDUCE THE RISK
WARNING - TO REDUCE THE RISK
WARNING - TO REDUCE THE RISK
OF FIRE, ELECTRIC SHOCK, OR
OF FIRE, ELECTRIC SHOCK, OR
OF FIRE, ELECTRIC SHOCK, OR
OF FIRE, ELECTRIC SHOCK, OR
OF FIRE, ELECTRIC SHOCK, OR
INJURY TO PERSONS, OBSERVE
INJURY TO PERSONS, OBSERVE
INJURY TO PERSONS, OBSERVE
INJURY TO PERSONS, OBSERVE
INJURY TO PERSONS, OBSERVE
THE FOLLOWING:
THE FOLLOWING:
THE FOLLOWING:
THE FOLLOWING:
THE FOLLOWING:
CAUTION: FOR GENERAL VENTI-
CAUTION: FOR GENERAL VENTI-
CAUTION: FOR GENERAL VENTI-
CAUTION: FOR GENERAL VENTI-
CAUTION: FOR GENERAL VENTI-
LATING USE ONLY.
LATING USE ONLY. DO NOT
LATING USE ONLY.
LATING USE ONLY.
LATING USE ONLY.
TO EXHAUST HAZARDOUS OR
TO EXHAUST HAZARDOUS OR
TO EXHAUST HAZARDOUS OR
TO EXHAUST HAZARDOUS OR
TO EXHAUST HAZARDOUS OR
EXPLOSIVE MATERIALS OR VA-
EXPLOSIVE MATERIALS OR VA-
EXPLOSIVE MATERIALS OR VA-
EXPLOSIVE MATERIALS OR VA-
EXPLOSIVE MATERIALS OR VA-
PORS.
PORS.
PORS.
PORS.
PORS.
A. Use this unit only in the manner
intended by the manufacturer. If
you have questions, contact the
manufacturer.
B. Before servicing or cleaning the
unit, switch power off at service
panel and lock service panel
disconnecting means to prevent
power from being switched on
accidentally. When the service
disconnecting means cannot be
locked, attach a tag to the service
panel to indicate power has been
switched off for maintenance.
READ AND SAVE THESE INSTRUCTIONS
LI06EC Ed. 10/98
ALLA
ALLATION MUST COMPL
ALLA
TION MUST COMPL
TION MUST COMPLY Y Y Y Y WITH
TION MUST COMPL
ALLA
TION MUST COMPL
before wiring this appliance.
before wiring this appliance.
before wiring this appliance.
before wiring this appliance.
before wiring this appliance.
Requirement: 120 V AC, 60 Hz. 15 or 20 A
Requirement: 120 V AC, 60 Hz. 15 or 20 A
Requirement: 120 V AC, 60 Hz. 15 or 20 A
Requirement: 120 V AC, 60 Hz. 15 or 20 A
Requirement: 120 V AC, 60 Hz. 15 or 20 A
IMPORTANT SAFETY INSTRUCTIONS
IMPORTANT SAFETY INSTRUCTIONS
IMPORTANT SAFETY INSTRUCTIONS
IMPORTANT SAFETY INSTRUCTIONS
IMPORTANT SAFETY INSTRUCTIONS
DO NOT USE
DO NOT
DO NOT
DO NOT
INSTALLATION INSTRUCTIONS
PHE WALL HOOD
APPROVED FOR ALL
RESIDENTIAL APPLIANCES
FOR RESIDENTIAL USE ONLY
WITH
WITH
WITH ALL LOC
ALL LOCAL CODES.
ALL LOC
ALL LOC
WITH
ALL LOC
C. Installation Work and Electrical
Wiring Must Be Done By
Qualified Person(s) In Accor-
dance With All Applicable
Codes & Standards, Including
Fire-rated Construction.
USE
USE
USE
USE
D. Sufficient air is needed for
proper combustion and ex-
hausting of gases through the
flue (chimney) of fuel burning
equipment to prevent back-
drafting. Follow the heating
equipment manufacturers
guideline and safety standards
such as those published by the
National Fire Protection Asso-
ciation (NFPA), the American
Society for Heating, Refrigera-
tion and Air
Conditioning
Engineers
(ASHRAE), and
the local code
authorities.
AL CODES.
AL CODES.
AL CODES.
AL CODES.
FILE # E21958
Advertisement

Related Manuals for Thermador PHE


Summary of Contents for Thermador PHE
-
Page 1: Installation Instructions
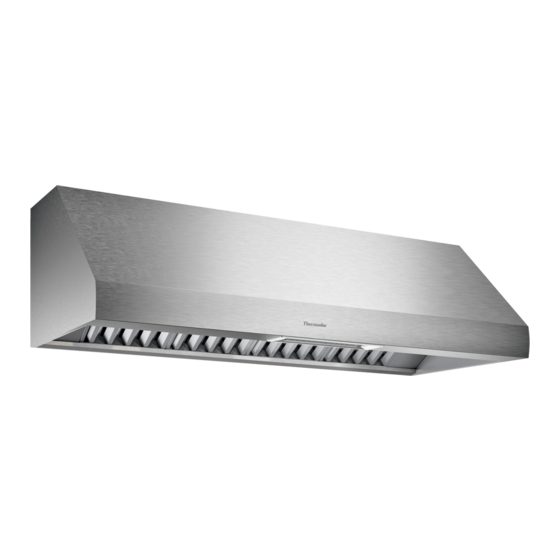
INSTALLATION INSTRUCTIONS PHE WALL HOOD APPROVED FOR ALL RESIDENTIAL APPLIANCES FOR RESIDENTIAL USE ONLY PLEASE READ ENTIRE INSTRUCTIONS BEFORE PROCEEDING. PLEASE READ ENTIRE INSTRUCTIONS BEFORE PROCEEDING. PLEASE READ ENTIRE INSTRUCTIONS BEFORE PROCEEDING. PLEASE READ ENTIRE INSTRUCTIONS BEFORE PROCEEDING. PLEASE READ ENTIRE INSTRUCTIONS BEFORE PROCEEDING. - Page 2 E. Due to size and weight of this to duct air outside - do not vent unit two installers are recom- exhaust air into spaces within mended. walls, ceilings, attics, crawl F. When cutting or drilling into spaces, or garages. wall or ceiling, do not damage H.
- Page 3 • 1/2" Conduit • Care & Use /Installation • Wire Nuts Instructions • Ventilator- The PHE model • Registration Card can be installed with any • Filters, 2, 3, 4 or 5 depend- ing on model and size Thermador VTN1000Q, •...
- Page 4 Assembly of the T Assembly of the T ransition: The transition supplied with the The PHE unit can be mounted on PHE hood mounts to the top or a wall or suspended from a rear of the hood depending on the cabinet.
- Page 5 Mount Installation all Mount Installation The desired installation 1. Hood Installation Height After the hood installation height of the PHE is the user’s preference. Figure 2 height has been determined shows a typical installation draw a horizontal line at a...
- Page 6 4. Find studs behind the 7. Use 2-4 (6mm x 80 mm) drywall by tapping the wall screws to attach the or using a stud finder. Lo- bracket to the wall as cate one stud on either side shown in Figure 3. For of the cooktop centerline to support of longer hoods, use for mounting the...
- Page 7 11. Discharge Direction: Hori- Figure 7 below shows the PHE zontal discharge requires a wall configured for vertical discharge. cutout, as shown in Figure 5, to Installations using this type of provide clearance for the transi- method require a cutout in the tion.
- Page 8 Cabinet Installation: Cabinet Installation: Cabinet Installation: through the center of the oval holes K into the wall. The PHE hood can be in- Insert two wall plugs into stalled under a cabinet by drilled holes. Tighten hood supporting the hood from to wall anchors by installing the top.
- Page 9 Figure 10 1. In the base of the cabinet drill 1/16” tap holes at the locations shown in Figure 10. Screw in " " " " " " " " " four 4.2 mm x 18 mm screws (provided with hood) leaving 1/4” "...
- Page 10 3. For horizontal discharge use Figure 5 for the geometry of the cutout required for clearance of the transition. 4. Hang hood from screws and tighten securely. 5. Install two wall anchors as described in step 15 on the previous page. Page 10...
- Page 11 Installing an Integral Installing an Integral Installing an Integral W W W W W iring the PHE with an iring the PHE with an iring the PHE with an iring the PHE with an Installing an Integral Installing an Integral...
- Page 12 Figure 15 with the blower unit. 5. Connect black, white, W W W W W iring the PHE with a iring the PHE with a iring the PHE with a iring the PHE with a iring the PHE with a...
- Page 13 6. Connect wire clamp to “pigtail” as shown in Figure 15. Insert “pigtail” wires into j-box and fix wire clamp to j-box using nut supplied with wire clamp V V V V V . 7. Run five wires (#16 AWG) in 1/2” conduit from the remote blower to the second conduit connector.
Need help?
Do you have a question about the PHE and is the answer not in the manual?
Questions and answers