Panasonic LUMIX DMC-TZ4 Operating Instructions Manual
Digital camera lumix dmc-tz4; lumix dmc-tz5
Hide thumbs
Also See for LUMIX DMC-TZ4:
- Operating instructions manual (342 pages) ,
- Operating instructions manual (53 pages) ,
- Operating instructions manual (116 pages)

Related Manuals for Panasonic LUMIX DMC-TZ4


Summary of Contents for Panasonic LUMIX DMC-TZ4
-
Page 1: Operating Instructions
Operating Instructions Digital Camera DMC-TZ5 Model No. DMC-TZ4 Before use, please read these instructions completely. Web Site: http://www.panasonic-europe.com VQT1P91... -
Page 2: Before Use
Caution for AC Mains Lead CAUTION We would like to take this opportunity to Danger of explosion if battery is thank you for purchasing this Panasonic For your safety, please read the following text WARNING: DO NOT CONNECT EITHER incorrectly replaced. Replace only Digital Camera. -
Page 3: Quick Start Guide
• Or go on line through our Internet Accessory ordering application at www.panasonic.co.uk. • Most major credit and debit cards accepted. • All enquiries transactions and distribution facilities are provided directly by Panasonic UK Ltd. • It couldn’t be simpler! To play back the pictures •... -
Page 4: Intelligent Auto
Record, view, save those precious moments. View Record Cards may be (P.28) inserted directly into (Playback) on large screen (P.86) devices with SD Enjoy crisp pictures memory card slots. Automatically reads the scene to take crisper pictures! on large screens! INTELLIGENT ●... -
Page 5: Table Of Contents
INDEX Before use Basics (Record • View) Before use ......12 Standard Accessories ..13 Taking picture with Viewing your pictures • Read first/ ........ Names of parts....14 (Play) automatic settings ..28 To prevent damage and faults • Mode dial ......15 •... - Page 6 INDEX (Continued) Applications (Record) Applications (View) Connecting with other devices (Continued) Taking motion pictures ‘MOTION PICTURE’ ......52 Viewing as list Using with your PC .... 81 (Multi playback/Calendar Useful features for travel ..............53 playback) ......67 Printing ....... 83 •...
-
Page 7: Before Use
• Do not press the lens or the LCD monitor. damage. • Consult the dealer or your nearest servicentre Do not get the camera wet or insert Panasonic will not provide compensation Standard accessories if you lose the supplied accessories. (You foreign objects even if damage is caused by faults with can purchase the accessories separately.) -
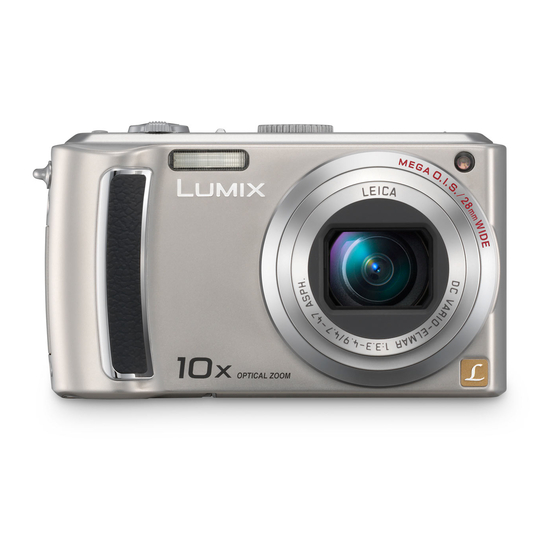
Page 8: Names Of Parts
(P.20) (P.81, 83, 86) with ▲▼◄►. DC IN socket (P.81, 83) Always use a genuine Panasonic AC adaptor (DMW-AC5E: optional). This manual is based on the DMC-TZ5 model. Product illustrations and screens may vary. VQT1P91 VQT1P91... -
Page 9: Preparations
DMC-TZ4 Battery will be warm during charging and for some time thereafter. Always use genuine Panasonic batteries (CGA-S007E). Battery will run out if not used for long periods of time, even after being charged. If you use other batteries, we cannot guarantee the quality of this product. -
Page 10: Picture Save Destination (Cards And Built-In Memory)
‘PLEASE SET THE CLOCK’ will be displayed Compatible memory cards (optional) when power is turned on for the first time. SDHC memory card The following SD standard-based cards (Panasonic brand recommended) Switch • SD memory cards (8 MB - 2 GB) (LOCK) •... -
Page 11: Using Menus
To get more out of your camera, you can use a variety of functions and select settings Using menus Preparations from 4 different menus. (Example) Change ‘LCD MODE’ in SETUP menu when in NORMAL PICTURE mode. Menu type Bring up the menu Camera ON/OFF REC menu switch... -
Page 12: Using Setup Menu
Make general camera settings such as adjusting the clock, extending the battery life, Using SETUP menu Preparations and changing the beep sounds. ‘CLOCK SET’, ‘AUTO REVIEW’ and ‘ECONOMY’ are important for clock setting and Item Settings, notes battery life. Be sure to check these before use. (Setting method : P.20) Default setting : BEEP LEVEL BEEP... -
Page 13: Economy
Using SETUP menu Preparations (Continued) Item Settings, notes Item Settings, notes POWER SAVE ECONOMY ZOOM RESUME OFF / ON OFF/2MIN./ 5 MIN. /10MIN. : Turn off LCD monitor Remember the zoom • Cannot be set when using ‘SELF PORTRAIT’ scene Automatically turn off the camera while not in use. -
Page 14: Tv Aspect
Using SETUP menu Preparations (Continued) Item Settings, notes Item Settings, notes YES/NO NTSC/ PAL FORMAT VIDEO OUT Use when ‘BUILT-IN Change the video output • This requires a sufficiently charged battery (P.16) or AC • Operates when AV cable is connected. MEMORY ERROR’... -
Page 15: Basics (Record • View)
Taking picture with Optimum settings are made automatically from information such as ‘face’, ‘movement’, Basics ‘brightness’, and ‘distance’ just by pointing the camera at the subject. automatic settings Applicable mode : Please set the clock before taking pictures (P.19). Backlight compensation (brighten subject against backlight) Turn on the power •... -
Page 16: Taking Pictures With Your Own Settings
Taking pictures with your Using REC menu (P.55) to change settings and set up your own recording environment. Basics own settings Applicable mode : Turn on the power Align focus for desired composition Status indicator illuminated for Shutter button Useful when subject is not in centre of picture. approx. -
Page 17: Taking Pictures With Zoom
You can zoom in up to 10 times with ‘optical zoom’, and up to 16.9 (DMC-TZ4: 15.9) Taking pictures with zoom Basics times with ‘Extra optical zoom’ with lower picture quality. You can also use ‘digital zoom’ to zoom in even further. Zoom In/Out To enlarge quickly to max. -
Page 18: Enlarging Further
Taking pictures with zoom Viewing your pictures Basics Basics (Play) (Continued) When there is no card inserted, the pictures played back from the built-in memory. Enlarging further ‘ DIGITAL ZOOM’ (Clipboard pictures can only be played back in CLIPBOARD mode (P.64).) Applicable modes : Set to Zoom 4 times further than optical/extra optical zoom (maximum 40x –... -
Page 19: Applications (Record)
Changing recording information Applications Deleting pictures Basics display (Record) Pictures deleted will be from card if card is inserted, or from built-in memory if the card is Change between different LCD monitor displays, such as histograms. not inserted. Deleted pictures cannot be recovered. Mode dial Set to Press to change display... -
Page 20: Taking Pictures With Flash
Taking pictures with flash Applications (Record) Applicable modes : Display ‘FLASH’ Available types in each mode ( : default setting) SCENE MODE Select the desired type FLASH AUTO AUTO/RED-EYE FORCED FLASH ON Set to (AUTO), (AUTO/RED-EYE reduction), or (SLOW SYNC./RED-EYE SLOW SYNC./RED-EYE reduction) according to subject and brightness. -
Page 21: Taking Close-Up Pictures
Positioning camera and subject within Taking close-up pictures Applications Applications accessible range for focus alignment (Record) (Record) Applicable modes : To enlarge the subject, you can take pictures from even closer up than the normal focus Accessible distance from subject depends on zoom ratio. range allows (up to 5 cm for max. -
Page 22: Taking Pictures With Self-Timer
Taking pictures with exposure Taking pictures with self-timer Applications Applications compensation (Record) (Record) Applicable modes : We recommend using a tripod. This is also effective for correcting jitter when pressing the Corrects exposure when adequate exposure cannot be obtained (if difference between shutter button, by setting the self timer to 2 seconds. -
Page 23: (Play)
Taking pictures according to Using SCENE MODE enables you to take pictures with optimum settings (exposure, Applications colouring, etc.) for given scenes. (Record) the scene ‘SCENE MODE’ Applicable modes : Set to Scene types Set to ‘SCN1’ or ‘SCN2’ SOFT SKIN PORTRAIT SELF PORTRAIT SCENERY... - Page 24 Taking pictures according to Applications How to select a scene (P.44) (Record) the scene Using flash in scene modes (P.39) ‘SCENE MODE’ (Continued) Scene Uses, Tips Notes Scene Uses, Tips Notes Improves the skin tone of subjects for a • ‘AF MODE’ default setting is Take pictures of people and nightscapes with •...
-
Page 25: High Sens
Taking pictures according to Applications How to select a scene (P.44) (Record) the scene Using flash in scene modes (P.39) ‘SCENE MODE’ (Continued) Scene Uses, Tips Notes Scene Uses, Tips Notes Uses weak flash to bring out skin colours. • Age and name will be displayed Prevents blurring of subject in dark, indoor •... -
Page 26: Starry Sky/Fireworks/ Beach/Snow
Taking pictures according to Applications How to select a scene (P.44) (Record) the scene Using flash in scene modes (P.39) ‘SCENE MODE’ (Continued) Scene Uses, Tips Notes Scene Uses, Tips Notes Take clear pictures of starry skies or dark • Main fixed settings Take pictures of the view from aircraft •... -
Page 27: Taking Motion Pictures
Taking motion pictures Useful features for travel Applications Applications (Record) (Record) ‘MOTION PICTURE’ Applicable mode : Applicable modes : Record motion pictures and sound (motion pictures cannot be recorded without sound). TRAVEL DATE (Record travel date and destination) You can take a motion picture while zooming. Record information as to what day and where pictures were taken by setting departure Set REC/PLAY switch to Aspect and picture quality... -
Page 28: World Time
Useful features for travel Using REC menu Applications (Continued) Applications (Record) (Record) Applicable modes : REC/PLAY switch: Default setting: WORLD TIME ‘Quick setting’ (P.66) is useful to easily call up frequently-used menus. (Registering local time at your overseas destination) Set-up: • Clock must be set in advance (P.19). PICTURE SIZE •... -
Page 29: Aspect Ratio
Applications Using REC menu (Continued) REC/PLAY switch: (Record) Shutter speed and ISO sensitivity are displayed in the screen for a few seconds after ASPECT RATIO recording. If interference becomes noticeable, we recommend reducing the setting, or selecting Aspect ratio of picture can be changed according to printing or playback format. ‘NATURAL’... -
Page 30: White Balance
Applications Using REC menu (Continued) REC/PLAY switch: (Record) WHITE BALANCE METERING MODE Adjust colouring to suit light source if colours otherwise appear unnatural. You can change the position for measuring brightness when correcting exposure. Set-up: Mode dial → Press ‘MENU/SET’ → Select ‘WHITE Set-up: Mode dial →... -
Page 31: Continuous Af
Applications Using REC menu (Continued) REC/PLAY switch: (Record) BURST Determined position for 1-area-focusing (High speed)/ Spot-focusing: focus 1-area-focusing: Focuses on smaller, limited Enables a rapid succession of photographs to be taken. Succession of photographs taken Focuses on AF area in centre area. -
Page 32: Digital Zoom
Applications Using REC menu (Continued) REC/PLAY switch: (Record) DIGITAL ZOOM MIN. SHTR SPEED Multiplies effect of optical zoom or extra optical zoom by up to 4 times. (See P.34 for Sets shutter speed to minimum. We recommend using slower shutter speeds to take details) brighter pictures in dark locations. -
Page 33: Taking/Viewing Clipboard Pictures (Clipboard)
Useful for taking pictures of timetables and maps instead of taking memos. Taking/viewing clipboard Applications Regardless of presence of card, pictures will always be saved to clipboard folder of pictures (Record) built-in memory. Beware of copyrights, etc. (P.2) (CLIPBOARD) Applicable mode : Taking clipboard pictures Zoom mark Useful for enlarging and saving parts of maps, etc. -
Page 34: Quick Setting
Viewing as list Quick setting Applications Applications (Record) (View) (Multi playback/Calendar playback) Applicable modes : REC menu items can be called up easily (settings items displayed vary depending on You can view 12 (or 30) pictures at once (multi playback), or view all pictures taken on a recording mode). -
Page 35: Creating Still Pictures From Motion Pictures
Viewing motion pictures · pictures with audio / Different playback methods Applications Applications Creating still pictures from motion pictures (View) (View) REC/PLAY switch: (Set mode dial to any except Various playback modes for your pictures. Set-up: REC/PLAY switch: (Set mode dial to any except Pictures will be selected from built-in memory (not clipboard) if no card is inserted. -
Page 36: Different Playback Methods
Different playback methods Applications REC/PLAY switch: (Set mode dial to any except (View) (Continued) SLIDE SHOW CATEGORY PLAY Automatically play pictures in order and to music. Recommended for when viewing on TV Pictures can be classified automatically and viewed by category. Automatic classification screen. - Page 37 Applications Using PLAYBACK menu REC/PLAY switch: (Set mode dial to any except (View) To edit select ‘SINGLE’ in step → select picture with ◄►, and press ‘MENU/ CALENDAR SET’ → correct text and press ‘EXIT’ Select date from calendar screen to view only the pictures taken on that day (P.67). Cannot be set in ‘CATEGORY PLAY’...
- Page 38 Using PLAYBACK menu Applications REC/PLAY switch: (Set mode dial to any except (View) (Continued) To check stamped text ‘playback zoom’ (P.35) MULTI Select ‘MULTI’ in step Select picture Picture size will be reduced if greater (up to 50 pictures) ASPECT After TEXT PICTURE SIZE than 3M.
- Page 39 Using PLAYBACK menu Applications REC/PLAY switch: (Set mode dial to any except (View) (Continued) ‘ROTATE DISP.’ and ‘ROTATE’ cannot be used with motion pictures. ASPECT CONV. ‘ROTATE’ cannot be used with protected pictures (P.79). Some pictures taken facing up or facing down may not be rotated automatically. Convert pictures taken in for printing.
- Page 40 Using PLAYBACK menu Applications REC/PLAY switch: (Set mode dial to any except (View) (Continued) DPOF PRINT PROTECT Picture/picture no./date printing settings can be made for when printing with DPOF print- Set protection to disable picture deletion. Prevents deletion of important pictures. compatible shops or printers.
-
Page 41: Using With Your Pc
DPOF settings will not be copied. Do not use any other USB connection cables except the supplied one. Only pictures from Panasonic digital cameras may be copied. Turn off the camera before inserting or removing memory cards. Original pictures will not be deleted after copying (to delete pictures → P.36). -
Page 42: Printing
Connecting Connecting Using with your PC Printing with other with other (Continued) devices devices Folder and file names on computer You can connect directly to a PictBridge- Turn on power of both compatible printer for printing. camera and printer You can save images to use on your computer by dragging and dropping folders and files into separate folders on your computer. -
Page 43: Printing Multiple Pictures
Connecting Printing with other (Continued) devices Printing multiple pictures Making print settings on camera Select ‘MULTI PRINT’ Select item Select ‘PRINT START’ in step on the (See below for details) (Make settings before selecting ‘PRINT START’) previous page Select item Select setting PictBridge PictBridge... -
Page 44: Viewing On Tv Screen
Connecting Viewing on TV screen with other devices You can view pictures on a TV screen by Connect camera to TV View on TV with component terminal connecting your camera to your TV with the AV cable (supplied) or component cable Use component cable (optional: DMW-HDC2) to enjoy still and motion pictures in high (optional: DMW-HDC2). -
Page 45: Others
List of LCD monitor displays Others Press the display button to change display (P.14). In recording In playback 6 Save destination (P.18) 6 Exposure compensation (P.43) 7 Recording state 7 Favourites settings (P.77) 8 Histogram (P.37) 8 Recorded date and time 9 Travel date (P.53) Travel destination setting (P.53)/Name (P.48)/ 100–0001... -
Page 46: Message Displays
Message displays Others Meanings of and required responses to major messages displayed on LCD monitor. THIS MEMORY CARD IS LOCKED MEMORY CARD ERROR PLEASE CHECK THE CARD Release using the write-protect switch on the SD memory card or SDHC memory Access to card has failed. - Page 47 Battery needs recharging. Camera is set to ‘POWER SAVE’. (P.24) → Press shutter button halfway to release. Which cards can I use? Using Panasonic cards is recommended. Recording SD memory card (8 MB – 2 GB) • SDHC memory card (4 GB – 16 GB) •...
-
Page 48: Q&A Troubleshooting
Q&A Others Troubleshooting (Continued) Date/age is not displayed. Recording (continued) Current date, ‘TRAVEL DATE’ (P.53), and ages in ‘BABY’ and ‘PET’ (P.48) scene Recorded pictures appear coarse, or there is interference. modes are only displayed for approx. 5 sec. after start-up, setting changes, or mode changes. - Page 49 Q&A Others Troubleshooting (Continued) Edges cut off pictures when printing. Playback (continued) Release any trimming or edgeless printing settings on printer before printing. White round spots like soap bubbles appear on the recorded picture. (Consult printer operating manual.) Pictures taken on ‘ASPECT RATIO’.
-
Page 50: Usage Cautions And Notes
Do not extend the supplied cord or cable. DMC-TZ4 Do not allow camera to come into contact with pesticides or volatile substances (can cause surface damage or coating to peel). CIPA standards: Using Panasonic SD memory card (16 MB) Using the • • supplied battery Temperature 23 °C, humidity 50%... -
Page 51: Recording Picture/Time Capacity
Recording picture/time capacity Figures given are estimates. May vary according to conditions, card type, and subject. Others Recording capacities/times displayed on LCD monitor may not be reduced regularly. Recording picture capacity (still pictures) Varies according to ‘ASPECT RATIO’ (P.56), ‘PICTURE SIZE’ (P.55), or ‘QUALITY’ DMC-TZ5 DMC-TZ4 (P.55) settings. -
Page 52: Resize
8 to 1/2000th [STARRY SKY] mode: 15 seconds, 30 seconds, 60 seconds Battery charger White balance AUTO/Daylight/Cloudy/Shade/Halogen/White set (Panasonic DE-A46A): Information for your safety Exposure (AE) AUTO (Programme AE) Exposure compensation (1/3 EV Step, -2 EV to +2 EV) Output CHARGE 4.2 V... - Page 53 QuickTime and the QuickTime logo are trademarks or registered trademarks of Apple Inc., used under license therefrom. VQT1P91 Matsushita Electric Industrial Co., Ltd. M0208KZ0 Web Site: http://panasonic.net Pursuant to at the directive 2004/108/EC, article 9(2) Panasonic Testing Centre Panasonic Marketing Europe GmbH Winsbergring 15, 22525 Hamburg, Germany...
Need help?
Do you have a question about the LUMIX DMC-TZ4 and is the answer not in the manual?
Questions and answers