Zanussi ZKI245 User Manual
Hide thumbs
Also See for ZKI245:
- Brochure & specs (3 pages) ,
- Specifications (7 pages) ,
- User manual (32 pages)
Table of Contents
Advertisement
Advertisement
Table of Contents

Related Manuals for Zanussi ZKI245


Summary of Contents for Zanussi ZKI245
- Page 1 User Manual Washer- dryer ZKI 245...
-
Page 2: Table Of Contents
Thank you for selecting our appliance We wish you lots of enjoyment with your new appliance and we hope that you will consider our brand again when purchasing household appliances. Please read this user manual carefully and keep it throughout the product life cycle as a reference document. -
Page 3: Safety Information
Safety information In the interest of your safety and to ensure Always unplug the appliance and turn off the ● the correct use, before installing and first water supply after use, cleaning and using the appliance, read this user manual maintenance. -
Page 4: Child Safety
Make sure that children or pets do not climb ● into the drum. To prevent children or pets This appliance is designed for domestic use. ● becoming trapped inside the drum the It must not be used for purposes other than machine incorporates special feature. -
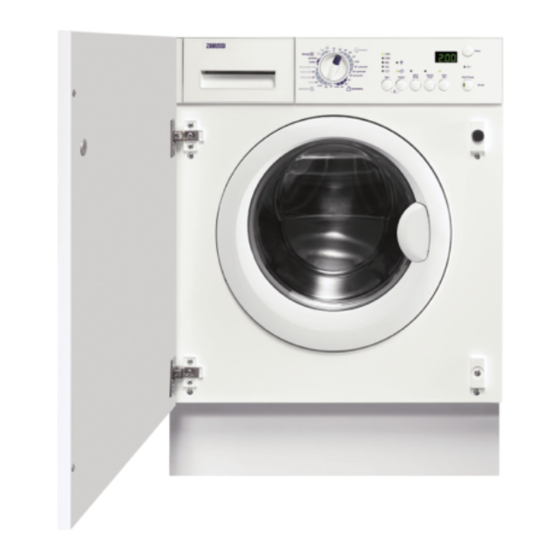
Page 5: Description Of The Appliance
Description of the appliance Detergent dispenser drawer Control panel Door opening handle Rating plate Drain pump Adjustable feet Detergent dispenser drawer Prewash Wash Fabric Softener... -
Page 6: Control Panel And Functions
Control panel Information The control panel is illustrated above. It shows the programme selector dial as well as the different buttons, the pilot light(s) and the display. These are represented by relevant numbers which are explained in the table below. Symbols: = Cotton, = Synthetics,... - Page 7 By pressing this button, you can select only one of the ● Option button: following options: ECONOMY or SUPER QUICK. Economy, Super Quick The relevant light will light up. ● By pressing this button, the machine performs some ● Extra Rinse button additional rinses.
- Page 8 Functions Rinse hold (Button 2) Drying Time button (Button 5) By selecting this option the water of the last By pressing this button you can select a timed rinse is not emptied out to prevent the fabrics drying for cotton or synthetics. The relevant from creasing.
- Page 9 /Alarm codes The display shows the following information: In the event of operating problems, some Duration of the programme/ alarm codes can be displayed, (see paragraph “What to do if...”). After selecting a programme the duration of the selected programme appears in minutes /End of programme or hours and minutes on the display .(e.g.
-
Page 10: Programme Table
Programme table Programme/ Description of Type of laundry Options Temperature programme Main wash Spin Red. / Rinse Hold, Rinses, long spin -1400 Super Quick( COTTON White cotton (normally soiled items) 90° - 60° Economy, Easy Iron, Max load: 6 Kg Extra Rinse Load reduced: 3 Kg Main wash... - Page 11 Programme table Programme/ Description of Type of laundry Options Temperature programme Special programme for Main wash free time items as denim, JEANS Spin Red. / Rinse Hold, Rinses, long spin - 1200 pants, shirts or jackets, jersey made of hi-tech Easy Iron 40°...
-
Page 12: Washing And Drying Hints
Washing and drying hints Sorting the laundry Remove the laundry when the appliance has finished drying. Follow the wash code symbols on each To avoid a static charge when drying is com- garment label and the manufacturer’s washing pleted, use either a fabric softener when you instructions. -
Page 13: Laundry Weights
Synthetics: drum no more than half full; (whites and fast coloureds only). Delicate fabrics and woollens: drum no more Ball point pen and glue: moisten with than one third full. acetone (*), lay the garment on a soft cloth and Washing a maximum load makes the most dab the stain. -
Page 14: Before The First Use
Quantity of detergent to be used If using concentrated powder or liquid detergents, a programme without prewash The type and quantity of detergent will depend must be selected. on the type of fabric, load size, degree of soiling The washing dryer incorporates a recirculation and hardness of the water used. -
Page 15: Operating Sequence
Operating sequence - Washing only 1. Load the laundry ATTENTION! Open the door by If you turn the programme selector dial to ano- carefully pulling the ther programme when the machine is working, door handle outwards. the red pilot light of button will flash 3 times Place the laundry in and the message Err is displayed on the dis-... - Page 16 selector dial to «O» and then to the new • press the button once. On the display will programme position. Start the new programme appear the symbol « ». 0’ by pressing button again. • press button again to start the programme. The washing water in the tub will not empty out.
-
Page 17: Drying Only And Autodrying
To empty out the water follow the following it will be possible to open the door. instructions: At the end of the cycle, turn the programme 1. turn the programme selector dial to «O» selector dial to «O» to switch the machine off. 2. -
Page 18: Drying Times
4. Select the drying time (see the drying pro- 7. At the end of the programme the buzzer- grammes). sounds. A flashing zero « » appear on the 5. Select the required options by pressing the display. At this point of the programme, relevant buttons. -
Page 19: Care And Cleaning
Care and cleaning IMPORTANT! To aid cleaning, the top part of the additive compartment should be removed. You must DISCONNECT the appliance from Remove the drawer by pressing the catch the electricity supply, before you can carry out downwards and by pulling it out. Flush it out any cleaning or maintenance work. - Page 20 The dangers of freezing If the machine is exposed to temperatures below 0°C, certain precautions should be taken. Turn off the water tap. ● Unscrew the inlet hose. ● Place the end of the emergency emptying ● hose and that of the inlet hose in a bowl placed on the floor and let water drain out.
-
Page 21: What To Do If
What to do if... IMPORTANT! Certain problems are due to lack of simple maintenance or oversights, which can be solved easily without calling out an engineer. Before contacting your local Service Centre, please carry out the checks listed below. During machine operation it is possible that the red pilot light of button flashes, a few acoustic signals sound and one of the following alarm codes appears on the display to indicate that the machine is not working:... - Page 22 Malfunction Possible Cause / Solution The end of the drain hose is too low. The machine fills then empties • Refer to relevant paragraph in «water drainage» immediately: section. The drain hose is squashed or kinked. • Check the drain hose connection. The drain pump is clogged.
- Page 23 Malfunction Possible Cause / Solution The programme is still running. • Wait the end of washing cycle. The door lock has not been released. The door will not open: • Wait until the pilot light has gone out. There is water in the drum. •...
-
Page 24: Technical Data
Malfunction Possible Cause / Solution The machine does not dry or does not dry The drying time has not been selected. • Select the drying time. properly The water tap is not turned on (E10) • Open the water tap. The drain filter is clogged (E20) •... -
Page 25: Consumption Values
Consumption values Programme Water Energy Programme duration consumption consumption (in litres) (in kWh) Cotton 90°C Cotton 60°C Cotton 60°C + Prewash 1.02 Cotton 60°+ Economy selected Synthetics 60°C Delicates 40°C 0.55 0.45 Handwash 40° ) The Cotton 60° + the option Economy Information selected with a load of 6 kg is the reference programme for the data entered... - Page 26 3. With a suitable spanner unscrew and The machine must not be installed in rooms remove the central rear bolt A. where the temperature can drop below 0. 4. Unscrew and remove the two large rear The water inlet hose and the drain hose must bolts B and the six smaller bolts C.
- Page 27 with a 3/4” thread. The inlet hose must not be lengthened. If it is too short and you do not wish to move the tap, you will have to purchase a new, longer hose specially The drain hose may be extended to a designed for this type maximum of 4 metres.
- Page 28 Special conditions Electrical connection If the floor is carpeted or covered with crumbly Any electrical work required to install this or soft material, insert a rigid support base appliance should be carried out by a qualified under the feet to prevent noise, vibration or electrician or competent person.
- Page 29 In this case it is sufficient to screw in the WARNING! hinges (1) and the counter-magnet (6) provided with the appliance, at the right level (Fig. B). A cut off plug inserted into a 13 amp socket is a serious safety (shock) hazard. Ensure that the cut off plug is disposed of safely.
- Page 30 the M5x15 screws (3-Fig. B). The hinges can Where the appliance has been raised by be adjusted to compensate for possible mounting onto a wooden base provided by the uneven thickness of the door. installer. The material used to construct the To align the door perfectly it is necessary to base should have a non slip surface, be water loosen the screw (3-Fig.
-
Page 31: Environmental Concerns
A final check for stability should be carried out with the machine on spin with a load, this will identify the need for any further fine adjust- ment to the feet. A strip of beading approximately 605 mm W, x 5 mm H, x 25 mm D must be screwed down into the base directly in front of the machine’s feet, this will provide additional security. - Page 32 Subject to change without notice 132 964 630 - 00 - 302008...
Need help?
Do you have a question about the ZKI245 and is the answer not in the manual?
Questions and answers