Table of Contents
Advertisement
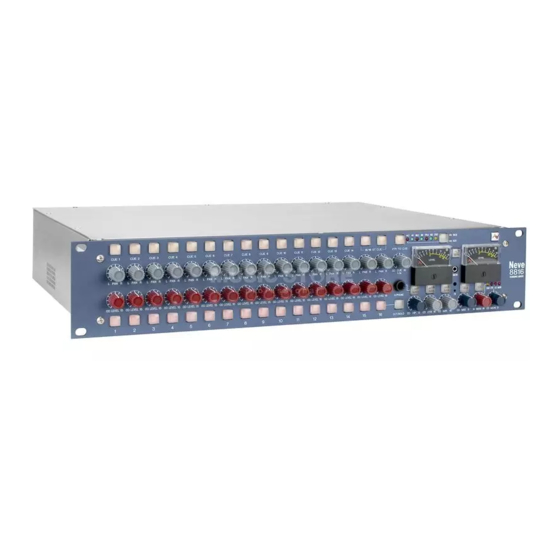
Neve 8816 16:2 Summing Mixer
© 2005 AMS Neve Ltd own the copyright of all information and
drawings contained in this manual which are not to be copied
or reproduced by any means or disclosed in part or whole to
any third party without written permission.
As part of our policy of continual product improvement, we
reserve the right to alter specifications without notice but with
due regard to all current legislation.
Disclaimer: The information in this manual has been carefully
checked and is believed to be accurate at the time of
publication.
However, no responsibility is taken by us for
inaccuracies, errors or omissions nor any liability assumed for
any loss or damage resulting either directly or indirectly from
use of the information contained within it.
Trademarks: All trademarks are the property of their respective
owners and are hereby acknowledged.
User Manual
527-361
Issue 2
AMS NEVE LTD • BILLINGTON ROAD • BURNLEY
TELEPHONE +44 (0)1282 457011 • FAX +44 (0)1282 417282
TELEPHONE +44 (0)1282 457011 • FAX +44 (0)1282 417282
TEL +1(212) 965 1400 • FAX +1(212) 965 9306
TEL +1(818) 753 8789 • FAX +1(818) 623 4839
HEAD OFFICE
LANCS BB11 5UB • ENGLAND
LONDON OFFICE
NORTH AMERICAN OFFICES
AMS NEVE INC, NEW YORK
AMS NEVE INC, HOLLYWOOD
e-mail: info@ams-neve.com
www.ams-neve.com
Advertisement
Table of Contents

Related Manuals for Neve 8816


Summary of Contents for Neve 8816
- Page 1 Neve 8816 16:2 Summing Mixer User Manual 527-361 Issue 2 © 2005 AMS Neve Ltd own the copyright of all information and HEAD OFFICE drawings contained in this manual which are not to be copied AMS NEVE LTD • BILLINGTON ROAD • BURNLEY or reproduced by any means or disclosed in part or whole to LANCS BB11 5UB •...
-
Page 2: Table Of Contents
CONTENTS________________________ INTRODUCTION............................. 1 8816 APPLICATION SCENARIOS......................2 SUB MIXER .............................. 9 CONTROLS ............................10 MON LEVEL ............................16 RECALL..............................21 REAR PANEL CONNECTORS AND CONTROLS ................28 DIMENSIONS............................30 RACK MOUNTING AND COOLING ....................30 POWER REQUIREMENTS........................30 SYSTEM SETTINGS ..........................31 SPECIFICATIONS.......................... -
Page 3: Introduction
DAW to a professional mixing facility. But that’s not all, not only does the unit provide quite unbelievable analogue facilities but also has remix and Recall as standard. In addition to the superb facilities offered as standard on the 8816 there are two options, digital outputs and a fader pack. -
Page 4: 8816 Application Scenarios
1073DPD or as a pre-mixer for recording a number of signals simultaneously to the workstation. With the optional fader pack, direct outs can be used from the 8816 to the DAW enabling it to be used like a conventional desk with both recording and monitoring signals passing through the unit. - Page 5 DAW (the direct outs are located on the fader pack). These channels can be muted so that they do not go to the main bus if monitoring via the 8816 or a monitor mix can be set up on the DAW and monitored via the 2 Track Return on the 8816.
- Page 6 15/16 on the 8816. Connect the output of the track being recorded to any of inputs 1- 14 on the 8816. Connect the performer’s headphones to the headphone socket on the rear of the 8816.
- Page 7 0dB. Final mix levels can be set on the 8816. The mix is now being created on the mix bus of the 8816. This uses the same transformer mix topology as the classic 80 series Neve consoles and recreates their legendary sound.
- Page 8 The outputs of the recording unit (or the appropriate two tracks of the DAW) can be connected to the two track return so that the engineer can switch between monitoring the mix leaving the 8816 and the mix coming back from the recorder. Page 6...
- Page 9 The monitor source select can be used to switch between monitoring the sound entering the 8816 on inputs 1 and 2, the sound leaving the 8816 on the mix bus and the sound as recorded on the CDR/DAT/Workstation via the 2 Track Return.
- Page 10 The 8816 can solve this problem. The main mix outputs of the 8816 should be connected to a recording device such as a DAT or DAW running on a laptop Mac or PC. The output of the recording device should be connected to the 2 Track Return on the 8816.
-
Page 11: Sub Mixer
Should more than 16 inputs be required on the sub-mixer then two 8816 units can be used. The output from the first 8816 is connected to the 2 Track Bus Input of the second 8816 and the output from the second 8816 goes to the main mixer. -
Page 12: Controls
4 Controls Channel Strip The channel strip comprises a cut/solo button, a rotary level control, a rotary pan control and a cue select button. Level Control The Level Control has a range of ∞dB to +15dB with 0dB set at "12 O’Clock". - Page 13 In Solo mode, selecting the button will cut all channels except the one operated, commonly referred to as Solo In Place. Solo is indicated by the button turning yellow. As the solo system is latching, it is possible to build up solo groups and to then use the cut / solo master to audition a solo group or a cut group, this is very useful for comping or sorting out EQ / balance problems in the mix quickly before printing the final pass.
- Page 14 Headphone Jack A headphone jack is provided on the front of the unit for the engineer and a second parallel headphone jack on the rear of the unit for the performer. Parallel +4dBu line outputs are provided on the rear of the unit to be used for cue feeds to the studio. NOTE: Only headphones with impedances above 60 Ohms should be used in this application.
-
Page 15: Master Section
Master Section Alt Spk Selects a second set of loudspeakers switching between main near field loud speakers. iMon This input has a 3.5mm Jack socket connecting your ipod to the unit’s LS selector and feeding to the LS outputs or cue headphone outputs. Talkback Level (adjustment screw) This adjusts the level from the talkback mic to the cue headphones. - Page 16 INS (Inserts) This switches the main mix pre fade insert in and out of circuit via the input and output connectors on the rear of the unit. It has two modes selectable by pressing the mix level control. When a normal pre fade insert is selected the button will illuminate yellow.
- Page 17 This could be of benefit when you need to monitor the ADC Input which could be a completely different source from the 8816 such as when using the digital option as a separate high quality stereo A to D.
-
Page 18: Mon Level
5 Mon Level This alters the loud speaker’s output level and has a range of ∞dB to 0dB. This is selected by pressing the width control. When illuminated yellow then the main mix outputs are summed with whatever is selected to the LS Monitor. This function is very handy when auditioning mixes together in the main or alt loudspeakers. -
Page 19: Power Switch
than 1 sample. This has priority over the analogue overload indication. Sensitivity of the digital overload indication will be set by the unit’s digital operating level. Metering The main left and right meters are sourced directly from the main outputs so signal problems within the unit or what is connected can be metered correctly. - Page 20 ∞dB to 0dB. With the fader pack fitted, the rotary channel level control of the 8816 becomes an aux send level control with a range of ∞dB to +15dB. This can be used to send channels to a reverb or other FX unit.
- Page 21 This will toggle through the sampling frequencies required one at a time. The 8816 has 2 sync inputs, AES 3 on a female XLR and Word Clock on a chassis BNC. If neither sync input is present, the unit will synchronise to its internal crystal clock.
- Page 22 SDIF 2 and SDIF 3 with a rear panel switch. SDIF 2 requires a 44.1kHz sync signal to be passed to the DAC and this should preferably come from the 8816 sync output via a 3rd BNC cable. SDIF 3 transmits the DSD signals with clock information included and should not need the sync signal.
-
Page 23: Recall
The 8816 forms part of the 88 outboard range which also includes the 8804 fader option for the 8816. All of 88 units can be connected to a PC or Mac using a USB hub to form a session that can be stored and Recalled. - Page 24 Making a store Access to Recall can be via a Recall icon on the desktop or dock, dependent on the user’s personal preferences. Clicking on this will take you into the Unit Select screen shown above, here a unit or units can be selected to be part of a store. The Recall system will automatically display any units present in green with the type of unit and its slave/master settings if applicable.
- Page 25 Create Store This creates a Store within the Recall project or the session folder using a ‘save as’ dialogue box. It can be named and filed by the user in the appropriate folder. Save Store Overwrites the currently active Recall file by updating it with the new settings from the appropriate unit(s) that are currently on the USB hub.
- Page 26 Load Store A Store can be selected for loading from the computer filing system, typically – a Recall folder or Session folder. Reload Store The last Recall file stored will be loaded back automatically. This could be a very recently created file or an old file that was the last one created within the current Recall project.
- Page 27 loaded onto the Recall screen. Selecting the green start button will activate Recall. Switch settings will be loaded automatically, pan and level controls will need to be reset manually. If there is more than one unit within the Recall file then the first one loaded will be the first one shown on the 'tool tip'.
- Page 28 Resetting Multiple Units If the Recall file reloaded has more than one unit stored within it, then the first unit that appeared in the tool tip box will be loaded first. Multiple Recall units are also shown a "Go To Unit" drop down box, which displays all the units available.
- Page 29 Mismatch Screen The mismatch screen is only active when a unit or units on the USB hub do not match the units or unit properties contained within the file the user has attempted to load. Text showing what is mismatched within the file is shown to the left of the screen, units that are connected to the USB hub are displayed on the right of the screen.
-
Page 30: Rear Panel Connectors And Controls
Slave Bus Switch This switches the 2T bus input onto the unit’s main mix bus. This allows two 8816 units to be joined together to create a slave and master system expanding the number of inputs. It also automatically sets the unit to be part of the Recall system as the slave or master. - Page 31 ADC Input. 1/4 inch jack acting as a switched insert into the ADC input. Maximum input level +26dBu for conversion to 0dBFS. N.B. See Headroom Level Setting for different input level conversions. AES Sync Female XLR to take a standard AES 110 Ohm input signal for use as a word clock sync source.
-
Page 32: Dimensions
Depth Height Approx. mm (Inches) mm (Inches) Weight kg (lbs) 8816 390 (15.4) 88 (3.5) 7 (16) 9 Rack Mounting and Cooling The rack unit should be installed in a 19 inch cabinet with access to the front and the rear. -
Page 33: System Settings
Only use a non metallic plunger tool to operate the level change switches. Fader Pack Jumper Settings NOTE: Internal jumper settings must be changed to enable the optional fader pack to take control of the main mix level. Please consult your Neve dealer if the following information is not clear. Page 31... - Page 34 Monitor source pre/post ADC Insert NOTE: The monitor source can be set to pre or post ADC insert using jumpers within the unit. Please consult your Neve dealer if the following Information is not clear. JUMPER SETTINGS MON SOURCE PRE ADC INSERT, DEFAULT SETTING...
-
Page 35: Specifications
12 Specifications (balanced+4dBu) >20ko’s Input impedance Output impedance (balanced +4dBu) 50 Ohms Output impedance (unbalanced -10dBV) <100 Ohms Cue HP Jack Output Impedance Loading More than 60 Ohms Max input level (balanced) Better than +26dBu Max output level (balanced) Better than +26dBu into 600 Ohms (unbalanced) Better than +14dBu into 600 Ohms... -
Page 36: Connectors
13 Connectors There are five 25 way D type connectors. Connectors 1 and 2 are used for channel inputs, connector 3 for auxiliary outputs, connector 4 for master section inputs and connector 5 for master section outputs. The 16 line inputs are on 2 x 25way D type connectors and follow the standard pin plan used by Pro Tools and Tascam DA88 Circuit... - Page 37 For: Main Mix L and R Tip - Hi, Sleeve - Screen There are four unbalanced mono 1/4" jack outputs For: Main SPK L and R and ALT SPK L and R Tip - Hi, Sleeve - Screen There are two unbalanced stereo 1/4" Jack outputs For: L &...
-
Page 39: Recall Software Installation
Please follow the on-screen instructions to install Neve Recall onto your PC. During Install you will be asked to register with AMS Neve. This is important since it will enable AMS Neve to supply you with software upgrades as they become available. - Page 40 Installation Procedure on the Mac Page 38...
- Page 41 Page 39...
-
Page 42: Optional Adc Installation Instructions
Optional ADC Installation Instructions Page 40... -
Page 43: Technical Support
Technical support If you encounter problems that you cannot solve, please contact AMS Neve Customer Service Department. csd@ams-neve.com +44 (0)1282 417 311 Page 41...
Need help?
Do you have a question about the 8816 and is the answer not in the manual?
Questions and answers