
Related Manuals for Panasonic LUMIX DMC-FT1


Summary of Contents for Panasonic LUMIX DMC-FT1
-
Page 1: Operating Instructions
Operating Instructions Digital Camera DMC-FT1 Model No. Before use, please read these instructions completely. Web Site: http://www.panasonic-europe.com VQT1Z56... -
Page 2: Information For Your Safety
Before Use Dear Customer, We would like to take this opportunity to thank you for purchasing this Panasonic Digital Camera. Please read these Operating Instructions carefully and keep them handy for future reference.Please note that the actual controls and components, menu items, etc. of your Digital Camera may look somewhat different from those shown in the illustrations in these Operating Instructions. -
Page 3: Caution For Ac Mains Lead
Before Use ∫ IMPORTANT Caution for AC mains lead The wires in this mains lead are coloured For your safety, please read the following in accordance with the following code: text carefully. Blue: Neutral, Brown: Live. This appliance is supplied with a moulded As these colours may not correspond with the coloured markings identifying the three pin mains plug for your safety and... - Page 4 Before Use ∫ About the battery charger CAUTION! • DO NOT INSTALL OR PLACE THIS UNIT IN A BOOKCASE, BUILT-IN CABINET OR IN ANOTHER CONFINED SPACE. ENSURE THE UNIT IS WELL VENTILATED. TO PREVENT RISK OF ELECTRIC SHOCK OR FIRE HAZARD DUE TO OVERHEATING, ENSURE THAT CURTAINS AND ANY OTHER MATERIALS DO NOT OBSTRUCT THE VENTILATION VENTS.
- Page 5 Before Use Information for Users on Collection and Disposal of Old Equipment and used Batteries These symbols on the products, packaging, and/or accompanying documents mean that used electrical and electronic products and batteries should not be mixed with general household waste. For proper treatment, recovery and recycling of old products and used batteries, please take them to applicable collection points, in accordance with your national legislation and the Directives 2002/96/EC and 2006/66/...
-
Page 6: Table Of Contents
Contents • Using the Optical Zoom/ Using the Extra Optical Zoom (EZ)/ Using the Digital Zoom ..... 43 Before Use Playing back Pictures ([NORMAL PLAY])......... 44 • Displaying Multiple Screens Information for Your Safety....... 2 (Multi Playback)........ 45 Quick Guide ..........9 •... - Page 7 • Changing [REC MODE] and • [TITLE EDIT] ......103 [REC QUALITY] ....... 72 • [TEXT STAMP]......104 • [CONTINUOUS AF] ....74 • Q [RESIZE] Reducing the picture • [WIND CUT] ......75 size (number of pixels) .... 106 •...
- Page 8 • Most major credit and debit cards accepted. • All enquiries transactions and distribution facilities are provided directly by Panasonic UK Ltd. • It couldn’t be simpler! • Also available through our Internet is direct shopping for a wide range of finished products, take a browse on our website for further details.
-
Page 9: Quick Guide
Before Use Before Use Quick Guide This is an overview of how to record and play back pictures with the camera. For each step, be sure to refer to the pages indicated in brackets. Charge the battery. (P17) • The battery is not charged when the camera is shipped. -
Page 10: (Important) About The Waterproof/Dustproof And Anti-Shock Performance Of The Camera
Supplied accessories are not waterproof. ¢1 This means that the camera can be used underwater for specified time in specified pressure in accordance with the handling method established by Panasonic. This does not guarantee no destruction, no malfunction, or waterproofing in all conditions. - Page 11 • If there is any crack or deformation in the area coloured black in the figure, get the camera inspected or repaired by an authorized Panasonic service centre. • Keep the Brush out of reach of children to prevent swallowing.
- Page 12 The integrity of the waterproof seals may decrease after about 1 year, with use and age. To avoid permanently damaging the camera the seals should be replaced once each year. Please contact Panasonic’s Service Centre for related costs and other information. VQT1Z56...
-
Page 13: Accessories
Before Use Accessories Check that all the accessories are included before using the camera. Battery Pack (Indicated as battery in the text) Charge the battery before use. Battery Charger (Indicated as charger in the text) AC Mains Lead USB Connection Cable DMW-BCF10E DE-A60A AV Cable... -
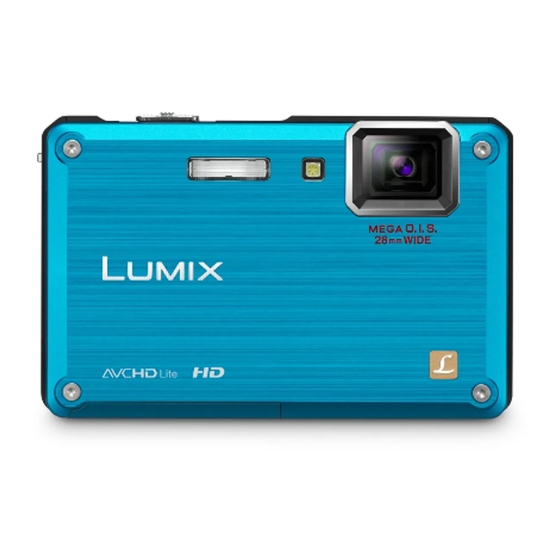
Page 14: Names Of The Components
Before Use Names of the Components Flash (P50) Self-timer indicator (P55) AF assist lamp (P93)/LED light (P75) Lens (P4, 131) LCD monitor (P48, 128) Status indicator (P20, 30, 34) Playback button (P25) [MENU/SET] button (P23) [DISPLAY] button (P48) [Q.MENU] (P27)/Delete (P46) button 10 Motion picture button (P34) 11 Mode dial (P34) 12 Cursor buttons... - Page 15 19 [HDMI] socket (P115, 116) 20 [AV/DIGITAL/MULTI] socket (P21, 114, 120, 124) • When using an AC adaptor, ensure that the Panasonic multi conversion adaptor (DMW-MCA1; optional) and AC adaptor (DMW-AC5E; optional) are used. For connection details, refer to P21. 21 Tripod receptacle •...
-
Page 16: Preparation
Preparation Preparation Attaching the hand strap Run the hand strap into the hand strap eyelet on the camera. Insert your hand following the arrow, then adjust the length. Note • Attach the hand strap correctly following the procedure. •... -
Page 17: Charging The Battery
To ensure that safe products are used we would recommend that a genuine Panasonic battery pack is used. • Use the dedicated charger and battery. -
Page 18: About The Battery (Charging/Number Of Recordable Pictures)
¢ • Temperature: 23 oC/Humidity: 50% when LCD monitor is on. • Using a Panasonic SD Memory Card (32 MB). • Using the supplied battery. • Starting recording 30 seconds after the camera is turned on. (When the optical image stabilizer function is set to [AUTO].) - Page 19 Preparation Playback time Approx. 300 min The number of recordable pictures and playback time will vary depending on the operating conditions and storing condition of the battery. ∫ Charging Charging time Approx. 130 min maximum Charging time and number of recordable pictures with the optional battery pack (DMW-BCF10E) are the same as above.
-
Page 20: Inserting And Removing The Card (Optional)/The Battery
Check that this unit is turned off. • Confirm that there is no foreign object. (P11) • We recommend using a Panasonic card. Slide the release lever in the direction of the arrow and open the card/battery door. • Always use genuine Panasonic batteries (DMW-BCF10E). - Page 21 3 Connect the AC mains lead to the AC adaptor and a wall outlet. 4 Connect the AC adaptor to the multi conversion adaptor. Note • Always use a genuine Panasonic AC adaptor (DMW-AC5E; optional). • Always use a genuine Panasonic multi conversion adaptor (DMW-MCA1; optional). VQT1Z56...
-
Page 22: About The Built-In Memory/The Card
It is recommended to use a card with SD Speed Class with “Class 6” or higher when recording motion pictures. ¢ SD speed class is the speed standard regarding continuous writing. • Please confirm the latest information on the following website. http://panasonic.co.jp/pavc/global/cs (This Site is English only.) VQT1Z56... -
Page 23: Setting Date/Time (Clock Set)
Preparation Note • Do not turn this unit off, remove its battery or card, or disconnect the AC adaptor (DMW-AC5E; optional) when the access indication is lit [when pictures are being written, read or deleted, or the built-in memory or the card is being formatted (P33)]. Furthermore, do not subject the camera to vibration, impact or static electricity. -
Page 24: Changing The Clock Setting
Preparation Press [MENU/SET] to set. • After completing the clock settings, turn the camera off. Then turn the camera back on, switch to recording mode, and check that the display reflects the settings that were performed. • When [MENU/SET] has been pressed to complete the settings without the clock having “... -
Page 25: Setting The Menu
Preparation Setting the Menu The camera comes with menus that allow you to set the settings for taking pictures and playing them back just as you like and menus that enable you to have more fun with the camera and use it more easily. In particular, the [SETUP] menu contains some important settings relating to the camera’s clock and power. -
Page 26: Setting Menu Items
Preparation Setting menu items This section describes how to select the normal picture mode settings, and the same setting can be used for the [PLAYBACK] menu and [SETUP] menu as well. Example: Setting [AF MODE] from [ ] to [ ] in the normal picture mode Ø... -
Page 27: Using The Quick Menu
Preparation Press 3/4 to select [AF MODE]. • Select the item at the very bottom, and press 4 to move to the second screen. Press 1. • Depending on the item, its setting may not appear or it may be displayed in a different way. Press 3/4 to select [š]. -
Page 28: About The Setup Menu
Preparation Perform these settings if you need to. About the Setup Menu [CLOCK SET], [ECONOMY] and [AUTO REVIEW] are important items. Check their settings before using them. • In the Intelligent auto mode, only [CLOCK SET], [WORLD TIME], [BEEP] and [LANGUAGE] can be set. - Page 29 Preparation These menu settings make it easier to see the LCD monitor when you are in bright places. [OFF] „ [AUTO POWER LCD]: [LCD MODE] The brightness is adjusted automatically depending on how bright it is around the camera. … [POWER LCD]: The LCD monitor becomes brighter and easier to see even when taking pictures outdoors.
- Page 30 Preparation You can conserve the battery life by setting these menus. Also, it will turn off the LCD monitor automatically when not in use to prevent discharge of the battery. [AUTO POWER OFF]: The camera is automatically turned off if the camera has not been q [ECONOMY] used for the time selected on the setting.
- Page 31 Preparation Reset the file number of the next recording to 0001. v [NO.RESET] • The folder number is updated and the file number starts from 0001. (P123) • A folder number between 100 and 999 can be assigned. When the folder number reaches 999, the number cannot be reset. We recommend formatting the card (P33) after saving the data on a PC or elsewhere.
- Page 32 Preparation Set the format for the HDMI output when playing back on the HDMI compatible high definition TV connected with this unit using the HDMI mini cable (optional). [AUTO]: The output resolution is automatically set based on the information from the connected TV. [1080i]: [HDMI MODE] The interlace method with 1080 available scan lines is used for...
- Page 33 Preparation It is possible to check which version of firmware is on the camera. [VERSION DISP.] The built-in memory or card is formatted. Formatting irretrievably [FORMAT] deletes all the data so check the data carefully before formatting. • Use a battery with sufficient battery power or the AC adaptor (DMW-AC5E; optional) and multi conversion adaptor (DMW-MCA1;...
-
Page 34: Selecting The [Rec] Mode, And Record Still Picture Or Motion Picture
Preparation Mode switching Selecting the [REC] mode, and record still picture or motion picture ON/OFF Press and hold down the ON/OFF button. A Motion picture button B Mode dial C Shutter button • The status indicator D lights when the ON/OFF button is pressed. - Page 35 Preparation ∫ List of [REC] modes Intelligent auto mode (P37) ¦ The subjects are recorded using settings automatically selected by the camera. Normal picture mode (P41) The subjects are recorded using your own settings. Sports mode (P58) Use this mode to take pictures of sporting events, etc. ¢...
-
Page 36: Playback The Recorded Still Pictures Or Motion Picture
Preparation Take the still picture after setting the mode dial Press the shutter button halfway to focus. Press the shutter button fully (push it in further), and take the picture. Take the motion picture after setting the mode dial Press the motion picture button to start the recording. Press the motion picture button again to stop the recording. -
Page 37: Basic
Basic ñ [REC] mode: Basic Taking pictures using the automatic function ñ : Intelligent Auto Mode) The camera will set the most appropriate settings to match the subject and the recording conditions so we recommend this mode for beginners or those who want to leave the settings to the camera and take pictures easily. -
Page 38: Scene Detection
Basic Scene detection When the camera identifies the optimum scene, the icon of the scene concerned is displayed in blue for 2 seconds, after which its colour changes to the usual red. > [i-PORTRAIT] ¦ [i-SCENERY] [i-MACRO] • [i-NIGHT PORTRAIT] Only when [‡] is selected •... -
Page 39: Face Recognition
Basic Face Recognition Face of the person that is taken often can be registered along with information such as name and birthday. When a picture is taken with [FACE RECOG.] turned [ON], it will search for the face similar to the registered face, setting the focus and exposure preferentially. -
Page 40: Settings In Intelligent Auto Mode
Basic Settings in Intelligent auto mode • Only the following functions can be set in this mode. [REC] mode menu ¢1 ¢1 – [PICTURE SIZE] (P83)/[BURST] (P90)/[COLOR MODE] (P91)/[FACE RECOG.] (P76) ¢1 The settings which can be selected are different from when other [REC] modes are used. [MOTION PICTURE] mode menu ¢2 ¢2... -
Page 41: Taking Pictures With Your Favourite Settings Normal Picture Mode)
Basic · [REC] mode: Taking pictures with your favourite settings Normal picture mode) · The camera automatically sets the shutter speed and the aperture value according to the brightness of the subject. You can take pictures with greater freedom by changing various settings in [REC] menu. Set the mode dial to [·]. -
Page 42: When The Subject Is Not In Focus (Such As When It Is Not In The Centre Of The Composition Of The Picture You Want To Take)
Basic A Focus indication B AF area (normal) C AF area (when using the digital zoom or when it is dark) D Focus range ¢ E Aperture value ¢ F Shutter speed G ISO sensitivity ¢ If correct exposure cannot be achieved, it will be displayed in red. (However, it will not be displayed in red when the flash is used.) When the subject is not in focus (such as when it is not in the centre of the composition of the picture you want to take) -
Page 43: Taking Pictures With The Zoom
Basic ñ· ¿¨ [REC] mode: Taking Pictures with the Zoom Using the Optical Zoom/Using the Extra Optical Zoom (EZ)/Using the Digital Zoom You can zoom-in to make people and objects appear closer or zoom-out to record landscapes in wide angle. To make subjects appear even closer [maximum of 9.1k], do not set the picture size to the highest setting for each aspect ratio (X/Y/W). -
Page 44: Playing Back Pictures ([Normal Play])
Basic Note • The digital zoom cannot be set when õ, or ¨ has been selected. • The indicated zoom magnification is an approximation. • “EZ” is an abbreviation of “Extra optical Zoom”. • The optical zoom is set to Wide (1k) when the camera is turned on. •... -
Page 45: Displaying Multiple Screens (Multi Playback)
Basic Displaying Multiple Screens (Multi Playback) Slide the zoom lever towards [L] (W). 1 screen>12 screens>30 screens>Calendar screen display (P102) A Number of the selected picture and the total number of recorded pictures • Slide the zoom lever towards [Z] (T) to return to the previous screen. -
Page 46: Switching The [Playback] Mode
Basic Switching the [PLAYBACK] mode Press [MENU/SET] during playback. Press 1. Press 3/4 to select the item and then press [MENU/SET]. [NORMAL PLAY] (P44) MENU All the pictures are played back. /SET [SLIDE SHOW] (P97) The pictures are played back in sequence. [MODE PLAY] (P99) ¢1 Playback in [PICTURE], [AVCHD Lite]... -
Page 47: To Delete Multiple Pictures (Up To 50) Or All The Pictures
Basic To delete multiple pictures (up to 50) or all the pictures Press [‚]. Press 3/4 to select [DELETE MULTI] or [DELETE ALL] and then press [MENU/SET]. • [DELETE ALL] > step Press 3/4/2/1 to select the picture, and then press [DISPLAY] to set. (Repeat this step.) •... -
Page 48: Advanced (Recording Pictures)
Advanced (Recording pictures) Advanced (Recording pictures) About the LCD Monitor Press [DISPLAY] to change. A LCD monitor B [DISPLAY] button • When the menu screen appears, the [DISPLAY] button is not activated. During playback zoom (P45), while playing back motion pictures (P101) and during a slide show (P97), you can only select “Normal display G”... -
Page 49: About The Histogram
Advanced (Recording pictures) ∫ Recording guide line When you align the subject on the horizontal and vertical guide lines or the cross point of these lines, you can take pictures with well-designed composition by viewing the size, the slope and the balance of the subject. This is used when dividing the entire screen into 3k3 for taking pictures with a well-balanced composition. -
Page 50: Taking Pictures Using The Built-In Flash
Advanced (Recording pictures) ñ· ¿¨ [REC] mode: Taking Pictures using the Built-in Flash A Photo flash Do not cover it with your fingers or other objects. Switching to the appropriate flash setting Set the flash to match the recording. Press 1 [‰]. Press 3/4 to select a mode. - Page 51 Advanced (Recording pictures) ¢ The flash is activated twice. The subject should not move until the second flash is activated. Interval until the second flash depends on the brightness of the subject. ∫ About the digital red-eye correction When the flash is used with the Red-eye reduction ([ ], [ ], [ ]) selected, it will...
- Page 52 Advanced (Recording pictures) ∫ The available flash range to take pictures • The available flash range is an approximation. Available flash range ISO sensitivity Wide Tele 30 cm (0.99 feet) to 2.8 m AUTO 30 cm (0.99 feet) to 5.1 m (16.7 feet) (9.18 feet) 30 cm (0.99 feet) to 80 cm...
-
Page 53: Taking Close-Up Pictures
Advanced (Recording pictures) Note • If you bring the flash too close to an object, the object may be distorted or discoloured by the heat or lighting from the flash. • When you take a picture beyond the available flash range, the exposure may not be adjusted properly and the picture may become bright or dark. - Page 54 Advanced (Recording pictures) ∫ Focus range in AF macro mode ¢ The focus range changes in steps. 30 cm (0.99 feet) 5 cm (0.17 feet) • Focus range will be 5 cm (0.17 feet) to ¶ during macro zoom mode regardless of the zoom position.
-
Page 55: Taking Pictures With The Self-Timer
Advanced (Recording pictures) ñ· ¿¨ [REC] mode: Taking Pictures with the Self-timer Press 2 [ë]. Press 3/4 to select a mode. • You can also press 2 [ë] to select. Press [MENU/SET]. • You can also press the shutter button halfway to finish. •... -
Page 56: Compensating The Exposure
Advanced (Recording pictures) · ¿¨ [REC] mode: Compensating the Exposure Use this function when you cannot achieve appropriate exposure due to the difference in brightness between the subject and the background. Look at the following examples. Properly Underexposed Overexposed exposed Compensate the exposure Compensate the exposure towards positive. -
Page 57: Taking Pictures Using Auto Bracket
Advanced (Recording pictures) · ¿ [REC] mode: Taking Pictures using Auto Bracket In this mode, 3 pictures are automatically recorded in the selected exposure compensation range each time the shutter button is pressed. You can select the picture with the desired exposure from the 3 pictures with different exposures. With auto bracket d1 EV 1st picture 2nd picture... -
Page 58: Take The Outdoors Scene Expressively
Advanced (Recording pictures) [REC] mode: Take the outdoors scene expressively By setting the mode dial to [ ], [ ], or [ ], pictures can be taken more effectively matching the conditions such as sports, snow, beach & surf. Note •... -
Page 59: Taking Pictures That Match The Scene Being Recorded (¿: Scene Mode)
Advanced (Recording pictures) ¿ [REC] mode: Taking pictures that match the scene being recorded (¿: Scene mode) When you select a scene mode to match the subject and recording situation, the camera sets the optimal exposure and hue to obtain the desired picture. Set the mode dial to [¿]. -
Page 60: [Portrait]
Advanced (Recording pictures) * [PORTRAIT] When taking pictures of people outdoors during the daytime, this mode allows you to improve the appearance of the persons concerned and make their skin tones look healthier. ∫ Technique for Portrait mode To make this mode more effective: 1 Slide the zoom lever as far as possible to Tele. -
Page 61: Self Portrait]
Advanced (Recording pictures) 0 [SELF PORTRAIT] Select this to take pictures of yourself. ∫ Technique for Self portrait mode • Press the shutter button halfway to focus. The self-timer indicator lights up when you are brought into focus. Making sure you hold the camera still, press the shutter button fully to take the picture. -
Page 62: [Night Portrait]
Advanced (Recording pictures) Take picture after moving the camera horizontally or vertically so the transparent image overlaps. • When taking the third and later pictures, repeat steps • You can retake the picture by selecting [RETAKE]. Press 3/4 to select [EXIT] and then press [MENU/SET]. -
Page 63: Food]
Advanced (Recording pictures) 1 [FOOD] This mode allows you to take pictures of food with a natural hue without being affected by the ambient light in restaurants etc. Note • The focus range is 5 cm (0.17 feet) (Wide)/30 cm (0.99 feet) (Tele) to ¶. 2 [PARTY] Select this when you want to take pictures at a wedding reception, an indoor party etc. -
Page 64: Í [Pet]
Advanced (Recording pictures) ∫ To cancel [AGE] and [NAME] Select the [OFF] setting in step of the “Birthday/Name setting” procedure. Note • It will be set to [PORTRAIT] when recording a motion picture. • The age and name can be printed out using the “PHOTOfunSTUDIO 3.0 HD Edition” bundled software on the CD-ROM (supplied). -
Page 65: Ô [Hi-Speed Burst]
Advanced (Recording pictures) ô [HI-SPEED BURST] This is a convenient mode for shooting rapid movement or a decisive moment. ∫ Picture size and aspect ratio Press 3/4 to select [SPEED PRIORITY] or [IMAGE PRIORITY] and then press [MENU/SET] to set. Press 3/4 to select the picture size and aspect ratio and then press [MENU/SET] to set. -
Page 66: Starry Sky]
Advanced (Recording pictures) Note • It will be a normal motion picture recording during the motion picture recording. • [QUALITY] is automatically fixed to [›]. • You can take pictures suitable for 4qk6q/10k15 cm printing. • The shutter speed becomes 1/30th of a second to 1/1300th of a second. •... -
Page 67: Aerial Photo]
Advanced (Recording pictures) 7 [AERIAL PHOTO] This mode allows you to take pictures through an airplane window. ∫ Technique for Aerial photo mode • We recommend using this technique if it is difficult to focus when taking pictures of clouds etc. Aim the camera at something with high contrast, press the shutter button halfway to fix the focus and then aim the camera at the subject and press the shutter button fully to take the picture. -
Page 68: [Underwater]
Advanced (Recording pictures) < [UNDERWATER] This is optimal to take pictures underwater 3 m or more using the marine case (10 feet) (DMW-MCFT1; optional). ¢ This camera has a waterproof/dustproof function equivalent to "IP58". It is possible to take pictures in 3.0 m (10 feet) depth for 60 minutes. Fixing the focus underwater (AF Lock) You can fix the focus before taking a picture with AF lock. -
Page 69: Recording Motion Picture
Advanced (Recording pictures) ñ· ¿ [REC] mode: Advanced (Recording pictures) Recording Motion Picture High definition image complying with AVCHD standard can be recorded (P72). Select the mode A Mode dial B Motion picture button ∫ Modes that can be recorded for motion picture Item Settings / Note ñ... - Page 70 Advanced (Recording pictures) Start recording by pressing the motion picture button. • The available recording time A is displayed on the top right and the elapsed recording time B is displayed on the bottom right of the screen. • Release the motion picture button right after you press it.
-
Page 71: Scene Detection
Sound from motion pictures (When [REC MODE] is set to [MOTION JPEG]) or pictures with audio recorded by this camera cannot be played back by older models of Panasonic digital camera (LUMIX) launched before July 2008. • In recording motion pictures, [STABILIZER] is fixed to [MODE1]. -
Page 72: Changing [Rec Mode] And [Rec Quality]
Advanced (Recording pictures) ∫ Face detection When [ ] is selected, the camera automatically detects a person’s face, and it will adjust the focus and exposure (P88). Note • Following [MOTION PICTURE] mode menu cannot be set because the camera sets automatically. - Page 73 Advanced (Recording pictures) Press 3/4 to select the item and then press [MENU/SET]. When [AVCHD Lite] is selected in step ¢1 Item Quality (bit rate) Aspect ratio ¢2 1280 k 720 pixels 17 Mbps High quality ¢2 1280 k 720 pixels 13 Mbps 16:9 ¢2 1280 k 720 pixels 9 Mbps...
-
Page 74: [Continuous Af]
Advanced (Recording pictures) Note ¢1 • It is recommended to use a card with SD Speed Class with “Class 6” or higher when recording motion pictures. ¢1 The SD Speed Class Rating is the speed standard for successive writes. • When you set the picture quality to [ ], [ ] or [... -
Page 75: [Wind Cut]
Advanced (Recording pictures) [WIND CUT] This will reduce the noise from wind hitting the built-in microphone. Select [WIND CUT] from motion picture [MOTION PICTURE] menu, and press 1. (P26) Press 4 to select [ON] and then press [MENU/SET]. Press [MENU/SET] to close the menu. •... -
Page 76: Taking A Picture With Face Recognition Function
Advanced (Recording pictures) ñ· ¿ [REC] mode: Taking a picture with Face Recognition function For details on [REC] mode menu settings, refer to P26. Face Recognition functions Following functions will work when in [REC] mode menu is [FACE RECOG.] [FACE RECOG.] set to [ON]. - Page 77 Advanced (Recording pictures) Take the picture adjusting the face with the guide. • The faces of subjects other than people (pets, etc.) cannot be registered. • Take a picture of a face from the front Press 3 to select [YES] and then press [MENU/SET]. Press 3/4 to select the item and then press 1.
- Page 78 Advanced (Recording pictures) ∫ Registering from the automatic registration screen When the is set to [ON] in step of the “Face settings”, the [AUTO REGISTRATION] registration screen will display automatically after taking the picture of a face that has high number of appearance.
-
Page 79: Useful Functions At Travel Destinations
Advanced (Recording pictures) ñ· ¿ [REC] mode: Useful Functions at Travel Destinations Recording which Day of the Vacation You Take the Picture For details on the [SETUP] menu settings, refer to P26. If you set the departure date or the travel destination of the vacation in advance, the number of days that have passed since the departure date (which day of the vacation it is) is recorded when you take the picture. -
Page 80: Take A Picture
Advanced (Recording pictures) Press 3/4/2/1 to set the return date (year/month/ day), and then press [MENU/SET]. • If you do not want to set the return date, press [MENU/SET] while the date bar is displayed. Press 4 to select [LOCATION] and then press 1. Press 4 to select [SET] and then press [MENU/SET]. -
Page 81: Recording Dates/Times At Overseas Travel Destinations (World Time)
Advanced (Recording pictures) Note • The travel date is calculated using the date in the clock setting and the departure date you set. If you set [WORLD TIME] (P81) to the travel destination, the travel date is calculated using the date in the clock setting and the travel destination setting. - Page 82 Advanced (Recording pictures) Press 3 to select [DESTINATION] and then press [MENU/SET] to set. C Depending on the setting, the time at the travel destination area or the home area is displayed. Press 2/1 to select the area the travel destination is in and then press [MENU/SET] to set.
-
Page 83: Using The [Rec] Mode Menu
Advanced (Recording pictures) Using the [REC] Mode Menu [PICTURE SIZE] For details on [REC] mode menu settings, refer to P26. Set the number of pixels. The higher the numbers of pixels, the finer the detail of the pictures will appear even when they are printed onto large sheets. ñ·... -
Page 84: A [Quality]
Advanced (Recording pictures) [QUALITY] For details on [REC] mode menu settings, refer to P26. Set the compression rate at which the pictures are to be stored. · ¿ Applicable modes: [A]: Fine (when giving priority to the picture quality) [›]: Standard (when using the standard picture quality and increasing the number of pictures to be recorded without changing the number of pixels) Note... -
Page 85: [Sensitivity]
Advanced (Recording pictures) > [SENSITIVITY] For details on [REC] mode menu settings, refer to P26. This allows the sensitivity to light (ISO sensitivity) to be set. Setting to a higher figure enables pictures to be taken even in dark places without the resulting pictures coming out dark. ·... - Page 86 Advanced (Recording pictures) ∫ Setting the white balance manually Set the white balance value. Use to match the condition when taking photographs. Select [Ó] and then press [MENU/SET]. Aim the camera at a sheet of white paper etc. so that the frame in the centre is filled by the white object only and then press [MENU/SET].
-
Page 87: [Face Recog.]
Advanced (Recording pictures) [FACE RECOG.] For details on [REC] mode menu settings, refer to P26. Specify a person's face and use the face recognition functions. ñ· ¿ Applicable modes: [OFF]/[ON]/[SET] Note • Refer to P76 for details. [AF MODE] For details on [REC] mode menu settings, refer to P26. This allows the focusing method that suits the positions and number of the subjects to be selected. - Page 88 Advanced (Recording pictures) ∫ About [š] The following AF area frames are displayed when the camera detects the faces. Yellow: When the shutter button is pressed halfway, the frame turns green when the camera is focused. White: Displayed when more than one face is detected. Other faces that are the same distance away as faces within the yellow AF areas are also focused.
-
Page 89: [Pre Af]
Advanced (Recording pictures) [PRE AF] For details on [REC] mode menu settings, refer to P26. The camera will adjust focus automatically depending on the settings. · ¿ Applicable modes: [OFF] ]: Quick AF ] is displayed on the screen. ¢ ]: Continuous AF ] is displayed on the screen. -
Page 90: [Burst]
Advanced (Recording pictures) ˜ [BURST] For details on [REC] mode menu settings, refer to P26. Pictures are taken continuously while the shutter button is pressed. Select the ones you really like from among the pictures you have taken. ñ· ¿ Applicable modes: [OFF] ˜... -
Page 91: [Digital Zoom]
Advanced (Recording pictures) ) [DIGITAL ZOOM] For details on [REC] mode menu settings, refer to P26. This can enlarge subjects even more than the optical zoom or extra optical zoom. · ¿ Applicable modes: [OFF]/[ON] Note • Refer to P43 for details. •... -
Page 92: [Stabilizer]
Advanced (Recording pictures) [STABILIZER] For details on [REC] mode menu settings, refer to P26. Using one of these modes, jitter during picture taking is detected, and the camera automatically compensates the jitter, enabling jitter-free images to be taken. · ¿ Applicable modes: [OFF] [AUTO]:... -
Page 93: B [Audio Rec.]
Sound from motion pictures (When [REC MODE] is set to [MOTION JPEG]) or pictures with audio recorded by this camera cannot be played back by older models of Panasonic digital camera (LUMIX) launched before July 2008. • [AUDIO REC.] cannot be set in the following cases. -
Page 94: Taking And Viewing Clipboard Pictures (¨: Clipboard Mode)
Advanced (Recording pictures) ¨ Mode dial: Taking and viewing clipboard pictures ¨ : Clipboard mode) This setting is useful when taking pictures of timetables, route maps or other information instead of taking notes. Regardless of whether a card is present or not, the data is stored in the dedicated clipboard folder of the built-in memory so it can be differentiated from the regular taken pictures and made available for immediate viewing. -
Page 95: Viewing Clipboard Pictures
Advanced (Recording pictures) Press 3/4 to select the setting and then press [MENU/SET]. Press [MENU/SET] to close the menu. Viewing clipboard pictures Set the mode dial to [¨]. Press [(]. Press 2/1 to move the picture. Play back the previous picture. Play back the next picture. - Page 96 Advanced (Recording pictures) Clipboard playback menu When [MENU/SET] is pressed during clipboard playback, the menu screen appears. (The steps taken are the same as for the “Clipboard recording menu” (P94).) Item Description of setting Used to release the zoom position. [CANCEL Press 2/1 to select a clipboard pictures with zoom mark [ MARK]...
-
Page 97: Advanced (Playback)
Advanced (Playback) ¸ [PLAYBACK] mode: Advanced (Playback) Playing Back Pictures in Sequence (Slide Show) You can play back the pictures you have taken in synchronisation with music, and you can do this in sequence while leaving a fixed interval between each of the pictures. Furthermore, you can play back the pictures grouped together by category or play back only those pictures you have set as favourites as a slide show. - Page 98 Advanced (Playback) Press 3 to select [START] and then press [MENU/SET]. Press 4 to finish the slide show. • Normal playback resumes after the slide show finishes. slide show ∫ Operations performed during The cursor displayed during playback is the same as 3/4/2/1. •...
-
Page 99: Selecting Pictures And Playing Them Back ([Category Play]/ [Favorite Play])
Advanced (Playback) ¸ [PLAYBACK] mode: Selecting Pictures and Playing them Back ([CATEGORY PLAY]/[FAVORITE PLAY]) [MODE PLAY] Playback in [PICTURE], [AVCHD Lite], or [MOTION JPEG] can be selected. Perform steps 1 and 2 on page 97. Press to select [MODE PLAY] and then press [MENU/SET]. Press 3/4 to select the item and then press [MENU/SET]. -
Page 100: [Favorite Play]
Advanced (Playback) Recording information Recording information [CATEGORY] [CATEGORY] e.g. scene modes e.g. scene modes ¢1 [FACE RECOG.] [SPORTS], [SNOW], [PORTRAIT], [BEACH & SURF], [i-PORTRAIT], [PARTY], [SOFT SKIN], [CANDLE LIGHT], [TRANSFORM], [FIREWORKS], [SELF PORTRAIT], [AERIAL PHOTO] [NIGHT PORTRAIT], [i-NIGHT PORTRAIT], [BABY1]/[BABY2], [i-BABY] [SCENERY], [BABY1]/[BABY2],... -
Page 101: Playing Back Motion Pictures/Pictures With Audio
Advanced (Playback) ¸ [PLAYBACK] mode: Playing Back Motion Pictures/Pictures with Audio • File formats of motion pictures/still pictures with audio that can be played with this unit are QuickTime Motion JPEG or AVCHD Lite. • For the motion picture recorded in [AVCHD Lite], only the motion picture that was recorded on this camera or the one that was edited with the “PHOTOfunSTUDIO 3.0 HD Edition”... -
Page 102: Using The [Playback] Mode Menu
Advanced (Playback) ¸ [PLAYBACK] mode: Using the [PLAYBACK] mode menu You can use various functions in playback mode to rotate pictures, set protection for them etc. • With [TEXT STAMP], [RESIZE], [TRIMMING] or [LEVELING], a new edited picture is created. A new picture cannot be created if there is no free space on the built-in memory or the card so we recommend checking that there is free space and then editing the picture. -
Page 103: [Title Edit]
Advanced (Playback) [TITLE EDIT] You can add text (comments) to pictures. After text has been registered, it can be included in prints using [TEXT STAMP] (P104). (Only alphabetic characters and symbols can be entered.) Names set in [BABY1]/[BABY2] and [PET] in scene mode or [LOCATION] in travel date are also recorded as the titles. -
Page 104: [Text Stamp]
Advanced (Playback) ∫ Delete the title [SINGLE] setting In step , delete all the texts, select [EXIT], and press [MENU/SET]. Press [‚]. Press [MENU/SET] to close the menu. [MULTI] setting In step , delete all the texts, select [EXIT], and press [MENU/SET]. Press [MENU/SET] to close the menu. - Page 105 Advanced (Playback) Press 3/4/2/1 to select [SHOOTING DATE], [AGE], [TRAVEL DATE] or [TITLE] and then press [MENU/SET] to set each item. [SHOOTING DATE] [W/OTIME]: Stamp the year, month and date. [WITHTIME]: Stamp the year, month, day, hour and minutes. [AGE] (P63) If this is set to [ON], [AGE] is stamped on the pictures.
-
Page 106: Q [Resize] Reducing The Picture Size (Number Of Pixels)
Advanced (Playback) Q [RESIZE] Reducing the picture size (number of pixels) We recommend resizing to [ ] if you want to attach a picture to an e-mail or use it on a website. (Pictures set to the minimum number of pixels for [ASPECT RATIO] cannot be further reduced in size.) Select [RESIZE] on the [PLAYBACK] mode menu. -
Page 107: [Trimming]
Advanced (Playback) [TRIMMING] You can enlarge and then clip the important part of the recorded picture. Select [TRIMMING] on the [PLAYBACK] mode menu. (P26) Press 2/1 to select the picture, and then press [MENU/SET]. Reduction Enlargement Use the zoom lever and press 3/4/2/1 to select the parts to be trimmed. -
Page 108: [Leveling]
Advanced (Playback) [LEVELING] Minute tilting of the image can be adjusted. Select [LEVELING] on the [PLAYBACK] mode menu. (P26) Press 2/1 to select the picture, and then press [MENU/SET]. Press 2/1 to adjust the tilting, and press [MENU/SET]. 1: clockwise 2: counter-clockwise •... -
Page 109: Ü [Favorite]
Advanced (Playback) Note • When you play back pictures on a PC, they cannot be displayed in the rotated direction unless the OS or software is compatible with Exif. Exif is a file format for still pictures which allows recording information etc. to be added. It was established by “JEITA (Japan Electronics and Information Technology Industries Association)”. -
Page 110: [Print Set]
Advanced (Playback) [PRINT SET] DPOF “Digital Print Order Format” is a system that allows the user to select which pictures to print, how many copies of each picture to print and whether or not to print the recording date on the pictures when using a DPOF compatible photo printer or photo printing store. For details, ask at your photo printing store. -
Page 111: P [Protect]
Advanced (Playback) Note • The number of prints can be set from 0 to 999. • With a printer supporting PictBridge, the date print settings of the printer may take precedence so check if this is the case. • It may not be possible to use the print settings with other equipment. In this case, cancel all the settings, and reset the settings. -
Page 112: B [Audio Dub.]
Sound from motion pictures (When [REC MODE] is set to [MOTION JPEG]) or pictures with audio recorded by this camera cannot be played back by older models of Panasonic digital camera (LUMIX) launched before July 2008. [FACE RECOG.] All the information regarding the [FACE RECOG.] of the selected image will be cleared. -
Page 113: S [Copy]
• Only pictures recorded with a Panasonic digital camera (LUMIX) will be copied. (Even if the pictures were recorded with a Panasonic digital camera, you may not be able to copy them if they were edited with a PC.) •... -
Page 114: Playing Back Pictures On A Tv Screen
Advanced (Playback) ¸ [PLAYBACK] mode: Playing Back Pictures on a TV Screen Playing back pictures using the AV cable (supplied) Preparations: Set the [TV ASPECT]. (P31) Turn this unit and the TV off. 1 Yellow: to the video input socket 2 White: to the audio input socket 3 Red: to the audio input socket A Align the marks, and insert. -
Page 115: Playing Back Pictures On A Tv With An Sd Memory Card Slot
Depending on the TV model, pictures may not be displayed on the full screen. • Motion pictures recorded with [AVCHD Lite] can be played back on Panasonic TVs (VIERA) with the AVCHD logo mark. In all other cases, connect the camera to the TV using the AV cable (supplied) and playback the motion picture. - Page 116 What is the VIERA Link? • This function allows you to use your remote control for the Panasonic TV for easy operations when this unit has been connected to a VIERA Link compatible device using a HDMI mini cable (optional) for automatic linked operations. (Not all operations are possible.) •...
- Page 117 Advanced (Playback) Preparations: Set the [VIERA Link] to [ON]. (P32) Connect this unit to a Panasonic TV compatible with VIERA Link with a HDMI mini cable (optional) (P115). Operate with the remote control for the TV. 1 Panasonic TV compatible with VIERA Link...
-
Page 118: Automatic Input Switching
Available linked operations between this unit and a Panasonic TV is different depending on the types of Panasonic TVs even if they are compatible with VIERA Link. Refer to the operating instructions of the TV for the operations that support on the TV. -
Page 119: Connecting To Other Equipment
Connecting to other equipment Connecting to other equipment Saving the recorded still pictures and motion pictures Method to acquire into other equipment is different for the still pictures and motion pictures recorded with this unit depending on their file format (JPEG, AVCHD Lite or MOTION JPEG). -
Page 120: Copying To A Pc
Connecting to other equipment Copying to a PC File formats that can be used: [JPEG]/[AVCHD Lite], [MOTION JPEG] It is possible to acquire still pictures and motion pictures recorded in [AVCHD Lite] or [MOTION JPEG] formats, or create standard quality DVD video which is not high definition from the motion picture that was recorded as [AVCHD Lite], using the software “PHOTOfunSTUDIO 3.0 HD Edition”... - Page 121 Connecting to other equipment Acquiring of still pictures and [MOTION JPEG] motion pictures (other than [AVCHD Lite] motion pictures) Preparations: Turn on the camera and the PC. Remove the card before using the pictures in the built-in memory. A USB connection cable (supplied) •...
- Page 122 Connecting to other equipment Double-click on [Removable Disk] in [My Computer]. • When using a Macintosh, the drive is displayed on the desktop. (“LUMIX”, “NO_NAME” or “Untitled” is displayed.) Double-click [DCIM] folder. Using a drag-and-drop operation, move the pictures you want to acquire or the folder storing those pictures to any different folder on the PC.
- Page 123 Connecting to other equipment ∫ Viewing the contents of the built-in memory or card using the PC (folder composition) Folders and images processed in the PC cannot be played back on the camera. It is recommended to use the “ ”...
-
Page 124: Printing The Pictures
Connecting to other equipment Printing the Pictures If you connect the camera to a printer supporting PictBridge, you can select the pictures to be printed out and instruct that printing be started on the camera’s LCD monitor. Preparations: Turn on the camera and the printer. Remove the card before printing the pictures in the built-in memory. -
Page 125: Selecting A Single Picture And Printing It
Connecting to other equipment Note • Do not use any other USB connection cables except the supplied one. Use of cables other than the supplied USB connection cable may cause malfunction. • Turn the camera off before connecting or disconnecting the AC adaptor (DMW-AC5E; optional). -
Page 126: Print Settings
Connecting to other equipment Item Description of settings Multiple pictures are printed at one time. • Press 3/4/2/1 to select the pictures, and then When [DISPLAY] is [MULTI SELECT] pressed, [ é ] appears on the pictures to be printed. (When [DISPLAY] is pressed again, the setting is cancelled.) •... - Page 127 Connecting to other equipment [PAPER SIZE] Item Description of settings Settings on the printer are prioritised. [L/3.5qk5q] 89 mmk127 mm [2L/5qk7q] 127 mmk178 mm [POSTCARD] 100 mmk148 mm [16:9] 101.6 mmk180.6 mm [A4] 210 mmk297 mm [A3] 297 mmk420 mm [10k15cm] 100 mmk150 mm [4qk6q]...
-
Page 128: Screen Display
Others Others Screen Display ∫ In recording Recording in normal picture mode [!] (Initial setting) Recording mode Flash mode (P50) AF area (P41) Focus (P41) Picture size (P83) Quality (P84) Battery indication (P18) Number of recordable pictures (P145) Built-in memory (P22) : Card (P22) (displayed only during F3.3 F3.3... - Page 129 Others 32 Intelligent Exposure (P89) 33 Burst (P90)/ : Auto bracket (P57)/B: Audio recording (P93) 34 AF assist lamp (P93)/ : AF Lock (P68) 35 Number of days that have passed since the travel date (P79) 36 Self-timer mode (P55) 37 WIND CUT (P75) 38 LED light (P75) ¢...
-
Page 130: Cautions For Use
3.0 m (10 feet) depth for 60 minutes. ¢1 This means that the camera can be used underwater for specified time in specified pressure in accordance with the handling method established by Panasonic. This does not guarantee no destruction, no malfunction, or waterproofing in all conditions. - Page 131 Others Do not use the camera near radio transmitters or high-voltage lines. • If you record near radio transmitters or high-voltage lines, the recorded pictures and sound may be adversely affected. Always use the supplied cords and cables. If you use optional accessories, use the cords and the cables supplied with them.
- Page 132 Others Battery The battery is a rechargeable lithium ion battery. Its ability to generate power comes from the chemical reaction that takes place inside it. This reaction is susceptible to the surrounding temperature and humidity. If the temperature is too high or too low, the operating time of the battery will become shorter.
- Page 133 Information including personal information may be altered or vanish due to erroneous operation, effect of static electricity, accident, malfunction, repair, or other handlings. Please note in advance that Panasonic is not liable in any way for any direct or indirect damage from the alteration or vanishing of information or personal information.
-
Page 134: Message Display
Others Message Display Confirmation messages or error messages will be displayed on the screen in some cases. The major messages are described below as examples. [THIS MEMORY CARD IS LOCKED] > The Write-Protect switch on the SD Memory Card and the SDHC Memory Card are moved to [LOCK]. - Page 135 Others [MEMORY CARD ERROR FORMAT THIS CARD?] • This card has a format which is not recognised by the camera. > Format the card again with the camera after saving necessary data on a PC etc. (P33) [PLEASE TURN CAMERA OFF AND THEN ON AGAIN]/[SYSTEM ERROR] •...
- Page 136 [THIS BATTERY CANNOT BE USED] • The battery cannot be recognised by the camera. > Use a genuine Panasonic battery. If this message is displayed even when a genuine Panasonic battery is used, contact the dealer or your nearest Service Centre. •...
-
Page 137: Troubleshooting
Others Troubleshooting First, try out the following procedures (P137–144). If the problem is not resolved, it may be improved by selecting [RESET] (P31) on the [SETUP] menu when taking pictures. Battery and power source The camera cannot be operated even when it is turned on. •... - Page 138 Others The area around where the pictures were taken becomes dark. • Was this picture taken with the flash at the close range when the zoom is near [W] (1k)? > Zoom in a little, and then take the pictures. (P43) •...
- Page 139 Others The brightness or the hue of the recorded picture is different from the actual scene. • If recording under fluorescent light, the brightness or the hue may change slightly when the shutter speed becomes fast. This occurs due to the characteristics of fluorescent light. It is not a malfunction.
- Page 140 Others LCD monitor The LCD monitor turns off although the camera is turned on. • The LCD monitor turns off and the status indicator lights when [AUTO LCD OFF] (P30) is selected for the [ECONOMY] mode. [This does not happen when using the AC adaptor (DMW-AC5E; optional).] If the remaining battery power is low, it may take longer for the flash to be charged, and the time during which the LCD monitor is turned off may become longer.
- Page 141 Others Playback The picture being played back is rotated and displayed in an unexpected direction. • [ROTATE DISP.] (P108) is set to [ON]. The picture is not played back. • Did you press [(]? • Is there a picture on the built-in memory or the card? >...
- Page 142 > Connect the camera to the TV with the AV cable (supplied), or with the HDMI mini cable (optional), and then play back the motion pictures on the camera. (P114, 115) > Motion pictures recorded in [AVCHD Lite] can be played back on Panasonic televisions (VIERA) with the AVCHD logo.
- Page 143 Others The card is not recognised by the PC. (The built-in memory is recognised.) > Disconnect the USB connection cable. Connect it again while the card is inserted in the camera. • When the mode dial is set to [¨], contents of the built-in memory will be displayed. >...
- Page 144 Others The clock is reset. • If you do not use the camera for a long time, the clock may be reset. > When the message [PLEASE SET THE CLOCK] appears, set the clock again. When you take a picture before setting the clock, [0:00 0.
-
Page 145: Available Recording Time
Others Others Number of Recordable Pictures and Available Recording Time • The number of recordable pictures and the available recording time are an approximation. (These vary depending on the recording conditions and the type of card.) • The number of recordable pictures and the available recording time varies depending on the subjects. - Page 146 Others Aspect ratio Picture size Quality › › Built-in Memory (Approx. 40 MB) 32 MB 64 MB 128 MB 256 MB 1080 1690 512 MB 2150 3350 1 GB 1770 4310 6710 2 GB Card 1910 3610 8770 12290 4 GB 3770 7090 17240...
- Page 147 Others Aspect ratio Picture size Quality › › › › Built-in Memory (Approx. 40 MB) 32 MB 64 MB 128 MB 256 MB 512 MB 1 GB 1280 2 GB Card 1700 1360 2560 4 GB 1210 1670 1740 3350 2680 5020 6 GB...
- Page 148 Others ∫ Available recording time (when recording motion pictures) File format [AVCHD Lite] [MOTION JPEG] Recording quality setting Built-in Memory 1 min Cannot be used. 27 s (Approx. 40 MB) 32 MB 16 s 17 s 55 s 64 MB 1 min 12 s 37 s...
-
Page 149: Specifications
Others Specifications Digital Camera: Information for your safety Power Source: DC 5.1 V Power Consumption: 1.35 W (When recording) 0.7 W (When playing back) Camera effective pixels: 12,100,000 pixels Image sensor: 1/2.33q CCD, total pixel number 12,700,000 pixels, Primary colour filter Lens: Optical 4.6kzoom, fl4.9 mm to 22.8 mm (35 mm film camera equivalent: 28 mm to 128 mm)/F3.3 to F5.9... - Page 150 Others White balance: Auto white balance/Daylight/Cloudy/Shade/Incandescent lights/ White set Exposure (AE): Programme AE Exposure compensation (1/3 EV Step, j2 EV to i2 EV) Metering Mode: Multiple LCD monitor: 2.7q TFT LCD (Approx. 230,000 dots) (field of view ratio about 100%) Flash: Flash range: [ISO AUTO] Approx.
- Page 151 1.5 m (5 feet) onto 5 cm (0.17 feet) plywood, which is compliant with “MIL-STD 810F Method 516.5-Shock”. Dustproof performance: Equivalent to IEC 60529 “IP5X”. Battery Charger (Panasonic DE-A60A): Information for your safety Input: 110 V to 240 V 50/60 Hz, 0.2 A Output: CHARGE 4.2 V...
-
Page 152: Vqt1Z56
HDMI, the HDMI Logo and the High-Definition • Multimedia Interface are the registered trademarks or trademarks of HDMI Licensing LLC. HDAVI Control™ is a trademark of Panasonic • Corporation. QuickTime and the QuickTime logo are • trademarks or registered trademarks of Apple Inc., used under license therefrom.
Need help?
Do you have a question about the LUMIX DMC-FT1 and is the answer not in the manual?
Questions and answers