Table of Contents
Advertisement
Quick Links
Video Cassette Recorder
NV-MV20EB/EBL
(Model suffix: 'EB' for UK model, 'EBL' for Ireland model)
INTELLIGENT TIMER
PROG PLAY
QUICK
ERASE
EXT LINK
PDC
Before attempting to connect, operate or adjust this
product, please read these instructions completely.
EJECT
REC
TIMER CHECK
Contents
CH
TIMER REC
page
2-4
5
6
7
8-9
10-11
12-13
14-15
16-17
18
19
20-21
22
23
24
25
26-28
29
30-32
33
34
35
36
37
37
38
39
40
41-43
44-45
46
47
Last Page
Advertisement
Chapters
Table of Contents

Related Manuals for Panasonic NV-MV20EB/EBL


Summary of Contents for Panasonic NV-MV20EB/EBL
-
Page 1: Table Of Contents
Contents page CAUTION Check List / Shop@Panasonic Front Panel Rear Panel / Inserting batteries Remote control functions Connections without Scart cable 10-11 with Scart cables and Satellite Receiver 12-13 Video Cassette Recorder with Scart cables 14-15 AUTO SETUP 16-17 NV-MV20EB/EBL... -
Page 2: Caution
Caution Be sure to read the cautions carefully before you operate this VCR. Keep the VCR away from high temperatures Keep the VCR away from sources of heat such as direct sunlight, heating radiators, or closed vehicles. Avoid magnets or magnetized objects Never bring a magnet or magnetized object close to the VCR because this could adversely affect the performance of the VCR. - Page 3 Avoid humidity and dust Do not use the VCR in very humid or dusty places. This may cause damage to its internal parts. Stacking Install the VCR in a horizontal position and do not place anything heavy on it. Condensation may form in the following cases: If the VCR is in a room that was very cold before a heater has just been turned on.
-
Page 4: Caution
CAUTION Caution for AC Mains Lead For your safety, please read the following text carefully. This appliance is supplied with a moulded three pin mains plug for your safety and convenience. A 5-ampere fuse is fitted in this plug. Should the fuse need to be replaced please ensure that the replacement fuse has a rating of 5-ampere and that is approved by ASTA or BSI to BS1362. -
Page 5: Operating Instructions
• Or go on line through our Internet Accessory ordering application. • Most major credit and debit cards accepted • All enquiries transactions and distribution facilities are provided directly by Panasonic UK Ltd. • It couldn’t be simpler! Customer Care Centre... -
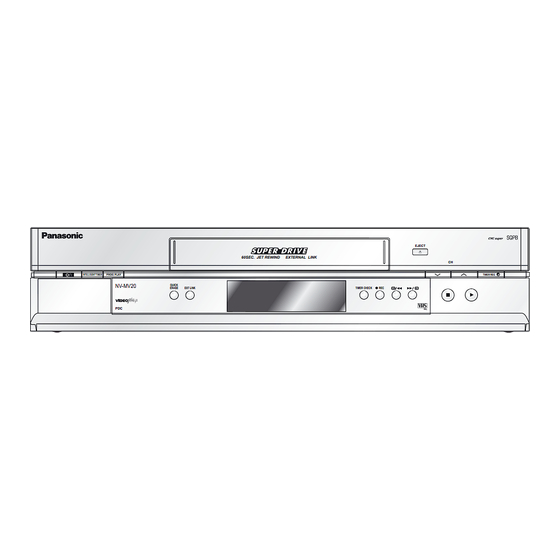
Page 6: 60Sec. Jet Rewind External Link
Front Panel EJECT 60SEC. JET REWIND EXTERNAL LINK INTELLIGENT TIMER PROG PLAY TIMER REC NV-MV20 QUICK ERASE EXT LINK TIMER CHECK 9 10 11 12 13 Stand-by/on switch /I Defines timer programmes. INTELLIGENT TIMER Plays back programmed recordings. PROG PLAY EJECT Ejects the cassette. -
Page 7: Rear Panel / Inserting Batteries
Rear Panel AV1 (TV) AC IN~ SECTEUR~ OUT/ SORTIE AC Input socket ( Power supply) AV1 21-pin Scart socket RF IN socket (Aerial input) RF OUT socket (Aerial output) Inserting batteries into the remote control unit: The batteries last for about a year, depending on how often you use the RC unit. Do not mix old with new batteries or batteries of different types. -
Page 8: Remote Control Functions
Remote control functions Some Panasonic TV sets accept control signals from the VCR's remote control unit. In the table, the TV buttons are marked with , the VCR buttons with Stand-by/on switch Press to switch the unit from on to stand-by mode or vice versa. In stand-by mode, the unit is still consuming a small amount of power. - Page 9 VIDEO Plus+ Displays the VIDEO Plus+ menu. P. 30 Selects a programme memory location and inputs the VIDEO Plus+ number. PROG PLAY Plays back programmed recordings. Example: 18= P. 27 Record P. 24 Selects the TV set's AV port. INPUT SELECT Toggles between AV input and TV station.
-
Page 10: Connections
Connections You can connect your VCR to a TV and Satellite Receiver using RF cable. without Scart cable However, using this connection method it may be difficult to obtain a clear picture from the Satellite Receiver. For this reason it is not recommended for inexperienced users. (See preferred connection on page 12.) Aerial Input socket Satellite Receiver... - Page 11 Follow the step-by-step guide below. Connect the aerial to the aerial input socket of the Satellite Receiver. Satellite Receiver - If you do not have a Satellite Receiver, connect the aerial to the RF input socket of the VCR and go to step . 3 Satellite Receiver Connect the aerial from Satellite Receiver to the RF Input socket.
-
Page 12: With Scart Cables And Satellite Receiver
Connections with Scart cables and Satellite Receiver RF Input socket (fully-wired) RF Output socket AV1 21-pin Scart socket AC Input socket Aerial AC Mains lead (supplied) RF cable (supplied) Necessary for Connecting a Satellite Receiver 21-pin Scart socket (VCR) Aerial Input socket Satellite Receiver 21-pin Scart socket (TV) To AC Mains socket... - Page 13 Follow the step-by-step guide below. Connect the aerial to the RF Input socket of the VCR. SORTIE Connect the RF cable from the RF Output socket of the VCR to the TV aerial input socket. SORTIE AV1 ( TV ) Connect the AV1 21-pin scart socket to the VCR scart socket on your Satellite Receiver/Digital Receiver.
- Page 14 Connections with Scart cables (fully-wired) RF Input socket RF Output socket AV1 21-pin Scart socket AC Input socket Aerial AC Mains lead RF cable (supplied) (supplied) Aerial Input socket Necessary for TV AV1 socket To AC Mains socket...
- Page 15 Follow the step-by-step guide below. Connect the aerial to the RF Input socket of the VCR. SORTIE Connect the RF cable from the RF Output socket of the VCR to the TV aerial input socket. SORTIE Connect the AV1 21-pin scart socket to the TV scart AV1 ( TV ) socket.
-
Page 16: Auto Setup
AUTO SETUP Set the VCR/TV switch to VCR. Turn on the TV, then press the VCR-Stand-by/ON button to switch on the VCR. The VCR will now start Auto Setup. While Auto Setup is running the first digit of the VCR display will flash. After a while it will stop flashing and the RF output channel number will be displayed. - Page 17 If the clock setting menu appears Datum / Zeit Clock set (Auto clock set was not possible due to a weak signal) MANUAL ! Press to set the correct time and date. Time : 12 : 00 : 00 ! Press the Date : 11.
-
Page 18: Checking The Settings For Auto Setup
Checking the Settings To confirm that the TV stations have been tuned correctly by Auto Setup for Auto Setup MENU Press the MENU button to display the OSD Main menu on the TV screen. On Screen Display Press to select Tuning then press the ENTER button. -
Page 19: Removing Interference / Changing Rf-Channel
Removing Interference / Changing RF-channel In some cases, interference (lines or patterning) or a very poor picture may appear on the TV when the VCR is connected. If this happens, follow the steps below to change the video playback channel (RF output channel) to remove the interference. -
Page 20: Menu System
Menu System Timer recording 1 / 3 Page 27 Date Start Stop -- ---- -- / -- --:-- --:-- -- ---- -- / -- --:-- --:-- -- ---- -- / -- --:-- --:-- -- ---- -- / -- --:-- --:-- -- ---- -- / -- --:--... -
Page 21: Menu System / Menu Overview
Menu Overview The cursor keys of the remote control unit allow you to move between Menu menus and to change settings. Timer recording Tuning Clock set Press MENU to display the Menu screen. Others Select an entry by pressing ENTER to access the selected sub-menu. -
Page 22: Playback / Sqpb / Ntsc Playback
Playback Set the TV set to the video channel and insert a cassette into the VCR Normal Playback: Press . Cue or Review Playback: During playback, press and release • To return to normal playback, press . • If you pre ss and hold down the , Cue or review playback continues for as long as you kee p the button pressed. -
Page 23: Tracking Control
Tracking control Adjusting the playback picture Under normal conditions, the VCR automatically adjusts the tracking for optimum performance. However, in some cases it may be necessary to adjust it manually. If the picture contains noise bars and it is not clear to see (tracking adjustment): If noise bars appear during normal playback or still playback, follow the Playback picture Playback picture... -
Page 24: Recording
Recording Set the TV set to the video channel and insert a cassette into the VCR; make sure that the cassette's protection tab is still in. Select a channel to record from. Select the AV channel if you are recording via the 21-pin scart cable. Press to start recording. -
Page 25: External Recording Control
External recording control The AV input of this VCR is equipped for future use with external equipment having external timer recording control such as digital satellite receivers. The Aerial AV input can be set to EXT LINK 1 or EXT LINK 2 depending on the equipment to be connected. -
Page 26: Timer Recording
Timer recording The recording timer allows you to programme the recording time of TV PROG/CHECK programmes up to 1 month in advance. Use the on-screen menu to programme a maximum of 16 recordings. Timer recording Press MENU , select and press ENTER Timer recording 1 / 3... - Page 27 Timer recording Quitting the timer mode TIMER Press TIMER ; the video recorder symbol turns off. You can now play back a cassette or make a manual recording. Press TIMER again to reactivate the timer programme you entered previously. Displays the timer programmes for verification. (button on the unit only) TIMER CHECK Repeatedly press TIMER CHECK...
- Page 28 Timer recording Automatic SP/LP selection A: If, at the beginning of a timer programme, there is not enough tape left to complete it, the SP/LP function will automatically run the tape at LP speed. This ensures that the entire programme will be recorded. If the LP mode is not enough to 'stretch' the remaining tape to fit you will not be able to record all of the TV programme.
-
Page 29: Intelligent Timer
INTELLIGENT TIMER This function makes it easier for you to time the recording of programmes I-TIMER transmitted by the same station at the same time but on different days. You can fully modify the programmes once they have been transferred to the Timer Recording menu. -
Page 30: Video Plus
VIDEO Plus+ Programming with the VIDEO Plus+ Function The VIDEO Plus+ Codes (numbers) make it easy to set the VCR for timer recording from TV channel and SAT channel. Video Plus+ The recording time may be slightly longer than the TV programme. 8 3 5 4 2 - - - - Press the VIDEO Plus+... - Page 31 VIDEO Plus+ If [- -] appears under Pos after entering a VIDEO Plus+ Code (Number) Timer recording Pos is the Programme Position/TV Station Name. Date Start Stop Normally, the name of the TV station and the number of the programme position is displayed under [Pos].
- Page 32 VIDEO Plus+ VIDEO Plus+ Codes for Satellite Receivers /Cable TV This VCR is not designed to control (switch on or change channel) your satellite receiver or Cable TV box, however, it can be taught to recognise VIDEO Plus+ Codes for Satellite stations. The Satellite receiver or Cable TV box must be switched on and the correct station selected.
-
Page 33: Others Menu
Others Menu Others Tape length : AUTO( E-240) SQPB : AUTO : 4:3 VCR display : DIMMED EXT LINK Sets the tape length of the cassette you use. Tape length AUTO ( E - 240 ), E - 195, E - 260, E - 300 : select : return : exit... -
Page 34: Manual Setup
Manual setup This VCR has 99 programme positions that can be tuned to receive TV stations. In certain circumstances you may wish to tune in a station manually or rename a TV station. Manual Tuning Tuning Tuning Press MENU and select Pos Name Pos Name Ch Press... -
Page 35: Changing The Name Of Tv Stations
Manual setup Changing the name of TV stations Tuning Press Menu and select Tuning Pos Name Pos Name Ch Press ENTER 1 BBC1 Manual Select and press ENTER 2 BBC2 7 - - - - - - - 3 ITV 8 - - - - - - - Select a TV station 4 CH4... -
Page 36: Changing The Order Of Tv Stations / Deleting A Station
Manual setup Changing the order of TV stations or deleting a station Tuning Tuning Press MENU and select Pos Name Pos Name Ch Press ENTER 1 BBC1 Manual Select and press ENTER 7 - - - - - - - 2 BBC2 3 ITV 8 - - - - - - -... -
Page 37: Restartauto Setup
Manual setup Restart Auto Setup Tuning Tuning Press MENU and select Manual Auto Setup Press ENTER Shipping condition Auto Select Setup and press ENTER Owner ID Press ENTER The Auto Setup menu will be displayed. : yes : no The Tuning will start automatically. EXIT ENTER Note:... -
Page 38: Owner Id
Owner ID Tuning To change the Owner ID Manual Press MENU and select Tuning Auto Setup Press ENTER Shipping condition Select Owner ID and press ENTER Owner ID Use the Numeric buttons or to enter the current PIN number. - After entering the correct PIN number, you can change the Name, House No and Postcode. -
Page 39: Clock Setting
Clock setting The clock will normally be set correctly during Auto-Setup however, in some circumstances the VCR cannot set the clock automatically. In this case, follow the operation steps below to manually set the clock. On Screen Display. To manually adjust the clock Menu Press MENU... -
Page 40: Tv Control
The settings for operating the TV with the remote control have already been made. No additional settings need to be performed. However, some of old Panasonic TVs cannot be operated using this remote control. TV-Stand-by/on Press to switch the TV from on to stand-by mode or vice versa. -
Page 41: Advanced Functions
Advanced functions Repeat Playback The video recorder repeats playback from beginning to end of a recording. In Stop or Playback mode, press the Playback button for longer than 5 seconds. The video recorder displays an 'R', indicating repeat play mode. Press to stop playing back at any time. - Page 42 Advanced functions Limiting the recording and playback time Switches the unit into stand-by mode after the set time of recording, playback or in Stop mode. OFF TIMER Press OFF TIMER repeatedly to extend the switch-off time from 30 to 60, 120, 180 or 240 minutes.
-
Page 43: Advanced Functions
Advanced functions Convenient Automatic Functions VCR Auto Power On When you insert a video cassette, the VCR switches on automatically. Auto Playback Start When you insert a video cassette with a broken erasure prevention tab, playback starts automatically without pressing the Play button. -
Page 44: Before Requesting Service
Before requesting service I HAVE AN ON SCREEN MESSAGE. You have attempted to carry out a function, which is Please follow the instructions as given on the display. not possible at this time. It may be that no tape is inserted and you have pressed Play , or that you... - Page 45 Before requesting service THE PICTURE OF A RECORDED PROGRAMME IS DISTORTED OR MISSING. The aerial or connection is defective. Check connections and reconnect as necessary. No programme was recorded because the VCR is Re-tune the VCR. not tuned correctly. Incorrect programme position was selected. Select correct channel.
-
Page 46: Tape Care / Cassette Erasure Protection
Tape Care Some do’s and dont’s on tape care. 1) Use a good quality branded tape, such as Panasonic. 2) Keep in the box supplied with the tape, or a video case, when not in use. 3) Try to use the whole tape when making recordings and avoid re-recording over the same section of the tape repeatedly as this will help prevent premature tape wear. -
Page 47: Specifications
Specifications NV-MV20EB/EBL Power supply 220-240 V AC, 50/60 Hz Power consumption in operation multifunctional remote control (VCR and Panasonic TV) / 21-pin Scart Socket Controls VCR direct controls (main functions) 11 13 15 17 19 Video heads (helical scanning system) -
Page 48: Index
RF cable 10,12,14 VIDEO plus+ This equipment complies with European conformity requirements, in accordance with the conditions of electromagnetic compatibility and product safety. This equipment complies with the requirements of protection class 2. Matsushita Electric Industrial Co., Ltd. F06C03-0 http://www.panasonic.co.jp/global/ RQTD0079-B...
Need help?
Do you have a question about the NV-MV20EB/EBL and is the answer not in the manual?
Questions and answers