Table of Contents
Advertisement
Advertisement
Table of Contents

Related Manuals for Smartparts SP-DPF56N


Summary of Contents for Smartparts SP-DPF56N
-
Page 1: Digital Picture Frame
USER MANUAL Digital Picture Frame SP-DPF56N www.smartpartsproducts.com Page 1... -
Page 2: Table Of Contents
Connecting the frame to a TV Changing and Adding Pictures ………………………………………..7 a. View contents on your memory card b. Formatting pictures from your computer c. Using Smartparts website for HELP Product Diagram ………………………………………………………….9 Viewing Pictures …………………………………………………..……..13 a. Turning the frame on b. - Page 3 Special Modes ………………………………………………………..…..16 a. Sleep Timer b. Sleep Mode Video Mode ……………………………………………………………..16 Warranty and Technical Support ……………………………………...17 www.smartpartsproducts.com Page 3...
-
Page 4: Overview
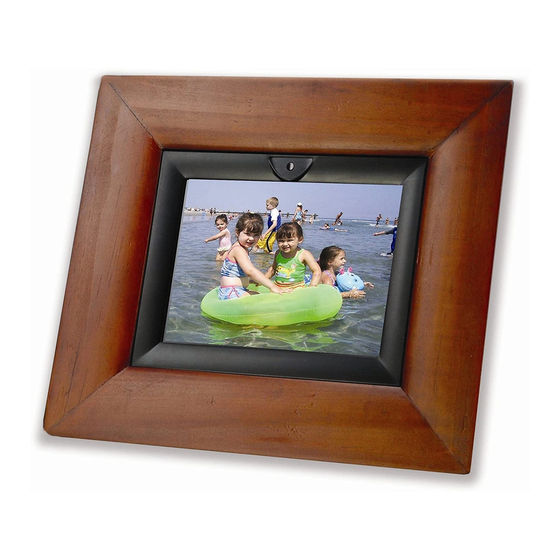
Overview The SP-DPF56N Digital Picture Frame lets you view the digital pictures from memory cards. You can enjoy or edit your photos any time and anywhere. The frame is an ideal way to display your digital photographs The Slide Show mode is a convenient method to display all your picture in a continuous mode –... -
Page 5: Features
Features The SP-DPF56N supports JPEG and AVI files The resolution of the screen is 960 x 234 (5.6”) Compatible with: Compact Flash (CF), Secure Digital (SD). Memory Stick (MS), Smart Media (SM) and Xtreme Digital (xD) memory cards USB 1.1 connection – compatible with Windows XP and... -
Page 6: Attaching The Fold Out Stand
the picture. Please be advised however that the LCD screen scratch easily and the film will protect it. c. Attaching the fold out stand Pls attach the fold out stand to the back of the frame. The stand is designed to hold the frame in the viewing angle desired by you. Simply slide the leg up or down to change the height of the stand to alter the viewing angle. -
Page 7: Connecting The Frame To A Tv
Connecting your digital picture frame to your TV Please use the supplied Video cable and connect the Digital Picture Frame to your TV. Use the “Video Out” connection on your frame and plug the “yellow” connector of the cable into a Video-In connection on your TV –... -
Page 8: Formatting Pictures From Your Computer
We also recommend naming the pictures without using underscores or more then 4 number digits in the name. c. Using Smartparts Website for HELP We provide a useful tool on our website to help you: Save your pictures in the proper and readable... -
Page 9: Product Diagram
Product Diagram a. Front view 1. LCD Screen 2. IR signal receiver 3. Front frame b. Back view The foldout stand is adjustable and can be rotated to use your Digital Picture Frame to view pictures vertically or horizontally. www.smartpartsproducts.com Page 9... - Page 10 c. Left view 6. Video Out Port 7. Video In Port 8. USB Port 9. AC Port d. Right view 10.SM/SD/MS/MMC/xD card slot 11. CF card slot www.smartpartsproducts.com Page 10...
- Page 11 e. Top view 12.Power 13. Power Light Indicator 14. Brightness 15. Color 16. Contrast 17. Top Slide Button 18. Page down / Slide 19. Right / 90°Rotate 20. Sleep / Next / Esc. 21. Enter www.smartpartsproducts.com Page 11...
- Page 12 Remote Control M ODE PHOTO/A VI SPEED UP SPEED DN N TSC/PAL 1.Mode 2.Speed UP DELETE FORM A T EN TER 3.Delete 4.Format 5.Zoom + PG UP 6.Page UP 7.Zoom - PG DN 8.Page Down SLIDE SLEEP W AKE 9.Slide 10.Speed Down 11.NTSC/PAL 12.Esc.
-
Page 13: Viewing Pictures
g. Changing The Battery Note: Before using remote control, please remove the protective tab. “+”Polarity is up Hold the remote control, push the button right, and pull the button to the outside. Then put the battery (Model CR2025) into the button with “+”... -
Page 14: Picture Preview Mode
selection by using the ENTER button. The frame will display one or more folder symbols – you can navigate from Folder to Folder using the cursor button on your remote control or the NEXT button on your frame. To select your folder (DCIM) please press ENTER. The frame will display the next set of Folders inside your DCIM folder –... -
Page 15: Slide Transition
button repeatedly will allow you to rotate the picture up to 360 degrees. Slideshow Select any picture in the preview mode and press ENTER. The press SLIDE on your remote control or frame. The frame will display all your pictures in a slide show. It will show all your pictures continuously. -
Page 16: Special Modes
Special Modes a. Sleep Timer The frame will go into a Sleep / Stand By mode after a pre-selected period of time. You can change the time. Remove all memory cards and press the NEXT button on your frame. You can press the button repeatedly to set the Sleep time in 5 min increments with a maximum time of 60 min. -
Page 17: Warranty And Technical Support
Warranty and Technical Support Please refer to our website at www.smartpartsproducts.com Technical Support and Warranty information. www.smartpartsproducts.com Page 17...
Need help?
Do you have a question about the SP-DPF56N and is the answer not in the manual?
Questions and answers