Table of Contents
Advertisement
Important Safety Precautions.......................2
What's Included..............................................3
Introduction....................................................4
Getting Started...............................................5
Copying Photos from a Memory Card.........6
Choosing an Album........................................7
Viewing Photos on a Memory Card..............7
Editing Albums...............................................8
SyncPix™ Settings..........................................9
Connect to a Macintosh...............................11
Connect a USB Flash Drive.........................11
Frequently Asked Questions........................12
Technical Specifications...............................14
Cleaning the LCD Screen............................15
Advertisement
Table of Contents

Related Manuals for Smartparts Syncpix SPX8


Summary of Contents for Smartparts Syncpix SPX8
-
Page 1: Table Of Contents
Important Safety Precautions...2 What's Included...3 Introduction...4 Getting Started...5 Copying Photos from a Memory Card...6 Choosing an Album...7 Viewing Photos on a Memory Card...7 Editing Albums...8 SyncPix™ Settings...9 Connect to a Macintosh...11 Connect a USB Flash Drive...11 Frequently Asked Questions...12 Technical Specifications...14 Cleaning the LCD Screen...15... -
Page 2: Important Safety Precautions
Important Safety Precautions Always follow these basic safety precautions when using your digital picture frame. This will reduce the risk of fire, electric shock, and injury. Warning: To reduce the risk of fire or shock hazard, do not expose this product to rain or moisture. Warning: To prevent the risk of electric shock, do not remove the cover. -
Page 3: What's Included
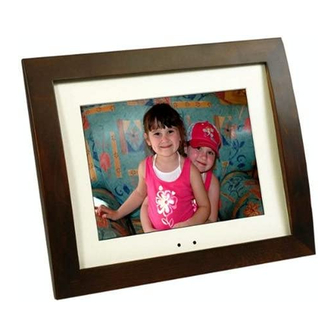
What's Included Digital Picture Frame AC Power Adapter (9V, 2.0A) This User's Guide Remote Control USB Cable Stand 5 Way button Stand Memory card slots USB Ports Power input jack... -
Page 4: Introduction
Introduction Congratulations on your new Smartparts SyncPix™ digital picture frame! SyncPix™ frames include revolutionary technology that makes transferring photos from a memory card to the frame virtually effortless. Your new picture frame does some amazing things. It will automatically: • Detect when a memory card is inserted. -
Page 5: Getting Started
Getting Started To begin using your SyncPix™ digital picture frame, start by connecting the stand or hanging the frame on a wall. The stand is connected by inserting the round knob at the top into the opening on the back of the frame and sliding it upward. The display angle of the frame can be adjusted by sliding the stand up or down. -
Page 6: Copying Photos From A Memory Card
Copying Photos from a Memory Card One of the key features of your SyncPix™ digital picture frame is the ability to copy photos from a memory card to the frame’s built-in memory automatically. This allows you to put your card back into your camera and continue taking pictures while the digital frame displays your photos. -
Page 7: Choosing An Album
IMPORTANT: The photos on the digital picture frame have a lower resolu- tion than your originals. They should not be considered backup copies of your originals. Do not delete your original photos from your memory card until you have backed them up to another type of storage medium, such as a computer hard drive. -
Page 8: Editing Albums
Video Clips Your SyncPix™ digital picture frame will play video clips from many types of digital cameras. The videos will play during the slide show. No special video mode is required. Best results are obtained with QVGA resolution (320x240). Adding Background Music to a Slideshow Your SyncPix™... -
Page 9: Syncpix™ Settings
SyncPix™ Settings From the albums screen, use the Menu button to highlight the Settings icon, and then press OK. Use the up and down arrow buttons to navigate to a setting, and the left and right buttons to change the setting. After making any changes, you must select OK for the changes to take effect. -
Page 10: Manually Transferring Files To Windows Computer
Volume The volume of background music and video clips can be set between 0 and 15. Note that volume also can be adjusted with the use of the + and – buttons on the remote control. However, if the remote control is not available, the volume must be adjusted here. -
Page 11: Disconnect Digital Picture Frame From Computer
Note: Photos transferred manually with a USB cable will not be optimized for use with the frame. We recommend copying photos and other media to your frame by means of inserting a memory card into the appropriate slot. Folders Your SyncPix™ digital picture frame’s internal memory has folders in which pictures, music and video clips are stored. -
Page 12: Frequently Asked Questions
Frequently Asked Questions: Q: What should I do if the digital picture frame does not respond to the buttons on the remote control or on the frame? A: If your digital picture frame seems unresponsive, please wait several seconds to allow it to process your request. If it still does not respond, turn the unit off and restart it. - Page 13 Q: Do I need a computer to copy music and videos to the frame’s internal memory. A: No. If the music and video files are stored on a memory card or USB flash drive, SyncPix™ will copy them to the built-in memory along with any photos.
-
Page 14: Technical Specifications
Power Input: Power Output: Features: Warranty Smartparts, Inc. warrants its digital picture frames against manufac- turing defects for a period of 90 days from date of purchase. For technical support, please visit our web site at: www.smartpartsproducts.com. 8” LCD Digital Picture Frame with SyncPix™™... -
Page 15: Cleaning Digital Picture Frame
Cleaning the LCD Screen Treat the screen gently. The screen is made of glass and can be scratched or broken. To clean fingerprints or dust from the LCD screen, we recommend using a soft, non-abrasive cloth such as a camera lens cloth. If you use a commercial LCD Cleaning Kit, do not apply the cleaning liquid directly to the LCD screen.
Need help?
Do you have a question about the Syncpix SPX8 and is the answer not in the manual?
Questions and answers
I can't figure out how to delete the pictures from the internal drive