Table of Contents
Advertisement
Available languages
Available languages
Quick Links
Download this manual
See also:
Service Manual
Advertisement
Table of Contents

Subscribe to Our Youtube Channel
Related Manuals for Philips Azur GC4250


Summary of Contents for Philips Azur GC4250
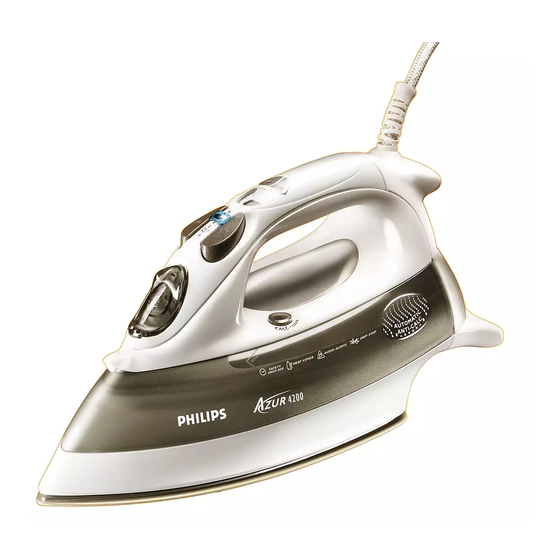
- Page 1 Azur GC4250...
- Page 3 ENGLISH 4...
-
Page 4: Before First Use
Check the cord regularly for possible damage. If the mains cord is damaged, it must be replaced by Philips, a service centre authorised by Philips or similarly qualified persons in order to avoid a hazard. -
Page 5: Preparing For Use
ENGLISH Preparing for use Filling the water tank Never immerse the iron in water. Make sure the appliance is unplugged. Set the steam control to position 0 (= no steam). Open the cap of the filling opening. Tilt the iron backwards. Fill the water tank with tap water up to the maximum level by means of the filling cup. - Page 6 ENGLISH Press temperature control button ¢ to select the required ironing temperature. A short beep indicates that the temperature setting has been changed. Check the garment label for the required ironing temperature: Synthetic fabrics (e.g. acrylic, nylon, polyamide, polyester) Silk 2 Wool 3 Cotton, linen - If you do not know what kind(s) of fabric(s) an article is made of,...
-
Page 7: Using The Appliance
ENGLISH Wait until the iron has reached the selected temperature.You will hear a double beep and the temperature indication and symbol stop blinking. Using the appliance Steam ironing Make sure that there is enough water in the water tank. Select the appropriate steam setting. Make sure that the steam setting you select is suitable for the ironing temperature selected: - 1 - 3 for moderate steam (temperature settings 2 to 3) -
Page 8: Vertical Shot Of Steam
ENGLISH Shot of steam A powerful 'shot' of steam helps remove stubborn creases. The shot-of-steam function can only be used at temperature settings between 2 and MAX. Press and release the shot-of-steam button. Drip stop This iron is equipped with a drip-stop function: the iron automatically stops producing steam when the temperature is too low to prevent water from dripping out of the soleplate.When this happens you may hear a sound. -
Page 9: Cleaning And Maintenance
ENGLISH The blue alert light starts blinking, 'OFF' starts blinking on the display and the iron starts beeping to indicate that the iron has been switched off by the safety shut-off function. When the iron is in safety shut-off mode, it will still start heating up again as soon as you move it. -
Page 10: After The Calc-Clean Process
ENGLISH Steam and boiling water will come out of the soleplate. Impurities and flakes (if any) will be flushed out. Release the calc-clean button as soon as all the water in the tank has been used up. Repeat the calc-clean process if the iron still contains a lot of impurities. After the calc-clean process - Put the plug in the wall socket and let the iron heat up to allow the soleplate to dry. -
Page 11: Guarantee And Service
ENGLISH Guarantee & service If you need information or if you have a problem, please visit the Philips website at www.philips.com or contact the Philips Customer Care Centre in your country (you will find its phone number in the worldwide guarantee leaflet). If there is no Customer Care Centre in your country, turn to your local Philips dealer or contact the Service Department of Philips Domestic Appliances and Personal Care BV. - Page 14 ¢ ¢ £ £...
- Page 17 ¢...
- Page 22 При первом включении утюга в сеть возможно выделение дыма, которое вскоре прекратится.
- Page 23 ¢ ¢...
- Page 24 £ £...
- Page 25 Парообразование начнется, как только утюг нагреется до установленной температуры.
- Page 26 ¢...
- Page 27 Из подошвы утюга будут выходить пар и кипящая вода, вымывающие наружу загрязнения и хлопья накипи (если они имеются).
- Page 33 ¢ ¢ £ £...
- Page 36 ¢...
- Page 40 На початку використання праска може давати невеличкий дим. Це незабаром припиниться.
- Page 42 ¢ ¢ £ £...
- Page 43 Праска почне виробляти пару, як тільки буде досягнуто встановлену температуру.
- Page 45 ¢...
- Page 46 З підошви праски буде вириватися пар і тверді частинки накипу (якщо такий є).
- Page 51 ¢ ¢ £ £...
- Page 54 ¢...
- Page 59 ¢ ¢ £ £...
- Page 62 ¢...
- Page 68 ¢ ¢ £ £...
- Page 71 ¢...
- Page 76 4239 000 54063...
Need help?
Do you have a question about the Azur GC4250 and is the answer not in the manual?
Questions and answers