
Related Manuals for LENCO MES-216


Summary of Contents for LENCO MES-216
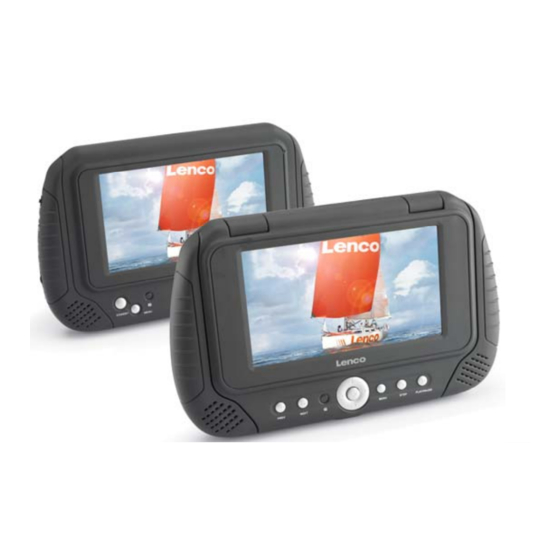
- Page 1 7” TWINS SCREEN PORTABLE DVD PLAYER AND MONITOR MES-216 USER MANUAL Please read and keep these instructions For information and support, www.lenco.eu...
-
Page 2: Safety Information
SAFETY INFORMATION CAUTION: DVD/VIDEO CD/CD PLAYER IS A CLASS 1 LASER PRODUCT. HOWEVER THIS DVD/ VIDEO, CD/CD PLAYER USES A VISIBLE LASER BEAM WHICH COULD CAUSE HAZARDOUS RADIATION EXPO SURE IF DIRECTED. BE SURE TO OPERATE THE DVD/VIDEO CD/CD PLAYER CORRECTLY AS INSTRUCTED. WHEN THIS DVD/VIDEO CD/CD PLAYER IS PLUGGED TO THE WALL OUTLET, DO NOT PLACE YOUR EYES CLOSE TO THE OPENING OF THE DISC TRAY AND OTHER OPENINGS TO LOOK INTO THE INSIDE OF THIS PLAYER. - Page 3 Read all instructions before using • Do not use this product near water. • Do not ceiling- or wall-mount the product. • Install the product in accordance with the operating instructions. • Do not set the product near heat sources, such as radiators, heat registers, stoves, or other apparatus (including amplifiers) that produce heat.
-
Page 4: Table Of Contents
Table of contents Getting Started: Safety information ........................1-2 Features ............................4 Accessories ..........................4 Control reference guide ....................... Basic connection ..........................7-11 Remote control preparation ........................12 Basic Operation: Basic play ............................13 Stopping play ............................14 Skipping ahead or back ........................14 Fast forward backward...........................14 Pause or play ............................14 Slow-motion play [DVD/VCD] ........................15 MP3 playback .......................... -
Page 5: Features
Features 7" TFT DISPLAY This player has a built-in 7" TFT display window, to provide clear vision, and low radiation. MULTI TV SYSTEM SUPPORT The player can play discs with signal system of PAL and NTSC. GRAPHICAL USER INTERFACE SCREEN Simply by pressing the OSD button on the remote control unit, information on the player and disc can be displayed on the TV screen for easy identification, The player's operations and settings can be performed by operating the remote control while monitoring screen. -
Page 6: Control Reference Guide
Control reference guide Main unit 1. TFT Display window - Displays all information about DVD work scene. 2. UP navigation button - Press this button to move up. 3. OK button - Press this button to confirm a selection. 4. Built-in Speakers. 5. - Page 7 Control reference guide Remote control 1. TFT MODE button - Press this button to select BRIGHTNESS, CONTRAST, SHARPNESS, SATURATION, HUE or 16:9/4:3 screen mode and then press left or right button to adjust as you like. 2. NUMERIC buttons - Press these buttons to input numeric information, such as track number, chapter number and so on.
-
Page 8: Basic Connection
Basic connection Ensure all the cables are disconnected from the main unit before connecting to AC power source by AC power adaptor. Read through the instructions before connecting other equipment. Connecting to AC power source... - Page 9 Connecting to monitor IMPORTANT: The slave unit will only work with the main unit by using the car adaptor. It will NOT work when you use the AC adaptor. 1. Monitor Unit FRONT VIEW 1. STANDBY button - Press it to set the unit in standby mode, press it again to enter work mode.
- Page 10 REMOTE CONTROL FOR MONITOR UNIT 1. STANDBY button - Press it to set the monitor in standby mode; press it again to set the unit in working mode. 2. MENU button - Press it to enter OSD menu control page. 3.
- Page 11 NOTE: The remote control is also effective to the monitor during playing. It is recommended to connect a multi-system TV. Disconnect the AC adaptor before commencing connection. Do not block ventilation holes of equipment and arrange them so that air can circulate freely. Read through the instructions before connecting other equipment.
-
Page 12: Connecting To Audio Equipment
Connecting to audio equipment Connect Headphones 1. Connect the Headphones. - Adjust the volume to minimize the volume. - Connect the headphones to phone jack. 2. Adjust the Volume to the level that you want. -
Page 13: Remote Control Preparation
Remote control preparation Battery installation Insert the batteries while observing the correct (+) and (-) polarities as illustrated at right. Service life of batteries The batteries normally last for about one year although this depends on how often, and for what operations, the remote control is used. -
Page 14: Basic Play
Before enjoying DVD/Video CD/CD The on-screen menu language of your player has been factory pre-set to English. If you want to change the menu language to other language, please refer to "Initial settings / General setup / OSD LANGUAGE". In the explanation below it is assumed that English has been selected as menu language. -
Page 15: Stopping Play
Stopping play Press the STOP button to stop playing a disc. NOTE: When player is stopped, the player records the point where STOP was pressed (RESUME function). Press the PLAY/PAUSE button again, playback will resume from this point . When the disc door is opened or the STOP button is pressed again, the RESUME function will be cleared. -
Page 16: Slow-Motion Play [Dvd/Vcd]
Slow-motion play (DVD/VCD) Press the SLOW button on the remote control during playback. 1) Plays the disc at a 1/2 of normal speed at first. Each time the button is pressed, the play Speed becomes 1/2,1/4,1/8,1/16. 2) Press the PLAY/PAUSE button to resume to normal play. -
Page 17: Mp4 Playback
MP4 playback 1. Insert the disc containing the files in Mp4 format to be played and after a few seconds, the screen of the monitor will show all the folders on the disc: 2. Select the folder you want to play by the navigation buttons and press the ENTER button to confirm. -
Page 18: Jpeg Cd
JPEG CD For JPEG picture CD, select the folder Flipping pictures you want to play by the navigation buttons Press UP navigation button to flip the and press ENTER button to confirm. picture vertically. The files in this folder are displayed and Press DOWN navigation button to flip select your pictures by using the up/down the picture horizontally. -
Page 19: Enjoying Video Cd With Playback Control
JPEG CD Slide show effects Press PROGRAM button to select one of the effects when changing from one picture to another : Wipe Top Wipe Bottom Wipe Left Wipe Right Diagonal Wipe Left Top Diagonal Wipe Right Top Diagonal Wipe Left Bottom Diagonal Wipe Right Bottom Extend From Centre H Extend From Centre V... -
Page 20: Usb Playback
USB Playback 1. Insert USB containing the files in VCD/SVCD/DVD/MP3/WMA/MP4/JPEG /CD format to be played. 2.Press USB/CARD/DVD button to switch the unit in USB reader mode. Then the screen will display as following: 3. After several seconds, all the folders in the USB will display on monitor screen: 4. -
Page 21: Card Playback
CARD Playback 1. Insert the CARD (SD/MMC) containing the files in VCD/SVCD/DVD/MP3/WMA/ MP4/JPEG /CD format to be played. 2. Press USB/CARD/DVD button to switch the unit in CARD reader mode. 3. After several seconds, all the folders in the CARD will display on monitor screen: 4. -
Page 22: On Screen Display Information
On screen display Information P ress OSD button to display playing information. Program play The player plays the files in an desired order. 1. Press PROGRAM button and the screen will display the program menu. 2. Press navigation buttons to choose memory index and then press ENTER button to start input. Enter desire titles/chapters numbers by using the numeric buttons. -
Page 23: Repeat Play
Repeat play Press REPEAT button during play, it will repeat play one chapter or one title (for DVD disc), or repeat play track (for VCD/CD). A-B repeat play Repeating sections between two specific points (A-B repeat) 1. Press A-B REPEAT button during play at the point where repeat play is to be started (A). 2. -
Page 24: Changing Subtitle Language(Dvd Only)
Changing subtitle language (DVD only) It is possible to change the subtitle language to a different language from the one selected at the initial settings. (This operation works only with discs on which multiple subtitle languages are recorded ) 1. Press SUBTITLE button during play, the screen will display the current language. -
Page 25: Viewing From Different Angle(Dvd Only)
Viewing from different angle (DVD only) Some DVDs may contain scenes which have been shot simultaneously from a number of different angles. For these discs, the same scene can be viewed from each of these different angles using the ANGLE button. Press ANGLE during play, number of angle being played will be displayed in the screen, press the button to change to different angles. -
Page 26: 1. General Set Up
1. GENERAL SET UP 1.1 TV TYPE - It is for selecting the TV system according to the colour system of the TV. Options: PAL NTSC 1.2 TV DISPLAY - It is for selecting TV output mode. Options: Normal /PS: Pan & scan mode Normal/ LB: Letter box mode Wide : 16:9 wide screen mode 1.3 ANGLE MARK - It is used to select whether or not the multi- angle icon is display on screen... -
Page 27: 3. Password Set Up
2.2 EQUALIZER SETUP - It is used to compensate for frequency distortion to improve its frequency response in audio systems (not applicable). Options: SOUND MODE - It is for selecting the Equalizer Type, in this unit, you can choose Mono, Rock, Pop, Live, Dance, Techno, Classic or Soft. BASS BOOST - It is used to turn the Bass Boost ON or OFF. -
Page 28: Definition Of Terms
Definition of terms This refers to a high-density optical disc on which high-quality pictures and sound have been obtained by means of digital signals. Incorporation a new video compression technology (MPEG II) and high-density recording technology, DVD enables aesthetically pleasing full-motion video to be recorded over long periods of time (for instance, a whole movie can be recorded). -
Page 29: Specifications
Specifications Power requirements: AC 100 -240V~ 50/60Hz Power consumption (main unit): 9.6W Signal system: NTSC/PAL Resolution:1440 (H) X 234 (V) Dots Distance: 0.107 (H) X 0.372 (V) mm Visible Range: 154.08 (H) X 87.5 (V) mm Discs played: (1) DVD-VIDEO disc 12 cm single-sided,single-layer 12 cm single-sided,dual-layer 12 cm double-sided,single-layer... -
Page 30: Troubleshooting
Troubleshooting Before requesting service for this player, check the chart below for a possible cause of the problem you are experiencing. Some simple checks or an adjustment on your part may eliminate the problem and restore proper operation. Symptom(Common) Remedy No power. -
Page 31: Disc Handling And Maintenance
Troubleshooting (Continued) The password for rating level Please contact your local sales dealer. has been forgotten. Symptom [Video CD] Remedy No menu play. This function works only for Video CDs with playback control. DISC handling and maintenance Handling precautions Hold the disc by the edges so the surface will not be soiled with fingerprints. Fingerprints, dirt and scratches can cause skipping and distortion.
Need help?
Do you have a question about the MES-216 and is the answer not in the manual?
Questions and answers