
Related Manuals for Panasonic HM-TA1


Summary of Contents for Panasonic HM-TA1
-
Page 1: Operating Instructions
Operating Instructions High Definition Mobile Camera HM-TA1 Model No. Before use, please read these instructions completely. VQT3A10 Model number suffix “EB” denotes UK model. 1AG6P1P6087--(S) -
Page 2: Information For Your Safety
Information for Your Safety WARNING: TO REDUCE THE RISK OF FIRE OR PRODUCT DAMAGE, ≥ DO NOT EXPOSE THIS APPARATUS TO RAIN, MOISTURE, DRIPPING OR SPLASHING AND THAT NO OBJECTS FILLED WITH LIQUIDS, SUCH AS VASES, SHALL BE PLACED ON THE APPARATUS. - Page 3 -If you see this symbol- ∫ Information for Users on Collection and Disposal of Old Equipment and used Batteries These symbols on the products, packaging, and/or accompanying documents mean that used electrical and electronic products and batteries should not be mixed with general household waste.
-
Page 4: Cards That You Can Use With This Unit
∫ Indemnity about recorded content Panasonic does not accept any responsibility for damages directly or indirectly due to any type of problems that result in loss of recording or edited content, and does not guarantee any content if recording or editing does not work properly. -
Page 5: Table Of Contents
Contents Information for Your Safety..2 Deleting motion pictures/ Accessories.........7 still pictures ......30 Optional accessories....7 Using the menu screen ... 32 Menu list........33 Preparation Watching Motion/Still pictures Parts identification and on your TV ....... 36 handling ........8 With a PC Battery supply ...... - Page 6 ≥ For customers within the UK: 0844 844 3869 ≥ For customers within the Republic of Ireland: 01 289 8333 Direct Sales at Panasonic UK ≥ For customers: 0844 844 3856 ≥ Order accessory and consumable items for your product with ease and confidence by phoning our Customer Care Centre Monday–Thursday...
-
Page 7: Accessories
Accessories Check the accessories before using this unit. Keep the accessories out of reach of children to prevent swallowing. Product numbers correct as of July 2010. These may be subject to change. Battery pack AV cable VW-VBJ10 VFA0530 Hand strap USB extension cord VFC4627 K2KYYYY00064... -
Page 8: Preparation
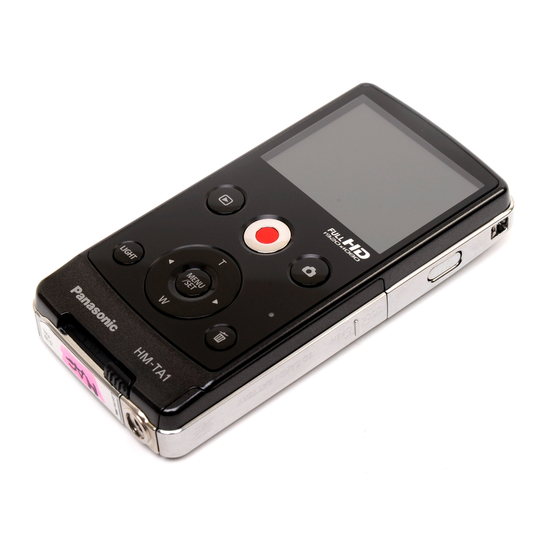
Preparation Parts identification and handling 6 7 8 9 10 1112 Motion picture button (l 21) Playback button [ ] (l 25) Light button [LIGHT] (l 23) Cursor button [T, W, 2, 1] USB terminal slide lever (l 11) MENU/SET button [MENU/SET] (l 32) Delete button [ ] (l 30) Status indicator (l 11, 16, 36) - Page 9 13 Audio-video output terminal [A/V] (l 36) ≥ Use the AV cable (only the supplied cable). 14 Speaker 15 USB terminal [ ] (l 11, 44, 46, 52) 16 USB terminal cover (l 11) 17 18 19 21 22 23 24 17 LED light (l 23) 18 Lens 19 Internal microphones...
-
Page 10: Battery Supply
To ensure that safe products are used we would recommend that a genuine Panasonic battery pack is used. Inserting/removing the battery Open the card/battery door and insert the battery in the direction shown in the figure. -
Page 11: Charging The Battery
CAUTION Danger of explosion if battery is incorrectly replaced. Replace only with the same or equivalent type recommended by the manufacturer. Dispose of used batteries according to the manufacturer’s instructions. Charging the battery When this unit is purchased, the battery is not charged. Charge the battery fully before using this unit. - Page 12 ≥ During the charging, the unit can not be turned on with the power button. In order to turn on the unit, disconnect it from the PC. ≥ We recommend using Panasonic batteries (l 7, 13). ≥ If you use other batteries, we cannot guarantee the quality of this product.
-
Page 13: Charging And Recording Time
Charging and recording time ∫ Charging/Recording time ≥ Temperature: 25 oC/humidity: 60%RH Battery model Maximum Actual number Charging Recording continuously recordable [Voltage/Capacity time mode recordable time (minimum)] time* Supplied battery/ 1 h 20 min 45 min VW-VBJ10 1 h 35 min 50 min 4 h 10 min (optional) -
Page 14: Approximate Operating Time And Number Of Recordable Still Pictures
Recording conditions by CIPA standard ≥ CIPA is an abbreviation of Camera & Imaging Products Association. ≥ Using the supplied battery ≥ Using a Panasonic SD Memory Card (2 GB) Battery capacity indication ≥ The display changes as the battery capacity reduces. -
Page 15: Preparing The Card
* The SD Speed Class Rating is the speed standard for successive writes. ≥ Please confirm the latest information about SD Memory Cards/SDHC Memory Cards/SDXC Memory Cards that can be used for motion picture recording on the following website. http://panasonic.jp/support/global/cs/e_cam (This website is in English only.) VQT3A10... -
Page 16: Inserting/Removing An Sd Card
Inserting/removing an SD card When using an SD card not from Panasonic, or one previously used on other equipment, for the first time on this unit, format the SD card. (l 35) When the SD card is formatted, all of the recorded data is deleted. - Page 17 ≥ When the status indicator is lit, do not: j Remove the SD card j Turn the unit off j Insert and remove the USB terminal j Expose the unit to vibrations or shock Performing the above while the lamp is on may result in damage to data/SD card or this unit.
-
Page 18: Recording/Playback
Recording/Playback Turning the unit on/off Press the power button to turn on the unit. ≥ The LCD monitor lights. To turn off the unit Continue pressing the power button until the LCD monitor goes off. ∫ About the screen display Please refer to page 53 for details of the icons displayed on the screen. -
Page 19: Setting Date And Time
Setting date and time When the unit is turned on for the first time, a message asking you to set the date and time will appear. Press the MENU/SET button and perform steps 2 to 3 below to set the date and time. - Page 20 ≥ The date and time will be set to January 1, 2010 00:00 when recording is performed without the date and time set. WARNING THE LITHIUM BATTERY IN THIS EQUIPMENT MUST ONLY BE REPLACED BY QUALIFIED PERSONNEL. WHEN NECESSARY, CONTACT YOUR LOCAL PANASONIC SUPPLIER. VQT3A10...
-
Page 21: Recording
Recording/Playback Recording ≥ This unit will perform automatic recording. Auto focusing, auto white balancing, and electronic stabilizer* will function during the recording. * The electronic stabilizer will not function when recording still pictures or using digital zoom. Recording motion pictures Press the motion picture button to start recording. -
Page 22: Recording Still Pictures
About the compatibility of the recorded motion pictures ≥ They are not compatible with devices other than those that support MP4. Images cannot be played with equipment that does not support MP4. Confirm that your equipment supports MP4 by referring to the operating instructions. -
Page 23: Digital Zoom In/Out Function
Digital zoom in/out function The maximum digital zoom ratio is 4k. Close-up recording (zoom in) W: Wide-angle recording (zoom out) ≥ Independent of zoom magnification, this unit can focus on a subject approx. 30 cm away from the lens. ≥ The larger the zoom magnification, the more the image quality is degraded. -
Page 24: Effect Function (Applying Special Effects)
Effect function (applying special effects) You can record with effects such as changing the colour tone or making the skin tone smooth. Press 1 or 2 on the cursor button while the recording is paused. ≥ The effect icon appears. Select the effect icon by pressing 1 or 2. -
Page 25: Playback
Recording/Playback Playback Motion picture/Still picture playback Press the playback button. ≥ The last recorded scene or still picture 00m00s 00m00s 00m00s will be played back. ≥ When 1 is pressed during playback of a scene, the unit goes to the next scene or still picture. -
Page 26: Playback Operation
∫ Playback operation Playback Playback Icon Operating steps operation data Thumbnail Press T during pause or stop. Scenes/ display (l 27) still pictures Press MENU/SET button or Pause playback button during playback. Press T or W during playback. Volume Increases the volume adjustment W: Decreases the volume Continue pressing 1 (fast... -
Page 27: Thumbnail Display
∫ To select a scene or still picture to playback (When playing back a scene) Press T during pause or stop. (When playing back still pictures) Press T. ≥ The thumbnails are displayed. A Thumbnail display Select the scene or still picture to playback using the cursor button, and press the MENU/SET button or playback button. -
Page 28: Creating Still Picture From Motion Picture
Motion picture compatibility ≥ This unit is based on the MPEG-4 AVC file format. ≥ This unit may degrade or not play back motion pictures recorded or created on other products, and other products may degrade or not play back motion pictures recorded on this unit, even if the products support MP4. -
Page 29: Playing Back The Slide Show
Playing back the slide show Recorded motion pictures and still pictures can be played back as a slide show. Press and hold the playback button for approx. 2 seconds while playing back/stopping/pausing a scene or playing back still pictures. appears. ≥... -
Page 30: Deleting Motion Pictures/Still Pictures
Deleting motion pictures/still pictures Deleted scenes/still pictures cannot be restored, so perform appropriate confirmation of the contents before proceeding with deletion. Press the button, then select [DELETE] while playing back the motion picture/still picture. ≥ The scene/still picture on playback will be deleted. ∫... - Page 31 (When [DELETE SELECTED] is selected in step 2) Select the scene/still picture to be deleted, then press the MENU/SET button. ≥ The scene/still picture is selected and the indication appears on the thumbnail. Select the scene/still picture again to cancel the operation.
-
Page 32: Using The Menu Screen
Recording/Playback Using the menu screen Press the MENU/SET button. Select the top menu A using the cursor button, and press 1 or the MENU/SET button. ≥ It will return to the recording screen when 2 is pressed. (EB only) (EP/GC only) Select the submenu by pressing T or W and press 1 or the MENU/SET button. -
Page 33: Menu List
Menu list [REC MODE] Switch the picture quality of the motion pictures to be recorded. : [RECORD SETUP] # [REC MODE] # desired setting A Image quality prioritised B Recording time prioritised C Use this to playback and edit using a Mac. ≥... -
Page 34: Web Camera
[TV ASPECT] Output settings can be changed to match the aspect ratio of the TV screen when playing back connected to a TV. : [SETUP] # [TV ASPECT] # desired setting [16:9]: When the aspect ratio of the TV screen is 16:9 [4:3]: When the aspect ratio of the TV screen is 4:3 [TV SYSTEM]... -
Page 35: Clock Set
[CLOCK SET] Please refer to page 19. [FORMAT] Please be aware that if a medium is formatted, then all the data recorded on the medium will be erased and cannot be restored. Back up important data on a PC etc. (l 38) : [FORMAT] ≥... -
Page 36: Watching Motion/Still Pictures On Your Tv
Recording/Playback Watching Motion/Still pictures on your TV ≥ Use the supplied AV cable. Connect this unit to a TV. ≥ The LCD monitor on this unit will turn off and the status indicator will flash. ≥ When this unit is connected to a TV during motion picture recording, the recording will stop. - Page 37 ∫ To watch images on a regular TV (4:3) or when both sides of the images do not appear on the screen Change the menu setting to display the images correctly. (Check the TV setting.) : [SETUP] # [TV ASPECT] # [4:3] Example of images with a 16:9 aspect ratio on a regular TV (4:3) ≥...
-
Page 38: With A Pc
With a PC What you can do with a PC ≥ The unit comes with built-in HD Writer PE 1.0 video editing software. ≥ See page 44 for how to install HD Writer PE 1.0 on your PC. HD Writer PE 1.0 You can copy the motion/still picture data to the HDD of PCs or write to SD cards using the HD Writer PE 1.0 software. -
Page 39: Important Notice
Important Notice ≥ When using an SDXC Memory Card, check the following support site. http://panasonic.net/avc/sdcard/information/SDXC.html ≥ Motion pictures that have been recorded on another device cannot be written to HD Writer PE 1.0. (EB/EP only) ≥ We cannot guarantee operation if you use software other than HD Writer PE 1.0 to read motion picture. -
Page 40: Operating Environment
With a PC Operating environment ≥ Even if the system requirements mentioned in these operating instructions are fulfilled, some PCs cannot be used. ≥ Operation is not guaranteed in the following cases. j When 2 or more USB devices are connected to a PC, or when devices are connected through USB hubs or by using extension cables other than the supplied USB extension cord. - Page 41 Intel Pentium 4 2.8 GHz or higher (including compatible CPU) ≥ Intel Core 2 Duo 2.16 GHz or higher or AMD Athlon 64 X2 Dual-Core 5200+ or higher is recommended when a playback function is used. ≥ Intel Core 2 Quad 2.6 GHz or higher is recommended when using the editing function.
- Page 42 ≥ Input is not supported in languages other than English, German, French and Simplified Chinese. ≥ Operation is not guaranteed on Microsoft Windows Vista Enterprise, Windows XP Media Center Edition, Tablet PC Edition and Windows 7 Enterprise. ≥ This software is not compatible with a multi-boot environment. ≥...
-
Page 43: Mass Storage
∫ Operating environment for the card reader function (mass storage) IBM PC/AT compatible PC Microsoft Windows XP (32 bit) Home Edition Service Pack 2/Service Pack 3 Microsoft Windows XP (32 bit) Professional Service Pack 2/Service Pack 3 Microsoft Windows Vista (32 bit) Home Basic Service Pack 1/Service Pack 2 Microsoft Windows Vista (32 bit) Home Premium Service Pack 1/Service Pack 2... -
Page 44: Installation
≥ When using Windows 7 or if the following screen is not displayed automatically, select [Start] # [Computer] (or double-click on [Computer] on the desktop), and then double-click [Panasonic HM-TA1]* # [setup(.exe)]. * Depending on the PC you are using, [CAM_APP] may be displayed. - Page 45 Select where the application is to be installed, then click [Next]. Select [Yes] or [No] to create shortcut. When installation is complete, some notes will appear. Check the contents, then close the window. Select [Yes, I want to restart my computer now.], then click [Finish].
-
Page 46: Connecting To A Pc
PC. ≥ Depending on your PC’s settings, this icon may not be displayed. Select [USB Mass Storage Device] and click [Stop]. Verify [MATSHITA HM-TA1/SD USB Device] or [MATSHITA HM- TA1/APP USB Device] is selected and click [OK]. VQT3A10... -
Page 47: About The Pc Display
About the PC display When the unit is connected to a PC, it is recognised as an external drive. ≥ Removable disk (Example: ) is displayed in [Computer]. (EB/EP only) We recommend using HD Writer PE 1.0 to copy motion picture data. (GC only) We recommend using HD Writer PE 1.0 to copy or write back motion picture data. -
Page 48: Starting Hd Writer Pe 1.0
(On the PC) Select [Start] # [All Programs] # [Panasonic] # [HD Writer PE 1.0] # [HD Writer PE]. ≥ For details on how to use the software applications, read the PDF operating instructions of the software. -
Page 49: If Using Mac
With a PC If using Mac ≥ HD Writer PE 1.0 is not available for Mac. ≥ iMovie’09 supported. For details about iMovie’09, please contact Apple Inc. ∫ Operating environment Mac OS X 10.5.8 Mac OS X 10.6 Intel Core Duo Intel Core 2 Duo 1 GB or more Interface... -
Page 50: To Use As A Camera For Skype
With a PC To use as a camera for Skype It is possible to perform video conferencing using Skype when this unit is connected to a PC that is connected to the Internet. Skype is a software that allows you to perform video conferencing using an Internet connection. - Page 51 IBM PC/AT compatible PC Intel Pentium 4 1.7 GHz or higher Intel Core Duo Intel Core 2 Windows 7: 1 GB or more (32 bit)/ 512 MB or 2 GB or more (64 bit) more Windows Vista Home Basic: 512 MB or more Windows Vista Home Premium/ Business/Ultimate/Enterprise: 1 GB or more...
-
Page 52: How To Connect
How to connect ≥ Turn on the unit. Select the menu. : [WEB CAMERA] # [ON] Connect USB terminal of this unit to a PC with a USB extension cord. ≥ Connect the USB extension cord by inserting it securely all the way without forcing. -
Page 53: Others
Others Indications ∫ Recording indications 01h30m 123456 T F2.8 1 /30 Recording mode (l 33) Recording motion picture ¥ Recording pause 01h30m Remaining time for motion picture recording (l 21) 00m00s Elapsed recording time (l 21) ≥ “h” is an abbreviation for hour, “m” for minute and “s” for second. Countdown until recording stops (l 18, 21) LED light (l 23) High temperature warning (l 18) -
Page 54: Playback Indications
∫ Playback indications 00m00s 100-0001 15. 11. 2010 Motion picture icon (l 27) Still picture icon (l 27) (White) Create still pictures from motion picture (l 28) (Red) Creating still pictures from motion picture (l 28) Display during playback (l 26) Playing back the slide show (l 29) Protected motion pictures/still pictures (l 31) -
Page 55: Messages/Troubleshooting
Others Messages/Troubleshooting ∫ Messages Major confirmation/error messages to be indicated on the screen in text. INCOMPATIBLE CARD. PLEASE CHECK CARD. This card is not compatible or it cannot be recognised by the unit. If this message appears even though motion pictures and still pictures are recorded on an SD card, the card may be unstable. - Page 56 Problem Check points This unit cannot be ≥ Remove the battery, wait about operated though it is 1 minute and then insert the battery. Then about 1 minute later, turn on the turned on. unit again. (Conducting the above This unit does not operation while the SD card is being operate normally.
- Page 57 Problem Check points Scenes cannot be ≥ Any scenes/still pictures where the deleted. thumbnails are displayed as cannot be deleted. If the scenes/still pictures are unnecessary, format the SD card to erase the data. (l 35) Please be aware that if an SD card is formatted then all the data recorded on the SD card is erased and cannot be recovered.
- Page 58 Problem Check points “ERROR ≥ The unit has automatically detected OCCURRED. an error. Restart the unit by turning off and on. PLEASE TURN UNIT OFF, THEN TURN ON ≥ After re-inserting the battery, turn on AGAIN.” is the unit again. displayed.
-
Page 59: Cautions For Use
Others Cautions for use About this unit The unit and the SD card become warm during use. This is not a malfunction. Do not drop or bump the unit. Do not subject to strong pressure. ≥ A strong impact can break the lens, LCD monitor or the unit’s casing, causing it to malfunction. - Page 60 ≥ Do not leave rubber or plastic products in contact with the unit for a long time. When you use the unit in a sandy or dusty place such as a beach, do not let sand or fine dust get into the body and terminals of the unit.
-
Page 61: Lcd Monitor
≥ Use of benzine, paint thinner, alcohol, or dishwashing liquid may alter the unit body or peel the surface finish. Do not use these solvents. ≥ When using a chemical dust cloth, follow the instructions that came with the cloth. LCD monitor ≥... - Page 62 Be sure to detach the battery after use. ≥ Extremely high temperatures or low temperatures will shorten the life of the battery. Prepare spare batteries when going out for recording. ≥ Be aware that the operating time of the battery becomes shorter in low temperature conditions such as at a ski resort.
-
Page 63: About Condensation
When disposing of or giving away the SD card, note that: Formatting and deletion of this unit or computer only changes the file management information and does not completely delete the data in the SD card. It is recommended to physically destroy the SD card or use the commercially available computer data deletion software to completely erase the data in the SD card before transferring to another party or disposing. -
Page 64: About Copyright
Others About copyright ∫ Carefully observe copyright laws Recording of pre-recorded tapes or discs or other published or broadcast material for purposes other than your own private use may infringe copyright laws. Even for the purpose of private use, recording of certain material may be restricted. ∫... -
Page 65: Recording Modes/Approximate Recordable Time
Others Recording modes/approximate recordable time ≥ SD cards are only mentioned with their main memory size. The stated times are the approximate recordable times for continuous recording. Recording mode Picture size 1920k1080 1280k720 640k480 960k540 4 GB 40 min 50 min 2 h 20 min 20 min 8 GB... -
Page 66: Approximate Number Of Recordable Pictures
Others Approximate number of recordable pictures ≥ SD cards are only mentioned with their main memory size. The stated number is the approximate number of recordable pictures. Aspect ratio Picture size 3264k2448 1600k1200 640k480 512 MB 3770 1 GB 1470 7550 2 GB 2920... -
Page 67: Specifications
Others Specifications High Definition Mobile Camera Information for your safety Power source: DC 5.0 V (When using USB)/DC 4.2 V (When using battery) Power consumption: Recording; 2.5 W/Charging; 2.5 W Signal system: 1080/30p, 720/30p, 540/30p, 480/30p Recording format: MPEG-4 AVC file format compliant Image sensor: 1/4 type (1/4z) MOS image sensor Total;... - Page 68 Microphone: 1 ch monaural microphone Speaker: 1 round speaker, dynamic type White balance adjustment: Auto tracking white balance system Standard illumination: 1,400 lx Minimum required illumination: Approx. 12 lx AV terminal video output level: Video OUT; 1.0 Vp-p, 75 h, NTSC/PAL system AV terminal audio output level (Line): Output level;...
-
Page 69: Motion Pictures
Mass in operation: Approx. 115 [with battery (supplied) and an SD card (optional)] Mass: Approx. 93 [without battery (supplied) and an SD card (optional)] Operating temperature: 0 oC to 35 oC Operating humidity: 10%RH to 80%RH Battery operation time: See page 13 ∫... - Page 70 Picture size: 1920k1080/30p 1280k720/30p 640k480/30p 960k540/30p Audio compression: AAC (1 ch) ∫ Still pictures Recording media: SD Memory Card (FAT12 and FAT16 system compliant) SDHC Memory Card (FAT32 system compliant) SDXC Memory Card (exFAT system compliant) Refer to page 15 for details on SD cards usable in this unit. Compression: JPEG (Design rule for Camera File system, based on Exif 2.2 standard) Picture size:...
-
Page 71: Index
Index ∫ A ∫ N A/V terminal ....36 Number of recordable Alert sound ....34 pictures . - Page 72 Pursuant to at the directive 2004/108/EC, article 9(2) Panasonic Testing Centre Panasonic Marketing Europe GmbH Winsbergring 15, 22525 Hamburg, Germany Panasonic Corporation VQT3A10 F0710MA0 Web site: http://panasonic.net 1AG6P1P6087--(S) © Panasonic Corporation 2010...
Need help?
Do you have a question about the HM-TA1 and is the answer not in the manual?
Questions and answers