Table of Contents
Advertisement
Dear customer
Thank you for purchasing this product.
For optimum performance and safety, please read
these instructions thoroughly before connecting,
operating or adjusting this product.
Please keep this manual for future reference.
SUPPLIED ACCESSORIES
SUPPLIED ACCESSORIES
Please check and identify the supplied accessories.
Use numbers indicated in parentheses when asking
for replacement parts. (As of January 2009)
1 x AC mains lead
(K2CZ3YY00005)
1 x Remote control
(N2QAYB000393)
1 x FM antenna
(REXV0088A-1)
1 x DAB "T" antenna
(N1EADY000001)
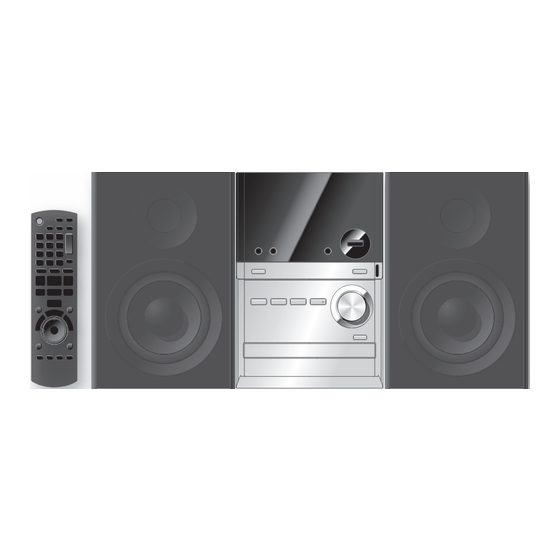
Operations in these instructions are described using
remote control, but you can do the operations with the
main unit if the controls are the same.
Your unit may not look exactly as illustrated.
Note:
"EB" on the packaging indicates the United Kingdom.
EB
Operating Instructions
CD Stereo System
SC-PM5DB
Model No.
Table of contents
Caution for AC Mains Lead .................... 3
Safety precautions ................................. 4
Placement of speakers ........................... 5
DEMO function ........................................ 5
Preparing the remote control ................ 5
Making the connections ......................... 6
Overview of controls .............................. 7
Discs ........................................................ 9
Using the FM radio ................................. 11
DAB .......................................................... 12
Using the timer ....................................... 15
Using sound effects ............................... 16
USB .......................................................... 16
Using other optional equipments ......... 17
Troubleshooting guide ........................... 18
Maintenance ............................................ 19
Specifi cations ......................................... 20
RQTX0237-1B
Advertisement
Table of Contents

Related Manuals for Panasonic SC-PM5DB


Summary of Contents for Panasonic SC-PM5DB
-
Page 1: Table Of Contents
Operating Instructions CD Stereo System SC-PM5DB Model No. Dear customer Thank you for purchasing this product. For optimum performance and safety, please read these instructions thoroughly before connecting, operating or adjusting this product. Please keep this manual for future reference. - Page 2 AC Mains, disconnect the power supply cord plug • All enquiries transactions and distribution facilities from AC receptacle. are provided directly by Panasonic UK Ltd. • It couldn’t be simpler! • Also available through our Internet is direct This product may receive radio interference shopping for a wide range of finished products,...
-
Page 3: Caution For Ac Mains Lead
Caution for AC Mains Lead For your safety, please read the following text WARNING: DO NOT CONNECT EITHER WIRE TO carefully. THE EARTH TERMINAL WHICH IS MARKED WITH THE LETTER E, BY THE EARTH SYMBOL n OR This appliance is supplied with a moulded three pin COLOURED GREEN OR GREEN/YELLOW. -
Page 4: Safety Precautions
Information for Users on Collection and Safety precautions Disposal of Old Equipment and used Batteries Placement Placement Set the unit up on an even surface away from direct sunlight, high temperatures, high humidity, These symbols on the products, and excessive vibration. These conditions can packaging, and/or accompanying damage the cabinet and other components, thereby documents mean that used electrical... -
Page 5: Placement Of Speakers
Placement of speakers Preparing the remote control Use alkaline or manganese batteries. Insert so the poles (+ and –) match those in the remote control. Speakers are designed identically so that no left or right channel orientation is necessary. Use only the supplied speakers. The combination of the main unit and speakers provide the best sound. -
Page 6: Making The Connections
Making the connections Connect the AC mains lead only after all other connections have been made. AC mains lead connections AC mains lead connections Speaker connections Speaker connections Black (·) READ THE CAUTION FOR AC MAINS LEAD ON PAGE 3 BEFORE CONNECTION. Insertion of connector Even when the connector is perfectly inserted, depending Red (ª) -
Page 7: Overview Of Controls
Overview of controls Main unit Main unit Refer to the numbers in parentheses for page reference. Buttons labelled such as 1 function in exactly the same way as the controls on the remote control. ( ➡ page 8) Top of unit Music port jack (17) Headphone jack ( ) Avoid listening for... - Page 8 Overview of controls (continued) Remote control Remote control Buttons labelled such as 1 function in exactly the same way as the controls on the main unit. ( ➡ page 7) Clock or timer setting (15) Play timer setting (15) Sleep timer setting (15) Dimmer function Auto off function 4 Volume control (9)
-
Page 9: Discs
Discs Checking the track information Checking the track information You can view the information of the current track Basic play Basic play from the display panel. Press [DISPLAY] repeatedly during play or Press [y] to turn the unit on. pause. Press [0, OPEN/CLOSE] to open the disc tray and then load the disc. - Page 10 NOTE about using a DualDisc Discs (continued) The digital audio content side of a DualDisc does not meet the technical specifi cations of the Program play Program play Compact Disc Digital Audio (CD-DA) format so This function allows you to program up to 24 tracks. playback may not be possible.
-
Page 11: Using The Fm Radio
Using the FM radio Memory preset Memory preset 30 FM stations can be preset. Manual tuning Manual tuning Preparation Press [DAB/FM] to select “FM”. Press [DAB/FM] to select “FM”. Press [TUNE MODE] to select “MANUAL”. Automatic presetting Automatic presetting Press [4/1] or [¡/¢] to select the Press [PLAY MODE] repeatedly to select frequency of the required station. -
Page 12: Dab
DAB reception method on this unit DAB reception method on this unit DAB stands for digital audio broadcasting. It is a new Depending on the region there is a difference form of radio that is broadcast digitally. Unlike regular between broadcast frequency and stations broadcast analogue broadcasting, digital radio deteriorates along the same frequency. - Page 13 Listening to the secondary Listening to the secondary DAB operation DAB operation service service Press [DAB/FM] to enter DAB mode. Press [DAB SECONDARY] to select the The unit comes on. secondary service. “ ” is displayed if there is a secondary service broadcast.
- Page 14 DAB (continued) Changing the Auto scan Changing the Auto scan frequency range frequency range Turning automatic clock Turning automatic clock Only the frequencies currently used in the UK as adjustment function on adjustment function on of January 2009 on BAND III are Auto scanned (“United Kingdom”, factory setting).
-
Page 15: Using The Timer
Press [CLOCK/TIMER] repeatedly to Using the timer select the play timer. ˚ PLAY CLOCK Setting the clock Setting the clock Original display This is a 24-hour clock. Within 5 seconds or so Press [CLOCK/TIMER] to select “CLOCK”. Press [4/1] or [¡/¢] to set the Each time you press the button: time. -
Page 16: Using Sound Effects
Using sound effects Changing the sound Changing the sound The USB connectivity enables you to connect and quality: Preset EQ quality: Preset EQ play MP3 tracks from USB mass storage class. Typically, USB memory devices. (Bulk only transfer) Press [PRESET EQ] repeatedly to select your desired setting. -
Page 17: Using Other Optional Equipments
MUSIC P. jack. Otherwise, sound from the Panasonic equipment Panasonic equipment speaker may be distorted. Other Panasonic audio or video equipment may Plug the audio cord into the MUSIC P. start functioning when you operate the unit using the jack. -
Page 18: Troubleshooting Guide
Troubleshooting guide Before requesting service, make the following checks. If you are in doubt about some of the check points, or if the solutions indicated in the chart do not solve the problem, consult your dealer for instructions. ■ Common problems Page No response when •... -
Page 19: Maintenance
■ USB The USB drive or its • The USB drive format or its contents is/are not compatible with the contents cannot be read. system, “NO PLAY” is displayed. Unplug the USB device and insert it again. • The USB host function of this product may not work with some USB —... -
Page 20: Specifi Cations
2 (FL, FR) FL = Front left channel FR = Front right channel Panasonic Corporation Web Site: http://panasonic.net Pursuant to at the directive 2004/108/EC, article 9(2) Panasonic Testing Centre RQTX0237-1B Panasonic Marketing Europe GmbH Winsbergring 15, 22525 Hamburg, Germany L0109CH1039...
Need help?
Do you have a question about the SC-PM5DB and is the answer not in the manual?
Questions and answers