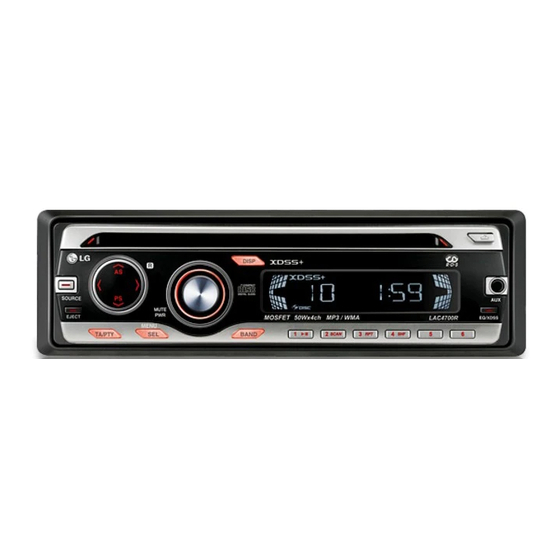
LG LAC4710R Owner's Manual
Car cd/mp3/wma receiver
Hide thumbs
Also See for LAC4710R:
- Service manual (33 pages) ,
- Manual (16 pages) ,
- Owner's manual (16 pages)
Table of Contents
Advertisement
Quick Links
Advertisement
Table of Contents

Summary of Contents for LG LAC4710R
- Page 1 LAC4700R_ENG_PL_CI_NEW2 LAC4700R/ 4705R/ 4710R/ 4715R ENGLISH CAR CD/MP3/WMA Receiver Read the manual carefully before using the unit Odbiornik samochodowy CD/MP3/WMA POLISH Przed przystąpieniem do obsługi urządzenia, przeczytaj dokładnie niniejszą instrukcję obsługi. P/NO : MFL37340736...
-
Page 2: Safety Note
Safety note CAUTION RISK OF ELECTRIC SHOCK DO NOT OPEN CAUTION : TO REDUCE THE RISK OF ELECTRIC SHOCK DO NOT SPLIT COVER(OR BACK) NO USER SERVICEABLE PARTS INSIDE. REFER SERVICING TO QUALIFIED SERVICE PERSONNEL. The lightning flash with the arrowhead symbol, within an equilateral triangle is intended to alert the user about the presence of uninsulated dangerous voltage within the product’s enclosure that may be of sufficient magnitude to constitute a risk of electric shock. - Page 3 • A defective or soiled disc inserted into unit can cause sound to drop out during playback. • Handle the disc by holding its inner and outer edges. • Do not touch the surface of the unlabeled side of the disc. Do not stick paper or tape etc.
-
Page 4: Table Of Contents
Table of contents Safety note ............2-3 Table of contents . -
Page 5: Control Panel
Control panel [SOURCE] • Volume Shuffle [SHF] I I /i i • Skip / Search • [MUTE] Repeat [RPT] I I /i i • Seek/ Tune • Power [PWR] Intro Scan [SCAN] U U / • Auto Store [ Display [DISP] Play/Pause B X u u / •... -
Page 6: Installation
Battery Installation 1 Pull out the battery holder with a sharp product like a ball point pen. 2 Put the battery with correctly on the battery holder. 3 Push the battery holder back into its original position. Note • Use only one CR2025 (3V) lithium battery. •... -
Page 7: Connection Diagram
Connection diagram Before connecting, make sure that the ignition switch is set to OFF, and remove the battery # terminal to avoid short circuits. To Speaker To Vehicle (Optional) (Optional) 1 . Violet : Rear Right + 2 . Violet/ Black Stripe : Rear Right – 3 . -
Page 8: Basic Operation
Speaker Connections REAR REAR FRONT FRONT Connecting to Auxiliary Equipment (Optional) FL (Front Left) RL (Rear Left) Connect the AUDIO OUTPUT jack of this unit RR (Rear Right) to the AUDIO INPUT jack of the Auxiliary FR (Front Right) Equipment. To AUDIO OUT To AUDIO IN To AUDIO IN... -
Page 9: Adjusting The Volume
Adjusting the volume Rotate MUTE/PWR (Press VOLUME on the remote control) to adjust the sound level. Note When you turn the unit off, the current volume level is automatically memorized. Whenever you turn the unit back on, it will operate at the memorized volume level. Mute 1 Press MUTE/PWR (POWER/ on the remote control) to cut the sound. - Page 10 PI (Programme Identification) SOUND / MUTE PI SOUND : If the sound of a station with different PI is heard intermittently, the receiver mutes the sound after 1 second. PI MUTE : If the sound of a station with different PI is heard intermittently, the receiver mutes the sound right now.
-
Page 11: Aux Operation
Adjusting the sound level 1 Press SEL (MENU/SEL on the remote control) repeatedly to select the mode you want to adjust from volume, bass, middle, treble, balance and fader. The indicator lights up in the following order. VOL t BAS t MID t TRB t BAL t FAD 2 Rotate the MUTE/PWR (Press VOLUME on the remote control) to adjust the sound quality. -
Page 12: Radio Operation
1 Press SOURCE to select the AUX as source. AUX IN appears in the display. 2 Turn on the connected Auxiliary Equipment and start playing the source. 3 Adjust the volume. Note • Before operating the Auxiliary Equipment using the following procedure, select the external input correctly. -
Page 13: Rds Operation
RDS operation RDS Display options In normal RDS operation the display will indicate the station name. Pressing DISP enables you to cycle through the various data types in the following sequence: CT t FREQUENCY t PTY t RT t PS •... -
Page 14: Cd/Mp3/Wma Operation
CD/MP3/WMA operation Playing an Audio CD and MP3/WMA Disc The unit can play MP3/WMA formatted recordings on CD-ROM, CD-R or CD-RW discs. Before playing MP3/WMA recordings, read the notes on MP3/WMA Recordings on page 3. If you change the source, CD play also stops (without ejecting the CD). Next time you select “CD”... -
Page 15: Specifications
Shuffle All of the tracks/files (SHF) or the current selected folder ( SHF) on the disc is played randomly. 1 Press SHF during playback. – (or SHF ) appears on the display window. Press and hold SHF for about 2 seconds during playback. –... -
Page 16: Troubleshooting
CD SECTION Frequency Response ..........20 Hz-20 kHz S/N Ratio .


Need help?
Do you have a question about the LAC4710R and is the answer not in the manual?
Questions and answers