
Related Manuals for LG DP570T


Summary of Contents for LG DP570T
-
Page 1: Portable Dvd Player
OWNER'S MANUAL Portable DVD Player Please read this manual carefully before operating your set and retain it for future reference. MODELS DP570T DP571T P/NO : MFL64940813... -
Page 2: Safety Precaution
It is rec- nearest authorized LG Electronics service point heating. The openings shall be never be blocked ommended that you use local, free reimbursment... -
Page 3: Introduction
VR mode finalized • If you try to play a DVD with a different regional LG Electronics hereby declares that this/ code from your player, the message “Check these product(s) is/are in compliance with... -
Page 4: Table Of Contents
Playable Discs Contents Safety Precaution ..................2 DVD-VIDEO (8 cm / 12 cm disc) Discs such as movies that can be purchased or rented. Introduction ....................3 Contents ....................4 DVD±R (8 cm / 12 cm disc) Playable Discs ..................4 - Video mode and fi nalized only - Supports the dual layer dsc also Main Unit ....................5 - DVD±R discs that contain Movie, Music or Photo fi... -
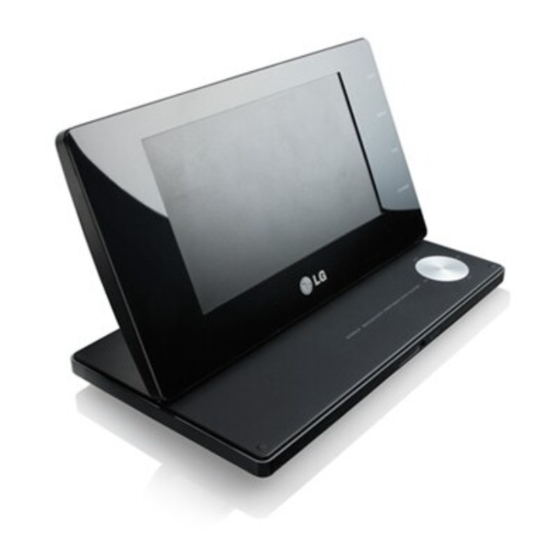
Page 5: Main Unit
c Playback control buttons Main Unit • N / X (Play/Pause): Presses to start playback and pause playback temporarily, press again to exit pause mode. • x (Stop): Presses to stop playback. • . (Skip): Presses to search backward* or return to the beginning of current chapters/ tracks/ fi... -
Page 6: Remote Control
Remote Control SCAN (m/M): Searches backward or forward. : Displays the teletext pages superim- posed on the TV picture. PROG.: Enters the program edit mode. SETUP: Accesses or exits the setup menu. RANDOM: Plays tracks in random order. MENU: Accesses the DVD menu. VIRTUAL SURROUND: Presses repeatedly to CH (+/-): Scans up or down through memorized apply the various sound effects. -
Page 7: Power Connections
Connecting the Automotive adapter Power connections This unit and its automotive adapter are designed for use in vehicles that have Connecting the AC Adapter 8.5 - 15 volt, negative ground electrical systems. This is standard for most Connect the supplied AC Adapter from the unit to a power socket. vehicles. -
Page 8: Attaching The Battery Pack
• Do not leave the LCD panel in the face-up position, or sudden shocks may • Operating time on the battery: damage it. - approximately 2 hours 30 minutes (DP570T only) - approximately 4 hours (DP571T only) • The maximum playing time:... -
Page 9: Hooking Up The Unit
Hooking up the unit Audio and Video Connection Antenna Connection Connect the TV antenna to the DVB-T jack on the unit after selecting one Connect the AV OUT jack on the unit to the corresponding input jacks on your TV using the supplied AV cable as shown below. between A and B as shown below: A: Connect an indoor antenna cable using supplied RF cable hub. -
Page 10: Selecting The Operation Mode
General about digital broadcast Selecting the operation mode Picture and sound You must select one of the operating modes before operating. Digital TV is a transmission technology that replaces the traditional analogue Press MODE repeatedly to change the mode among DVB-T, DAB or Disc. technique. -
Page 11: Displaying Disc Information
Adjust the settings Displaying Disc Information REMOTE REMOTE Press DISPLAY during playback: DISPLAY Display setup menu: SETUP Select an item: Select a desired option on the first level: Adjust the Display menu settings: / ENTER Move to second level: Exit the menu: DISPLAY Select a desired option on the second level: Displaying Disc Information - more you can do... - Page 12 Adjust the display settings Adjust the others settings TV Aspect – Select which screen aspect to use based on the shape of your TV REC Bitrate – You can choose a bit rate for USB direct recording. screen. Higher bit rate gives the better sound quality but uses more space on the USB Flash Drive.
-
Page 13: Playing A Disc
Skip to the next/previous chapter/track/file Playing a Disc Press SKIP (>) to move to the next chapter/track/file. Press SKIP (.) to return to the beginning of the current chapter/track/file. REMOTE Press SKIP (.) twice briefly to step back to the previous chapter/track/file. Insert a Disc: Pause a playback Press PAUSE/STEP (X) to pause playback. -
Page 14: Playing A Disc
DivX Hearing a different audio Last Scene Memory This unit memorizes last scene from the last disc that is viewed. The last scene During playback, press AUDIO ( ) repeatedly to switch between the available remains in memory even if you remove the disc from the player or switch off the audio languages, channels or encoding methods. -
Page 15: Playing A Movie File
Playing a DivX movie file Listening to Music Disc or files REMOTE REMOTE Insert a disc: Insert a disc: Select a music title from the menu: Select a movie file from the menu: v V, MENU v V, MENU To go directly to track/file and play, enter the track/ To go directly to file and play, enter the file num- file number using the numbered buttons (0-9). -
Page 16: Viewing Photo Files
Viewing photo files Using an USB Flash Drive You can play MP3/WMA/JPEG/DivX files in the USB Flash Drive with version REMOTE 1.1/2.0. Insert a disc: REMOTE Connect an USB Flash Drive to the USB Select a photo file on the menu: To go directly to file and play, enter the file num- port on the unit: v V, MENU... -
Page 17: Usb Direct Recording
The making of unauthorized copies of copy-protected material, including USB Direct Recording computer programs, files, broadcasts and sound recording, may be an infringement of copyrights and constitute a criminal offence. Connect a USB Flash Drive to the unit before recording. This equipment should not be used for such purposes. - Page 18 TV Channel / Radio Channel – Displays the TV or Radio channel list. Use B to Adjust the time settings select the [Select] then press ENTER to display the channel list. Set the channel that broadcasts a clock signal and the clock will be set auto- You can also display the channel list pressing CH.
- Page 19 Viewing a Teletext service Adjust the others settings Teletext is a free broadcasting service by some TV stations which gives up-to- OTA (Over the Air) – Your unit is able to keep the built-in digital tuner up to the-minute information on news, weather, television programs, share prices and date with the latest software.
-
Page 20: Language Codes
Language Codes Use this list to input your desired language for the following initial settings: Disc Audio, Disc Subtitle, Disc Menu. Language Code Language Code Language Code Language Code Language Code Language Code Afar 6565 Croatian 7282 Hausa 7265 Lingala 7678 Quechua 8185... -
Page 21: Troubleshooting
2.0 A outlet securely. External Dimensions (237 x 54 x 149) mm (W x H x D) Net Weight (Approx.) DP570T : 1.1 kg The battery is discharged. Recharge the battery. (With a battery) DP571T : 1.2 kg Operating temperature 0 °C to 40 °C... -
Page 22: Enjoying In A Car With The Headrest Mounting Bracket
Enjoying in a car with the Headrest Mounting Separate the headrest. (Refer to your car’s user Bracket guide.) You can enjoy video in the back seat attaching the unit to the back of the front seat. Warnings • The driver must not operate this unit Install the cradle as shown in while the vehicle is moving. -
Page 23: Bracket Installation To Prevent Shaking Of Lcd Panel
Bracket installation to prevent shaking of LCD panel If you want to separate the Bracket In case of installation of this unit headrest of car seat, Bracket must be installed to prevent You can separate the Bracket using the release knob on the shaking of LCD panel as below. - Page 25 Manuale dell’utente Lettore DVD portatile Leggere con attenzione questo manuale prima di azionare l’unità e conservarlo per uso futuro. MODELLO DP570T DP571T P/NO : MFL64940813...
-
Page 26: Precauzioni D'uso
Tali aperture non devono mai rivenditore autorizzato LG più vicino. smaltita inserendola nel contenitore adeguato nei essere bloccate posizionando l’apparecchio su un letto, un divano, un tappeto o altre superfici simili. - Page 27 Dichiarazione di conformità dalla Macrovision. Su alcuni dischi sono regis- La società LG ELECTRONICS ITALIA S.p.A. dichiara DivX è un marchio commerciale di DivX, Inc., e trati i segnali di protezione da copia. Durante la che i prodotti ai quali si riferisce il manuale d’istruzione...
- Page 28 Sommario Dischi supportati Precauzioni d’uso ..................2 DVD-VIDEO (disco da 8 cm / 12 cm) Introduzione ....................3 Film che possono essere acquistati o noleggiati. Sommario ....................4 DVD±R (disco da 8 cm / 12 cm) Dischi supportati ..................4 - Solo in modalità video e fi nalizzati Unità...
-
Page 29: Unità Principale
c Pulsanti di controllo riproduzione Unità principale • N / X (Play/Pause): Avvia la riproduzione. Mette temporaneamente in pausa la riproduzione, premere nuovamente per uscire dalla modalità di pausa. • x (Stop): Arresta la riproduzione • . (Salta): Consente di eseguire la ricerca all’indietro* o di tornare all’inizio del capitolo/brano corrente o di passare al capitolo/brano precedente. -
Page 30: Telecomando
Telecomando SCAN (m/M): Ricerca in avanti o all’indietro. : Consente di visualizzare le pagine del teletext sovrapposte all’immagine della TV. PROG.: Accede alla modalità di modifica del SETUP: Apre o chiude il menu di configurazione. PROG. MENU: Accede al menu DVD. RANDOM: riproduce le tracce in modo casuale CH (+/-): Scansionare i canali memorizzati. -
Page 31: Connessioni Di Alimentazione
Collegare l’adattatore per auto Connessioni di alimentazione Questa unità e il rispettivo adattatore per auto sono ideati per l’impiego in Collegamento dell’adattatore veicoli con sistemi elettrici a 8.5 - 15 volt e massa negativa. Si tratta della norma per la maggior parte dei veicoli. Se l’impianto elettrico del proprio veico- Collegare l’adattatore CA dell’unità... -
Page 32: Collegamento Del Pacco Batterie
• Tempo di funzionamento a batteria: • Non lasciare il pannello LCD nella posizione rivolta verso l’altro, altrimenti gli - circa 2 ore e 30 minuti (solo DP570T) urti improvvisi potrebbero danneggiarlo. - circa 4 ore (solo DP571T) • Autonomia di riproduzione massima:... -
Page 33: Collegamento Dell'unità
Collegamento dell’unità Collegamenti audio e video alla TV Collegamento dell’antenna Collegare il connettore AV OUT dell’unità al connettore di ingresso Collegare l’antenna TV terrestre alla presa DVB-T sull’unità dopo aver corrispondente sulla TV come mostrato sotto. selezionato uno tra A e B come illustrato di seguito. A: Collegare un cavo per l’antenna interna usando un hub per cavi RF. - Page 34 Informazioni generali sulle trasmissioni digitali Selezione della modalità operativa Immagine e audio Prima di procedere, bisogna selezionare una delle modalità di funzionamento. La TV digitale è una tecnologia di trasmissione che sostituisce la modalità Premere ripetutamente MODE per cambiare la modalità tra DVB-T, DAB e analogica tradizionale.
-
Page 35: Visualizzazione Delle Informazioni Del Disco
Visualizzazione delle informazioni del disco Regolazione delle impostazioni TELECOMANDO TELECOMANDO Premere DISPLAY durante la riproduzione: DISPLAY Visualizzare il menu di configurazione: SETUP Selezionare una voce: Selezionare l’opzione desiderata al primo livello: Regolare le impostazioni di visualizzazione: / ENTER Spostarsi al secondo livello: Per uscire: DISPLAY Selezionare l’opzione desiderata al secondo livello:... - Page 36 Regolazione delle impostazioni di visualizzazione Regolazione delle altre impostazioni Rapporto D’aspetto - Selezionare il tipo di visualizzazione da usare in base Bit rate REC – È possibile scegliere una velocità bit per la registrazione USB alle proporzioni dello schermo. diretta. Valori elevati forniscono una migliore qualità dell'audio ma utilizzano più [4:3]: Scegliere questa impostazione quando è...
-
Page 37: Riproduzione Di Un Disco
Passaggio al capitolo/alla traccia / file successivi Riproduzione di un disco Premere SKIP (>) per spostarsi al capitolo / traccia / file successivo. Premere SKIP (.) per tornare all’inizio del capitolo / traccia / file corrente. TELECOMANDO Premere brevemente due volte SKIP (.) per tornare indietro al capitolo / traccia / file precedente. - Page 38 DivX Ascolto di un audio diverso Memoria dell’ultima scena Questa unità memorizza l’ultima scena dell’ultimo disco visionato. L’ultima Premere ripetutamente AUDIO ( ) durante la riproduzione per selezionare le scena resta in memoria anche se si rimuovere il disco dal lettore o si spegne lingue disponibili, i canali o i metodi di codifica.
-
Page 39: Riproduzione Di Un Filmato Divx
Riproduzione di un filmato DivX Ascolto di dischi o file musicali TELECOMANDO TELECOMANDO Inserire un disco: Inserire un disco: Selezionare un brano musicale dal menu: Selezionare un film dal menu: v V, MENU v V, MENU Per andare direttamente alla traccia/file e iniziare Per andare direttamente al file e riprodurlo, immet- la riproduzione, immettere il numero di traccia/file tere il numero del file con i tasti numerici (0-9). -
Page 40: Visualizzazione Di Fotografie
Visualizzazione di fotografie Utilizzo di un disco Flash USB È possibile riprodurre file MP3/WMA/JPEG/DivX presenti in un disco Flash TELECOMANDO USB versione 1.1/2.0. Inserire un disco: TELECOMANDO Collegare il disco Flash USB alla porta Selezionare una fotografia dal menu: USB dell’unità: Per andare direttamente al file e riprodurlo, v V, MENU immettere il numero del file con i tasti numerici (0-9). -
Page 41: Registrazione Usb Diretta
La creazione di copie non autorizzate di materiale protetto dalla copia, Registrazione USB diretta compresi programmi per computer, trasmissioni e registrazioni audio, può violare i copyright e costituire azione illecita. Collegare l’unità flash USB all’unità prima della registrazione. Impostare Non utilizzare questa apparecchiatura per questi scopi. l'opzione [Bit rate REC] in base alle esigenze. - Page 42 Canale TV / Canale radio – Visualizza l’elenco dei canali della TV o della radio. Regolare le impostazioni dell’ora Utilizzare B per selezionare [Selezione], quindi premere ENTER per visualizzare Imposta un canale che trasmette il segnale orario per regolare automaticamente l’elenco dei canali.
- Page 43 Visualizzare il servizio di Teletext Regolare le altre impostazioni È un servizio gratuito di trasmissione che alcune stazione televisive offrono agli OTA (Over the Air) – È possibile effettuare l’aggiornamento all’ultima versione utenti, con notizie aggiornate su cronaca, meteo, programmi televisivi, indici del software tramite il sintonizzatore digitale integrato.
-
Page 44: Codici Lingua
Codici lingua Utilizzare questo elenco per inserire la lingua preferita per le seguenti impostazioni iniziali: Disc Audio, Disc Subtitle, Disc Menu. Lingua Codice Lingua Codice Lingua Codice Lingua Codice Lingua Codice Lingua Codice Afar 6565 Croato 7282 Hausa 7265 Lingala 7678 Quechua 8185... -
Page 45: Risoluzione Problemi
(237 x 54 x 149) mm (W x H x D) alimentazione. legato. one alla presa di corrente. Peso netto (approssimativo) DP570T : 1,1 kg La batteria è scarica. Ricaricare la batteria. (Con una batteria) DP571T : 1,2 kg Temperatura di funzionamento 0 °C a 40 °C... -
Page 46: Montaggio In Un'autovettura Con Staffa Di Montaggio Sul Poggiatesta
Montaggio in un’autovettura con staffa di montaggio sul Separare il poggiatesta. (Vedere la guida dell'utente poggiatesta dell'auto) È possibile godersi il video dal sedile pos- teriore fissando l’unità sulla parte posteri- ore del sedile anteriore. Avvertenze • Il conducente non deve usare Installare il supporto come mos- quest’unità... -
Page 47: Installazione Del Supporto Per Evitare Movimenti Del Pannello Lcd
Installazione del supporto per evitare movimenti del Se si desidera separare il supporto pannello LCD si può separare la staffa utilizzando la manopola di rilascio sul retro. In caso d’installazione dell’unità nel poggiatesta di un sedile di automobile, è necessario installare un supporto per evitare movimenti del pannello LCD come descritto di seguito.
Need help?
Do you have a question about the DP570T and is the answer not in the manual?
Questions and answers