
Related Manuals for JVC LT-32FXD7


Summary of Contents for JVC LT-32FXD7
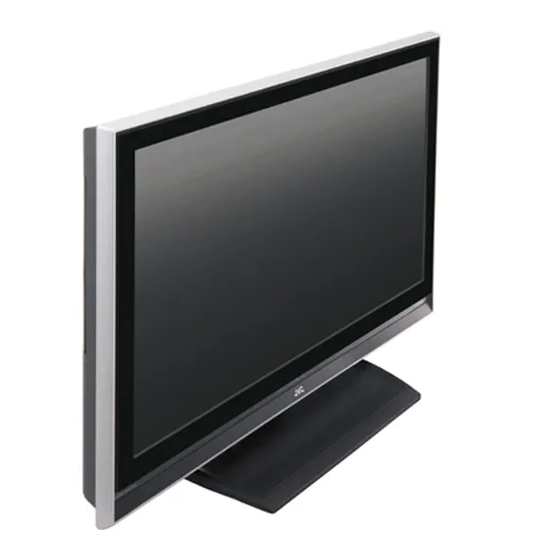
- Page 1 LT-32FXD7 LT-42FZD7 LT-46FZD7 WIDE LCD PANEL TV I NSTRUCTIONS Digital Video Broadcasting Trade Mark of the DVB Digital Video Broad casting Project (1991 to 1996) Number: 4859 for LT-32FXD7; 4860 for LT-42FZD7; 4861 for LT-46FZD7...
- Page 3 Thank you for buying this JVC WIDE LCD PANEL TV To make sure you understand how to use your new TV, please read this manual thoroughly before you begin. (“LCD” stands for Liquid Crystal Display.) READ THESE INSTRUCTIONS. KEEP THESE INSTRUCTIONS.
-
Page 4: Cleaning The Screen
Point defects LCDs use collections of fine pixels to display images. While there is no problem with more than 99.99% of these pixels, please understand that a very small number of pixels may not light or may light all the time. Distance recommendations Avoid improper installation and never position the unit where good 200mm... -
Page 5: Table Of Contents
Connecting external equipment......34 Hyper Surround............10 Displaying the source information......10 Troubleshooting........35 ZOOM function............11 Using the PCPIP function........12 Operating a JVC brand VCR or DVD player... 12 Specifications.......... 37 Teletext function........13 Basic operation........... 13 Hold..............13 Sub-page............14 Reveal.............. -
Page 6: Setting Up Your Tv
Setting up your TV Installation Cautions for installation • Install the TV in a corner on a wall or on the floor so as to keep cords out of the way. • The TV will generate a slight amount of heat during operation. Ensure that sufficient space is available around the TV to allow satisfactory cooling. -
Page 7: Putting The Batteries Into The Remote Control
Setting up your TV Putting the batteries into the Remote control Use two AA/R6 dry cell batteries. Insert the batteries from the - end, making sure the + and - polarities are correct. • Follow the warnings printed on the batteries. •... -
Page 8: Connecting The Aerial And Video Cassette Recorder (Vcr)
Setting up your TV Connecting the aerial and VCR • The connecting cables are not provided. Use a good quality of 75-ohm coaxial cable to connect. • Use a fiber connector to connect to digital sound equipment (DTV only) Caution •... -
Page 9: Initial Settings
Initial settings When the TV is first turned on, it enters the initial setting 3 AUTO PROGRAM menu appears mode. Follow the instructions on the on-screen display to make the initial settings. INSTALL AUTO PROGRAM button :SELECT OK:MOVE VCR/TV/ DVD Switch 4 Press the OK button to enter the AUTO PROGRAM. -
Page 10: Tv Buttons And Functions
TV buttons and functions Turn the TV on from standby mode Press the button or buttons to turn the TV on from standby mode Choose a TV channel Press the buttons to choose a program number Watch images from external devices Press the TV/AV button to choose a TV/AV Terminal EXT mode... -
Page 11: Remote Control Buttons And Functions
Remote control buttons and functions Muting button Number buttons Information button Colour buttons TV/DTV button / / / buttons (Text)button button VCR/DVD/Teletext buttons (Favourite) button buttons 12 ZOOM button (Hyper Surround) button (Standby) button 15 VCR/TV/DVD switch 16 AV button 17 MENU button 18 OK button 19 BACK button... -
Page 12: Adjust The Volume
Remote control buttons and functions Adjust the volume Displaying the source information Press the buttons to adjust the volume. You can display the source information and current time on the The volume indicator appears and the volume changes as screen. you press the buttons. -
Page 13: Zoom Function
Remote control buttons and functions ZOOM function Choose the ZOOM mode You can change the screen size according to the picture 1 Press the ZOOM button to choose the ZOOM aspect ratio. Choose the optimum one from the following menu ZOOM modes. -
Page 14: Using The Pcpip Function
If your device is not made by JVC, these buttons SUB: Sub picture will not work. • Even if your device is made by JVC, some of these buttons may not work, depending on the device you • If you press the menu button when the PIP are using. -
Page 15: Teletext Function
Teletext function Basic operation Hold You can hold a teletext page on the screen for as long as 1 Choose a TV channel with a teletext broadcast you want, even while several other teletext pages are being received. 2 Make sure to set the VCR/TV/DVD switch to the Press the (Hold) button Hold indication TV position. -
Page 16: Sub-Page
Teletext function Cancel Sub-page You can search for a teletext page while watching TV. Some teletext pages include sub-pages that are automatically displayed. 1 Press the number button to enter a page number, or press a colour button 1 Choose a teletext page that includes The TV searches for a teletext page. -
Page 17: Using The Tv's Menu
Using the TV’s menu 3 Press the buttons to choose a function This TV has a number of functions you can operate using menus. To use all your TV’s functions, you need to understand • For details of the functions in the menus, see the the basic menu operating techniques fully. -
Page 18: Picture Setting
PICTURE SETTING Refer to “Using the TV’s menu” (see page 15) for details of WHITE BALANCE displaying the menu. You can select one of two WHITE BALANCE modes (two tones of white) to adjust the white balance of the PICTURE picture. -
Page 19: Sound
SOUND Refer to “Using the TV’s menu” (see page 15) for details HDMI IN of displaying the menu. You can set the kind of the device connected with the SOUND HDMI terminal. STEREO/I . II BASS HDMI: If the HDMI device is connected, select HDMI. TREBLE Analog: If the DVI device is connected, select Analog. -
Page 20: Features
FEATURES Refer to “Using the TV’s menu” (see page 15) for details of displaying the menu. FEATURES SLEEP TIMER BLUE BACK CHILD LOCK :SELECT :MOVE SLEEP TIMER You can set the TV to automatically turn off after a set period of timer; press the button to set the period of time from 30, 60, 90, 120, to OFF. -
Page 21: Install
INSTALL After the TV channels have been registered in the Refer to “Using the TV’s menu” (see page 15) for details of program numbers, the PR LIST menu appears. displaying the menu. • If you want, you can now edit the program numbers INSTALL using the AUTO PROGRAM function. -
Page 22: To Edit The Pr List Menu
PR LIST NAME: 01 ----- 11 ----- 21 ----- This function registers a channel name (ID) to a TV 02 JVC 12 ----- 22 ----- channel. 23 ----- 03 ----- 13 -----... - Page 23 02 ----- 12 ----- 22 ----- 03 ----- 13 ----- 23 ----- PR LIST 04 JVC 14 ----- 24 ----- 05 ----- 15 ----- 25 ----- 01 ----- 11 ----- 21 -----...
- Page 24 TV channel stored in the program number appears on the screen. PR LIST 01 ----- 11 ----- 21 ----- 02 JVC 12 ----- 22 ----- 03 ----- 13 ----- 23 ----- 24 -----...
-
Page 25: Operation With The Dtv Menu
Operation with the DTV menu 5 Press the OK button to complete the setting This DTV has a number of functions you can operate by entering menus. To use all functions, you need to understand The menu disappears. the basic menu operating techniques fully. •... - Page 26 Operation with the DTV Menu AUTOMATIC SEARCH 2 The default city will be displayed. Press the buttons to choose the city you live in, It automatically stores the all DTV channels for which then press OK button. generally you have the best reception. This is automatic generate the full band scan based on 7 MHz bandwidth.
-
Page 27: Edit Pr List
Operation with the DTV menu 3 Press the ▼/▲ buttons to highlight Start Scan, EDIT PR LIST and then press OK button to implement scanning the channel. This feature allows you to edit channel settings that requires a password. 1 Press the ▼/▲ buttons to choose EDIT PR LIST and press the OK button When you select EDIT PR LIST, it requires the password. -
Page 28: Setting Favourite Channels
Operation with the DTV menu SETTING FAVOURITE CHANNELS After initial Channel Installation 5 Under book mark row press “OK” once to select To set favourites and “OK” a second time to remove. 1 Press MENU. 2 Select INSTALL. MENU Note: Channels marked in"EDIT PR LIST" are shown on "FAVOURITE LIST". -
Page 29: Configuration
Operation with the DTV menu PCM (Pulse code modulation): CONFIGURATION A technique used to transform an incoming analog signal into a noise-free, digital equivalent. Set the basic setting for watching Digital terrestrial broadcasting (DVB-T). You can setup the audio output, Dolby Digital: local Time, a new pin code and I-Plate. - Page 30 Operation with the DTV menu TIME ZONE RECEIVER UPGRADE You may set your local time depending on area. Set the method to upgrade the Digital terrestrial broadcasting (DVB-T) receiver software. This function is only available to 1 Press the ▼/▲ buttons to choose TIME ZONE, be upgraded by your distributor.
- Page 31 Operation with the DTV menu ENTER PIN CODE I-PLATE SETUP You can change the pin code, and its purpose is allowing to The programer information setting can be adjusted. enter the system of locking certain channels in EDIT PR LIST 1 Press the ▼/▲...
-
Page 32: Operation While Watching Dtv Menu
Operation while watching DTV Menu Information function Using the Electronic Program Guide (EPG) hen the (Information) button is pressed while the EPG screen appears when the GUIDE button is pressed under information would be displayed. Digital terrestrial broadcasting (DVB-T). Channel Number Date Time TELETEXT/Subtitle... -
Page 33: Pc Menu
PC MENU (In PC mode only) PICTURE This TV also has a number of functions on PC mode; you can operate using pc menus. You can change the picture settings of each PICTURE mode as PC MENU you like. PC PICTURE POSTITION PC PICTURE PICTURE SOUND... -
Page 34: Sound
PC MENU (In PC mode only) WHITE BALANCE: SOUND You can adjust the picture colour mode. You can adjust the sound to your liking. HIGH: A bluish white. Using this mode when watching bright SOUND pictures allows you to enjoy a more vivid and bright picture. -
Page 35: Pc Support Mode List
PC MENU (In PC mode only) Please use AUTO Setup to automatically configure your PC Support mode list display to the best setting. Notice when using LCD-TV under PC mode: Mode Name H.Freq.(KHZ) Mode No. Resolution V.Freq.(HZ) 1. Whenever your LCD-TV is connected to the PC, or VGA 60HZ 31.469 you have changed the PC display mode. -
Page 36: Additional Preparation
Additional preparation Connecting external equipment Connect the equipment to the TV, making the correct rear VCR (composite signal) panel and front panel connections. VCR (composite signal/S-VIDEO signal) DVD player (composite signal/S-VIDEO signal) Before connecting anything: DVD player (component signal) • Read the manuals that came with the equipment. -
Page 37: Troubleshooting
Troubleshooting If a problem arises while you are using the TV, please read this troubleshooting guide carefully before you ask to have the TV repaired. You may be able to fix it easily by yourself. For example, if the mains plug is disconnected from the mains outlet, or the TV aerial has problems, you may think there is a problem with the TV itself. - Page 38 Troubleshooting Troubleshooting rouesoong Other concerns • When the SLEEP TIMER function operates, the TV is automatically turned off. If the TV suddenly turns off, try to press the (standby) button to turn on the TV once again. If the TV goes back to normal, there is no problem. •...
-
Page 39: Specifications
Specifications Model LT-32FXD7 LT-42FZD7 LT-46FZD7 COUNTRY setting AUSTRALIAN Broadcasting system CCIR B/G Colour system Analogue 48.25~863.25MHz Channels and frequencies Digital 174MHz~858MHz Sound-multiplex systems A2/NICAM system,Digital(MPEG2) Teletext FLOF(Fastext) ,WST(World Standard System) Power requirements 240V AC, 50Hz Power consumption 164W (Standby < 1W) 287W (Standby <... - Page 40 ©2007 Victor Company of Japan, Limited E030057335...
Need help?
Do you have a question about the LT-32FXD7 and is the answer not in the manual?
Questions and answers