Table of Contents
Advertisement
Advertisement
Table of Contents

Related Manuals for Bewator Bewacard BC615

Summary of Contents for Bewator Bewacard BC615
- Page 1 Bewacard BC615, BC615Prox, BC615EM Installation and User manual...
- Page 2 Copyright © 2004 Bewator AB, Solna, Sweden. Material from this manual may only be copied with the consent in writing of Bewator. Bewator reserves the right to alter both the content of the manual and the design of the product.
-
Page 3: Table Of Contents
WIRING .................... 16 Recommended cables ............18 Considerations concerning earthing & screening ....18 Connecting the power supplies..........19 Connecting BC615 to the CR1 converter ......21 ENTRO WIRING EXAMPLE ............23 COMMISSIONING THE SYSTEM............ 24 Standalone card readers ............24 Card readers in Entro systems.......... - Page 4 BC615 Installation and User Manual) Cancel card (without card)............. 35 Program/change/erase common code........35 Program holidays..............36 Delete individual holidays............36 Delete all holidays..............37 Set door release time.............. 37 Set door held warning time............ 37 Buzzer on/off ................38 Calculated PIN .................
-
Page 5: What Is The Bc615
See also chapter Proximity function on page 12 for more information of the proximity function. BC615 can be used as a stand-alone unit or be included in a system consisting of several BC615 card readers. •... -
Page 6: Features Included
BC615 Installation and User Manual Features included These are the main features included in BC615: • Six different security levels. Various methods of opening the door, e.g. Card, Card + PIN and Common code. • Built-in time clock. Enables time control of cards and security levels. -
Page 7: How Does The Card Reader Work
BC615 Installation and User Manual How does the card reader work? BC615 can easily be adapted to the security requirements in a particular building, a particular day of the week or time of day. To make this possible you have to be familiar with the following concepts: •... - Page 8 BC615 Installation and User Manual Examples of timing security levels During office hours, when there are people in the premises, the security level may not need to be so high: Unlocked door or Common code may be suitable levels. During lunch time, the level may be raised to Card.
-
Page 9: Time Zones And Day Types
BC615 Installation and User Manual Time zones and day types There are two purposes of creating time zones: • To be able to assign different security levels to different times of the day. • To be able to make certain cards valid at certain times. - Page 10 BC615 Installation and User Manual Each time zone may consist of two intervals. To be able to assign suitable security levels to the office example above, the following time zones are needed: Time zone no Applies Applies 24 hours a day (all day types). Note: Default time zone that can be changed.
-
Page 11: Time Schedules
BC615 Installation and User Manual Time schedules There are two purposes for creating time schedules: To be able to combine time zones for the control of security levels. To be able to combine time zones defined for the time control of specific cards. -
Page 12: Proximity Function
BC615 Installation and User Manual Proximity function General The Proximity function means that the reader can read cards or tags without them being in contact with the reader. The reader continuously transmits a low power radio frequency. When a card or tag is presented within the field of the reader it activates and transmits a unique identification number (card number) back to the reader. -
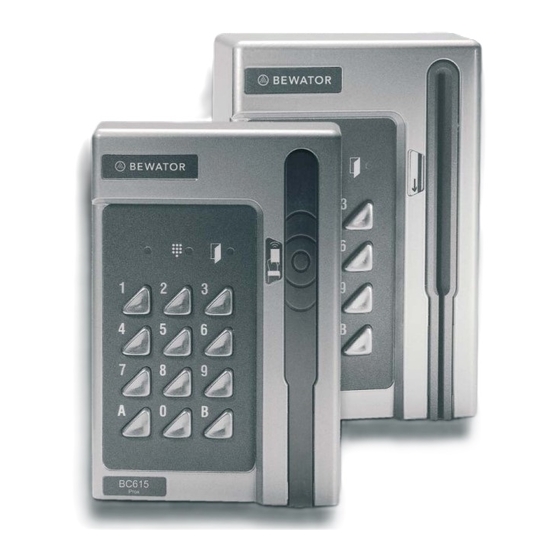
Page 13: Keypad Layout
BC615 Installation and User Manual Keypad layout Diagram of the LEDs and pushbuttons on the BC615 keypad. Yellow LED. Red LED. Indicates keypresses. Lit when PIN code should be entered. Indicates errors. E.g. cancellation of card following 3 incorrect PIN codes. -
Page 14: Installing The Card Reader
To cater for disabled persons, a suitable height is approximately 95 cm. When installing the BC615-Prox, care should be taken to avoid sources of electrical noise, such as motors, generators, pumps, computer installation and mains cabling. -
Page 15: How To Select Connecting Cables
BC615 Installation and User Manual How to select connecting cables It is important to use cables with the correct conductor gauge, to keep the voltage drop in the cables as low as possible. • 12 volt supplies. A 12 V electric locking device generally needs at least 11 V to work properly, so the voltage at the card reader should never be less than 11 V. -
Page 16: Wiring
BC615 Installation and User Manual Wiring LINK OUT DOOR CON 1 2 3 4 5 6 7 8 9 12-30V LOCK Connection to PC ALERT Wall 9 pin 25 pin RS-232 socket DSUB DSUB ENAB RS-232 ENAB BACK LIGHT... - Page 17 The SW1 push button. Used when erasing the memory and setting a new password. If the card reader is part of a Bewator Entro system, place jumper on INT (attempts of tamper will be displayed as messages on the PC’s screen), otherwise to EXT. (Direct connection to external...
-
Page 18: Recommended Cables
BC615 Installation and User Manual Recommended cables Cable from Bewator Entro to CR1 Maximum length: 1200 metres. • Pair twisted screened (1 pair + screen), e.g. Beldon 9502 (communication) and 1.5mm (power) • PAARFLEX CY (Bewapass custom cable comprising communication and power in one cable). -
Page 19: Connecting The Power Supplies
BC615 Installation and User Manual Connecting the power supplies Connect the power supply according to the instructions below, but do not connect the power to outgoing cables. Apply power when you start the system (see the Check the communications circuit section). - Page 20 BC615 Installation and User Manual Central power supply If central power supply is used, precautions should taken against voltage drop. Dimension the power supply equipment and cables so that the voltage at the last door is not below the lock or reader’s tolerance.
-
Page 21: Connecting Bc615 To The Cr1 Converter
BC615 Installation and User Manual Connecting BC615 to the CR1 converter 12-24V 12-24V FRAME FRAME POWER 12-24V FG TX RX RTS 0V 12-24V LINK OUT DOOR CON 1 2 3 4 5 6 7 8 9 12-30V LOCK ALERT RS-232... - Page 22 BC615 Installation and User Manual Power LED. Lit green when CR1 is powered. RX. Yellow LED flashing quickly when CR1 is communicating with the PC. TX/RTS. Flashes green/red when CR1 is communicating with the card reader. Power supply to card reader. Connect to terminal nos 1 and 2 on the BC615 circuit board.
-
Page 23: Entro Wiring Example
BC615 Installation and User Manual Entro wiring example In premises where the system is more extensive, the BC615 card readers can be connected to a Bewator Entro system. SR32 BC615 BC615 BC615 BC615 BC615 BC615 BC615 BC615 Drop Drop Drop... -
Page 24: Commissioning The System
Set the Link 1 jumper to N/W. Press SW1 for about 3 seconds. The card reader starts beeping. Set the address (A1-A8 Entro) on the card reader keypad. Start programming Start programming according to the instructions in the Bewator Entro manual. -
Page 25: Programming (Standalone Installation)
BC615 Installation and User Manual Programming (standalone installation) In the sections below are the instructions on how to program the BC615 if the card reader is operating as a standalone unit. Programming Bewator Entro installations is described in the Bewator Entro manuals. -
Page 26: Set Password
BC615 Installation and User Manual Set password The first thing to do before starting to program the card reader is to set a password. Open the card reader with the key supplied. The lock is located on the underside of the card reader. -
Page 27: Set Time And Date
BC615 Installation and User Manual Set time and date Set the card reader to programming mode. Press A23. Enter the current year, month and date, e.g. 981021 for the 21 October 1998. Enter the current day of the week. Example: 1 = Monday, 2 = Tuesday etc. -
Page 28: Program Time Zones
BC615 Installation and User Manual Program time zones This function is used to program the time zones to be used in the installation. Take out the completed time zone chart/s. Set the card reader to programming mode. Press A31. Enter the number of the time zone to be programmed. Use two digits, e.g. -
Page 29: Program Time Schedules
BC615 Installation and User Manual Program time schedules This function is used to program the time schedules to be used in the installation. Take out the completed time schedule chart/s. Set the card reader to programming mode. Press A32. Enter the number of the time schedule to be programmed. Use two digits, e.g. -
Page 30: Define The "Door Unlocked" Security Level
BC615 Installation and User Manual Define the “Door unlocked” security level Set the card reader to programming mode. Press A33. Enter the number of the time schedule to control the “Door unlocked” security level. Use two digits, e.g. 01 for time schedule Press B to leave programming mode. -
Page 31: Define The "Card + Pin" Security Level
BC615 Installation and User Manual Define the “Card + PIN” security level Set the card reader to programming mode. Press A36. Enter the number of the time schedule to control the “Card + PIN” security level. Use two digits, e.g. 01 for time schedule 1. -
Page 32: Log On A Card (With A Card)
Enter the time schedule during which the card/s should be valid. Use 2 digits, e.g. 01 for time schedule 1. Swipe the card (BC615) – or present the card (BC615-Prox). If several cards should be valid during the same time schedule, swipe or present these cards as well. -
Page 33: Log On A Card (Without The Card)
BC615 Installation and User Manual Log on a card (without the card) Using this function, cards can be programmed by keying in the card number. Set the card reader to programming mode. Press A03. Enter the time schedule during which the card/s should be valid. -
Page 34: Log On A Series Of Cards
Set the card reader to programming mode. Press A14. Swipe the card (BC615) – or present the card (BC615-Prox). Swipe or present the next card, as required. When finished, press B to go back to programming mode. -
Page 35: Cancel Card (Without Card)
BC615 Installation and User Manual Cancel card (without card) Using this function, cards can be cancelled using the card number. Set the card reader to programming mode. Press A16. Enter the card number. If the card is not logged on the ”faulty programming”... -
Page 36: Program Holidays
BC615 Installation and User Manual Program holidays This function is used to pre-program holidays that do not occur on Sundays and holiday periods. Set the card reader to programming mode. Press A51. Enter the number of the holiday using two digits (01-15). -
Page 37: Delete All Holidays
BC615 Installation and User Manual Delete all holidays This function is used to delete all programmed holidays. Set the card reader to programming mode. Press A55. Press A55 one more time. The unit automatically goes back to programming mode. Set door release time The door release time determines for how long the lock should remain released following a correct transaction. -
Page 38: Buzzer On/Off
BC615 Installation and User Manual Buzzer on/off The default is that the buzzer is activated. If you do not want the buzzer to beep on key presses or door opening, it can be turned off. Note that even when the buzzer is off for normal operation, it will continue to sound during programming. -
Page 39: Calculated Pin
BC615 Installation and User Manual Calculated PIN If it is preferred not to have the users choose their own PIN codes, this function will enable automatic calculation of PIN codes, based on the card holder’s card number. Proceed as follows: Set the card reader to programming mode. -
Page 40: Card Reading Parameters
Magnetic strip card reader When BC615 is delivered, the card reader reads positions 9 to 16 on the card’s magnetic strip, or the last 8 positions if they are fewer than 16. If you want to use your own cards and they should be read differently, enter from which position on the magnetic strip the reader should start reading and how many digits should be read (max. -
Page 41: Change Programming Password
BC615 Installation and User Manual Change programming password To change the password: Press B and enter the present password. Press A27. Enter the new password. A warning tone is heard. Enter the new password again. The warning tone sounds until all six digits have been entered. -
Page 42: Erase The Memory
BC615 Installation and User Manual Erase the memory When the card reader’s memory is erased, the default settings are restored (see below). Set the card reader to programming mode. Open the card reader with the key supplied. The lock is located on the underside of the card reader. -
Page 43: Printout Of Events
BC615 Installation and User Manual Printout of events Using this function, printouts of events occurred can be requested. Set the card reader to programming mode. Press A41. Press B to cancel the printout at any time. Printout format: YY-MM-DD D HH:MM TS XXXXXXXX TA... -
Page 44: Printout Of Programmed Time Zones And Time Schedules
BC615 Installation and User Manual Printout of programmed time zones and time schedules Using this function, printouts of programmed time zones, time schedules and printer time zones can be requested. Set the card reader to programming mode. Press A45. Press B to cancel the printout at any time. -
Page 45: Printout Of Reader Information
BC615 Installation and User Manual Printout of reader information Set the card reader to programming mode. Press A46. Press B to cancel the printout at any time. Printout format: BC615 Ver XX.XX Version number on software 04-02-27 5(5) 11:34 Date, Daytype, (Halfday) and Time. -
Page 46: Printout Of Logged On Cards
BC615 Installation and User Manual Printout of logged on cards Set the card reader to programming mode. Press A47. Press B to cancel the printout at any time. Printout format: XXXXXXXX TS Card number and Time schedule Press B to leave programming mode. -
Page 47: Explanation On Event Codes
BC615 Installation and User Manual Explanation on event codes Event code Explanation ------ Access events Access granted. Common code Access granted. Card Access granted. Card + PIN Access granted. Card + PIN Duress Access denied. Illegal common code Access denied. Card not logged on Access denied. -
Page 54: Daily Use
Choose/change PIN code (Calculated PIN not set) To choose/change your individual PIN (in Bewator Entro installations the PIN code is set from the PC): Press A on the card reader’s keypad. -
Page 55: Duress
BC615 Installation and User Manual Duress This is how to activate the duress alarm output if forced to open the door under threat (this works during the Card + PIN security level only): Swipe or present the card at the card reader and enter the usual PIN code, only add 1 to the last digit in the code. -
Page 56: Troubleshooting
BC615 Installation and user manual Troubleshooting Problem Possible cause Action Red, yellow and green A button is pressed. Adjust the button. LEDs blink on power Memory error. Change card reader. Cannot enter Wrong password. Choose a new programming mode. password. -
Page 57: Technical Information
Red LED external control: Galvanic insulation. 12-30 V DC. Communications port: RS-232 (printer, PC or system). Temperature range: BC615: –35° C to +50° C BC615Prox & BC615EM: –30° C to +50° C (at 90 % relative air humidity). Housing protection class:... -
Page 58: Charts
BC615 Installation and user manual Charts Time zones Name interval interval (01-15) From From type/s Example: Name interval interval (01-15) From From type/s Working hrs 0830 1159 1300 1759 12345... - Page 59 BC615 Installation and User Manual Time schedules No (01-15) Name Time zones included Example: No (01-15) Name Time zones included Office staff 01020305 In the above example are time zones nos 1, 2, 3 and 5 included in time schedule no 1.
- Page 60 BC615 Installation and user manual Security levels Level Time schedule Door unlocked Common code Card Card + PIN Toggle Special settings Function Setting Default Password 112233 Common code None Release time 7 sec Door held warning 10 sec time Buzzer...
- Page 61 BC615 Installation and User Manual Holidays No Date Duration No Date Duration (MMDD) in days type (MMDD) in days type Example: No Date Duration No Date Duration (MMDD) in days type (MMDD) in days type 1224 0701...
- Page 62 BC615 Installation and user manual Persons Name Card number Time schedule Example: Name Card number Time schedule Edwards Anthony 12345678...
Need help?
Do you have a question about the Bewacard BC615 and is the answer not in the manual?
Questions and answers