Table of Contents
Advertisement
Advertisement
Table of Contents

Related Manuals for ProStalk PC5000


Summary of Contents for ProStalk PC5000
- Page 1 ProStalk PC5000 Nature Camera User Manual...
-
Page 2: Table Of Contents
Index Introduction ........................3 Digital Nature Camera Specifications ................3 Parts Identification ......................5 Packing Contents ....................... 6 Battery and SD Card Installation ..................6 Setup Your Camera ......................7 Set Camera Delay ....................... 8 Set Camera State and Photo Resolution ..............9 Set Date, Year and Time ..................... -
Page 3: Introduction
1. Introduction Congratulations on your purchase of the ProStalk PC5000 Digital Nature Camera. This Nature Camera is designed to record the activity of wildlife in the outdoors with its still image and movie modes and weatherproof, rugged construction. The Nature Camera is ultra small and portable with an extra longer surveillance time. - Page 4 Image Sensor Type 1/2.5 Inch CMOS Effective Pixels 5.0 Megapixels Effective Focal Length 7.6 mm Lens Aperture F/3.0 Camera Lens Sight Angle 55 Degrees IR Filter Full Automatic IR Filter Display PIR Sensor PIR Distance Adjustor Yes (2m ~ 20m) PIR Sensor Sight Angle 55 Degrees Trigger Speed...
-
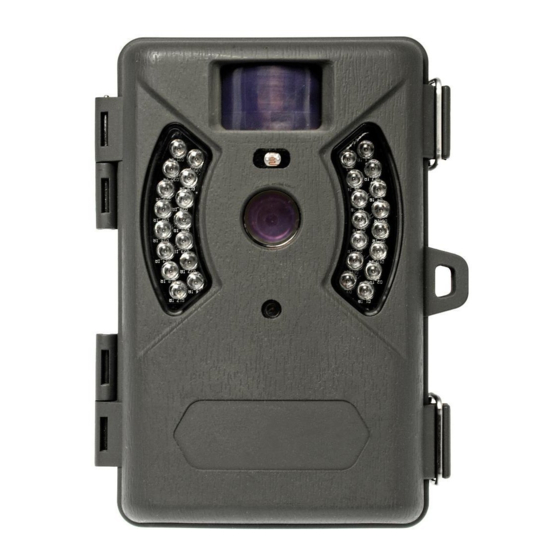
Page 5: Parts Identification
3. Parts Identification... -
Page 6: Packing Contents
• Mounting Kit 5. Battery and SD Card Installation The ProStalk PC5000 Digital Nature Camera is designed to operate using 8 x AA Cell Batteries. We recommend using alkaline batteries. NOTE: Always have the camera switched OFF when installing or removing batteries. -
Page 7: Setup Your Camera
(+/-) will damage the camera. Memory The ProStalk PC5000 Digital Nature Camera saves images to an SD memory card (accepting up to a 32GB SD card - sold separately). Inserting SD card Make sure the camera is in the OFF position whenever adding or removing a memory card. -
Page 8: Set Camera Delay
1. Date 2. Time 3. 4 Digit Display 4. Image Resolution Select 5. Movie Recording 6. Camera Delay Setting 7. Password 8. SD Card It is very easy to setup this camera. Turn on the unit and then press the “SETUP” button, the “DATE”... -
Page 9: Set Camera State And Photo Resolution
Then the LCD will display “LoHi” which comes to setting the image resolution. “Lo” represents 3.0MP and “Hi” represents is 5.0MP. Press “UP” or “DOWN” to select and press “OK” to confirm. Default is “Hi”. Model PC5000 2048x1536 (3.1M) 2560*1920 (5.0M) If selecting the “Movie” mode, press “OK” to confirm. -
Page 10: Setup Or Clear Password
2) Set Time a) Turn on the unit and press the “SETUP” button b) The menu icon will start to blink, press the “UP” or “DOWN” button till icon 2 “TIME” is blinking, press “OK” to enter. c) Then the LCD first two digits represent hour (HH) and last two digits represents minutes (MM). -
Page 11: Display How Many Pictures And Video Taken
6.5 Display How Many Pictures and Video Taken a) Turn on the unit and then press the “SETUP” button b) The menu icon will start to blink, press the “UP” or “DOWN” button till icon 8 “SD Card” is blinking. c) Then the LCD will display the total number of the picture and video taken in this SD card. -
Page 12: Turn On The Camera
(longer distance) or to a smaller value to make the PIR less sensitive (shorter distance). 7.4 Testing the camera coverage area One of the ProStalk PC5000 Nature Camera’s features is the ability to test the coverage area. • After mounting the camera, open the front housing and slide the “Power” switch to the “ON”... -
Page 13: Secure Your Camera
Otherwise the camera will not take any pictures or movies. 7.5 Secure Your Camera The ProStalk PC5000 Nature Camera has a lock hole to secure the device using a padlock. 7.6 Replacing the Battery If the battery is low, the red light indicator will flash 3 times and then turn off. This indicates that... -
Page 14: Viewing The Images And Movies
8. Viewing the Images and Movies Connect the Camera directly to a PC 1. Sliding the “Power” toggle switch to “on” position 2. Press “SETUP” button 3. Connect your camera to the PC by the USB cable, the PC will recognize the new device and enter into “mass storage”... -
Page 15: Glossary
1. Sliding the “Power” toggle switch to “on” position 2. Press “SETUP” button 3. Connect the TV cable to the camera and TV 4. Then the LCD will display “TV” 5. Then the real time image will be transfer to the TV 10. - Page 16 images and number of flashes during that time. Based on our new advanced power system, this camera can support 30 pictures/day for one year surveillance. Burst: To set the number of pictures the camera will take per PIR triggering 1P: Single image capturing per PIR triggering 3P: Three images continuous capturing per PIR triggering FULL: When memory capacity is full, this LCD screen will show “FULL”...
Need help?
Do you have a question about the PC5000 and is the answer not in the manual?
Questions and answers
Had this prostalk pc5000ir for years. Have tried on numerous occasions to get it set up. Can't be done. Took it to the shop, and they hadn't a clue. Turn it on and a key flash's, press OK and the first 0 flash's so set the date and then the year, but when you press OK it goes straight back to all the zeros'. After the thrid time it comes up as error. This was an expensive camera, and as yet, not taken a single picture.