Table of Contents
Advertisement
Advertisement
Table of Contents

Related Manuals for Digital Concepts 26062


Summary of Contents for Digital Concepts 26062
-
Page 1: Digital Camera
26062 Digital Camera with Water Resistant casing User‟s Manual © 2009 Sakar International, Inc. All rights reserved. Windows and the Windows logo are registered trademarks of Microsoft Corporation. All other trademarks are the property of their respective companies. -
Page 2: Table Of Contents
Get photos and videos from your camera to your computer ..........14 Get started! ........................16 Using Your Camera as a Webcam ..................17 Maintenance of Your Digital Camera ................. 19 Sakar Warranty Card ......................19 Technical Support ......................20 Technical Specifications ....................21 Frequently Asked Questions ....................22... -
Page 3: Introduction
Introduction Thank you for purchasing the 26062 Digital Camera with Water Resistant casing. Everything you need to take quality digital photos and videos is included with your device. Please read this manual carefully FIRST in order to get the most out of your digital camera. -
Page 4: Computer System Requirements For Windows Xp
Computer System Requirements for Windows XP To be able to download photos and videos to your PC, you will need the following minimum configuration: Pentium 4 processor or above with Windows XP service pack 2 512 MB RAM, with 150MB of free disk space ... -
Page 5: Computer System Requirements For Macintosh
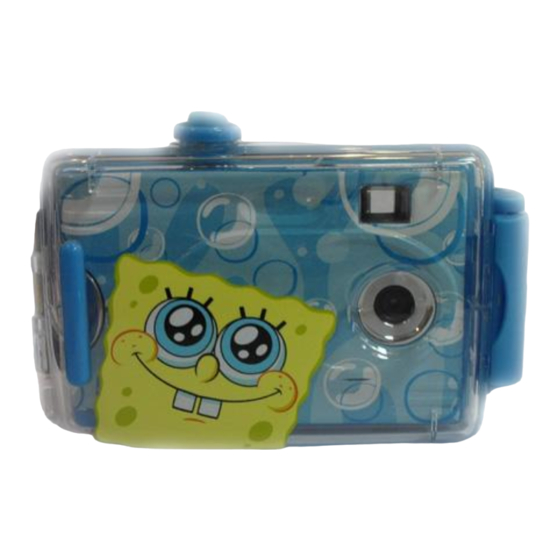
Computer System Requirements for Macintosh Macintosh with Intel processor running Mac OS X v10.4.6 or later 256 MB RAM, 150 MB free disk space Display: 1024 x 768 or higher-resolution monitor QuickTime 6 or higher A Quick Look at your Digital Camera... -
Page 6: Inserting Batteries
Inserting Batteries Your camera requires two AAA batteries. Insert the batteries into the camera: Remove the camera from the Water resistant cover by releasing the clip on the side. Open the cover of the battery compartment on the bottom of the camera. Insert the batteries according to the polarities (+ and -) indicated on the inside of the battery cover. -
Page 7: Starting Your Camera
Note: If you do not intend to use your camera for an extended period, remove the batteries to avoid battery leakage and corrosion. Warning: Please download any photos you have on the camera before opening the battery compartment Do not remove the batteries before downloading the photos and videos from the camera. -
Page 8: Taking Photos
Taking Photos 1. Compose your shot using the view finder. 2. Hold the camera steady and press the Shutter button to take the photo. 3. The camera will beep when a photo is taken. 4. The photo is save as a JPEG file in the camera`s memory 5. -
Page 9: The Camera Modes
The Camera Modes Power Off - Press the MODE button for the icon to appear on the LCD screen. Press the Shutter button and the camera will switch off. Self-Timer - Press the MODE button for the icon to appear on the LCD screen. Press the Shutter button. - Page 10 Lift your finger off the Shutter button to stop shooting the video. The video will be saved as an AVI file. Note: Photos taken in Continuous shot mode may fail under poor lighting conditions. 3 Shot Mode - Press the MODE button for the icon to appear on the LCD screen.
- Page 11 Delete (Last Photo) - To delete the last photo taken: Press the MODE button for the icon to appear on the LCD screen. Press the Shutter button within 5 seconds and the last photo will be deleted. The LCD counter will display the updated number of photos that can be taken at the current resolution and compression.
- Page 12 There are 2 photo compressions to select from, high density - or low density - Press the MODE button for the icons to appear on the LCD screen If the LCD displays this means the present compression is and in order to change to , click the Shutter button.
- Page 13 Frequency - The camera has 2 Frequency settings, 50HZ for Asia and Europe, and 60HZ for the U.S. and Japan. To set the camera for the correct frequency: Press the MODE button for the 50HZ or the icon 60HZ icons to appear on the LCD screen If the LCD displays this means the present frequency is...
-
Page 14: Install The Spongebob Squarepants Snapshots Software And Camera Driver
Install the SpongeBob SquarePants Snapshots Software and camera driver Warning: Do not plug your camera into the computer until the SpongeBob SquarePants Snapshots software installation is complete. Insert the installation CD into your CD-ROM drive. The SpongeBob SquarePants Snapshots will begin to install. Please review the license terms. -
Page 15: Connect Your Camera To The Computer
Connect your camera to the computer Use the USB cable that came with your camera to connect your camera to your computer. Plug the one end of the USB cable into the USB slot on the side of the camera and plug the other end into an available USB port on your computer. - Page 16 The “Get media from device” window opens. Both photos and videos (if you have captured any) will get downloaded. Select your camera model from the device window. If your camera is the only device connected then it will be selected automatically. Select a location on the computer where to place the new photo and video files.
-
Page 17: Get Started
A media download progress window appears in the middle of the screen showing the number of media files downloading to your computer. A message appears when the download is complete. The photo and video files that you selected are now downloaded to your computer to the selected folder and albums ready for your use. -
Page 18: Using Your Camera As A Webcam
Using Your Camera as a Webcam Your camera can also be used as a Webcam with most instant messaging and web conferencing applications that support video, when plugged into your computer. On PC: The webcam driver is installed on your computer when you install the SpongeBob SquarePants Snapshots software for this device. - Page 19 Click the “Macintosh HD” icon on the desktop Click the “Library” folder Click the “QuickTime” folder Click the “26062_pccam” to open the Webcam application for Mac. Once you see the object appearing in the Webcam application window, you can now open the instant messaging and web conferencing application that you use to begin using this camera as a webcam on your computer.
-
Page 20: Maintenance Of Your Digital Camera
If water enters the camera or the battery compartment this will ruin the camera and cause the camera to stop working. Sakar Warranty Card This warranty covers for the original consumer purchaser only and is not transferable. Products that fail to function properly UNDER NORMAL USAGE, due to defects in material or workmanship. -
Page 21: Technical Support
For phone support in the US please call 1-877-397-8200, in the UK call 0800 917 4831. If you would like to call from anywhere else, please visit www.sakar.com for your local toll free number. -
Page 22: Technical Specifications
Technical Specifications Image Sensor ¼ inch CMOS Image Specification 352*288 (CIF); 176*144 (QCIF) Memory 16MB SDRAM Number of pictures Hr 26 CIF; Lr 104 QCIF(non- compressed) Hr 52 CIF; Lr 208 QCIF(compressed) Lens ¼ inch Fixed Lens: f=3.9mm/F2.8 AVI pixel format 352 * 288 pixels Shutter speed Range 1/60~ 1/1500 second... -
Page 23: Frequently Asked Questions
Frequently Asked Questions Q: I have taken photos, but my computer says "No photos in camera." What do I do? First, ensure that you have taken photos with your camera. Press the shutter button a few times to take some sample photos and try again. If you still get a no photos error, this indicates that the software was not installed correctly or your computer may not meet the minimum system requirements (see the Computer System Requirements section of this manual).
Need help?
Do you have a question about the 26062 and is the answer not in the manual?
Questions and answers