
Related Manuals for Amico AP14000

Summary of Contents for Amico AP14000
-
Page 1: User Manual
USER MANUAL PORTABLE AIR CONDITIONER AP14000 Thank you for selecting super quality air conditioner. Please be sure to read this manual carefully before using it. Any question, please contact the professional service for help. -
Page 2: Table Of Contents
CONTENTS CONTENTS……………………………………………………..1 IMPORTANT SAFETY INSTRUCTIONS…………………..2-4 INSTALLATION……………………………………………….5,6 PARTS NAME……………………………………………………7 CONTROL PANEL……………………………………………...8 REMOTE CONTROL………………………………………….9 OPERATING METHOD………………………………….…10,11 WATER DRAINAGE…………………………………………...12 MAINTENANCE………………………………………………..13 TROUBLE SHOOTING………………………………………..14... -
Page 3: Important Safety Instructions
IMPORTANT SAFETY INSTRUCTIONS PLEASE READ ALL INSTRUCTIONS BEFORE USING THIS APPLIANCE. BASIC SAFETY PRECAUTIONS WARNING To reduce the risk of fire, electric shock, or injury to persons when using this appliance, follow basic precautions, including the following: •Do not attempt to repair or replace any part of your air conditioner unless it is specifically in this manual. - Page 4 risk of fire or explosion. •Turn off and unplug the air conditioner before cleaning to avoid the risk of electric shock. •Do not clean the unit with water. Water can enter the unit and damage the insulation, creating a shock hazard. If water enters the unit, unplug it immediately and contact Customer Service.
-
Page 5: Save These Instructions
•Do not drink the water from the drain pan. Dispose of it properly outdoors or down the drain. •Do not operate air conditioner without the filter securely in place. Operation without the filter could damage the unit. •Clean the filter every two weeks, or more often if needed. ELECTRICAL SAFETY WARNING Electrical Shock Hazard Failure to follow these instructions can result in... -
Page 6: Installation
INSTALLATION Selection of installation location · Install the unit on a flat and dry place. Leave at least 50cm space all around the unit. · Fix the end of the exhaust duct to the exhaust terminal of the unit. · Half-open the window and let the air outlet duct get through. The window slider kit has been designed to fit most standard vertical and horizontal windows. - Page 7 WARNING The length of the exhaust pipe is specially designed according to the specification of this product. Do not replace or prolong it with your own private hose as this could cause mal-function. BE CAREFUL: Use the shortest possible length. When mounting, we advise to keep the exhaust pipe in a horizontal position.
-
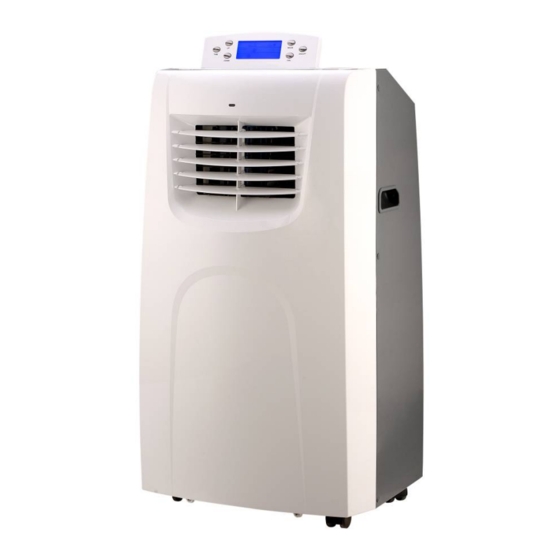
Page 8: Parts Name
PARTS NAME Front 1. Control panel 2. Air outlet 3. Signal receiver 4. Adjustable air flow 5. Handle Back 6. Castor 7. Evaporator air inlet 8. Up drain port( used when Continuous Drainage or in dry mode) 9. Power cord 10. -
Page 9: Control Panel
CONTROL PANEL 1. ON/OFF button: press this button to turn on/off the unit. 2. MODE button: press this button to select automatic adjusting, Cool, Dry or Fan mode. 3. FAN button: press this button to select high, middle or low fan speed. 4. -
Page 10: Remote Control
REMOTE CONTROL 1. High fan speed 2. Middle fan speed 3. Low fan speed 4. Swing 5. Timer 6. Up 7. Down 8. Cool mode 9. Dry mode 10. Fan mode 11. Celsius and Fahrenheit exchange 12. Power (same as ON/OFF) -
Page 11: Operating Method
OPERATING METHOD Auto mode ·The appliance will operate in auto mode directly once it is turned on. Press MODE button also could choose this mode. ·Under Auto mode, the running mode of air conditioner depends on the room temperature, here under is called Ta. ≥... - Page 12 ·Select the fan speed by press FAN button or press High/Mid/Low button directly. ·Press Swing button to make the fins swing (use remote control only). The LCD will display ·The temperature can not be set. ·Do not use the air outlet duct. Timer-on ·When the appliance is switch off, press Timer button to set timer-on.
-
Page 13: Water Drainage
WATER DRAINAGE This product has a self-evaporative system. The condensing water will be recycled to cool the condenser. This can not only improve cooling efficiency, but also save energy for you. ·When in Cool or Fan mode, there’s no need of water drainage. ·During dehumidifying mode, remove the drain plug from the back of the unit, then install a drain pipe (φ10mm inner dimension) and place the open end of the hose into any vessel such as bucket. -
Page 14: Maintenance
MAINTENANCE Note: Turn off the unit and unplug it before any maintenance or repair begins to avoid electric shock. Cleaning ·Unplug the unit before any cleaning. ·Clean the housing with a soft half-wet cloth. Do not use chemical solvent (such as benzene, alcohol, gasoline). -
Page 15: Trouble Shooting
TROUBLE SHOOTING Before contacting professional service, check it first yourself referring to the followings: Problem Cause Solution Connect to a functioning outlet No power supply. and switch on. Is the unit plugged? Plug the unit. The air The fuse is burned or the unit Change a new fuse and power conditioner is power off?
Need help?
Do you have a question about the AP14000 and is the answer not in the manual?
Questions and answers