
Related Manuals for Amico AP11000

Summary of Contents for Amico AP11000
-
Page 1: User Manual
Portable Air Conditioner User Manual AP11000 Thank you for selecting this super quality air conditioner. Please be sure to read this manual carefully before using it. -
Page 2: Table Of Contents
CONTENTS CONTENTS …....................... 2 IMPORTANT SAFETY INSTRUCTIONS …..........3- 5 INSTALLATION …....................6 PART NAME …....................7- 8 CONTROL PANEL ....................9 REMOTE CONTROL ..................10 OPERATION METHODS ................11 WATER DRAINAGE …................. ..12 MAINTENANCE ....................12 TROUBLESHOOTING …................13... -
Page 3: Important Safety Instructions
IMPORTANT SAFETY INSTRUCTIONS PLEASE READ ALL INSTRUCTIONS BEFORE USING THIS APPLIANCE. Your safety and the safety of others is very important. BASIC SAFETY PRECAUTIONS WARNING To reduce the risk of fire, electric shock, or injury to persons when using this appliance, follow basic precautions, including the following: •Do not attempt to repair or replace any part of your air conditioner unless it is specifically in this manual. - Page 4 creating a shock hazard. If water enters the unit, unplug it immediately and contact Customer Service. It can result in the risk of electric shock. •Use two or more people to lift and install the unit. Failure to do so can cause back injury or other injuries.
-
Page 5: Save These Instructions
ELECTRICAL SAFETY WARNING Electrical Shock Hazard Failure to follow these instructions can result in death, fire, or electrical shock. •This unit must be properly grounded. •Do not, under any circumstances, cut or remove the ground prong. •If you do not have a properly grounded outlet, or if there is any doubt that the outlet is not properly grounded, a qualified electrician should check the outlet and circuit, and, if necessary, install a properly grounded outlet. -
Page 6: Installation
INSTALLATION Selection of installation location Keep the unit on a flat surface and dry place. Leave at least 50cm space all around the unit. Installation Fix the exhaust pipe into the adapter, and then fix the other side of the exhaust pipe into the air outlet vent of the unit. -
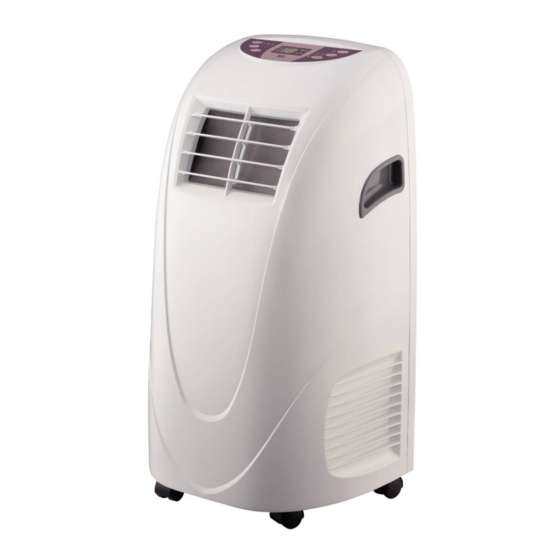
Page 7: Part Name
Incorrect mounting The bend of the exhaust pipe is very important. Incorrect mounting can prevent the machine from working correctly. Take care to prevent any sharp bows or bends of the exhaust pipe. The exhaust air must flow freely。 WARNING The length of the exhaust pipe is specially designed according to the specification of this product. - Page 8 Back 10. Exhaust air outlet vent 11. Power cord 12. Big filter 13. Small filter 14. Draining hole Check all the accessories included in the package and please refer to the installation instructions for their usage. Accessories Adapter Exhaust pipe 2 foams Window slider kit B Window slider kit A...
-
Page 9: Control Panel
CONTROL PANEL button: press this button to turn on/off the unit. MODE button: press this button to select Cooling, Automatic adjusting mode or Fan mode SPEED button: press this button to select high, low fan speed Timer: when stand-by time press this key to set automatic time on; when running time press this key to set automatic time off. -
Page 10: Remote Control
REMOTE CONTROL 1. Power 2. Celsius and Fahrenheit exchange button 3. Fan button 4. Cool Mode Button 5. Auto mode button 6. Down button 7. Up button 8. High fan speed button 9. Low fan speed button 10. Max cool button 11. -
Page 11: Operation Methods
OPERATION METHODS Cooling mode .Press Cool button to choose Cool mode, the Cool mode indicator will flash. ·Press UP or DOWN button to set room temperature between 62°F (17℃) to 88°F (30℃) . ·Press FAN SPEED button (or High/Low button) to select high, low fan speed. Fan mode ·Press Fan button to choose Fan mode, the Fan mode indicator will flash. -
Page 12: Water Drainage
WATER DRAINAGE This product has a self-evaporative system. The condensing water will be recycled to cool the condenser. This can not only improve cooling efficiency, but also save energy for you. · If the inside water is full, the display panel will display “P2”, and the compressor will stop running. -
Page 13: Troubleshooting
End of season ·Please drain the water. ·Keep the unit running in Fan mode for two hours until the inside of the unit is dry. ·Turn off the unit and unplug it. ·Clean the air filter and after dry it thoroughly, reinstall it. ·Remove the exhaust pipes and keep them carefully.
Need help?
Do you have a question about the AP11000 and is the answer not in the manual?
Questions and answers
I have AMICO USA portable air conditioner . Model AP 11000 . I need to replace the hose . How do I replace it . Is there one or is there a compatible one that will fit.