Table of Contents
Advertisement
Quick Links
Advertisement
Table of Contents

Related Manuals for Smart Electronic CX01


Summary of Contents for Smart Electronic CX01
-
Page 1: User Manual
HDTV Satellite Receiver CX01 User Manual Version: 20.06.2013 - V2 - English... - Page 2 +49 (0) 7724 9478-333 E-mail: service@smart-electronic.de Internet: www.smart-electronic.de © smart electronic GmbH 2013 All rights, technical changes, errors as well as printing mistakes reserved. Any reproducing or copy- ing of the contents requires prior written permission from smart. smart CX01...
-
Page 3: Table Of Contents
Location ......................15 Grounding ......................16 Handling of Batteries ..................17 Notes on Product Liability ................17 Installation of smart CX01 ............... 18 Connection Scheme ..................18 Connect Satellite Antenna ................18 Connect TV Set ....................19 Connect Home Cinema System (Optional) ........... 19 Connect Data Storage (Optional) ............. - Page 4 Subtitles ......................40 5.7.9 Aspect Mode ....................40 5.7.9.1 Setting the Aspect Mode with the V-MODE key ........40 5.7.9.2 Setting the Aspect Mode via the Menu ..........40 5.7.10 Video Resolution ..................... 41 5.7.11 Recall ........................42 smart CX01...
- Page 5 7.1.4 Single Satellite ....................54 7.1.5 Multi Satellite ....................55 TV Channel List / Radio Channel List ............55 7.2.1 Add Channel to Favorites ................55 7.2.2 Provide Channels with Password Protection (Lock Against Unauthorized Access) ................... 56 smart CX01...
- Page 6 Update of the Receiver Software .............. 65 7.18.1 Software Update via Satellite ..............65 7.18.2 Update via USB ....................66 Operation in a Unicable System ............. 66 About Unicable ....................66 Allocation of IF Channels and Frequencies ........... 67 smart CX01...
- Page 7 13 Technical Data ..................73 13.1 General Information ..................73 13.2 Remote Control ....................73 13.3 Mains Adapter ....................73 13.4 Connections ..................... 73 13.5 Temperature ....................74 13.6 Dimensions and Weight ................74 14 Declaration of Conformity ............... 75 smart CX01...
-
Page 8: User Information
User Information User Information Use of this Manual • This manual is intended for the HDTV cable receiver smart CX01. • Please carefully read this user manual before operating the device for the first time. • Please note all warnings and notes included in this user manual. -
Page 9: Product Description
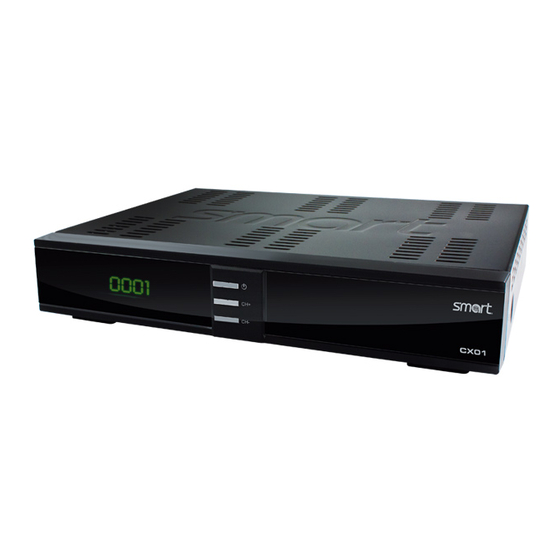
Product Description Scope of Delivery • HDTV satellite receiver smart CX01. • remote control • 2 batteries (AAA) for remote control • user manual... -
Page 10: Receiver
Indicates, that the receiver is in Standby mode. Channel up / up-navigation in menu STANDBY Switch between standby / normal operation LED green Indicates that a valid video signal is routed to the TV set. Channel down / down-navigation in menu smart CX01... -
Page 11: Rear Panel
Digital audio and video out DIGITAL AUDIO Digital RCA audio out (SPDIF) Connection for external USB data storage 10 ON / OFF Power switch (On/Off) High Definition Multimedia Interface (engl.), Schnittstelle für die volldigitale Übertragung von Audio- und Video-Daten. smart CX01... -
Page 12: Remote Control
Remote Control Description Switch between operational and standby mode. Switch aspect mode V-MODE Direct channel selection 1 - 9 Switch between TV and radio mode TV/Radio Call of channel search function FIND Channel + or up-navigation in menu smart CX01... - Page 13 EXIT Display / hide teletext 10 entries down in menu / channel list Call main menu MENU Yellow function key Blue function key Pause playback Stop playback SEPP = Smart Elektronic Program Portal EPG = Electronic Program Guide smart CX01...
-
Page 14: Save Energy
GmbH corresponds to the legal regulations at the time of purchase. General Safety Instructions Intended Use The HDTV satellite receiver smart CX01 is intended for private receiving of digi- tal satellite television (DVB-S/S2). It is exclusively intended for such purpose and must be used exclusively for such purpose. -
Page 15: Risks In Case Of Intended Use
Protect the receiver from humidity, heat, dust and dirt. Do not place items filled with liquid, e.g. flower vases, onto the receiver. Protect the receiver from dripping and splash water. Do not place burning items, e.g. burning candles, onto the receiver. smart CX01... -
Page 16: Grounding
VDE = Verband der Elektrotechnik, Elektronik, Informationstechnik (German) = Association for Electrical, Electronic & Information Technologies DIN EN 60728-11 VDE 0855-1:2011-06: Cable networks for television signals, sound signals and interactive services, Part 11: Safety smart CX01... -
Page 17: Handling Of Batteries
Then, liability regarding function of the device correspondingly passes over to the operator: • The device is not used in accordance with the user manual. • The device is used out of the field of application as described above. • The operator performs unauthorized changes of the device. smart CX01... -
Page 18: Installation Of Smart Cx01
Installation of smart CX01 Installation of smart CX01 First connect the receiver to the satellite antenna and any other devices before connecting the mains plug to the power outlet. Please also note the user manuals of the other devices. -
Page 19: Connect Tv Set
Connect Home Cinema System (Optional) To improve audio playback, you can connect to the smart CX01 - additionally to the TV set - also a multichannel home cinema system or a hi-fi system. There are various possibilities for connection. Your type of connection depends on the connection possibilities of your home cinema system. -
Page 20: Connect Data Storage (Optional)
Installation of smart CX01 Your home cinema system can process digital audio data – connection for digital data is pre- sent. Connect your home theater system and your receiver with a cinch cable. Your home cinema system can not process dig- ital audio data –... - Page 21 Installation of smart CX01 2. Place the two batteries 1.5 V (type: AAA). Ensure correct polarity! 3. Close the battery compartment Replace the batteries if certain remote control functions are not performed any more or are performed incorrect- ...
-
Page 22: Basic Operation
4. Switch on the receiver by using the power switch (on the rear panel of hous- ing) (I, ON). 5.1.2 Language By default, the smart CX01 language is preset to Deutsch [German]. Please ensure that the setting is cor- rect; you may change your settings by correspondingly pressing the keys PR+ and PR-. -
Page 23: Raps Start
The RAPS system of your CX01 automatically performs such programming work. The window RAPS Automatic Installation is the second window of the installa- tion process. -
Page 24: Raps Parameters
Astra 23.5° East Eurobird 9A 9° East Number of transponders included in the RAPS file Number of all channels in the RAPS lists Progress bar: informs on progress of download of the RAPS file East, often abbreviated "E" smart CX01... -
Page 25: Satellite List
5.1.5. Press OK to go to the next window Your regional channel. DiSEqC = Digital Satellite Equipment Control, a digital control signal technology with satellite receiving systems smart CX01... -
Page 26: Regional Channel
(Yes) or not (No) by respectively pressing Press OK to store your settings and to finish installation of the RAPS channel list. After this, TV operation will automatically start. smart CX01... -
Page 27: Select Operation Mode
TV and Radio. For menu navigation, you can use both the keys at the receiver as well as the remote control: Press CH+/PR+ to select the menu item above. Press CH-/PR- to select the menu item below. smart CX01... -
Page 28: Parental Lock
PIN and selecting Off or On by using the keys − change the password: 1. Select the field New Password. 2. Enter a new password. 3. Go to the field Confirm Password. 4. Again enter the new password. smart CX01... -
Page 29: Set Time
- or in the sub-menu - to perform fur- ther settings. Set Time Reasonable operation of the smart CX01 require setting of system time. By de- fault, the receiver is set to GMT Usage, i.e. date and time are taken from the received signal. - Page 30 7. Leave the menu by pressing EXIT until the screen shows the TV picture. You have several possibilities to select a channel: • Direct channel selection; • Channel selection via selection window; and • Channel selection via search function; as explained in the following sections. smart CX01...
-
Page 31: Direct Channel Selection
Name of current program Press the INFO key to call this window at any time. Set display time at OSD Timeout (see section 7.9, page 62). Press EXIT two times to close the information window. smart CX01... -
Page 32: Channel Selection Via Selection Window
Scroll bar – shows position of current channel in channel list 5.7.3 Channel Selection via Search Function The channel lists can be quite comprehensive; correspondingly, the smart CX01 offers various possibilities to filter the list, search for channels in the list, or sort the list:... -
Page 33: Hdtv Filter
OK. The channel selection window will open as second window; this window only shows channels with the se- lected genre. Press EXIT to close the channel selection window. Now you can choose an- other genre. smart CX01... -
Page 34: Find Channels (By Alphabet)
Deletes the last entered character. (red function key) or <- Closes the windows. (blue function key) Enters a space character. The question mark as first character has a wildcard func- tion. Example: "?R" searches for all channel names that include an "R". smart CX01... -
Page 35: Sort Channel List (By Alphabet)
by pressing OK, i.e. if you are then pressing the OK key to show the channel selection window, the channel selection list is displayed in its previous original state. smart CX01... -
Page 36: Program Information
PID = Packet IDentifier, each table or each elementary stream in a transport stream is identified by a 13-bit PID. PCR = Program Clock Reference; required to enable the decoder to perform correct presentation regarding time and speed. smart CX01... -
Page 37: Single Epg
Timer Service is set to Channel. You may change settings as described in section 7.4, page 59. Press the blue function key to go to the window EPG. Press the EXIT key to close the window Single EPG and return to TV opera- tion. smart CX01... -
Page 38: Epg
Press the OK key, the red function key or the EXIT key to close such win- dow. Press the keys PR+ and PR- to flip through all available channels. Press the keys to page back and forward respectively one program within a channel. smart CX01... -
Page 39: Audio Settings
3. Press the keys PR+ or PR- to select another language or Dolby AC3 (Dolby Digital) as far as provided by the TV station. 4. After selecting the desired audio mode, leave the menu by pressing the EXIT key. smart CX01... -
Page 40: Teletext
Press the V-MODE key several times to set the aspect ratio. Possible values: Auto, 4:3PS, 4:3LB, 16:9LB (see below table). 5.7.9.2 Setting the Aspect Mode via the Menu Select Aspect Mode to set the aspect ratio by using the keys smart CX01... -
Page 41: Video Resolution
= progressive scan: progressive scan images are transmitted, e.g. 720p means that 50 progres- sive scan images with a resolution of 1280 pixel/line and 720 lines/image are transmitted per sec- ond. i = interlaced video: odd and even lines are transmitted alternatingly. smart CX01... -
Page 42: Recall
5.7.12 Sleep Timer The smart CX01 comprises of a Sleep-Timer that enables an automatic change of the device from the operating mode to the standby mode: 1. Select the submenu Local Time Setting in the menu System and press OK. -
Page 43: Media Player
The buttons on the bottom edge of the Media Player window provide further functions. Such functions depend on the selected file type (music, images, videos). Music 6.1.1 Playback 1. Select the track to be played by using the keys PR+ und PR-. smart CX01... -
Page 44: Playlist
1. Select a track to be deleted by using the keys PR+ and PR-. 2. Press the green function key to remove the selected track from the playlist. 3. Press EXIT to end deletion, or go back to step 1 to remove further tracks from the playlist. smart CX01... -
Page 45: Delete All Files From The Playlist
All tracks in the current directory are played and repeated in the displayed order. All tracks in the current directory are played in random order and are then repeated. Press the EXIT key to close the Media Player and to return to the menu REC. smart CX01... -
Page 46: Images
Use the keys , , and to control playback. 2. Press OK to start playback in full screen mode. 3. Use the keys , , , and to control playback. smart CX01... -
Page 47: Edit Video Files
Press the EXIT key twice to leave the Edit mode. You will be directed back to the initial window of the Media Player. 6.3.3 Sorting Videos Press key 1 to sort the displayed videos by name, play time or file size. smart CX01... -
Page 48: Extended Settings And Functions
1. In the menu Installation, select the submenu Satellite List and confirm by pressing OK 2. Select the satellite you want to receive by pressing the keys PR+ and PR-, and confirm by pressing OK. The selected satellite will be correspondingly marked ( ). smart CX01... - Page 49 , and confirm your selection by pressing OK. You will be directed back to the satellite list. Press EXIT to leave the submenu Satellite List. Press EXIT to leave the menu Installation and to return to TV operation. smart CX01...
-
Page 50: Antenna Setup
5150 - 5750 Unicable (9750 - 10600) 10450 5750 - 5150 Unicable (10200) A universal LNB with 9750 - 10600 MHz is the default value. You can set signal strength and signal quality for receiving of a certain tran- sponder: smart CX01... - Page 51 H (horizontal), V (vertical) and Auto. Factory setting is made to Auto. DiSEqC = Digital Satellite Equipment Control, a digital control signal technology with satellite receiving systems DiSEqC1.0 supports four satellite positions DiSEqC1.1 supports 16 satellite positions smart CX01...
-
Page 52: Motor Antenna
6. Then press OK to save the found position. A query will be displayed. As compared to 1.0 and 1.1, DiSEqC1.2 offers the additional possibility of rotor control, USALS = Universal Satellites Automatic Location System (particularly simple motor antenna control) smart CX01... - Page 53 Select Motor Setting and press OK to open the submenu Motor Setting. 1. Select Satellite to select the satellite that should be used as reference for USALS control of the antenna. smart CX01...
-
Page 54: Single Satellite
At Tuner, select the LNB to process the signals (if only one LNB is present, then this item will not be active). Start channel search by selecting Search and confirm by pressing OK. FTA = Free To Air = unencrypted channels smart CX01... -
Page 55: Multi Satellite
A selection window with the eight available favorite lists will open. 3. Select the favorite list to which the channel is to be allocated by using the keys PR+ and PR-, and confirm by pressing OK. The respective favorite list is correspondingly marked ( smart CX01... -
Page 56: Provide Channels With Password Protection (Lock Against Unauthorized Access)
1. Press the yellow function key to activate the function Move. 2. Mark the channel to be moved by using the keys PR+ and PR-, and confirm by pressing OK. The channel to be moved is marked in the channel list. smart CX01... -
Page 57: Rename Channels
− Enter the new character respectively by using the numeric keys of the remote control. − Press the red function key (CAPS) to switch between upper case and lower case. − Press the green function key (DEL) to delete the respectively selected character. smart CX01... -
Page 58: Delete Individual Channels From Channel List
In the submenu Favorite of the menu Edit Channel you can rename favorite lists. 1. Select the favorite list to be edited by using the keys PR+ and PR-, and con- firm by pressing OK. 2. An on-screen keyboard will be displayed. smart CX01... -
Page 59: Display Setting
SCART output and press OK. Possible values are YUV and RGB. Default is YUV. Due to the internal signal processing it’s not anymore pos- sible to select higher resolutions than 576i even at the HDMI if RGB is selected smart CX01... -
Page 60: Format Of The Audio Signal At The Digital Audio Out
-compatible TV set, and receiver and TV set are connected via HDMI you can switch on and off (standby mode) both sets with the remote control of your smart CX01: 1. Select in the menu System the submenu TV System and press OK. - Page 61 – then you will return to the sub-menu Timer Setting). You can directly add programs marked in EPG to the timers. This significantly facilitates programming as you do not have to make settings for channel, date and time. smart CX01...
-
Page 62: Osd Setting
7.12 Simultaneous Playback of Picture and Sound Asynchrony between the image and the sound signals might for example occur in your home cinema system due to the use of long cables. Your smart CX01 OSD = On Screen Display smart CX01... -
Page 63: Lnb In / Out Loop Through (Loop Standby)
The display shows the current time. CAUTION! 7.14 RAPS System 7.14.1 Show the Date of the RAPS File on the Receiver The window RAPS System displays at Last changes from the date of the RAPS file on the receiver. smart CX01... -
Page 64: Setting Raps Mode
7.16 Software Version The submenu Information of the menu Tools displays the current version number of the smart CX01 software. 7.17 Factory Settings If you erroneously saved wrong settings or if you want to pass on the receiver without your settings, then you can reset the receiver to the factory settings... -
Page 65: Update Of The Receiver Software
Now it is being checked if the software currently installed on the receiver is up-to-date. If it is not up-to-date, then the current software version will be downloaded via satellite and installed onto the receiver. After end of instal- lation you will be asked if the update should be saved. smart CX01... -
Page 66: Update Via Usb
Operation in a Unicable System About Unicable The HDTV receiver smart CX01 allows for changing the receiving mode to the unicable standard. This makes it possible - depending on the antenna type - to connect up to eight independent receivers to only one main line. -
Page 67: Allocation Of If Channels And Frequencies
Installation If the receiver is connected to a uni- cable system, then RAPS installation will automatically cancel. The win- dow to the right will open. 1. Press the red function key (SHIFT) to open the submenu Antenna Setup. smart CX01... - Page 68 Antenna Setup without saving. 8. Press the red function key to open the window Antenna Setup Center Freq. 9. Leave the menu by pressing EXIT (settings will be saved). RAPS installation will be contin- ued automatically. smart CX01...
-
Page 69: Cleaning
3. Remove the batteries from the remote control. 4. Put receiver, cables and remote control into the original packaging. 5. Store the receiver and the accessory parts at a dry and dust-free location. 6. Protect the receiver from freeze. smart CX01... -
Page 70: Troubleshooting
TV set. zation. The remote control The batteries are empty. Replace empty batteries with new does not operate. batteries. The remote control shows Direct the remote control towards into wrong direction. the front panel of the receiver. smart CX01... - Page 71 If the malfunction still cannot be remedied, then please contact your specialist dealer. Service Hotline In case of technical problems, connection problems or general questions on settings: Service Hotline: +49 (0) 7724 9478-555 Fax: +49 (0) 7724 9478-333 E-mail: service@smart-electronic.de Internet: www.smart-electronic.de smart CX01...
-
Page 72: Disposal
WEEE = Waste Electrical and Electronic Equipment. The WEEE directive is the EC directive 2002/96/EC on reduction of the increasing amount of waste from electrical and electronic equip- ment not used any more. Its objective is prevention, reduction and environmentally friendly dispos- al of the increasing amounts of electronic waste. smart CX01... -
Page 73: Technical Data
13.4 Connections Data storage interfaces USB 2.0 Antenna in F-socket Tuner LOOP THROUGH F-socket Service RS232 Audio out 1 x RCA digital audio 1 x RCA stereo Video out 1 x HDMI 1 x SCART connector (EURO AV) smart CX01... -
Page 74: Temperature
Technical Data 13.5 Temperature Operating temperature +5° C to +40° C Storage temperature -40° C to +65° C 13.6 Dimensions and Weight Width 260 mm Height 45 mm Depth 165 mm Weight approx. 1.2 kg smart CX01... -
Page 75: Declaration Of Conformity
Declaration of Conformity 14 Declaration of Conformity The company smart electronic GmbH, Industriestraße 29, 78112 St. Georgen, Germany herby declares that this product meets the following directives and standards: • Directive on electromagnetic compatibility 2004/108/EC − EN 55013: 2001+A1:2003+A2:2006 EN 55020: −... - Page 76 Doc-ID: 120402302...
Need help?
Do you have a question about the CX01 and is the answer not in the manual?
Questions and answers