
Related Manuals for Smart Electronic Joy C1


Summary of Contents for Smart Electronic Joy C1
-
Page 1: User Manual
Digital Cable Receiver SCART - Digital Audio User Manual Version: 30.04.2014 - English... -
Page 2: Table Of Contents
5.7.1 Direct Channel Selection ..10 5.7.2 Channel Selection via Selection Window ..... 10 © smart electronic GmbH 2014 5.7.3 Channel Selection via Search All rights, technical changes, errors as well as printing Function ........11 mistakes reserved. Any reproducing or copying of the 5.7.4... -
Page 3: User Information
Table of Contents 5.7.6 EPG .......... 12 6.2.6 Delete Individual Channels from Channel List ..... 17 5.7.7 Audio Settings ......13 6.2.7 Delete All Channels ....17 5.7.8 Teletext ........13 Rename Favorite Lists ..... 17 5.7.9 Subtitles ........14 Language Setting ..... -
Page 4: Signs, Symbols, Layout
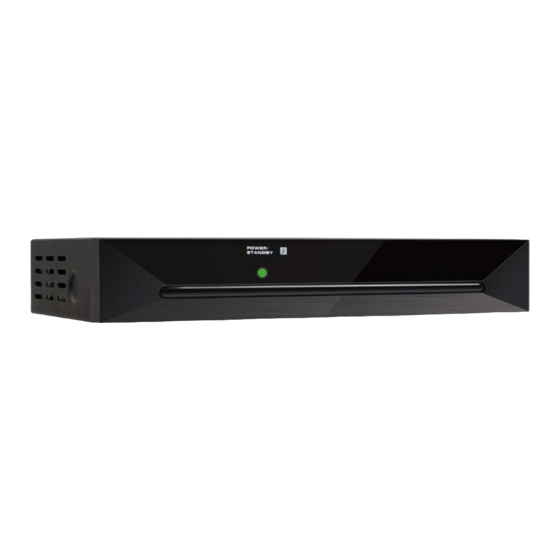
Product Description Signs, Symbols, Layout Receiver Symbol/layout Meaning 2.2.1 Front Panel WARNING Danger due to electric shock with possible severe bodily injury CAUTION No. Description Warning of possible physi- LED, lights green during opera- cal damage tion (when mains is connected) NOTE and red during standby mode. -
Page 5: Remote Control
Product Description Remote Control No. Key Description Switch of previously selected 9 PR channels Yellow function key 11 AUDIO Selection of audio format Switch between TV and radio 12 TV/RADIO mode Not used Not used Not used Not used Mute 18 FAV Call list of favorites Call of EPG (Electronic Pro-... -
Page 6: Safety Instructions
Safety Instructions Risk of electric shock when Safety Instructions contacting mains voltage. Damage to housing, Intended Use mains cable or improper The cable receiver is intended for private re- repair may result in con- ceiving of unencrypted digital cable television tact to mains voltage. -
Page 7: Handling Of Batteries
Installation of the Receiver Connection Scheme If the device is transported from cold to hot environment, then condensing humidity may build up in the device. Do not connect the device, but leave it switched-off for some hours. Handling of Batteries •... -
Page 8: Insert Batteries Of Remote Control
Basic Operation Insert Batteries of Remote Control Using the keys PR+ and PR, go to the key Start search and press OK to start auto- This describes the steps for inserting new matic channel search. batteries of the remote control or for replac- ing empty batteries: 5.1.3 Auto Scan... -
Page 9: Menu Navigation
Basic Operation Menu Navigation by using the keys The menu items with the settings for TV and − radio can be respectively accessed in the two set if certain channels are to be locked by a PIN, operation modes TV and Radio. Channel lock by selecting and select-... -
Page 10: Watching Tv
Basic Operation = automatic time setting via cable sig- With each change of channel, an information nal is deactivated. window with information on the current chan- nel will be displayed: It is recommended to keep the pre- (GMT usage On). setting GMT offset 4. -
Page 11: Channel Selection Via Search Function
Basic Operation 5.7.3 Channel Selection via Search Function The channel lists can be quite comprehensive; Press the FAV key to select from your fa- correspondingly, the receiver offers the possi- vorite lists. bility to search for channels in the list: 1. -
Page 12: Channel Information
Basic Operation 5.7.5 Recall Press the PR key to go to the last viewed channel. 5.7.6 The Electronic Program Guide is a comfortable tool, replacing a printed TV guide. Press the EPG key of the remote control. The window will open. -
Page 13: Audio Settings
Basic Operation The current program is marked with the current program, the following modes Left - Right - Stereo - Mono. are available: Press the red function key to access the 3. Press the keys PR+ or PR- to select an- Time window other language or Dolby AC3 (Dolby Digi-... -
Page 14: Subtitles
Basic Operation 5.7.11 Aspect Mode Press the EXIT or TXT key to deactivate teletext. 5.7.11.1 Setting the Aspect Mode with the V-MODE 5.7.9 Subtitles Press the V-MODE key several times to set If subtitles are offered for the program in the aspect ratio. -
Page 15: Extended Settings And Functions
Extended Settings and Functions Extended Settings and Func- 6.1.2 Manual Channel Scan Instead of using Auto Scan, you can also tions manually set the DVB-C channels: Channel Search 1. Press the key MENU. If you want to start channel scan during on- Installation 2. -
Page 16: Channel List
Extended Settings and Functions TV Channel List / Radio Channel 6.2.1 Add Channel to Favorites List 1. Mark the corresponding channel by using the keys PR+ and PR-. You can individually customize the lists. There 2. Press the key FAV and confirm by pressing are various available possibilities for editing. -
Page 17: Move A Channel To Another Channel Position
Extended Settings and Functions − Press the blue function key (CAN- From now on, the channel is CEL) to discard the changes made so skipped when switching from one far and to close the window Rename. channel to the next (zapping). 5. -
Page 18: Language Setting
Extended Settings and Functions 2. The window Rename will be displayed. channel to be displayed by using the keys See section 6.2.5. blue function key (L/R) Press the key to 6. Mark the line Wakeup Date by using the Favorite return to the submenu and press... -
Page 19: Hide Osd
Cleaning 6.6.2 Hide OSD To reset the receiver: Tools 1. In the menu , select the submenu Using the keys , set the Factory Settings number of seconds after which the OSD should be hidden. You may set values from 2. -
Page 20: Troubleshooting
Troubleshooting 3. Remove the batteries from the remote Symptom: control. • The TV set does not show a picture. 4. Put receiver, cables and remote control Possible cause(s): into the original packaging. • The system is not correctly connected. 5. Store the receiver and the accessory parts Solution: at a dry and dust-free location. -
Page 21: 10 Disposal
Disposal Fax: +49 (0) 7724 9478-333 11.1 General Information E-mail: service@smart-electronic.de • Standby Save • Energy mode • Timer 10 Disposal • 8 favorite lists Input frequency range 51 MHz ~ 858 MHz Input impedance 75Ω Do not dispose of the re- Band width 7 / 8 MHz ceiver and the batteries in... -
Page 22: Declaration Of Conformity
12 Declaration of Conformity − EN 55020: 2007+A11:2011 − EN 61000-3-2: 2006+A1:2009+A2:2009 The company smart electronic GmbH, Indus- − EN 61000-3-3 :2008 triestraße 29, 78112 St. Georgen, Germany • Low voltage directive 2006/95/EC herby declares that this product meets the following directives and standards: −... - Page 23 Index Index Aspect Mode ..........14 Menu Audio Settings ..........13 Call/Leave ..........8 Auto Scan ............. 8 Navigation..........9 Automatic Channel Scan ......15 Move a Channel .......... 17 Automatic Standby Function ...... 19 Operation Mode ..........8 Batteries OSD Setting ..........
- Page 24 Doc-ID: 14041401...
Need help?
Do you have a question about the Joy C1 and is the answer not in the manual?
Questions and answers