Table of Contents
Advertisement
Advertisement
Table of Contents

Subscribe to Our Youtube Channel
Related Manuals for Sumvision CYCLONE HD


Summary of Contents for Sumvision CYCLONE HD
- Page 1 CYCLONE HD ’ USER S MANUAL Default package: Harddrive Is Not Included REV1.1...
-
Page 2: Table Of Contents
Table of Content Warning and introduction………………………………… 4 Warning and caution………………………………………………………… 4 4 Limited liability……………………………………………………………… Introduction…………………………………………………………………… 5 Powerful Multilingual Subtitle Languages………………………………… 6 Home Theater & Car Theater……………………………………………… 6 Digital Photo Album………………………………………………………… 6 Firmware Update…………………………………………………………… 6 Powerful Media Processor………………………………………………… 6 External decode software…………………………………………………… 7 Package contents……………………………………………………………... - Page 3 Changing record setings……………………………………………………… 29 Changing photos setings……………………………………………………… 31 Changing network setings………………………………………………………33 Browser menu…………………………………………………35 Browser music……………………………………………………………………36 Browser photos………………………………………………………………… 37 Browser movies………………………………………………………………… 37 Browser all……………………………………………………………………… 38 File edit menu…………………………………………………………………… 38 File copy menu………………………………………………40 Step 1.select source device……………………………………………… 40 Step 2.select Destination Device………………………………………… 40 Step 3.select copy files or folders…………………………………………...
-
Page 4: Warning And Introduction
Warnings and introduction Warnings and Cautions It is normal that the surface becomes hot when using it as a player but do not cover anything over the device. The product may generate heat when used for long period of time. Do not attempt to disassemble this product. -
Page 5: Introduction
CYCLONE HD Media player is not designed or intended to, and may not be used to violate any copyrights or other IP (Intellectual Property) rights. Every user of player may only use it in connection with materials legally owned by or licensed to the user and only extend such ownership or license rights that will permit such use. -
Page 6: Powerful Multilingual Subtitle Languages
. Home Theater Store your video files to you CYCLONE HD Media player, and playback on TV to provide full digital Entertainment to you. Using HDMI it can provide high definition playback format to your eyes. You can also steam media though the Ethernet network or by the USB2.0 host. -
Page 7: 1.4 External Decode Software
1.4 External decode software Transcode server software is decode for format rm&rmvb of movie Notice: If you want to play for format “rm / rmvb “of movie via LAN you need to setup “transcode server” software to your PC. “Note there is no official support for this software” 1.5 Package Contents Package contents 1.DVR media player (no hard driver include) -
Page 8: Getting Started
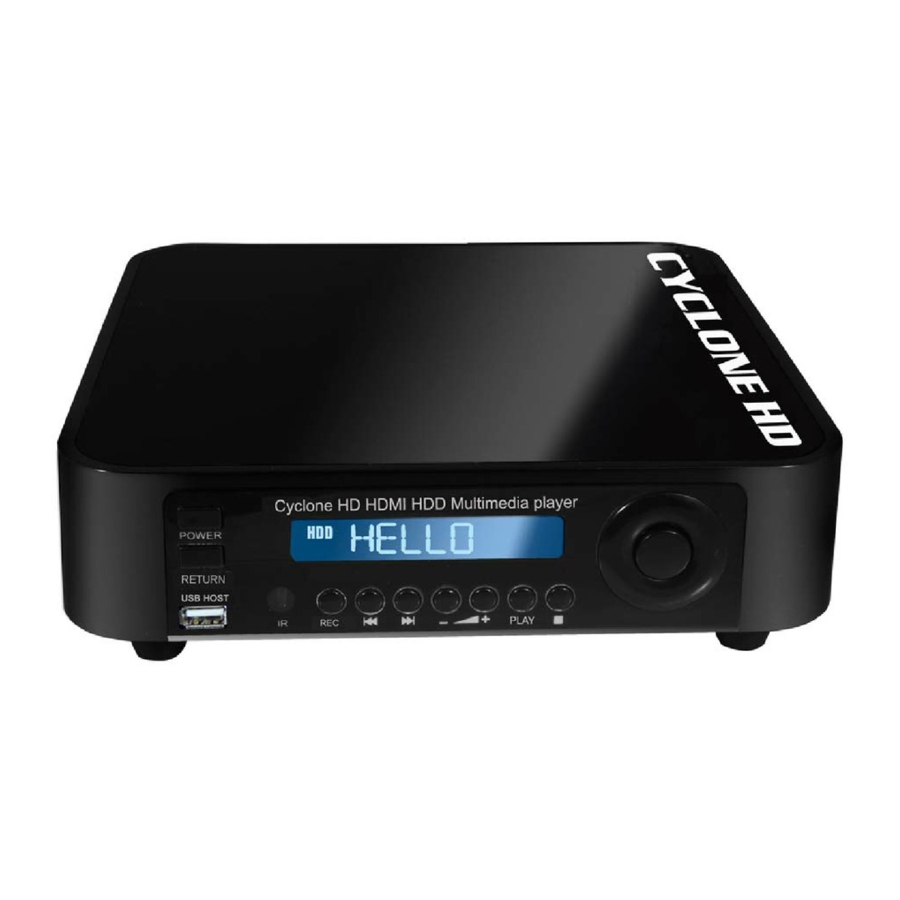
Getting Started Front Panel View: (1) Up - press the button to up (2) Right- press the button to right (3) down- press the button to down (4) Left- press the button to left (5) Enter- press the button to confirm your choose (6) Stop- press the button to stop playing files (7) Play- Press to begin playback of a DVD or HDD title. -
Page 9: Rear Panel View
Rear Panel View: (1) AV OUT-Composite video output to TV set (2)AV IN- Composite video input to Multimedia player (3) HDMI out- HDMI video output (720P/1080i) to TV set. (4) LAN Port-Used to connect Lan and play the shared files. (5) USB 2.0- connect to PC USB 2.0 port providing power and transferring data (6) POWER in-DC input, provide 12V/3A power adapter for TV Play mode or PC mode. -
Page 10: The Remote Control
The Remote Control All procedures in this manual can be carried out using the remote control buttons. Certain functions can also be carried out using the front panel at the front of the DVD recorder. See the following for details on each button and its function: 1. - Page 11 Button Function POWER button: Press to POWER on or off the AVHDD recorder. GUIDE button: “The Guide Menu” on page 6 Press to view the Guide menu. See more details. MUTE button: Press to mute audio output, and press again to resume. BROWSER button: Press to browse the music , photo, movie, all files on USB,HDD.
- Page 12 PREVIOUS buttons: Press to go the prev. on a HDD or USB file when playing music. Press to page up the file list at Browser. When play photo ,the button is enable; play Movie and Mp3 file, the button is disable. NEXT buttons: Press to go the next on a HDD or USB file when playing music.
- Page 13 REPLAY button. Press to backward 10 seconds of the current playback, which suitable for sport program. TV SYSTEM button: Press to switch between NTSC Interlaced, NTSC Progressive, PAL Interlaced, and PAL Progressive. GOTO button: Press to jump to a specific point on the disc or title. Specify the point using Title, Chapter and Time.
- Page 14 Button Function OPTION button: Press to select option bar. SELECT buttons: Press to select file or folder to rename or delete. CM SKIP button: Press to advance 30 seconds when in playback or record mode. CONFIRM button: Press to select confirm. STAND BY Press to stand by mode or power off waiting 5 seconds as correctly SUBTITLE...
-
Page 15: Selectin Video In
Power on the MK-AVHDD system, you can see the star up page. After a few second, the system will enter a guide menu. To enter this menu, press on the remote control too. Selecting Video In To select the a input source, select Video In button on the guide menu page. Selecting file Copy A clip recorded in HDD or USB disc is called a Title. -
Page 16: Selecting Time Rec
Selecting Time REC To enter the Time REC setup page, select on the remote control or select Timer REC button on the guide menu page. -
Page 17: Format Hard Disc
Format Hard disc When you insert a Hard disc on the system at the first time, System will remain you to enter the Hard disc format interface. You can also press into Setup menu and select HDD Format to Format HDD. -
Page 18: The Second Step
The second step Step 2: Hard disk format Press on the remote control to select back or format. When highlight move the Format button, Press to start. Otherwise, select back button to back. Congratulation page When complete the format, the system will display the congratulation page. Select OK button and Press to exit. -
Page 19: The Rec List
The REC List The REC List menu allows you to play all saved titles. REC List Menu When you press to begin recode. System will make a “My Recordings” folder at “HDD1” or USB device automatically for the first time. And your recode movie file will be saved at this folder. The file name will be rename according system time. -
Page 20: Timer Record Menu
Timer Record Menu The Timer Record menu allows you to create, edit and delete recording schedules and view all schedule status and history. To enter the menu, select Timer Record from the Guide menu . Creating a New Schedule Press on the remote control to select the Edit tab from the menu bar. -
Page 21: Editing Schedeles
Repeat Select how often you want the schedule to record. Choose from Once, Everyday, Mon-Fri, Mon-Sat or for an individual day of the week. Quality Select the recording quality. Choose from HQ, SLP, EP, LP and SP. The higher the quality, the more space required on the hard drive. See HDD/USB Free Space on the left of the screen for details of how long you can record for using each setting. -
Page 22: Viewing Recording History
The schedule list is displayed. Select a schedule and press Select Enable VPS, Disable VPS or Pause the selected schedule. Press to confirm. Viewing Recording History Press the left and right navigation arrows on the remote control to select the History tab from the menu bar. -
Page 23: Setup Menu
Setup Menu The Setup Menu allows you to configure video, record and system settings. To enter the menu, select Setup from the Guide menu. Changing System Settings Press on the remote control to select the System tab from the menu. - Page 24 Select to choose the OSD (On Screen Display) language. Menu Language Press to select the language. Press to confirm. Select to choose the text encoding language. Text Encoding Press to select the text encoding language. Press confirm. Time Select to set the system time. Press and enter Manual setup.
- Page 25 Select to HDD Format. HDD Format Press button on the remote control to select Cancel or CONFIRM from the menu. Restore Default Select to restore factory defaults. A confirmation message appears. Select CONFIRM and press RETURN to restore all settings to defaults. Note: If you open “system”...
-
Page 26: Changing Video Settings
Changing Video Settings Press on the remote control to select the Video tab from the menu bar. Aspect Ratio Select to set aspect ratio. Press to select from Pan Scan 4:3, Letter Box 4:3, or 16:9. Press to confirm. Pan Scan 4:3: Display a wide picture on the entire screen and cuts off the redundant portions. - Page 27 Brightness Select to set brightness levels. Press to adjust brightness. The new setting is previewed onscreen. Press to confirm. Contrast Select to set contrast levels. Press to adjust contrast. The new setting is previewed onscreen. Press to confirm. TV System Select to adjust TV system.
-
Page 28: Changing Audio Settings
Changing Audio Settings Press on the remote control to select the Audio tab from the menu bar. Night Mode Select to toggle Night Mode on and off. This function reduces the maximum dynamic audio range. Press to to enable or disable the function. Press confirm. -
Page 29: Changing Record Settings
Changing Record Settings Press on the remote control to select the Record tab from the menu bar. - Page 30 Quality Select to set the default recording quality setting. Press to select the quality setting you require. The highest quality setting is HQ which requires the most storage space. The other settings reduce recording quality sequentially but also require less storage space.
-
Page 31: Changing Photos Setings
Changing Photos Settings Press on the remote control to select the Photos tab from the menu. - Page 32 Select to set slide show time. Slide Show Time select the interval you require Press Press to confirm. Select to set the transition effect of photos. Transition Effect Press to select the transform of photo you require: Cross Fade – fade in and fade out Left to Right- from left to right Top to Bottom- from top to bottom Waterfal l- like a steep descent of water from a height...
-
Page 33: Changing Network Settings
Changing Network Settings Press on the remote control to select the Network tab from the menu. Wired Lan Setup Select to set the Network Setting. Before use the Network functions, please check following items: 1) Connect the MKAVHDD to Network first. 2) Please enable NetBIOS of TCP/IP on computer. - Page 34 Select “Infrastructure(AP)”to confirm and enter menu ,then select “Auto”to connect to network and will get the IP address by auto, you also select others to setup Note: wireless only support to Realtek chipset solution (RTD8187 chipset) Cyclone HD cannot support any other manufacturer network dongle.
-
Page 35: Browser Menu
Browser Menu The Browser menu allows you browse and play music, photo and movie files stored on a HDD or an external USB device and Card reader, Network. To enter the menu, select Browser from the Guide menu. Press to select the device on which the media is stored. Choose from HDD, USB (for media stored on an external flash disk),Card reader, NET and press When data on HDD,USB device or Card reader is connected the system to Network, you can also browse photos, listen to MP3 files, and watch videos. -
Page 36: Browser Music
Note: If you install the “Transcode Server” in your PC, the system will support ,RMVB WMV,RM… format playback through the NET. Browsing Music Use the left and right navigation arrows to select the Music tab. Press to select the folder containing your audio files. A thumbnail strip appears at the bottom of the screen, along with song information. -
Page 37: Browser Photos
Press to select the folder containing your photo files. Enter the folder press to select the photo you want to view and press The photo is displayed full screen. Note: 1. When the photo is displayed in full screen mode, the slide show starts automatically. 2. -
Page 38: Browser All
This browsing movies function supports High Definition Video(720P,1080i) Playback. For example: 1. MPEG1(DAT ,MPG) 2. MPEG2(VOB, MPG, TS) 3. MPEG4(AVI,DIVX,XVID) Note: When play the HD Video, you can according the movie resolution to adjust HD Video output. See “ HD Output of SETUP menu” on page 18 for more details. Browsing All Use the left and right navigation arrows to select the All tab. - Page 39 Select to return to the main screen. Return Rename To rename a file, do the following: 1. Press on the remote control to select the Rename tab from the menu bar. 2. Press on the remote control. The name entry screen appears. 3.
-
Page 40: File Copy Menu
File Copy Menu The Setup Menu allows you to copy files at NET,USB,HDD each other. To enter the menu, select File Copy from the Guide menu or select on the remote control. Step 1. Select Source Device When you enter the File copy interface, press to select the device which your want to copy first. -
Page 41: Step 3.Select Copy Files Or Folders
Step 3. Select copy files or folders At Source sector, press to select and press Enter to select file or folders which you want to copy. When you succeed to select, at the file or folder name right side will display Then press to next step, and press to return. - Page 42 When copy succeed, the system will display “File Copy Completed!”; if failed, the system will display “File Copy failed!” When the File Copy completed! You can select “OK” to browser files, or select “No” return Video1.
-
Page 43: Specifications
Specifications Product Name CYCLONE HD Media player Available OS USB Device Compatible: Windows 98SE/ME/2000/XP/VISTA, USB Device Device Port x 1, 480Mbps USB 2.0 (USB 1.1 compatible) USB Host Host Port x 1, 480Mbps USB 2.0 (USB 1.1 compatible) Supporting to read USB devices like External USB HDD, Flash... - Page 44 Video Output HDMI (Auto EDID,480P,576P,720P 50HZ,720P 60HZ,1080i 60HZ.) COMPOSITE Audio Output Stereo L-R FAN & 40mm Brushless FAN ; 0°C ~ 60°C Working Temperature (L x W x H) : 170 x 165 x 40mm Dimension Weight 500g (without HDD) Power 12V/3A 35W;...
Need help?
Do you have a question about the CYCLONE HD and is the answer not in the manual?
Questions and answers
I have a cyclone Primus which is a few year old and getting full, I have tried to copy some of the films to a ssd drive but after several hours only the folders are on the drive and show empty folder. Can I backup the films on this externa drive