Blendtec Classic Series Manual
- Owner's manual and user's manual (38 pages) ,
- Owner's manual and user's manual (18 pages) ,
- Owner's manual and user's manual (29 pages)
Advertisement
UNPACKING
SAVE ALL PACKAGING MATERIALS AND INSTRUCTIONS FOR FUTURE USE
UNPACKING YOUR BLENDER
You should have received the following items:
- Classic series motor base
- Blender jar with blade assembly and lid
Additional literature may be included depending on package configuration
- Remove the blender motor base, the blender jar with the blade assembly, and the lid from the packaging
- Unwind the power cord
- Check for any packing material that may be blocking the ventilation holes on the underside of the blender motor base
- Inspect all items to ensure no damage occurred during shipment
- If any damage has occurred, contact your Blendtec service agent immediately
RECORDING YOUR SERIAL NUMBER AND DATE OF PURCHASE
Record your blender motor serial number and the date of purchase in the space below
You will need these when contacting Blendtec for service or with questions Motor Serial # (found on the bottom of the motor base):
Date of Purchase:
Purchased From:
REGISTERING YOUR BLENDER
Register your blender online at www.blendtec.com/registration
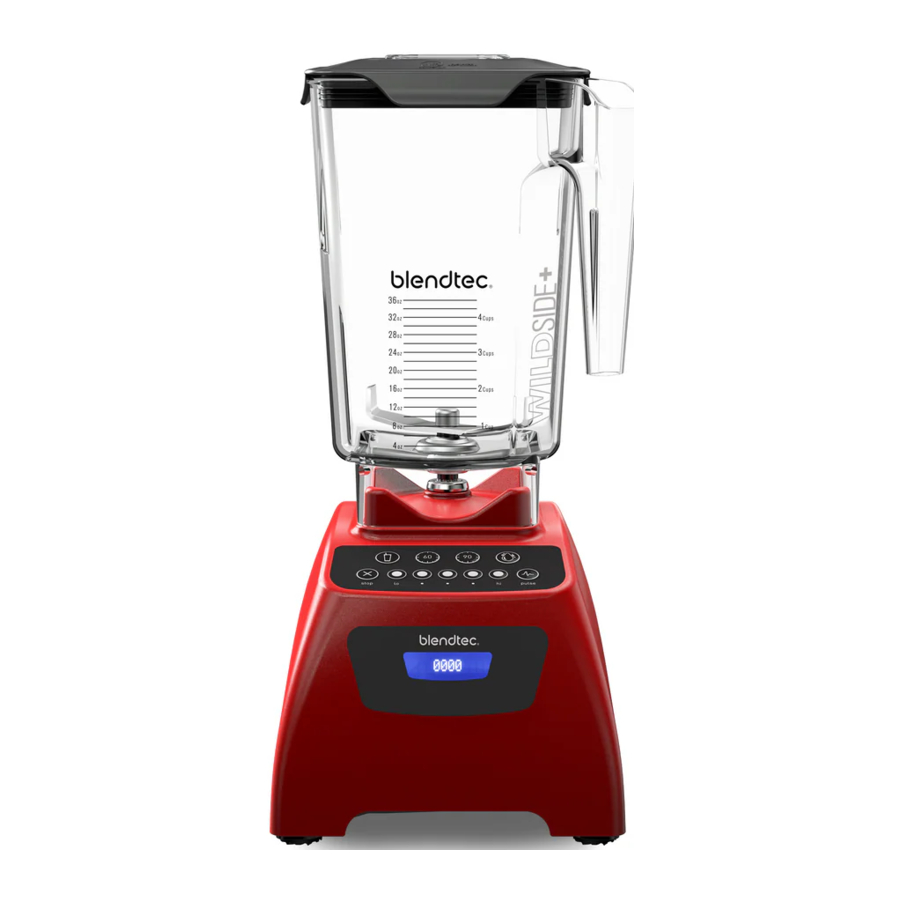
GETTING TO KNOW YOUR BLENDER
(Refer to Figures 1 and 2)


BLENDER MOTOR BASE
- Touchpad: Consists of one-touch pre-programmed cycles and speeds, as well as Stop and Pulse buttons
- Hardened Metal Drive Socket: Where the jar couples with the motor to turn the blade assembly; made of hardened metal
- LCD Information Centre: Displays the number of times a blend cycle button has been pressed
- Power Unit: This unit is located within the blender motor base and contains the computerized electronics that run the blender
- Motor Base Cover: Houses the power unit in a durable, plastic material
- Power Switch: Located in the lower-right corner on the back of the motor base cover
- Power Cord: Located at the back of the motor base cover
BLENDER JAR ASSEMBLY
The blender jar assembly consists of the blender jar, the blade assembly, and the lid
- Jar: Durable, easy-clean, BPA-free jar
- Blade Assembly: Uniquely designed stainless steel blade provides fast, consistent blending
- Lid: Vented gripper lid seals liquids in the jar during blending
NOTE: Filling the blender jar beyond the marked capacity is not recommended.
INSTALLATION
- Place the blender on a flat, clean, and dry surface Blender vents should be unobstructed to permit proper cooling during use
- Make sure an outlet is available within two feet (61cm) of the blender motor
- Ensure the power switch located on the back of the motor base is turned off before plugging the blender in
- Turn the unit on by toggling the power switch to the ON position
- Place the appropriately filled blender jar onto the blender motor base with the lid in place
OPERATIONAL OVERVIEW
QUICK RECIPE INSTRUCTIONS
Use these steps to get started right away.
- Choose a recipe
- Gather all of the ingredients
- Load the blender jar as indicated in the recipe
- Attach the blender lid to the jar; ensure that it is securely in place
- Turn on the main power switch located on the back of the blender motor base
- Place the blender jar onto the base, making sure the jar is securely and fully seated on the motor base
- Press the touch pad button indicated in the recipe once (or as indicated in the recipe)
- When the cycle is complete, remove the blender jar from the motor base
- Remove the jar lid and serve as indicated in the recipe
- For the best cleaning results, clean the blender immediately after blending
(See Section CLEANING AFTER USE)
ALL ABOUT BLEND CYCLES
Blend cycles are timed cycles designed for specific types of blending These one-touch cycles speed up, slow down, and shut off automatically, so results are perfect every time
Each blender in the Classic series features a number of pre-programmed cycles and settings that provide a wide range of results and functions:*
 Smoothie — For fruit smoothies, green smoothies, milkshakes
 One-Touch Timed — Used to blend ingredients for a 60-second or 90-second cycle
 Clean — Automatic cleaning cycle
 Incremental Speed — 50-second cycles that blend at Lo, Medium-Lo, Medium, Medium-Hi, and Hi speeds
 Stop — Stops the blender at any point while blending
 Hot Soup — For soups, hot chocolate, syrups, fondues
 Pulse — Used to quickly stir, chop, or mince at a high speed
*Interfaces and cycles will vary depending on the model number
CLASSIC 475™

![]() SMOOTHIE
SMOOTHIE
This cycle is designed specifically for various types of smoothies and thick drinks that frequently use dense or frozen ingredients It slows down and speeds up automatically during the course of the cycle This allows the blender to draw the ingredients into the blending vortex, creating the desired texture
![]() INCREMENTAL SPEEDS
INCREMENTAL SPEEDS
The Classic 475 comes with three incremental speed cycles that allow you to completely customize the consistency of the product you are blending
- Lo
- Medium
- Hi
You can switch to a different speed at any point during the cycle. To stop the cycle at any point while blending, press Stop.
![]() PULSE
PULSE
The Pulse function is used for chopping, mincing, whipping, or other momentary tasks that do not require a long blend cycle You can also use Pulse ![]() to quickly stir a blended product before serving it
to quickly stir a blended product before serving it
The Pulse setting runs at speed 7 and only while the Pulse ![]() button remains pressed When the button is released, the motor shuts off
button remains pressed When the button is released, the motor shuts off
CLASSIC 560™

![]() INCREMENTAL SPEEDS
INCREMENTAL SPEEDS
The Classic 560 comes with four incremental speed cycles that allow you to completely customize the consistency of the product you are blending
- Lo
- Medium
- Medium-hi
- Hi
You can switch to a different speed at any point during the cycle To stop the cycle at any point while blending, press Stop
![]() PULSE
PULSE
The Pulse function is used for chopping, mincing, whipping, or other momentary tasks that do not require a long blend cycle You can also use Pulse ![]() to quickly stir a blended product before serving it
to quickly stir a blended product before serving it
The Pulse setting runs at speed 7 and only while the Pulse ![]() button remains pressed When the button is released, the motor shuts off
button remains pressed When the button is released, the motor shuts off
CLASSIC 570™

![]() SMOOTHIE
SMOOTHIE
This cycle is designed specifically for various types of smoothies and thick drinks that frequently use dense or frozen ingredients It slows down and speeds up automatically during the course of the cycle This allows the blender to draw the ingredients into the blending vortex, creating the desired texture
![]() INCREMENTAL SPEEDS
INCREMENTAL SPEEDS
The Classic 570 comes with three incremental speed cycles that allow you to completely customize the consistency of the product you are blending
- Lo
- Medium
- Hi
You can switch to a different speed at any point during the cycle To stop the cycle at any point while blending, press Stop
![]() HOT SOUP
HOT SOUP
This cycle is designed for hot recipes The cycle's duration, combined with the speed of the motor, heats the ingredients to a hot temperature This cycle can also be used for hot chocolate, syrups, and fondue
When using fresh ingredients, remember that the speed of the blade generates enough heat to warm the ingredients Do not add any liquids or ingredients warmer than 115°F (46°C) to the jar when preparing soups or hot items
![]() PULSE
PULSE
The Pulse function is used for chopping, mincing, whipping, or other momentary tasks that do not require a long blend cycle You can also use Pulse ![]() to quickly stir a blended product before serving it
to quickly stir a blended product before serving it
The Pulse setting runs at speed 7 and only while the Pulse ![]() button remains pressed When the button is released, the motor shuts off
button remains pressed When the button is released, the motor shuts off
CLASSIC 575™

![]() SMOOTHIE
SMOOTHIE
This cycle is designed specifically for various types of smoothies and thick drinks that frequently use dense or frozen ingredients It slows down and speeds up automatically during the course of the cycle This allows the blender to draw the ingredients into the blending vortex, creating the desired texture
![]() ONE-TOUCH TIMED CYCLES
ONE-TOUCH TIMED CYCLES
The Classic 575 comes equipped with 2 one-touch timed cycles: a 60-second one and a 90-second one These cycles free your hands for other kitchen tasks and are ideal for recipes that require longer blending times, such as hot soup or bread dough
![]() CLEAN
CLEAN
This cycle automatically cleans the inside of your blender jar To use the Clean cycle:
- Add 1 cup (240ml) of water and a drop of dish soap to the blender jar
- Secure the lid on the jar and place the jar on the blender motor base
- Press the Clean button
- Once the cycle is complete, remove the jar, and rinse it out
- For the best results, use the Clean cycle immediately after blending
![]() INCREMENTAL SPEEDS
INCREMENTAL SPEEDS
The Classic 575 comes with five incremental speed cycles that allow you to completely customize the consistency of the product you are blending
- Lo
- Medium-lo
- Medium
- Medium-hi
- Hi
You can switch to a different speed at any point during the cycle To stop the cycle at any point while blending, press Stop
 PULSE
PULSE
The Pulse function is used for chopping, mincing, whipping, or other momentary tasks that do not require a long blend cycle You can also use Pulse ![]() to quickly stir a blended product before serving it
to quickly stir a blended product before serving it
The Pulse setting runs at speed 7 and only while the Pulse ![]() button remains pressed When the button is released, the motor shuts off
button remains pressed When the button is released, the motor shuts off
CARE AND CLEANING
CLEANING AFTER USE
- Add 1 cup (240ml) of hot water and a drop of liquid dish soap to the blender jar
- Place the lid tightly onto the jar
- Place the jar on the base and, with your hand placed on top of the lid, the Pulse button for 5 seconds or press the Clean cycle button
- Rinse well
- Clean the blender base by simply wiping the base and interface with a damp cloth
LONG-TERM SANITATION
- Fill the blender jar with hot water
- Add one to two teaspoons (5-10ml) of liquid chlorine bleach to the jar
- Stir for 10 seconds to mix the water and bleach Let the mixture stand in the blender jar for 5 minutes
- Empty the water/bleach mixture and leave the jar upside down on a dish rack until dry
CLEANING TIPS AND CAUTIONS
- DO NOT use stiff bristled brushes or abrasive cloths/pads to clean the blender motor base or jar, as this will dull or scratch the surface
- NEVER submerge the blender motor base in water Avoid submerging the blender jar for more than 5 minutes Water penetration through the lower jar seals will reduce the life of the jar After cleaning, we recommend the blender jar be stored upright
- THE BLENDER JAR IS DISHWASHER SAFE (TOP RACK ONLY)!
- Extreme temperatures will damage the lower seal of the jar We recommend hand washing to prolong the life of the blender jar We do not recommend the jar be exposed to temperatures above boiling (212°F or 100°C)
TROUBLESHOOTING
While we don't expect you to have any problems with your blender, sometimes failures do occur Use the following guidelines to determine whether the problem can be easily fixed or requires service
BLENDER MOTOR WILL NOT TURN ON (NO POWER)
If the blender motor will not turn on, try the following:
- Determine whether the liquid crystal display (LCD) Information Centre is lit up If the LCD Information Centre is not lit up, this indicates a lack of power to the unit
- Make sure the main power switch located in the lower-right corner on the back is turned on ON is indicated by the vertical slash (I) on the power switch
- Check your house circuit breaker switch to make sure it is set in the ON position
- Unplug the power cord from the wall receptacle, wait 5 seconds, and then plug the power cord back in
ERROR MESSAGES ON THE INFORMATION CENTRE
![]() Overload: This message indicates an overload on the motor Turn off and unplug the unit Remove the blender jar from the motor base and turn the shaft by hand to ensure the blade turns freely If the blade does not move freely, check for any obstruction in the jar The problem may also be the jar itself, not the motor If the blade moves freely, plug the unit in and turn the blender on If the overload condition reoccurs, please contact your Blendtec Service Agent for further assistance
Overload: This message indicates an overload on the motor Turn off and unplug the unit Remove the blender jar from the motor base and turn the shaft by hand to ensure the blade turns freely If the blade does not move freely, check for any obstruction in the jar The problem may also be the jar itself, not the motor If the blade moves freely, plug the unit in and turn the blender on If the overload condition reoccurs, please contact your Blendtec Service Agent for further assistance
![]() Overtemp: This message indicates that the motor is overheating The blender has been disabled until the unit cools to normal operating temperature Turn off and unplug the unit Allow it to cool for at least 20 minutes
Overtemp: This message indicates that the motor is overheating The blender has been disabled until the unit cools to normal operating temperature Turn off and unplug the unit Allow it to cool for at least 20 minutes
![]() E-05 (Reset Error): This message indicates a permanent failure of the electronics in the unit Please contact your Blendtec Service Agent for repair or replacement
E-05 (Reset Error): This message indicates a permanent failure of the electronics in the unit Please contact your Blendtec Service Agent for repair or replacement
(see Section Warranty)
![]() E-04 (No Zero Crossing): This message indicates failure of a component on the electronic board Please contact your Blendtec Service Agent for repair or replacement (see Section Warranty)
E-04 (No Zero Crossing): This message indicates failure of a component on the electronic board Please contact your Blendtec Service Agent for repair or replacement (see Section Warranty)
NOISE LEVEL CHANGES
If the blender noise level has increased from original levels, determine whether the sound is coming from the blender motor or the jar
- Blender motor: Remove the jar, and press the Pulse
![]() button Listen to the motor If it is excessively noisy, please contact your Blendtec Service Agent for evaluation
button Listen to the motor If it is excessively noisy, please contact your Blendtec Service Agent for evaluation - Jar: After checking the motor, fill the jar with 2 cups (480ml) of water and place it back on the motor base Run the blender for a few seconds by pressing the Pulse
![]() button If you have more than one jar, test a different jar to determine whether the sound is different If a jar is excessively noisy, or if the blade assembly seems loose or sounds gravelly when turned by hand, please contact a Blendtec Service Agent
button If you have more than one jar, test a different jar to determine whether the sound is different If a jar is excessively noisy, or if the blade assembly seems loose or sounds gravelly when turned by hand, please contact a Blendtec Service Agent
BLENDED TEXTURE UNSATISFACTORY
If the blended texture of a product is lumpy or uneven, do the following:
- Ensure the mixture is not cavitating during the cycle Cavitation is a condition in which an air pocket forms within the mixture because it is too cold or too solid The blender blade then spins freely in this cavity This problem can be corrected by increasing the mixture temperature by reducing ice, increasing liquid and/or ensuring that the frozen ingredients used in the recipe are never colder than 10 degrees Fahrenheit (-12 degrees Celsius)
- If the recipe is mixing well but has not had enough time to blend completely, increase the cycle time Try a longer cycle or push and hold the Pulse
![]() button for the required extra blending time
button for the required extra blending time - TRIED EVERYTHING? If none of the preceding suggestions work, contact your Blendtec service agent for further assistance
INSTRUCTIONS THAT APPEAR IN THIS OWNER'S MANUAL AND USER
GUIDE ARE NOT MEANT TO COVER EVERY POSSIBLE CONDITION OR SITUATION THAT MAY OCCUR. GOOD JUDGMENT MUST BE USED WHEN OPERATING THIS OR ANY OTHER MACHINERY.
IMPORTANT SAFEGUARDS
IMPORTANT INFORMATION
Read all instructions carefully before using your Blendtec® blender
Following these instructions will help prevent personal injuries and damage to the machine and will ensure that you have the best possible experience with your new blender
AVOID CONTACT WITH MOVING PARTS
- ALWAYS keep fingers, hands, hair and clothing away from all moving parts
- ALWAYS keep all utensils away from the drive socket and blender jar blades during operation as utensils may damage blades or the blender jar
- NEVER put hands into the blender jar or add ingredients by hand when the blender jar is on the motor base
- NEVER touch the blades with your fingers whether they are on or off the motor base
- NEVER place the jar onto the drive socket if the blender motor is on
- DO NOT rock or remove the blender jar during operation
These precautions will prevent personal injury and/or damage to the blender
NEVER OPERATE THE BLENDER IF IT APPEARS DAMAGED
If the blender malfunctions, call your service agent first If it is dropped or damaged in any way, return the blender to a Blendtec service agent immediately for examination, repair, electrical or mechanical adjustment, or possible replacement
NEVER OPERATE THE BLENDER IN LIQUID
To protect against the risk of electrical shock do not put the motor base in water or other liquid Do not use the blender outdoors where it is subject to precipitation This will void the warranty
NEVER PUT NON-FOOD ITEMS INTO THE JAR
Utensils, rocks, and glass are dangerous if placed in the jar Damage caused by such foreign objects will void the warranty Keep hands and utensils out of the jar while blending to reduce the risk of severe injury to persons or damage to the blender Utensils may be used only when the blender is not running
NEVER OPERATE THE BLENDER WITHOUT THE LID IN PLACE
NEVER OPERATE THE BLENDER USING ATTACHMENTS NOT SOLD BY BLENDTEC
The use of any unauthorized attachments may cause fire, electric shock, and/or injury and will void the warranty
THE BLENDER JAR MUST BE PROPERLY IN PLACE WHILE THE APPLIANCE IS ON

DO NOT BLEND HOT LIQUIDS OR OTHER HOT INGREDIENTS
Starting blend cycles with boiling or very hot liquids or other hot ingredients may result in burns or cause the lid to blow off
USE CAUTION WHEN BLENDING ON THE HOT SOUP CYCLE
When blending on the Hot Soup cycle, blade friction will heat the contents The vented lid releases pressure Be careful not to come in contact with any steam coming from the clear centre part of the lid
POWER CORD PRECAUTIONS
- NEVER operate the blender with a damaged cord or plug If the cord is damaged, it must be replaced by the manufacturer or an authorized service agent to avoid a hazard
- DO NOT permit the cord to hang over the edge of the work surface
- NEVER use an extension cord with the unit
- Unplug the blender motor when not in use and before moving the blender or cleaning it
NEVER ATTEMPT TO REPAIR THE POWER UNIT
Never remove the blender motor base cover The blender motor does not contain user-adjustable or serviceable parts A qualified service agent must make all service adjustments Removing the cover or attempting to service the blender will void the warranty
TURN THE POWER SWITCH OFF WHEN NOT IN USE
The power switch (ON/OFF switch) is located on the back of the blender motor base cover
AVOID TOUCHING THE BLENDER DRIVE SOCKET OR JAR SHAFT AFTER USE
The blender drive socket and jar shaft may become very hot during blend cycles
SAFETY
This appliance is not intended for use by persons (including children) with reduced physical, sensory or mental capabilities, or lack of experience and knowledge, unless they are supervised or have been given instructions on how to use the appliance by a person responsible for their safety Children should be supervised to ensure that they do not play with the appliance
THIS BLENDER IS INTENDED FOR HOME USE ONLY! ANY
USE OF THIS BLENDER FOR COMMERCIAL PURPOSES VOIDS ALL WARRANTIES
NEVER OPERATE THE BLENDER WHEN IT IS FILLED
BEYOND THE MARKED CAPACITY OF THE JAR
SAVE THESE INSTRUCTIONS
Documents / Resources
References
Download manual
Here you can download full pdf version of manual, it may contain additional safety instructions, warranty information, FCC rules, etc.
Advertisement


Need help?
Do you have a question about the Classic Series and is the answer not in the manual?
Questions and answers