
Related Manuals for GAS GAS EC 2008


Summary of Contents for GAS GAS EC 2008
- Page 1 enducross EC´08 enducross EC´08 enducross EC´08 MANUAL DEL USUARIO USER MANUAL MANUEL D’ENTRETIEN LIBRETTO D´USO BETRIEBSANLEITUNG...
- Page 3 enducross EC´08 enducross EC´08 enducross EC´08 USER MANUAL USER MANUAL...
-
Page 5: Foreword
GAS GAS thanks you for the trust you have placed in us. By choosing the new GAS GAS EC / MC / SM 2008 you have become part of the great GAS GAS family and, as a user of the number one manufacturer of off-road motorbikes, you deserve the distinguished treatment that we wish to offer to you both in our after-sale relationship and in the explanations that we provide in this manual. -
Page 6: How To Use This Manual
HOW TO USE THIS MANUAL Motorcycle riding, if improverly conducted, has the potential to cause environmental problems as well as conflicts with other people. Responsible riding use of your motorcycle will ensure that these Read this Manual carefully. You will find it contains all the necessary problems and conflicts do not develop. -
Page 7: Table Of Contents
Maintenance Schedule ..............17 Final recommendatios..............51 Electronic Ignition................19 Homologation..................52 Cooling System................19 Preparation for competition.............53 Spark Plug ..................20 Storage ...................54 Transmission...................22 GAS GAS Multifunction Instructions ..........55 Air Cleaner ..................24 Troubleshooting ................63 Throttle Cable .................25 Electric Schemas ................68 Carburetor..................25 Warranty Manual................69 Clutch....................26 - 5 -... -
Page 8: Specifications
SPECIFICATIONS ENGINE 2 cycles, single cylinder, crankcase intake, liquid cooled 125 cc Engine Bore and stroke 54 x 54.5 mm Displacement 124 cc 200 cc Engine (only EC) Bore and stroke 62.5 x 65 mm Displacement 199.4 cc 250 cc Engine Bore and stroke 66.4 x 72 mm Displacement... - Page 9 Primary reduction 2.85 (57/20) (250 cc, 300 cc) Final reduction 3.692 (48/13) (250 cc, 300 cc) Overall gear ratio 8.323 (6th gear) Transmission oil Capacity 750 cc (125 cc) 900 cc (200 cc / 250 cc / 300 cc) Type 10W30 API SF or SG CHASSIS Type...
-
Page 10: Location Of Components
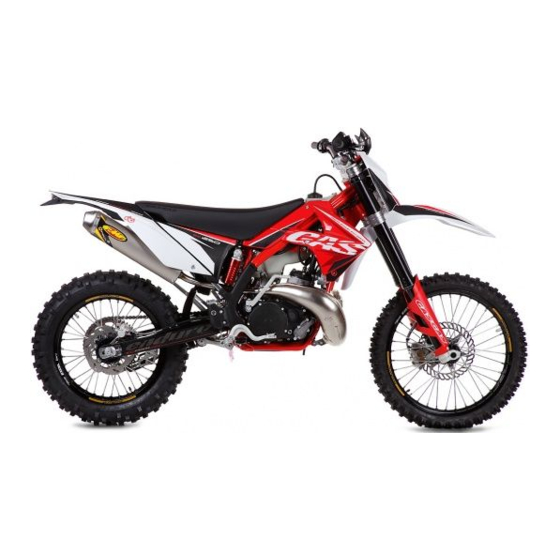
LOCATION OF COMPONENTS 1- Clutch lever GAS GAS EC 2008 2- Steering, lights, horn and headlamp controls 3- Fuel tank cap 4- Brake fluid reservoir 5- Front brake lever 6- Throttle grip 7- CDI Switch GAS GAS MC 2008 1- Clutch lever... - Page 11 GAS GAS EC 2008 7- Brake disc 17- Air cleaner 8- Front suspension 18- Muffler 9- Brake fluid reservoir 19- Seat 10- Fuel tank 20- Gas reservoir 11- Carburetor 21- Chain guide 12- Rear shock absorber 22- Chain 13- Brake caliper...
- Page 12 GAS GAS MC 2008 24 25 7- Brake disc 20- Gas reservoir & Rear shock absorber 8- Front suspension 21- Chain guide 9- Brake fluid reservoir 22- Chain 10- Fuel tank 23- Suspension linkage and swingarm 13- Brake caliper 24- Rear brake pedal...
- Page 13 GAS GAS SM 2008 24 25 7- Brake disc 20- Gas reservoir & Rear shock absorber 8- Front suspension 21- Chain guide 9- Brake fluid reservoir 22- Chain 10- Fuel tank 23- Suspension linkage and swingarm 14- Radiator 24- Rear brake pedal...
-
Page 14: Side Stand
FUEL To set the side stand only turn it until it contacts the stopper, then The GAS GAS EC / MC / SM models have 2-cycle engines that the side stand will be parallel to the ground and rest securely. - Page 15 RECOMMENDED FUEL Recommended oil: Use gasoline with an octane rating equal to or higher than that shown 2-CYCLE SYNTHETIC in the table. NOTE OCTANE RATING METHOD MINIUM If the recommended oil is not available, use only oil designed RATING for racing with 2-cycle engines. Antiknock Index (RON+MON)/2 Gasoline and engine oil mixing proportions:...
-
Page 16: Serial Number
SERIAL NUMBER (A) STARTING THE ENGINE It is stamped on the steering pipe. It indicates the frame number 1. Make sure the motorcycle is in the neutral position. 2. Turn the gasoline cock (A) clockwise to the "ON" position. registered for this motorcycle. HOMOLOGATION PLATE (B) This motorcycle carries its corresponding homologation plate where Open... -
Page 17: Shifting Gears
NOTE Stopping the engine (MC model) - When the engine is already warm or on hot days, open the throttle instead of using the choke knob. 1. Shift the transmission into neutral. - If the engine is flooded, kick with the throttle fully open. 2. -
Page 18: Stopping The Motorcycle
STOPPING THE MOTORCYCLE inspection of the spark plug shows this to be the case, replace the standard spark plug with another of a higher heat range. For maximum deceleration, close the throttle (A) and apply both front and rear brakes. Disengage the clutch as the motorcycle comes Perform the break-in period following these steps: to a stop. -
Page 19: Maintenance Schedule
MANTENANCE SCHEDULE Check / Inspect Adjust Change / Replace Clean Apply grease / Item Lubricate Clutch At each fill up At each fill up At each fill up* At each fill up Discs 3 fill ups 3 fill ups* 3 fill ups* Throttle cable 1 fill up Spark plug... - Page 20 MANTENANCE SCHEDULE Check / Inspect Adjust Change / Replace Clean Apply grease / Item Lubricate Brake caliper piston seal & dust seal Every 2 years Brake hose and pipe Every 4 years Spoke tightness and rim runout 1 fill up 1 fill up* 1 fill up* Lubricate drive chain...
-
Page 21: Electronic Ignition
ELECTRONIC IGNITION - If the marks are not aligned, loosen the magnetic inertia wheel screws and turn it. - Tighten the screws securely. This motorcycle uses a capacitor discharge ignition system (CDI). - Install the magnetic flywheel cover. The ignition system should never require adjustment unless the stator of the magnetic flywheel was incorrectly installed during engine NOTE reassembly. - Page 22 CAUTION If the lowest ambient temperature encountered falls below the freezing If high water pressure is used the radiator fins could be damaged point of water, protect the cooling system. Use a permanent type of and impair the radiator effectiveness. antifreeze in the cooling system (distilled water and ethylene glycol Do not obstruct or deflect airflow through the radiator by installing and corrossion inhibitors for aluminium engines and radiators).
- Page 23 WARNING To prevent severe scalding do not remove the radiator cap or try to change liquid, when the engine is still hot. Wait until it cools. (1). Coolant level. (2). Filler opening. Coolant level Total quantity - Place the motorcycle in riding position. Mix antifreeze and distilled water 1:1 (distilled water 50%, antifreeze - Turn the radiator cap (A) counterclockwise and wait a few seconds 50%).
-
Page 24: Spark Plug
Standard Spark Plug WARNING 125 cc 0.7-0.8 mm 200 / 250 / 300 cc 0.7-0.8 mm If coolant gets on the tires will make them very slippery and can cause an accident. The spark plug should be removed periodically to check its gap. If the plug is oily or has carbon deposits, clean it with a sandblaster. - Page 25 Oil level inspection Oil change - Wait a few minutes if the motorcycle has been operating. NOTE The engine must be completely cool and then warm up the engine again for a few minutes to normal operating temperature, to register the correct engine oil temperature and to obtain an accurate oil level measurement.
-
Page 26: Air Cleaner
- Place a lint-free towel in the intake port of the carburetor so no AIR CLEANER dirt is allowed to enter the carburetor. A clogged air cleaner restricts the engine air intake, increasing fuel CAUTION consumption, reducing engine power, and causing spark plug fouling. Do not turn the filter since it can be easily damaged or torn. -
Page 27: Throttle Cable
- Inspect the filter for damage such as tears, hardening, or shrinkage. - If the free play cannot be set by adjusting the cable, remove the If damaged, replace it or it will allow dirt into the carburetor. cable protector in the throttle body. Make the necessary free play - Apply grease to all connections and screws in the air cleaner and adjustments with the tensor at the end of the cable, tighten the intake ports. -
Page 28: Clutch
WARNING EXHAUST SYSTEM Riding with a damaged throttle cable could be dangerous. The exhaust and the muffler reduce the noise and send gases away from the rider. CLUTCH The clutch lever should have a maximum play of 3 mm. This margin If the exhaust is badly damaged, dented, cracked or rusted, replace increases with the wear on the clutch plate. -
Page 29: Drive Chain Guide
Changing the silencer packing EC Model - Remove all cover rivets with a drill. MC and SM Models - Remove the inside core of the muffler. - Replace the muffler fibre by wraping it around the inner tube. - Reinstall the assembly. (A). - Page 30 Drive Chain Slack Adjustment - Tighten the chain tensor nuts (B). - Tighten rear axle nut to 98 Nm. - Loosen the rear axle nut (A). - Rotate the wheel, measure the chain slack again at the tightest - Turn the nuts on the chain adjusting tensors (B) until the drive position, and readjust if necessary.
-
Page 31: Handlebar
Chain Guide Slider Apply oil to the sides of the chain rollers for better oil penetration. Wipe off any excess oil. Visually inspect the upper and lower chain slider at the location of the swingarm. If damaged or worn, replace it with a new part. (A). -
Page 32: Brakes
Rear brake pedal position Tighten the bolts, front first and then the rear, to 25 Nm of torque. When the brake pedal is in rest position, there should be a free play of 10 mm. Check the brake for good braking power and no brake drag. If the handlebar is installed correctly, there will be an... -
Page 33: Steering
EC and MC Models If the thickness of either pad, front and rear, is less than 1 mm, replace both pads as a set. Pad replacement should be carried out only by an authorized GAS GAS dealer. SM Model STEERING The steering should always be kept adjusted so that the handlebar will turn freely but without free play. -
Page 34: Steering Blockage
To check the steering adjustment use a stand under the chassis, - Install the suspension top bridge (D). and lift the motorcycle off the ground. Move the handlebar lightly to - Tighten the steering stem nut, and front fork washers and screws. either side;... -
Page 35: Front Fork
- Using a stand under the frame, and stabilize the motorcycle. CAUTION - Place a support under the engine so that the front wheel is raised Never leave the key in the latch. If the steering is turned to the left off the ground. - Page 36 Standard oil level Use the standard settings to adjust the rebound (turn it 6 positions counterclockwise). 110 mm CAUTION The left and right fork tubes must be at the same level and aligned with the top bridge. Compression dampening adjustment - To adjust the compression, turn with your finger the adjusting knob located at the top of the front fork.
- Page 37 (1). Spring. (2). Locknut. (3). Suspension cap. (4). Cap wrench. (5). Locknut wrench. Suspension tube spring Different springs are available in accordance with the rider´s weight or the road conditions. - Harder springs make the fork stiffer, and rebound action quicker. - Softer springs make the fork softer, and rebound action slower.
-
Page 38: Rear Suspension
Shock absorber extension adjustment To adjust, turn by hand the extension adjuster in the lower part of the shock absorber until a “CLICK” is heard. Total number of adjustments possible is: 40 "CLICKS". Rebound adjustment standard measures:25 “CLICKS”. (Counterclockwise from fully closed position). (1). - Page 39 Suspension spring The standard spring is 5.2 (250 cc, 300 cc) - 5.0 (125 cc, 200 cc) - 5.6 (MC). The spring length preloaded with the shock absorber at rest is 258 mm (A). High and low compression adjustment. (A). Nut. Spring adjustment (B).
-
Page 40: Wheels
Wheel rim runout WARNING Improper installation of the rear shock absorber spring may cause Place a dial indicator at the rim side, and spin the wheel by hand the spring and any of its related parts to be ejected at high velocity. to measure the axial runout. -
Page 41: Cleaning
CLEANING CAUTION To avoid excessive ageing of the plastic parts and other washable 1- Preparation for washing pieces of the motorcycle, it is suggested that these items must be washed carefully. If the washer applies water at high pressure and/or temperature, take the precaution of maintaining the washer outlet Before washing the motorcycle, precautions must be taken to prevent water from entering the following parts of the motorcycle. -
Page 42: Bolts And Nuts Tightening
BOLTS AND NUTS TIGHTENING Every day before riding, check the tighteness of the bolts and nuts described here. Also check that all other fasteners are in place and in good condition. 5,6,7 23,24,25 31,32 10 11 12 13 14 15 16 1- Front and rear wheel. - Page 43 Torque Values Table Tighten all bolts and nuts to the proper torque using an adequate wrench. A bolt or nut loose might damage the motorcycle or even cause an accident. PART NAME PART NAME Brake caliper mounting bolt Cylinder head screws Disc mounting screw Cylinder nut Engine mounting bolt...
-
Page 44: Lubrication
LUBRICATION Lubricate the points shown here, apply either engine oil or grease, periodically or whenever the vehicle has been operated under wet or rainy conditions, and especially after using high water pressure. Before lubricating each part, remove any rusty spots with rust remover and wipe off any grease, oil, or dirt. -
Page 45: Tunning (Carburetor And Suspension)
Drive Chain Lubrication NOTE The main jet should be increased or decreased 1 to 5 sizes and Lubricate the drive chain after driving on wet terrein or when the tested until the engine gives maximum power. chain looks dry. A high viscosity oil is preferred rather than a lower viscosity because it will stick to the chain longer and lubricate the chain better. - Page 46 Idling nozzle and mixture adjustment screw Carburetor jet needle Controls the mixture from the closed position to an opening of 1/8 The jet needle and jet needle hole together have their greatest effect of throttle range, but has little effect on full throttle. To adjust the in the one-half throttle range.
- Page 47 Check the condition of the spark plug, make sure the ingnition timing Correction factors: is correct, service the air cleaner element, decarbonize the exhaust tube (For altitude or temperature changes). If you machine has run properly up to this point, it is possible that the problem is elsewhere;...
- Page 48 ALTITUDE ALTITUD (104) (86) (68) (ºC) (50) (ºF) °C (32) (°F) (14) 0.86 0.88 0.90 0.92 0.94 0.96 0.98 1.00 1.02 1.04 1.06 CORRECTION FACTOR FACTOR DE CORRECCIÓN NEEDLE POSITION / AIR SCREW OPENING CORRECTION FACTOR 1.06 or HIGHER 1.06 - 1.02 1.02 - 0.98 0.98 - 0.94 0.94 or LOWER...
- Page 49 2. SUSPENSION TUNE-UP - When the oil level is raised: The spring effects become more progressive, and the front fork This adjustment is very critical because if an improperly tuned action feels harder at the end of travel. suspension will keep even the best rider from attaining the full benefit If the front suspension is making jounce stops, raise the oil level 10 of his machine´s ability.
- Page 50 Troubleshooting Improper Settings Symptoms of the rear shock absorber: Listed below are some symptoms of improper suspension settings - Too hard: and the most likely means of correcting them. 1. The suspension is too stiff • Compression damping is too high. The proper settings can be achieved by applying the information in •...
- Page 51 Riding experience Front and rear compatibility: Beginner: Soft spring with rebound. Use this procedure to determine if the suspension is balanced. Place Experienced: Harder spring. the motorcycle upright. While standing next to the right side of the motorcycle, hold the front brake and press the rear brake pedal firmly. If the motorcycle maintains its level attitude as the suspension is Rider's weight compressed, the spring rates are well balanced.
- Page 52 Does the front fork fails to respond to small potholes while Adjustments that depend on the conditions of the jounce stops managing wide turns? (rear shock absorber). Front Fork is hard: 1. Decrease the compression or rebound damping. - Suspension jounce stops at low speed, increase the spring preload 2.
-
Page 53: Final Recommendatios
In different sections of this manual you will find data at maximum speed is long, the motorcycle should be set so that and work specifications that must be done at an autorized GAS GAS the maximum machine speed can be developed towards the end... -
Page 54: Homologation
HOMOLOGATION (SM y EC): The vehicle you have just acquired has been homologated under the directives of the EU and complies with all the homologation requirements demanded. Compulsory homologation elements required, among others, when travelling on a public road and to meet periodical vehicle inspection approval at state controlled plants are listed below. -
Page 55: Preparation For Competition
PREPARATION FOR COMPETITION (2). After 1 day of racing competition: (1). Check: 1. Clean the air cleaner element. 2. Adjust drive chain slack. 1. Front axle and bridges nuts tightness. 3. Tighten rear sprocket nuts. 2. Front fork clamp bolts tightness. 4. -
Page 56: Storage
STORAGE For extended storage of the motorcycle, you must do the following: - Clean the motorcycle thoroughly. - Start the engine for about 5 minutes to warm up the transmission oil and then drain it (refer to the transmission section). - Fill with new transmission oil. -
Page 57: Gas Gas Multifunction Instructions
GAS GAS MULTIFUNCTION INSTRUCTIONS The multifunction apparatus, which is waterproof, has 2 LED indicators on a central indicator screen. This central indicator screen, made of liquid crystal and with illumination, gives information about the rpm, speed, distance travelled, total kilometres travelled, time, average speed, maximum speed, ambient temperature, length of time with motor running and total time. - Page 58 Technical characteristics FUNCTIONS SYMBOL TECHNICAL INCREMENTS PRECISION CHARACTERISTICS CURRENT SPEED SPD: - 399.9 kmph or mph 0.1 kmph or mph +/- 0,1% TACHOMETER 0 -19999 rpm 10 rpm +/- 0,1% TACHOMETER BAR -12000 rpm. Variable +/- 0,1% MAXIMUM SPEED - 399.9 kmph or mph 0.1 kmph or mph +/- 0,1% DISTANCE TRAVELLED...
- Page 59 Functions ODO: Odometer It shows the total mileage accumulated by the vehicle. The data is stored in the memory, even when the device is not running. RPM: Bar Tachometer with bar graph. The bar graph of the tachometer displays ART: Time of use controller up to 12,000 rpm.
- Page 60 Setting the multifunction display parameters After confirming each value, the display goes from one screen to the next until all have been displayed. If no button is pressed, the display returns to the home screen after 15 seconds. Activating adjustment mode Selecting the speed unit To start setting mode for the To change between kmph and...
- Page 61 Setting the time Setting the pulse per Enter the value for the time by revolution (PPR) pressing button 1 in succession. The gauge receives one To go on to the next digit, press electrical pulse for each button 3. revolution on the engine (PPR). Confirm by pressing button 2.
- Page 62 Selecting the temperature unit Selecting the warning To change the temperature temperature display between ºC and ºF, press Note: button 1. This step can only be taken on Confirm by pressing button 2. vehicles fitted with the optional temperature sensor. When the engine temperature exceeds the set value, the warning LED on the left lights up.
- Page 63 Selecting the danger rpm Total reset of the display When the set rpm is reached, the right-hand warning LED flashes to show that the rpm on Press the RESET button, using a suitable object. The display will the engine are too high. start from zero, except for the data for total accumulated distance and time.
- Page 64 Screen options When the display is powered by the internal battery only, the screen lights up partially for 3 seconds when the button is pressed. If the lighting is connected to the 12V system on the vehicle, it will The multifunction display shows all the information on three different screens.
-
Page 65: Troubleshooting
TROUBLESHOOTING NOTE This is not an exhaustive list of malfunctions, it only shows the most common problems. POSSIBLE CAUSE REMEDY MALFUNCTION Engine does not crank - Seized crankshaft. - Go to a specialized workshop. - Seized cylinder / piston / jornal bearing. - Go to a specialized workshop. - Page 66 MALFUNCTION POSSIBLE CAUSE REMEDY The engine operates irregularly - Ignition rotor damaged. - Replace the rotor. - Water in fuel. - Drain the fuel tank and fill up with new fuel. Engine lacks power or poor - Fuel supply defective. - Clean the fuel system and verify its operation.
- Page 67 MALFUNCTION POSSIBLE CAUSE REMEDY Gears do not engage correctly - Clutch does not disengage. - Go to a specialized workshop. - Bent or seized shift fork. - Replace the shift fork. - Gear seized at the transmission. - Go to a specialized workshop. - Damaged gearshift lever.
- Page 68 MALFUNCTION POSSIBLE CAUSE REMEDY Shock absorber set too hard - Excessive front fork oil. - Pour excess oil until reaching the correct oil level. - Front fork oil viscosity too high. - Drain fork oil and fill with correct fork oil viscosity. - Bent front fork.
- Page 69 MALFUNCTION POSSIBLE CAUSE REMEDY Handlebar vibration - Excessive steering axles tolerances. - Tighten steering bracket and steering stem locknut to the correct torque values. - Loose handlebar bracket, and loose - Tighten steering bracket and steering stem locknut to the handlebar stem locknut.
-
Page 70: Electric Schemas
Black ELECTRIC SCHEMAS Blue Grey Brown White Green Ignition coil Pink Orange Yellow Violet Front right Bright green indicator Magnetic flywheel Front brake sensor Speed sensor Rear brake sensor Rear right indicator Rear sidelight/ brake light Front sidelight Rear left indicator Dipped/ Full beam... -
Page 71: Warranty Manual
Warranty terms of the manufacturer GASGAS Motos, S.A. The company GAS GAS MOTOS, S.A. (hereafter referred to as “GG”), with this present document guarantees the consumer, the purchaser of a vehicle manufactured by GG, that both the materials and the manufacturing are free of defects in accordance with the highest standards of quality. - Page 72 Obligation of the purchaser GG will have the right to reject any claims under Warranty in the event that: a) The purchaser has failed to submit the vehicle to any of the inspections and/or maintenance work required in the Users’ Manual, or has exceeded the date set for such inspections or maintenance work.
- Page 73 e) Any damages caused as a result of the defects, as well as any expenses incurred either directly or indirectly as a consequence of the defects (for example, communication costs, accommodation expenses, car hire costs, public transport costs, breakdown truck fees,, courier costs, etc.), as well as other financial losses (for example, those caused by the loss of the use of the vehicle, loss of income, time lost, etc.) f) Any acoustic or aesthetic phenomenon that does not significantly affect the condition or use of the motorcycle (for example, small or hidden imperfections, noise or vibrations that are normal in use, etc.)
- Page 74 RECOMIENDA EL USO DE ACEITE: RECOMMENDS THE USE OF OIL: RECOMMANDE L’USAGE DE L’HUILE: CONSIGLIA L’USO D’OLIO: EMPFIEHLT DEN GEBRAUCH VON ÖL: AGOSTO / AUGUST / AOÛT / AGOSTO / AUGUST 2007 C/ UNICEF nº 17 · Poligon Industrial Torremirona · 17190 Salt (Girona) SPAIN · Tel: +34 902 47 62 54 Fax: +34 902 47 61 60 E-mail: officegg @ gasgasmotos.es / partsgg @ gasgasmotos.es...
Need help?
Do you have a question about the EC 2008 and is the answer not in the manual?
Questions and answers