
Related Manuals for A.M.P.I. Master-8

Summary of Contents for A.M.P.I. Master-8
- Page 1 Master-8 EIGHT CHANNEL PROGRAMMABLE PULSE GENERATOR Operation Manual A.M.P.I. 123Uzlel St., P.O.B. 16477 Jerusalem 91163, ISRAEL Tel: (972) 2 439 338 A.M.P.I. Fax: (972) 2 431 833...
- Page 2 Therefore Master-8 has many handy options. Please read this manual carefully and become familiar with all the possibilities. You will find Master-8 friendly to use and the programming simple and easy to learn. Master-8 is an attractive unit and you will enjoy working with its eight paradigms.
- Page 3 Channels 1 & 2 can receive external triggers. This offers a possibility of synchronizing those (and other) channels with external devices. In addition to its standard 8 channels Master-8 features a clock that counts the time that has passed from pressing the CLOC^K-RESET key (e.g. the experiment time).
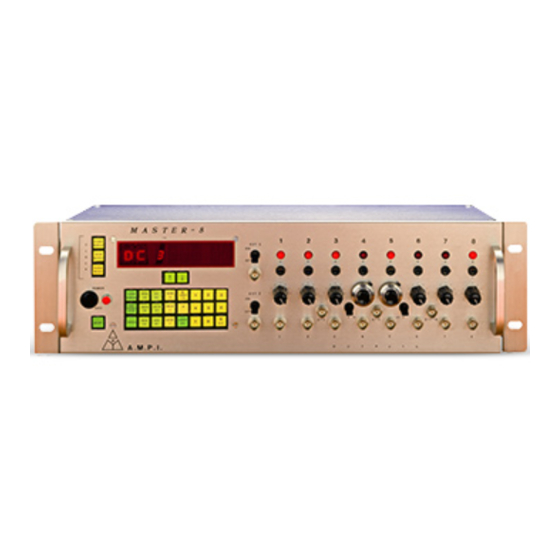
- Page 4 Description T H E PO\X'ER S W I T C H is located on the lower left side of the front panel. Beside it is a red light indicating 'POWER 0 N \ F r o n t p a n e l k e y s The front panel keys are divided into 5 groups.
- Page 5 Operation General The operation of Master-8 is simple and can be learned in a short time. Previous parameters remain in the memory even after the power has been switched off, unless the parameters are changed. Every instruction is carried out only after pressing the ENTER key. As long as the ENTER key has not been pressed, the instruction can be changed or deleted by giving new instructions (e.g.
- Page 6 Applications The following illustration gives you an idea of how M a s t e r - 8 works. Don't follow the programming yet, you will do it in the next chapter. duration "L Output 4+5; Bilevel pulses (out U4 + out flSj CHANNEL MODE PARAMETERS IN USE...
- Page 7 A Demonstration of Programming Master-8 This chapter is a demonstration of how to program the Master-8. Please follow the instructions and notice how simple and straight-forward the instructions are. Please note that each instruction is followed by the page number where you can find more details on similar instructions.
- Page 8 8 channels to run in a specitic pattern, which is your present experiment. Now you want to switch to a new pattern (paradigm) that also uses all the 8 channels. With Master-8 you can do this very easily. But first you have to program the other paradigm .
- Page 9 (14) What about turning the power ofP Let's try it. Turn the power off. Master-8 stores all the 8 paradigms even when the power is turned off. There is a lithium battery for memory retention. This lithium battery should be replaced only after 7 years.
- Page 10 Modes of Operation Each of the 8 channels can operate in one of the following modes: FREE RUN: The channel delivers pulses continuously according to the programmed duration and interval times. The channel is independent of the other channels. TRAIN: Following a trigger, the channel delivers a train of pulses according to the programmed duration and interval times.
- Page 11 Setting Parameters In order to set the time parameters (DURA, DELAY or INTER), first press the chosen parameter key then the time desired. Example: In order to set the duration of channel 6 to be 52 msec (52x 10"^ sec, the time is always given in seconds).
- Page 12 Table 1 P a r a m e t e r s and e r r o r indication Hrror indication for illegal values. (x is the channel number) 1. M 59,990 2. D U R A T I O N 40|isec 3999 sec 3.
- Page 13 (channels 1 and 2 can activate the other channels internally). 'The external input has to be in the range of 5-10 V. Please note that a computer can trigger each channel directlv 'manually' via the RS-232 interface of Master-8-cp (see page 17).
- Page 14 NOTE: Clearing the present paradigm does not affect the other paradigms, the clock, the stop-watch and the timer. In order to clear all the memory of all the 8 paradigms (and Master-8 will then be without any user program) Press: 'OFF, ALL, ALL, ALL, ENTER'.
- Page 15 Ways to Check There are many details you can check. All the checking instructions begin with the word 'CHECK'. 1) To check the modes of all the channels — Press: 'CHECK, ENTER'. The display shows the modes of all the channels that are not turned off and the present paradigm number.
- Page 16 Clock Options In addition to its standard 8 channels, M a s t e r - 8 features 2 internal clocks. The first is called 'clock' and counts the time in seconds up to 24 hours. The other called 'stop-watch' counts the time by tenths of seconds up to 1 hour. The clock 'The clock is used: 1) to measure the time that passed from an event (e.g.
- Page 17 Otherwise its internal buffer will fill with insignificant information. Whenever the computer is ready to receive information, its program has to send to Master-8-cp the initial code 'B 1 E' (meaning B=l, ENTER). To stop the flow of...
- Page 18 'B 0 E' (B=0) should be sent to Master-8-cp. While B=l, Master-8-cp transfers all the information that appears on the front panel display to the computer. When Master-8-cp accepts a CHECK instruction, it recognizes whether it was sent by the front panel keys or by the computer.
- Page 19 'B 1 E' at the beginning of the communication (without the final code 'B 0 E'). In this case Master-8-cp sends all the information that appears on its display to the monitor. The instrucfion 'H X E '('CHECK, CONNECTIONS, ENTER') causes Master-8-cp to send the connections-table to the monitor as described above.
- Page 20 7 SIGNAL GND A jumper should be connected between pins no. 4 and 5 (CTS,RTS) on the connector in the Master-8-cp side. For a regular connection, pins no. 1,2, 3,7 should be connected as described above, without the jumper between pins 4 and 5. In addition pins no. 4, 5,6,20 should be...
- Page 21 Appendix B Setting the baud-rate and character format 1) A double press on the ALL key shows the present baud rate. Each additional press on the ALL key selects the next baud-rate in the cycle: 75,110,150,200,300,600,1200,2400,4800,9600,19200. 2) Pressing the EN'TER key latches the selected baud-rate. 3) BITS PER CHARACTER: Each press on the ALL key selects either 7 or 8 bits per character (ASCII).
- Page 22 Appendix C The codes of the keys — D —ALL, 9 DURATION — I — BEGIN INTERVAL — L — DC DELAY — M — DURATION — F FREE-RUN — ENTER — N — FREE - RUN TRAIN — G TRIG —...
- Page 23 PC to communicate at baud rate 9600, no parity, 8 bits per character, 1 stop bit and suppress the control lines. From now on the computer refers to Master-8-cp as #1. Now, to operate channel 3 on the FREE-RUN mode, you can use the instruction: PRINT #1,"F 3 E";...
- Page 24 «iJ—jfj^t'wXj^jaaMS'"~'BI * * -'-'*! • " T — ' ^ V | « i a > o c H U M | cflnvfir ^yimr'^-^i0^i^ .a/SsmuMdy A.M.P.I. 123UzielSt., P.O.B, 16477 Jerusalem 91163, ISRAEL Tel: (972) 2 439 338 A.M.P.I. Fax: (972) 2 431 833...
- Page 25 [ / c ^ Master-8-vp THE VOLTAGE PROGRAMMABLE PULSE GENERATOR A.M.P.I. 123UzielSt.. P.O.B. 16477 Jerusalem 91163, ISRAEL Tel: (972) 2 439 338 A.M.P.I. Fax: (972) 2 431 833...
- Page 26 - 1 - In this manual we assume that you have already read the manual of Master-8. Thus, it describes only the features of Master-8-vp that Master-8 does not have. If you are an experienced user of Master-8 you probably know that Master-8 is a very flexible unit.
- Page 27 4 and 5 are programmed via the front panel keys or via a PC. INCREMENT AND DECREMENT STEPS Master-8-vp has an additional powerful feature - Channel 5 can be set increment decrement output voltage steps.
- Page 28 Press: 'V , 5, 1, ENTER, ENTER' . The voltage range is from -12.7V to +12.7V with steps of 0.1 V. (If you use Master-8-vp as the EXTERNAL COMMAND driving a Patch Clamp unit, the Patch Clamp divides the amplitude by a factor of 10 to 1000).
- Page 29 - 4 - Example 3: If V5=2, M5=4 and AV=0.5 then: the 1st pulse = 2.5V the 2nd pulse = 3V the 3rd pulse = 3.5V the 4th pulse = 4V Channel 5 delivers its pulses using the time parameters (DURATION, INTERVAL and DELAY) the same way as the other channels do.
- Page 30 NOTE: When A V = OFF Master-8-vp uses the VARIED STEPS. When A V = Value - Master-8-vp uses the FIXED STEPS. When A V = 0 Master-8-vp doesn't have any steps (but delivers pulses with constant amplitude = V 5 ) .
- Page 31 In Channels 4 and 5 the parameters are as follows: Voltage range: from -12.7 volt to +12.7 Volt. Interval time of Channel #5; 500 usee, to 3,999 sec. (more then an hour) In all the other channels all parameters are as described in the OPERATION MANUAL of Master-8.
- Page 32 - 7 - Demonstration In order to follow the demonstration in this chapter use an oscilloscope. In this demonstration we use channel 1 as the trigger source to channels 4 an and to the scope. Connect channel 1 to the external trigger input of the scope. Set channel 1 to run with the following parameters: FREE-RUN mode, D1=0.1 m s e c , 11=500 msec.
- Page 33 6) Now lets say that we want the following VARIED STEPS: -4V, -2V, -IV, -0.5V, +2V, +4V . In order to set these steps press: ' AV, ENTER' Now Master-8-vp is ready to get the different steps. Press:'4,ENTER,-,ENTER, 2,ENTER,-,ENTER, 1,ENTER,-,ENTER, 0.5,ENTER,-,ENTER, 2,ENTER,ENTER, 4,ENTER,ENTER' .
- Page 34 2. This gives a resolution of 0.05 V but changes the whole range to -6.35 V to 6.35 V. You should keep in mind that Master-8-vp does not know that you made this change. Thus, after switching, if you want an output of 1 V, you should set the channel to a 2 V output.
- Page 35 First check that the offset knobs of those two channels on the front panel are set to 0 offset. Now remove the top cover of Master-8-vp. On the rear part of the circuit board, find 4 trim-potentiometers (trimpots). These trimpots are blue or gray.
- Page 36 Thus, when the command pulses are generated from the sampling program it is possible that there are capacitive currents but you never sample them (because of the synchronization). If the same command pulses come from Master-8-vp and there is no synchronization with the sampling you may sample those capacitive currents.
- Page 37 - 12 - APPENDIX D - Communication With a PC When setting the parameters of Master-8-vp through your PC you should send ASCII codes of letters instead of pressing keys. The codes are the same as the codes of Master-8-cp. See the operation Manual of Master-8-cp Appendix C.
- Page 38 Read them carefully and become familiar with the flexibility of Master-8. The programming is friendly and easy to learn. I am sure that you will find Master-8 an attractive unit and you will enjoy working with its eight paradigms as many users do.
Need help?
Do you have a question about the Master-8 and is the answer not in the manual?
Questions and answers