Table of Contents
Advertisement
Quick Links
Advertisement
Table of Contents
Troubleshooting

Related Manuals for Grundig Xentia LXW 102-8625 REF


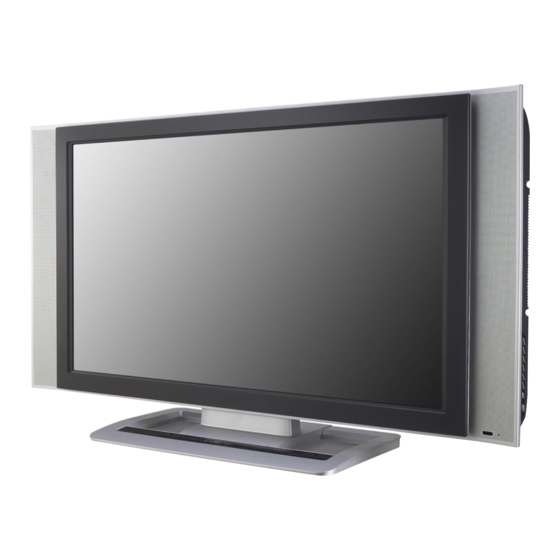
Summary of Contents for Grundig Xentia LXW 102-8625 REF
-
Page 2: Table Of Contents
Quick and Easy Installation Versatility and Expandability That doesn’t make you feel fatigue on your Eyes. Flat-Panel Digital Display easy on the Eyes. Safety Precautions Power Supply ……………………………………………………………………………………………………………… Installation …………………………………………………………………………………………………………………… Use and Maintenance ………………………………………………………………………………………………… Important Safety Instructions ………………………………………………………………………………………… User Guidance Information What is the LCD TV? ………………………………………………………………………………………………………... - Page 3 Changing Sound Settings ………………………………………………………………………………………………… Custom Sound Adjustment ………………………………………………………………………………………………… Sound Output ………………………………………………………………………………………………………………… Selecting the Menu Language …………………………………………………………………………………………… Setting OSD Tone Menu Background Setting Blue Background ………………………………………………………………………………………………… Setting Digital Noise Reduction ………………………………………………………………………………………… Changing Screen Size ……………………………………………………………………………………………………… Changing the Screen Size for WSS Signal Input Manual Store …………………………………………………………………………………………………………………...
-
Page 4: Safety Precautions
Power Supply Warnings Do not use a damaged Do not touch the power power cord or plug or a plug with wet hands. loose outlet. Doing so may result in Doing so may result in electric shock. fire or electric shock. Be sure to ground the unit. -
Page 5: Installation
Do not place containers with Do not place the unit where it liquids such as flower vases, is exposed to rain, excessive soft drink cans, or medicine moisture or grease. bottles or small metallic objects on top of the unit. Doing so may result in fire, electric shock, malfunction, If liquid enters the unit or any... -
Page 6: Use And Maintenance
Use and Maintenance Warnings Disconnect the power Do not insert any metal cord from the wall outlet objects, such as a screwdriver, during an electrical storm. paper clip, or bent wire into the ventilation openings or Not doing so may result A/V terminals. -
Page 7: Important Safety Instructions
Safety Precautions Important safeguards for you and your new product ● Always be careful when using your LCD TV. To reduce the risk of fire, electrical shock, and other injuries, keep these safety precautions in mind when installing, using, and maintaining your machine. -
Page 8: Important Safety Instructions
Important Safety Instructions CAUTION RISK OF ELECTRIC SHOCK DO NOT OPEN CAUTION : TO REDUCE THE RISK OF ELE- CTRIC SHOCK, DO NOT REMOVE COVER (OR BACK). NO USER SERVICEABLE PARTS INSIDE. REFER SERVICING TO QUALIFIED SERVICE PERSONNEL. WARNING TO PREVENT DAMAGE WHICH MAY RESULT IN FIRE OR ELECTRIC SHOCK HAZARD, DO NOT EXPOSE THIS APPLIANCE TO RAIN OR MOISTURE. -
Page 9: User Guidance Information
User Guidance Information What is LCD TV? LCD (Liquid Crystal Display) is a next generation flat-panel display module. Liquid crystal material is contained between sheets of glass and electricity causes the liquid crystal material to reflect or block the light emitted from a light source inside the display chassis. By incorporating this LCD display module, LCD TVs enable you to enjoy outstanding picture quality without the worries of space limitation and harmful radiation you may have experienced with conventional CRT TVs. -
Page 10: Name Of Each Part
User Guidance Information Names of each part Front View ❶ Main Power Button - Please turn off the main power switch, if the LCD TV will not be used for a long period of time. ❷ Stand by Button ❸ Source Button - Input Source Select Button Menu Button ❹... -
Page 11: Controls And Functions
User Guidance Information ❶ ❷ ❸ ❹ AC Input ❶ RS-232C Terminal ❷ Analog RGB (D-SUB) ❸ Digital RGB (DVI-D) ❹ Component 1 ❺ Component 2 ❻ Audio Input (Component 1, 2, PC/ DVI) ❼ Audio Input (Composite 1/ S-Video 1) ❽... -
Page 12: Mounting On A Wall
User Guidance Information Mounting on a Wall Your LCD TV can be mounted on a wall as shown in the figure above. ▶ Installation Precautions Wall Mounting Please secure enough space for safe use. (Please refer to A and B.) ●... -
Page 13: Installing An Antenna
User Guidance Information Installing an Antenna For an Apartment or Condo Complex Using an Indoor Antenna ● Locate a wall jack with an F-connector, and then connect the coaxial antenna cable to the wall jack. Wall Jack with F-Connector Coaxial (Round) Antenna Cable Copper Wire For a House... -
Page 14: Remote Controller
User Guidance Information Remote Controller Functions of remote control buttons ● The remote control is using Infra-Red (IR). Point it towards the front of the LCD TV. The remote control may not work correctly if it is operated out of range or out of angle. 1. -
Page 15: Precautions
User Guidance Information 1. Check the polarity ( ) of the batteries in the remote controller. 2. Check that the batteries have power. 3. Check that the LCD TV is powered and that it is properly plugged in. 4. Check if any three-wavelength lamp, special fluorescent or neon sign is turned on near the LCD TV. 1. -
Page 16: Connections
VCR Connections Connecting to the composite terminal ● ※ Connection terminals of other appliances differ by manufacture and model. < LCD TV Back view > ·Connect the LCD TV's Composite In terminal to the VCR's Composite Out terminal using the Composite cable. (Make sure the colour of the terminals and the colour of the cable are the same) Connecting to the S-Video terminal ●... -
Page 17: Cable Tv Connections
Connecting to the composite terminal ● ※ In order to watch Cable TV, Subscribe to your local Cable TV company and install a separate converter(Set-Top-Box) ※ Connection terminals of other appliances differ by manufacture and model. < LCD TV Back view > ·Connect the LCD TV's Composite in terminal to the cable broadcasting receiver’s composite Out terminal using the Composite cable. -
Page 18: Camcorder/Game Console Connections
Camcorder/Game Console Connections Connecting to the composite terminal ● ※ Connection terminals of other appliances differ by manufacture and model. < LCD TV Back view > ·Connect the LCD TV's Composite In terminal to the camcorder/game console's Composite Out terminal with the Composite cable. -
Page 19: Dvd Connections
Connecting to the component terminal ● ※ Connection terminals of other appliances differ by manufacture and model. < LCD TV Back view > 1. Connect LCD TV's Y, P terminal in component 2. Connect LCD TV's Audio terminals (left & right) in component Connecting to the S-Video terminal ●... -
Page 20: Dtv Connections
DTV Connections Connecting to the component terminal ● ※ Connection terminals of other appliances differ by manufacture and model. < LCD TV Back view > 1. Connect LCD TV's Y, P terminal in component 2. Connect LCD TV's Audio terminals (left & right) in component the Audio cable. -
Page 21: Pc Connections
※ Connection terminals of other appliances differ by manufacture and model. < LCD TV Back view > ·Connect LCD TV's RGB terminal to PC's RGB terminal using the D-Sub cable. ·Connect LCD TV's PC Audio terminal to PC's Audio terminal using the Audio cable. (Only possible for PC's with Audio terminal) ·If there is a DVI- D terminal in your PC, use the DVI- D cable connection. -
Page 22: Audio Out Connections
Audio Out Connections ※ Connection terminals of other appliances differ by manufacture and model. < LCD TV Back view > ·Connect LCD TV's Audio Out terminal to AUDIO's Audio Out terminal using the Audio Out Cable. Headphone Connections < LCD TV Back view > ·Connect the Headphone to the LCD TV's headphone terminal. -
Page 23: External Adjustment
Connection External Adjustment ·Use the RS-232C jack to control monitor's functions externally by external equipment. How connect a external equipment ● RS232C Cable <Back view of the LCD TV> Caution : Regular customer does not allow using the external adjustment that is used for service purpose only. -
Page 24: Basic Use
Powering the LCD TV Power on/ off ● ·To turn the LCD TV on : Press the "Main Power" button of LCD TV and then press the "Standby" button. ·To turn the LCD TV off : Press "Standby" button on the LCD TV and then press the "Main Power" button. Turning the main power switch off will save energy. -
Page 25: Watching Tv
Channel Selection ● increases the channel. decreases the channel. To go back to the previous channel ● Press to go back to the channel previously viewed. Volume Control ● increases the volume. decreases the volume. To turn off only sound ●... -
Page 26: Selecting Tv/External Input
Selecting TV/External Input You can between the TV signal and the input signal of other appliances connected to the TV. Use this function to switch to the input source you wish to view. SCART 1 ※ Once Source button press it indicate a present status and repress it is set with different itput Source. ※... -
Page 27: To Set Location
To Set Location Press to move to Press to select. Press to move to "Country". to select the desired country. Press to go back to the previous menu. ·TV System Standard I/PAL : United Kingdom, Hongkong B.G/PAL : Germany ,Netherland, Switzerland, Italy, Austria, Yugoslavia B/PAL : Australia, New Zealand, Singapore, Norway, India, Thailand, Indonesia, Malaysia D/PAL : China, North Korea B.H/PAL : Belgium... -
Page 28: Setting Channels
Setting Channels Use the Auto Search function to preset all channels that are being broadcast Press to move to Press to select. Press to move to "ATM". Press to select. to move to "Start". Press to select. Press "Start" to start the automatic channel search/set function. All broadcasting channels will be set. -
Page 29: Changing Picture Settings
Press to move to Press to select. Press to move to "Screen Mode". select between Custom/ Dynamic/ Standard/ Move/ Mild. Press to go back to the previous menu. Custom Picture Adjustment ● Press to move to Press to select. Press to move to "Custom Adjust". -
Page 30: Changing Sound Settings
Changing Sound Settings Press to move to Press to select. Press to move to “Custom Adjust”. Press to select. select between Custom, Standard, Music, Movie, Speech. Press to go back to the previous menu. Custom Standard ·Standard : It is the flat sound setting with no equalizer effect at all. ·Music : It is preset for music listening. -
Page 31: Custom Sound Adjustment
Press to move to Press to select. Press to move to "Custom Adjust". Press to select. to move to the desired category. to adjust the setting. Press to go back to the previous menu. Press to move to Press to select. Press to move to "Sound Output". -
Page 32: Selecting The Menu Language
Selecting the Menu Language Menu screen can be viewed in the language preferred by the user. Press to move to Press to select. Press to move to "Language". to select the desired language. Press to go back to the previous menu. Basic Use... -
Page 33: Setting Blue Background
The LCD TV can be set to display blue screen when no TV signal or signal from other connected appliances are being received. If there is an incoming signal, the blue screen will be replaced by the normal picture screen. Press to move to Press... -
Page 34: Application
Changing Screen Size Press Auto wide wide Panorama In PC input mode, you can only select either the wide or the normal (4 : 3) mode. In Component 1/2 input mode, you can't Select Auto Wide. In Component 1/2 input mode (1080i), you can't Select Zoom2. Auto wide 14 : 9 Screen Size... -
Page 35: Changing The Screen Size For Wss Signal Input
Changing the Screen Size for WSS Signal Input When WSS signal is incoming from a connected external appliance, screen size can be changed to panorama or 4 : 3. Press to move to Press to select. Press to move to "WSS ". to select the Panorama or 4 : 3. -
Page 36: Sorting Program
Sorting Program In this mode, you can arrange programs in numerical order. Press to move to Press to select. Press to move to "Program Sort". Press to select. to move to the desired Program Number. Press to move to the next category. to move to the Preferred Program Number. -
Page 37: Editing Program Name
Favorite programs can be stored to make it easier to find. Press to move to Press to select. Press to move to "Program Name". Press to select. to move to the desired Program Number. Press to move to program name. to register program name. -
Page 38: Adjusting Unclear Screen
Adjusting Unclear Screen Use screen fine-tune controls to adjust the screen when picture quality is unclear or lines appear. Press to move to Press to select. Press to move to "Fine Tune". Press to select. to tune. Press to go back to the previous menu. To return to initial setting or Auto Setting, use To view the still picture Press... -
Page 39: Viewing Picture In Picture
Press to move to Press to select. Press to move to "Mode". to select the "On" or "Off". Press to go back to the previous menu. Or press Sound from only one of the screens may be heard. TV/External Input ●... - Page 40 Viewing Picture in Picture Selecting Position ● Press to move to "Position". to select the desired position. Press to go back to the previous menu. Or press Sub-screen position can be selected only from the Main Screen/Sub Screen Swap ● Press to move to "PIP Swap".
-
Page 41: Auto Volume Level
This feature maintains an equal Volume level ; even if you change channels. Press to move to Press to select. Press to move to "Auto Volume Level". to select the "On" or "Off". Press to go back to the previous menu. Press to move to Press... -
Page 42: Resetting Lcd Tv Setting
Resetting LCD TV Settings It resets all of the parameters to the factory default. Press to move to Press to select. Press to move to "Reset". Press to select “OK”. The LCD TV will turn off. The parameters will be set to factory default. ※... -
Page 43: Setting Time
Press to move to Press to select. Press to move to "Clock". Press to move one step. to adjust the desired hour. Press to move one step. to adjust the desired minute. Press to go back to the previous menu. You can set your local time by adjusting the differences from GMT, according to your location. -
Page 44: Automatic Power On/Off
Automatic Power On/Off Clock time must be set ● Press to move to Press to select. Press to move to desired category. Press to go back to the previous menu. Setting Hour to select, to set Setting Minute to select, to set Set/Cancel to select,... -
Page 45: Teletext
Basic Function ■TEXT On/Off 1. Press "ON" once , then displays the Teletext pages. 2. If you press "ON" once more, Text mode is off. ■TOP TEXT The user guide displays four fields-red, green, yellow and blue at the bottom of the screen. The yellow field denotes the next group and the blue field indicates the next block. -
Page 46: External Adjustment
External adjustment External adjustment How connect a external equipment ● <Back view of the LCD TV>... -
Page 47: Set Id
External adjustment Press to move to Press to select. Press to move to "Set ID". to select the desired ID number. Press to go back to the previous menu. The adjustment range of Set ID is 0 ~ 99. Set ID... -
Page 48: Special Features
Special features Type of connector : D-Sub 9-pin male ● Pin name No connection RXD (Receive data) TXD (Transmit data) DTR (DTE side ready) DSR (Dce side ready) RTS (Ready to send) CTS (Clear to send) No Connection ·Use a crossed (reverse) cable. Wire the cable so that each pair of data lines cross between the two devices. -
Page 49: Rs232C Communication Protocol
External adjustment COMMUICATION PARAMETERS ● BAUD RATE : 9600 bps Data Length : 8bits Parity : None Stop bit : 1bit ※ The Remote Control and LCD TV Key Control(Except Main Power) Don't Operate When Controlling LCD TV Set by PC. Command List ●... - Page 50 RS232C Communication Protocol 1. Power : p ▶ To Control Power On/Off of the LCD TV * Transmission {p}{ }{SET ID}{ }{Data}{Cr} Data 0 : Off Data 1 : On * Ack {SET ID}{:}{OK}{x}{Data}{x} Data 0 : Off Data 1 : On ▶...
- Page 51 External adjustment 4. Volume Mute : w ▶To Select volume mute on/off * Transmission {w}{ }{SET ID}{ }{Data}{Cr} Data 0 : On Data 1 : Off * Ack {SET ID}{:}{OK}{x}{Data}{x} Data 0 : On Data 1 : Off 5. Volume Control : v ▶...
- Page 52 RS232C Communication Protocol 11. Sharpness : h ▶ To adjust Sharpness * Transmission {h}{ }{SET ID}{ }{Data}{Cr} Data : Min : 00h~Max : 64h * Ack {SET ID}{:}{OK}{x}{Data}{x} Data : Min : 00h~Max : 64h 12. Information : f ▶ Information on/off * Transmission {f}{ }{SET ID}{ }{Data}{Cr} Data 0 : On...
- Page 53 External adjustment 16. Pip Sound Set : e ▶To Select Pip Sound * Transmission {e}{ }{SET ID}{ }{Data}{Cr} Data 0 : Main Data 1 : Sub * Ack {SET ID}{:}{OK}{x}{Data}{x} Data 0 : Main Data 1 : Sub 17. Pip Mode : d ▶...
-
Page 54: Maintenance And Service
Maintenance and Service Trouble shooting In case a problem occurs with your If you still have the problem, turn the power off and contact your dealer or an authorized service center. Screen related Matters Problem The screen does not appear. The screen appears too slowly after the power is turned on. -
Page 55: Trouble Shooting Tip
Maintenance and Service Others ● Problem Remote controller does not work. LCD TV makes strange noise. LCD TV indication lamp is On. This LCD TV is for household use and registered as suitable on electromagnetic waves. Therefore, you can use it in every location as well as residential areas. For improvement of product's quality, program can be upgrade without costomer's agreemant. -
Page 56: Supported Display Modes
Maintenance and Service Supported Display Modes Component Mode ● Resolution Horizontal Frequency (KHz) 720×480 720×576 720×480 720×576 1280×720 1280×720 1920×1080 1920×1080 If any signal of unsupported resolution is input, the "Out of Range" message appears. Specifications ● Aspect Ratio Screen Size (H×V) Resolution Pixel pitch... - Page 57 Maintenance and Service Memo...
- Page 58 Maintenance and Service Memo...
- Page 59 Maintenance and Service Memo...
Need help?
Do you have a question about the Xentia LXW 102-8625 REF and is the answer not in the manual?
Questions and answers