Table of Contents
Advertisement
Quick Links
Advertisement
Table of Contents

Related Manuals for SEVIC SV070270D

Summary of Contents for SEVIC SV070270D
- Page 1 VISION LIBERTY COMBO 2 SV070270D - Operating manual - 1 -...
-
Page 2: Introduction
Introduction Thank you for choosing the 7” portable DVD player. The unit applies the latest state of the art electronics and is designed for use in hotels, offices or your home. The DVD Player is constructed to provide years of reliable, trouble- free service, and is compact so that you can take it with you anywhere and is designed for quick and easy setup. -
Page 3: Important Safety Instruction
Important Safety Instruction The lightning flash with arrowhead symbol, within an equilateral triangle, is intended to alert the user to the presence of un-insulated “dangerous voltage” within the product’s enclosure that may be of sufficient magnitude to constitute a risk of electric to persons. The exclamation point within an equilateral triangle is intended to alert the user to the presence of important operating and maintenance (servicing) instructions in the literature accompanying the appliance. - Page 4 Important Safety Instruction Notes Read these instructions. Keep these instructions. Heed all warnings. Follow all instructions. Do not use near water. Clean only with dry cloth. Do not block any ventilation openings. Maintain well ventilated conditions around the product. Do not put product on bed, sofa or anything that blocks ventilation. Install in accordance with the manufacturer’s instructions.
-
Page 5: Table Of Contents
Table Of Contents Introduction-------------------------------------------------------------------------------------------- Important Safety Instruction--------------------------------------------------------------------- Table of Contents ----------------------------------------------------------------------------------- Main Features --------------------- ------------------------------------------------------------------- View of Main Unit------------------------------------------------------------------------------------ Remote Control -------------------------------------------------------------------------------------- System Connections ------------------------------------------------------------------------------ Connecting to AC Adapter -------------------------------------------------------------------------- Connecting to a TV------------------------------------------------------------------------------------ Connecting to a Normal Amplifier ---------------------------------------------------------------- Connecting to a Digital Amplifier ------------------------------------------------------------------ Connecting to External AV Signal Source------------------------------------------------------- Connecting to DC Adapter--------------------------------------------------------------------------... -
Page 6: Main Features
Main Features High Quality Audio and Video Advanced Playing Function Excellent Sound Compatibility Dolby Digital output to produce excellent DVD, CD, CD-R, CD-RW and JPEG audio output signal. discs are compatible. High Resolution ON-Screen Display MPEG2 decoding format achieves more ON-screen displays in your choice of than 500 lines of horizontal resolution. -
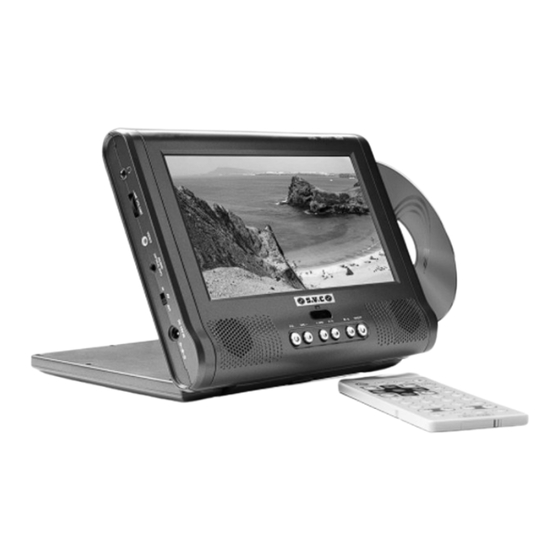
Page 7: View Of Main Unit
View of Main Unit Front and Right Panel PIC button Press to enter the brightness, color or contrast adjusting mode, then use the +/- button to adjust the items. Press and hold the button for about 1~2 seconds to shift screen aspect ration between 16:9 and 4:3. / -button Press to go to beginning of a previous track/chapter. - Page 8 View of Main Unit Power ON Indicator Light turns green when the player is in work status. It will turn off automatically when enter standby mode. Speakers Provides high quality Audio outputs. 10. Disc Tray When loading the disc into the disc tray, it will be automatically slotted in. 11.
-
Page 9: Remote Control
Remote Control Remote Control 1. PWR button Press to turn ON or OFF the power. ENTER button Press to confirm the items settings. 2. SUBT button When a DVD with subtitles is SETUP button playing, press to select a subtitle Press to access the DVD player’s language or to turn subtitle OFF. - Page 10 Remote Control 9. NEXT SKIP button 17. STOP button Press to go to next track /chapter. Press once to stop playback. Press the PLAY/PAUSE button to resume 10. A-B Repeat button normal playback. Press the button Used to play a section of the DVD twice to stop playback completely.
-
Page 11: System Connections
System Connections Always ensure that the DVD player, TV and any other electrical equipment to be connected to the DVD player are switched OFF. Ensure that you observe the color coding when connecting audio and video cables. Connecting to AC Adapter Connect the supplied adapter to the side of the DVD player in the jack marked “DC 12V IN”. -
Page 12: Connecting To A Normal Amplifier
System Connections Connecting to a Normal Amplifier The DVD player can be connected to an amplifier. Please refer to the equipment’s manual before connecting. After connecting, switch the AV IN/OUT to OUT. Connecting to a Digital Amplifier The DVD Player can be connected to an amplifier with a digital optical input. The cable is not supplied, but can be purchased at most home electronics retailer. -
Page 13: Connecting To External Av Signal Source
System Connections Connecting to External AV Signal Source The unit supports AV signal input function. Use the audio/video cable to connect the unit to the external AV signal source such as a DVD, VCR etc. after connecting, switch the AV IN/OUT button to AV IN. -
Page 14: Playback Preparations
Playback Preparations Using of Remote Control Remove the empty battery receptacle. Refer to the drawing above. Insert the battery into the receptacle and insert the receptacle into the remote. For best results, aim the remote directly at the player’s receiving window within 15 feet, and angles of not exceeding 60 degrees. -
Page 15: Using Wired Headphone
Playback Preparations Using wired Headphone Using Wireless Headphone The unit also supports IR function. You Connect headphone into the can use a wireless headphone when headphone Jack on the left side of the listening the music. Please take the unit. As shown below: steps below when using the wireless headphone. -
Page 16: Disc Formats Supported By This Player
Playback Preparations Disc Formats Supported By This Player PLAYBACK TIME/ DISC LOGO DIAMETER PLAYABLE SIDES 1 3 3 m i n ( S S- S L ) 2 4 2 m i n ( S S - D L ) 12cm 2 6 6 m i n ( D S- S L ) 4 8 4 m i n ( D S- D L ) -
Page 17: Rechargeable Battery Pack
Rechargeable Battery Pack About Rechargeable Battery Pack Your portable DVD player comes with a lithium ion rechargeable battery that attaches to the bottom of the player. Your new battery should be fully charged before initial use. Charging time is normally about 5 hours. A fully charged battery delivers about 2.5 hours of use, but playing time varies from disc to disc. -
Page 18: Battery Pack Attaching And Placement
Rechargeable Battery Pack Warning: Do not touch any metal objects to the battery connectors, as it will put the battery in standby mode. To exit the standby mode, connect the battery and DVD player to AC or DC power. Battery Pack Attaching and Placement The DVD Player’s power supply is the AC power adapter or the battery pack, which are provided with the player. -
Page 19: Charging The Battery Pack
Rechargeable Battery Pack After attaching the Battery Pack, place the DVD Player LCD screen in normal position. The attached Battery Pack serves as a stand. The battery pack can be locked with the main unit. As shown below: When used in a vehicle, the DVD P layer is placed into a sturdy carrying Bag/Mount. The Bag/Mount is easy to attach to a headrest and fits on most vehicle headrest types. -
Page 20: Detaching The Battery Pack
Rechargeable Battery Pack Detaching the Battery Pack If the DVD Player is not going to be used for long periods of time, the Battery Pack should be detached. When the DVD Player is turned OFF, the DVD Player is still consuming some power in STANDBY mode. -
Page 21: Playback Operation
Playback Operation Pre-Operation Connect the DVD Player to power supply. Press the “POWER” switch to turn on the power of the unit. Hand the disc with its printed side toward you (Refer to the picture below). Push ¾ the disc in about of the way. -
Page 22: Dvd Playback
Playback Operation This function is not available for JPEG disc. Zoom For DVD disc, press the ZOOM button to display the image as Q1-Q2-Q3-Q4-QOFF in sequence. For JPEG disc, press the ZOOM button enlarge and reduce the picture as follows: Q4/3-Q3/2-Q2-Q3-Q1/2-Q3/4-Qoff. - Page 23 Playback Operation Press direction buttons () or the number buttons to select the title or disc option you wish to play. Press the ENTER button to start playback of a disc. This feature is not available on all discs. Title and Menu are only available for DVD discs.
-
Page 24: Cd Playback
Playback Operation Search by time Press the GOTO button to select desired disc starting time, chapter or title. Press the GOTO button to display a menu on the screen: Search: Time _ _:_ _:_ _ Title/Chapter _ _ _/_ _ _ Press the direction buttons to select the item you prefer, then use the number buttons to input the time (in the sequence of hour, minute and second) or the title/chapter number you prefer. -
Page 25: Jpeg Playback
Playback Operation JPEG Playback JPEG is a common picture format. Hundreds of pictures can be stored in a disc in this format. Normal Playback Load a JPEG disc into the DVD Player. After reading the disc, the DVD Player will display the images on the disc in sequence. - Page 26 Playback Operation Previous and Next Press the button to go to the previous file. Press the button to go to the next file. Fast Playback Press the and button to start fast forward and reverse playback during disc playing.
-
Page 27: System Setup
System Setup Setup Menu You can change the default settings to your own preference. Press the SETUP button on the remote control to display the settings menu. The menu includes Language setup, Video setup, Audio setup and Rating setup. Press the orbutton on the remote control to select a category. -
Page 28: Video Setup
System Setup DVD Menu There are several menu languages available. You can select English, Chinese, German, etc. Restore Default Select the item and press ENTER button to return to the original settings. Video Setup Press thebutton to select Video setup menu, then press the ENTER button to enter the menu. -
Page 29: Rating Setup
System Setup In this menu, use the or button to select an item. Press the ENTER button to enter, use the or button to select item. Press the ENTER button to confirm selection and return. Press the button to return to the previous menu. Downmix You can select Stereo, Left, Right or Mix audio output mode. -
Page 30: Troubleshooting
Troubleshooting Symptom What To Check • Make sure the AV IN/OUT switch ON the side of the player is in the OUT position for standard play. • Make sure a disc is loaded. • Make sure the disc isn’t loaded backwards. The DVD Player will not •... -
Page 31: Specifications
Specifications TFT Screen Size 7 inches Laser Wavelength Wavelength: 780/650nm Video System NTSC/PAL Frequency Response 20Hz~20KHz ±2.5dB ≥ 75 dB Audio Signal-To-Noise Rate ≤ -70dB (1KHz) Audio Distortion + Noise ≥ 70dB (1KHz) Channel Separation ≥ 80dB (1KHz) Dynamic Range Audio Out Analog Audio Out Out Level: 1.5V±...
Need help?
Do you have a question about the SV070270D and is the answer not in the manual?
Questions and answers