Table of Contents
Advertisement
Advertisement
Table of Contents

Related Manuals for Harman EPM12


Summary of Contents for Harman EPM12
- Page 1 User Guide User Guide User Guide User Guide User Guide...
- Page 2 Parts of the design of this product may be protected by worldwide patents. Part No. ZM0338-01 Soundcraft is a trading division of Harman International Industries Ltd. Information in this manual is subject to change without notice and does not represent a commitment on the part of the vendor.
-
Page 3: Table Of Contents
Contents Contents Contents Contents Contents User Guide IMPORTANT SAFETY INSTRUCTIONS SAFETY SYMBOL GUIDE OVERVIEW THE 60-SECOND GUIDE INTRODUCTION WIRING UP BLOCK DIAGRAM MONO INPUT CHANNEL STEREO INPUT CHANNELS MASTER SECTION USING YOUR EPM CONSOLE FITTING OPTIONAL RACKMOUNT EARS APPLICATIONS GLOSSARY TYPICAL CONNECTING LEADS MARK-UP SHEETS TYPICAL SPECIFICATIONS... -
Page 4: Important Safety Instructions
IMPORTANT SAFETY INSTRUCTIONS Read these instructions. Keep these instructions. Heed all warnings. Follow all instructions. Do not use this apparatus near water. Clean only with a dry cloth. Do not block any ventilation openings. Install in accordance with the manufacturer’s instructions. Do not install near any heat sources such as radiators, heat registers, stoves, or other apparatus (including amplifiers) that produce heat. - Page 5 Note: It is recommended that all maintenance and service on the product should be carried out by Soundcraft or its authorised agents. Soundcraft cannot accept any liability whatsoever for any loss or damage caused by service, maintenance or repair by unauthorised personnel. WARNING: To reduce the risk of fire or electric shock, do not expose this apparatus to rain or moisture.
-
Page 6: Safety Symbol Guide
For your own safety and to avoid invalidation of the warranty please read this section carefully. SAFETY SYMBOL GUIDE For your own safety and to avoid invalidation of the warranty all text marked with these symbols should be read carefully. WARNINGS The lightning flash with arr The lightning flash with arr... -
Page 7: Overview
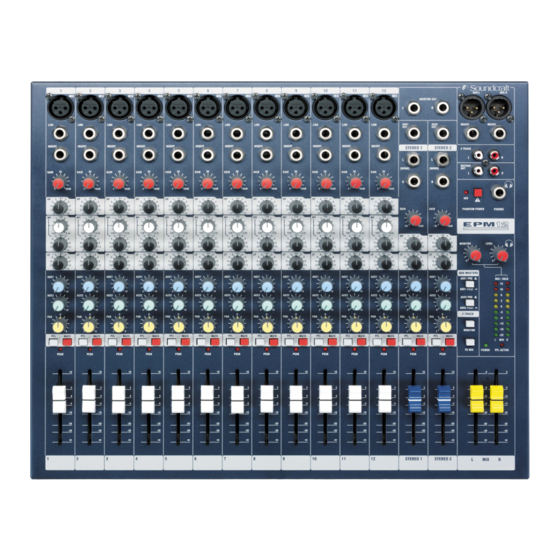
OVERVIEW THE 60-SECOND GUIDE To get you working as fast as possible, this manual begins with a 60-second guide. Here you can find quick information on any feature of the console. 1 MIC INPUT (XLR) Connect Microphones here. If you are using a condenser mic, ensure phantom power is supplied by pressing the switch at the top of the master section. - Page 8 10 PEAK LED This is used to indicate that the signal is close to distorting (clipping) on a specific channel. 11 INPUT CHANNEL FADER This is used to control the level fed to the Mix Bus and post-fade sends. 12 MIX OUTPUTS (XLR) Connect these to your analogue recording device, or to your amplification system.
-
Page 9: Introduction
INTRODUCTION Thank you for purchasing a Soundcraft EPM mixer. The EPM range is our most cost-effective mixing solution, bringing you all the features and performance that you expect from a Soundcraft product, at an extraordinarily low price. The packaging, which your EPM arrived in, forms part of the product and must be retained for future use. -
Page 10: Wiring Up
WIRING UP Please refer to pages 30/31 for additional wiring details. Mic Input The MIC input accepts XLR-type connectors and is designed to suit a wide range of BALANCED or UNBALANCED low-level signals, whether from delicate vocals requiring the best low-noise performance, or drum kits needing maximum headroom. Professional dynamic, condenser or ribbon mics are best because these will be LOW IMPEDANCE. -
Page 11: Aux Outputs
Stereo Inputs STEREO 1/2 These accept 3-pole ‘A’ gauge jacks, or 2-pole mono jacks which will automatically ground the ‘cold’ input. Use these inputs for sources such as keyboards, drum machines, synths, tape machines or as returns from processing units. The input is BALANCED for low noise and immunity from interference, but you can use UNBALANCED sources by wiring up the jacks as shown, although you should then keep cable lengths as short as... - Page 12 Polarity (Phase) You will probably be familiar with the concept of polarity in electrical signals and this is of particular importance to balanced audio signals. Just as a balanced signal is highly effective at cancelling out unwanted interference, so two microphones picking up the same signal can cancel out, or cause serious degradation of the signal if one of the cables has the +ve and -ve wires reversed.
-
Page 13: Problem Solving
PROBLEM SOLVING Basic problem solving is within the scope of any user if a few basic rules are followed. • Get to know the Block Diagram of your console (see page 14). • Get to know what all controls and/or connections in the system are supposed to do. •... -
Page 14: Block Diagram
BLOCK DIAGRAM... -
Page 15: Mono Input Channel
MONO INPUT CHANNEL 1 Mic Input The MIC input accepts XLR-type connectors and is designed to suit a wide range of BALANCED or UNBALANCED signals. Professional dynamic, condenser or ribbon mics are best because these will be LOW IMPEDANCE. You can use low-cost HIGH IMPEDANCE mics, but the level of background noise will be higher. -
Page 16: Aux Sends
background hiss will be more noticeable and you may not be able to get enough signal level to the output of the mixer. Note that some sound equipment, particularly that intended for domestic use, operates at a lower level (-10dBV) than professional equipment and will therefore need a higher gain setting to give the same output level. -
Page 17: Peak Led
8 MUTE All outputs from the channel except inserts are on when the MUTE switch is released and muted when the switch is down, allowing levels to be pre-set before the signal is required. 9 INPUT CHANNEL FADER The 60mm FADER, with a custom-designed law to give even smoother control of the overall signal level in the channel strip, allows precise balancing of the various source signals being mixed to the Master Section. -
Page 18: Stereo Input Channels
STEREO INPUT CHANNELS 1 INPUTS STEREO 1/2 These inputs accept 3-pole ‘A’ gauge (TRS) jacks. Use these inputs for sources such as keyboards, drum machines, synths, tape machines or processing units. The inputs are BALANCED for low noise and top quality from professional equipment, but you can use UNBALANCED sources by wiring up the jacks as shown in the “Wiring it Up”... - Page 19 7 FADER The 60mm FADER gives you smooth control of the overall signal level in the channel strip, allowing precise balancing of the various source signals being mixed to the Master Section. It is important that the input level is set correctly to give maximum travel on the fader which should normally be used at around the “0”...
-
Page 20: Master Section
MASTER SECTION 1 PHANTOM POWER Many professional condenser mics need PHANTOM POWER, which is a method of sending a powering voltage down the same wires as the mic signal. Press the switch to enable the +48V power to all of the MIC inputs. The adjacent LED illuminates when the power is active. -
Page 21: Monitor Level
6 RECORD OUTPUTS These two RCA outputs carry a copy of the MIX L and MIX R signals. They allow the use of a recording device, e.g. DAT player, Minidisc, Cassette tape recorder etc. 7 2 TRACK These two RCA phono sockets are unbalanced Left and Right line-level inputs, used for connecting a playback device. -
Page 22: Using Your Epm Console
USING YOUR EPM CONSOLE The final output from your sound system can only ever be as good as the weakest link in the chain, and especially important is the quality of the source signal because this is the starting point of the chain. Just as you need to become familiar with the control functions of your mixer, so you must recognise the importance of correct choice of inputs, microphone placement and input channel settings. - Page 23 Note: The initial settings should only be regarded as a starting point for your mix. It is important to remember that many factors affect the sound during a live performance, for instance the size of the audience! You are now ready to start building the mix and this should be done progressively, listening carefully for each component in the mix and watching the meters for any hint of overload.
-
Page 24: Fitting Optional Rackmount Ears
Note: a rack extender is included in the EPM6 and EPM8 rack mounting kits to make the console fit into a 19” frame. The part numbers for the kits are: RW5744 RACK MOUNTING KIT - EPM6 RW5745 RACK MOUNTING KIT - EPM8 RW5746 RACK MOUNTING KIT- EPM12... -
Page 25: Applications
APPLICATIONS APPLICATION 1 - LIVE SOUND REINFORCEMENT APPLICATION 2 - MULTISPEAKER APPLICATIONS This configuration demonstrates how multiple speaker configurations can be driven by the EPM. - Page 26 APPLICATION 3 - PLACES OF WORSHIP This configuration uses the Aux 2 output to drive an induction loop for the hard of hearing. Aux 1 output is used to generate foldback monitoring for the speaker/singer. The main outputs are used to drive the main speaker system. The record and playback connections are used to pass audio to and from a DAT machine or CDR.
- Page 27 APPLICATION 4 - RECORDING The insert points on channels 1-8 may be used to feed a multitrack recorder as shown (link the send and return signals). The Mix outputs are used for a preliminary stereo mix on a DAT recorder. APPLICATION 5 - LINKING TWO EPM CONSOLES...
-
Page 28: Glossary
GLOSSARY Auxiliary send An output from the console comprising a mix of signals from channels derived independently of the main stereo mix. Balance The relative levels of the left and right channels of a stereo signal. Balanced A method of audio connection which ‘balances’ the wanted signal between two wires, these wires also have a screen which carries no signal. - Page 29 Pre-fade The point in the signal path before a fader, and therefore unaffected by the fader position. Rolloff A fall in gain at the extremes of the frequency response. Shelving An equaliser response affecting all frequencies above or below the break frequency i.e. a highpass or lowpass derived response.
-
Page 30: Typical Connecting Leads
TYPICAL CONNECTING LEADS... -
Page 32: Mark-Up Sheets
You may freely copy these pages, and use them to record the settings used for particular MARK-UP SHEETS applications/gigs. -
Page 34: Typical Specifications
140Hz – 3kHz 12kHz EQ Bands (stereo input) +/- 15dB 80Hz 12kHz AVERAGE POWER CONSUMPTION (QUIESCENT) EPM6 13 Watts EPM8 14.5 Watts EPM12 17 Watts MIN / MAX OPERATING TEMPERATURE Centigrade / Farenheit 0°C - 50°C / 32°F - 122°F... -
Page 35: Warranty
WARRANTY Soundcraft is a trading division of Harman International Industries Ltd . End User means the person who first puts the equipment into regular operation. Dealer means the person other than Soundcraft (if any) from whom the End User purchased the Equipment, provided such a person is authorised for this purpose by Soundcraft or its accredited Distributor.
Need help?
Do you have a question about the EPM12 and is the answer not in the manual?
Questions and answers