Advertisement
Quick Links
Download this manual
See also:
Owner's Manual
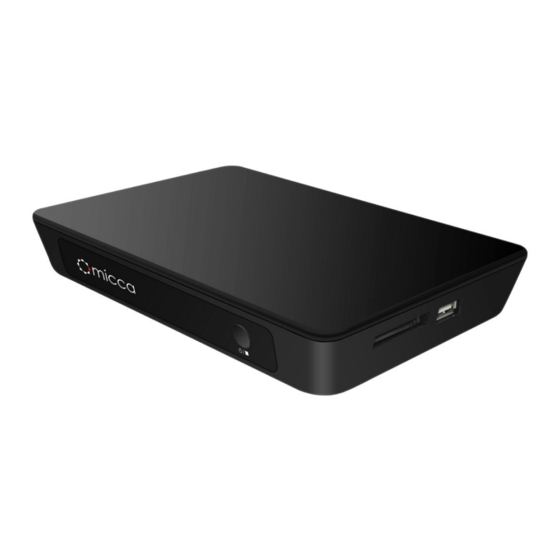
MPLAY-HD Net Digital Media Player
Owner's Manual
Attention US Customers!
Thank you for purchasing a Micca product. Should you have any
enquiries or need assistance, please contact our technical
support team before contacting the store for assistance: email
support@miccastore.com
Most common questions and answers regarding this product can
be found at the following FAQ:
http://content.miccastore.com/faq
Copyright © 2009-2011 Micca, Ltd. All rights reserved.
This manual may not be reproduced in whole or in part
without permission for any purpose other than personal use.
Advertisement

Subscribe to Our Youtube Channel
Related Manuals for Micca MPLAY-HD


Summary of Contents for Micca MPLAY-HD
- Page 1 MPLAY-HD Net Digital Media Player Owner’s Manual Attention US Customers! Thank you for purchasing a Micca product. Should you have any enquiries or need assistance, please contact our technical support team before contacting the store for assistance: email support@miccastore.com Most common questions and answers regarding this product can be found at the following FAQ: http://content.miccastore.com/faq...
- Page 2 Introduction Thank you very much for choosing our product. We hope you will enjoy using it as a great home entertainment device. This media player has the following functionality. Play Videos File Types: MKV, AVI, MP4, MOV, MPEG, RM/RMVB, VOB, DAT, TS/TP/M2TS Codecs: H.264/AVC, MPEG1/2/4, DivX/Xvid, RM/RMVB, Flash External Subtitles: SRT, SSA, ASS, SMI, SAMI, TXT, SUB, SUB+IDX, MKS Supports DVD/DVD ISO Playback and Menu operation...
- Page 3 Remote Control Button Function Power Turns the device On/Off Mute Mutes/un-mutes the sound TV Out Toggles the TV output mode Keypad For entering numeric values Zoom Zoom for picture and movies Audio Change audio track for movies Title Show title screen for ISO files Subtitle Subtitle on or off Display...
- Page 4 1. Cautions This player’s design and manufacture has your safety in mind. In order to safely and effectively use this player, please read the following before usage. 1.1. Usage Caution User should not modify this player. The environmental temperature should be within the range of 40 to 95 degrees Fahrenheit.
- Page 5 Do not disassemble the player, repair the player, or change the design of the player. Any damage done will not be included in the repair policy. Do not press the buttons of the player too hard. Avoid hitting the player with hard objects. Avoid shaking the player and stay away from magnetic fields.
- Page 6 2.2. HDMI Connection to TV Always use an HDMI cable that meets HDMI v1.3a specification or better. Connect one end the HDMI cable to the media player’s HDMI output, the other end to the TV HDMI input. Ensure that cable is fully inserted into the media player and TV jacks. Set the TV to the appropriate HDMI input.
- Page 7 3. Start Up Media Player After making connections, connect the AC power adapter to the player. The player should turn on automatically and the Power light is illuminated. After 4-5 seconds, the Home menu will be displayed with a selection of media icons. 3.1.
- Page 8 Connect a storage device containing media files to the media player. The media player is equipped with two USB 2.0 Host connectors as well as a memory card reader. The USB 2.0 Host connectors can be used with USB flash drives or USB portable hard disk drives. The memory card reader can be used to read media files from SD/SDHC, MMC, and MS flash memory cards.
- Page 9 When a movie is highlighted, a preview of the movie will begin to play in the preview box. Below the preview box will be the movie’s name, duration, size, and file type. To begin playing the movie, press OK or PLAY on the remote. 4.2.
- Page 10 The on screen display contains information regarding the currently playing movie, including the file name, movie length, and the current time mark. The control buttons on the menu can be used to perform the same functions as the following remote control buttons: PREV, REW, PLAY/PAUSE, SUBTITLE, AUDIO, ZOOM, FWD, NEXT.
- Page 11 5.1. Browsing Photos In Thumbnail Mode By default, photos found on the storage device will be displayed as thumbnails that the user can scroll through. The files can be sorted by name or date according to what has been chosen in settings.
- Page 12 all photos on the storage device (directory disabled in settings), starting with the selected photo. During slideshow playback, the following controls are available: Control Description Mute Mute and un-mute background music Zoom Zoom 2x, 4x, 8x, and 16x, slideshow is paused. Display Display the on screen display and control menu Vol +/-...
- Page 13 5.5. Playing Background Music During Slideshow To play background music during a slide show, first press the DISPLAY button on the remote while a slideshow is playing to bring up the on screen display. Use the arrow buttons on the remote to highlight the music control icon and press OK.
- Page 14 files can be sorted by name or date according to what has been chosen in settings. Each press of the arrow buttons on the remote will move the cursor by one file. Each press of the PREV/NEXT buttons on the remote will scroll a full page. If directories have been enabled in settings, only music in the current folder and sub folders will be shown.
- Page 15 The on screen display contains information regarding the currently playing music file, including the file name, length, and the current time mark. The control buttons on the menu can be used to perform the same functions as the following remote control buttons: PREV, REW, PLAY/PAUSE, FWD, NEXT.
- Page 16 and press OK. To exit from a folder, press the STOP/RETURN button on the remote. If directories have not been enabled, all text files found on the storage device will be displayed on one screen. 7.1. Text File Viewing Controls Once the user selects a text file, pressing the OK button on the remote will start viewing the file.
- Page 17 buttons on the remote will scroll a full page. Only Flash files in the current folder and sub folders will be shown. To navigate into a sub folder, highlight it using the arrow buttons on the remote, and press OK. To exit from a folder, press the STOP/RETURN button on the remote.
- Page 18 IMPORTANT: There are some limitations to streaming content from an UPnP server. Due to hardware limitations, streaming video bitrate is limited to 720p@4.5mbps. Higher resolution and bitrate videos will stream and play but will have frequent pauses and stutters. Additionally, PlayOn and TVersity UPnP software is not supported at the time of this manual.
- Page 19 After selecting the NetRadio icon from the Network menu, the list of available Internet radio genres will be displayed. Use the remote to select the desired genre and press OK on the remote control to browse available stations. An Internet radio may offer multiple streams at different bitrates or on different servers. These sub channels will be displayed as a list.
-
Page 20: File Copy And Delete
9.3. Picasa and Flickr The media player can display photos from Picasa and Flickr accounts that has been setup. For Picasa, both the account user name and password is needed. Only the account name is needed for Flickr After selecting the Picasa or Flickr icon from the Network menu, the user is prompted to enter account information to proceed. - Page 21 folders will be shown. To navigate into a sub folder, highlight it using the arrow buttons on the remote, and press OK. To exit from a folder, press the STOP/RETURN button on the remote. Once the user selects a Flash file, pressing the OK button on the remote will start playing the file.
- Page 22 Settings To change settings on the media player, select the Setting icon from the Home menu screen, or press the SETUP key on the remote. After changing a setting, the OK button must be pressed in order for the setting to take effect. 11.1.
- Page 23 require specific encoding for proper display. Select the value that matches what the subtitle file uses. 11.4.8. Digital Audio Output – Sets the format of the coaxial and optical digital output. SPDIF PCM will downmix all sound tracks to 2 channel PCM. SPDIF RAW will perform pass-through for all sound tracks, including AC3 and DTS.
- Page 24 11.10.1. Setting-Wifi-Auto – Currently not used. Will be enabled when USB WiFi dongles are available for this media player. 11.10.2. Setting-Wifi-Manual – Currently not used. Will be enabled when USB WiFi dongles are available for this media player. 11.10.3. Setting-Ethernet-DHCP – Initiates a DHCP address request. Typically, this page will simply display the current network setting since most DHCP address assignments are automatic and do not need a manual request.
-
Page 25: Troubleshooting
Troubleshooting The following are common troubleshooting questions and associated solutions. 12.1. “No File!” message even though a USB drive with media files is inserted. Make sure the appropriate device has been selected from the Home menu by pressing the DEVICE button on the remote. Make sure the correct media type is selected – selecting Movies from the Home menu when the USB drive only contains photos will cause the “No File!”...
Need help?
Do you have a question about the MPLAY-HD and is the answer not in the manual?
Questions and answers