Table of Contents
Advertisement
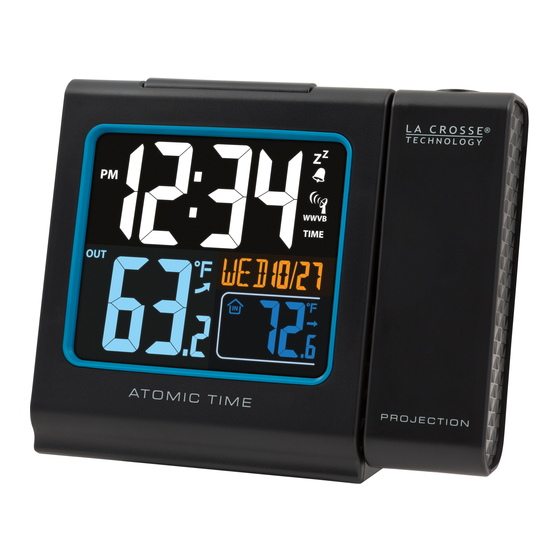
with Indoor and Outdoor Temperature
This Atomic Projection Alarm with snooze alarm and backlit display projects time and outdoor
temperature on your wall or ceiling in a variety of ways. It automatically sets the time and date based on
your time zone, and even updates Daylight Saving Time for you. Monitor indoor and outdoor temperature,
track temperature trends and charge your smartphone or other device with the USB charging port--all in
one convenient device for your desktop or bedside table. It runs on AC power with battery backup, and
has a wireless transmission range of over 200 ft. to the backyard temp. sensor.
Atomic Projection Alarm
Time, Alarm
+ Calendar
Outdoor/Indoor
Temperature
Get Support: http://www.lacrossetechnology.com/616-146
INITIAL SETUP
Step 1: Insert the included 5-volt AC power adapter into projection alarm and then into wall outlet.
Step 2: Insert 3 new "AAA" batteries (not included) into the projection alarm. Observe the correct polarity.
Step 3: Insert 2 new "AA" batteries (not included) into the TX141 transmitter. Observe the correct polarity.
The red LED will flash with transmitting.
Do Not Mix Old and New Batteries
Do Not Mix Alkaline, Standard, Lithium or Rechargeable Batteries
RESTART:
If the outdoor temperature is not displayed after 3 minutes, unplug the AC adapter and remove
batteries from the projection alarm & transmitter for 15 minutes.
Return to Step 1 above.
Atomic Projection Alarm
Projection
Arm
Rotates 180º
NOTE: This projection alarm will come with one
Instruction Manual
TX141
Outdoor
Transmitter
TX141 transmitter OR one TX14 transmitter.
Both transmitters work interchangeably.
Model: 616-146
1
Advertisement
Table of Contents

Subscribe to Our Youtube Channel
Related Manuals for La Crosse Technology 616-146


Summary of Contents for La Crosse Technology 616-146
-
Page 1: Atomic Projection Alarm
TX141 transmitter OR one TX14 transmitter. Temperature Both transmitters work interchangeably. Get Support: http://www.lacrossetechnology.com/616-146 INITIAL SETUP Step 1: Insert the included 5-volt AC power adapter into projection alarm and then into wall outlet. Step 2: Insert 3 new “AAA” batteries (not included) into the projection alarm. Observe the correct polarity. -
Page 2: Table Of Contents
Table of Contents Atomic Projection Alarm Initial Setup Restart Table of Contents Features Power the Projection Alarm A/C Adapter Batteries Install Batteries in the TX141 Transmitter Install Batteries in the TX14 Transmitter Functions Buttons Program Menu WWVB Reception On/Off Time Zone Daylight Saving Time Indicator 12/24 Hour Time Format Set Time... -
Page 3: Features
Features Projects time & outdoor temp. on wall or ceiling Projection rotates in 90 degree increments Projection options: (1) Default: toggle between time and temp., (2) time only, or (3) temperature only Time zones: Atlantic Time (AST), Eastern Time (EST), Central Time (CST), Mountain Time (MST), Pacific Time (PST), Alaskan Time (AKT) &... -
Page 4: Install Batteries In The Tx141 Transmitter
ATOMIC SIGNAL SEARCH: The LCD backlight, projection and USB charging port will momentarily turn off while the station searches for the atomic signal. After the initial search, this station will only search for the atomic signal after midnight. Install Batteries in the TX141 Transmitter NOTE: This projection alarm will come with one TX141 transmitter OR one TX14 transmitter. -
Page 5: Program Menu
SNOOZE/LIGHT Once: Backlight and Projection low intensity HI/LOW/OFF (A/C) Twice: Backlight and Projection OFF (A/C) Third time: Backlight and projection ON high intensity (default, A/C adapter) Battery Power: Activate backlight for 10 seconds Trigger snooze alarm (ringing) Program Menu The SET button will moves through the items in the program menu. The +/TEMP or -/TIME buttons will change these values: WWVB reception ON or OFF Time Zone (Seven Time Zones) -
Page 6: Set Time
1. 12H will flash. 2. Press and release the +/TEMP or -/TIME buttons to select 24-hour time. 3. Confirm with the SET button and move to Set Time. Set Time To set the time manually: 1. The hour digit will flash. 2. -
Page 7: Snooze
Snooze 1. When the alarm sounds, press the SNOOZE/LIGHT button to trigger snooze alarm for 10 minutes. The snooze icon Zz will flash when the snooze feature is active. 2. To stop alarm for one day, press ALARM button, while in snooze mode. The alarm icon will remain solid. -
Page 8: Usb Charge Port
USB Charge Port Charge a smart phone, camera or other devices when the forecast station is plugged into a power outlet with the included 5V AC adapter. Note: This is a power-output charging port. It does not supply power to the projection alarm. Connect your external device’s USB charging cable (not included) to the USB charging port. -
Page 9: Manual Signal Search
Reposition the display for better signal reception or try again at bedtime. The display will start searching at UTC: 07:00 and if no reception on the first attempt they will try again at 08:00, 09:00 and 10:00. Each attempt will be at least 2 minutes and the most will be 10 minutes. -
Page 10: Position Projection Alarm
To achieve a true temperature reading, mount where direct sunlight cannot reach the outdoor transmitter. Mount the outdoor transmitter on a North-facing wall or in any well shaded area. Under an eave or deck rail work well. The maximum transmitting range in open air is over 200-feet (60 meters). Obstacles such as walls, windows, stucco, concrete and large metal objects can reduce the range. -
Page 11: Care And Maintenance
If the unit does not work properly, change the batteries and/or check the A/C cord connection. Warranty Information La Crosse Technology, Ltd. provides a 1-year limited time warranty (from date of purchase) on this product relating to manufacturing defects in materials & workmanship.
Need help?
Do you have a question about the 616-146 and is the answer not in the manual?
Questions and answers