Table of Contents
Advertisement
Quick Links
Advertisement
Table of Contents

Related Manuals for Medion AKOYA X7811


Summary of Contents for Medion AKOYA X7811
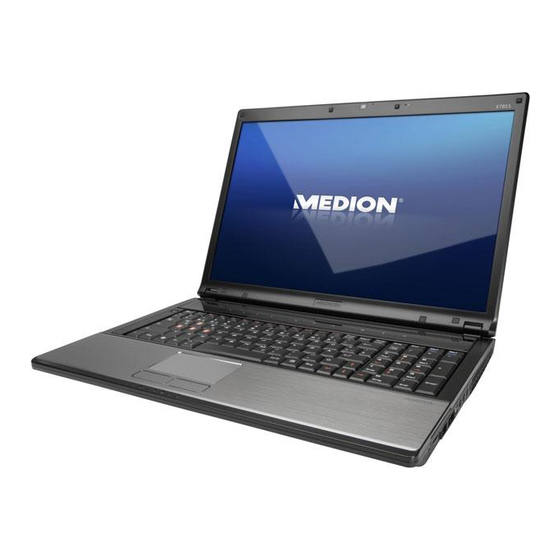
- Page 1 Notebook MEDION AKOYA ® ® X7811 Medion Electronics Ltd. 120 Faraday Park, Faraday Road, Dorcan Swindon SN3 5JF, Wiltshire United Kingdom Hotline: 0871 - 376 10 20 (Costs 7p/min from a BT landline, mobile costs maybe higher) FAX: 01793 - 715 716 www.medion.co.uk...
-
Page 2: Document Your Notebook
Notes on This Manual Keep these instructions with your computer at all times. The proper set up, use and care can help extend the life of your computer. In the event that you transfer ownership of this computer, please provide these instructions to the new owner. This manual is divided into sections to help you find the information you require. -
Page 3: Copying This Manual
This document contains legally protected information. All rights reserved. Copying in mechanical, electronic and any other form without the written approval of the manufacturer is prohibited. © ® Copyright 2010 MEDION ® ® All rights reserved. Microsoft , MS-DOS , and Windows are registered trademarks of Microsoft Corporation in the U.S. -
Page 4: Table Of Contents
Table of Contents Safety and Maintenance ................. 1 Safety Instructions ................... 3 Data Security ....................4 Set-Up Location ................... 4 Ambient Temperature ................. 5 Working in Comfort ..................6 Connecting ....................7 Power supply .................. - Page 5 Display ......................34 Opening and Closing the Display .............. 34 Screen Resolution ..................34 Appearance and Personalization ............... 35 Connecting an External Monitor ............... 36 Duplicate the Desktop ................. 37 Extend the Desktop ................37 ...
- Page 6 Securing the Notebook ................. 59 Startup Password ..................59 Using a safety lock ..................59 Software ......................60 Getting to Know Windows® 7 ..............60 ® Windows 7 - News ................60 ® Windows 7 - Help and Support ............
- Page 7 Appendix ..................... 89 Information about conformity ............... 91 ISO 13406-2 Class II .................. 91 FCC Compliance Statement ..............93 Restricted Warranty ..................94 Index ......................99...
-
Page 8: Safety And Maintenance
Chapter 1 Safety and Maintenance Subject Page Safety Instructions ............. 3 Data Security ..............4 Set-up Location ..............4 Ambient Temperature ............5 Working in Comfort ............6 Connecting ................ 7 Information about the regulatory compliance according to R&TTE ............9 Touch Pad ................ - Page 9 Safety Instructions...
-
Page 10: Safety Instructions
Safety Instructions Please follow the instructions in this section for the safe operation of your notebook: Do not allow small children to play unattended with electrical equipment. Children are incapable of judging potential risks properly. Keep the packing materials, such as plastic sheet away from children. The danger of suffocation could arise in the case of misuse. -
Page 11: Data Security
Switch off your Notebook immediately or do not switch it on at all and contact customer service … … if the power cord or the connectors attached to it are burnt or damaged. Replace the defective power cord with an original power cord. Under no circumstances may a defective power cord be repaired. -
Page 12: Ambient Temperature
Ambient Temperature The notebook is most reliably operated at an ambient temperature between +41° (5° C) and +86° F (30° C) and at a relative humidity between 20% and 70% (without condensation). When powered off, the notebook can be stored at temperatures between 32°... -
Page 13: Working In Comfort
Working in Comfort Sitting in one position for long periods can be uncomfortable. To minimize the potential for physical discomfort or injury, it’s important that you maintain proper posture. Back – While sitting at your work surface, make sure your back is supported by the chair’s backrest in an erect position or angled slightly backwards. -
Page 14: Connecting
Connecting Pay attention to the following information, in order to connect your notebook correctly: Power supply Do not open the power adapter housing. When the housing is open there is a danger of severe electric shock. It contains no user-serviceable parts. ... -
Page 15: Cabling
Cabling Arrange cables so no one can walk on or trip over them. Do not place objects on any of the cables. Do not allow any large forces to be exerted on the plug-in connections, from the side, for example. This will otherwise lead to damage to and in your device. -
Page 16: Information About The Regulatory Compliance According To R&Tte
The company declares herewith that these devices are in agreement with the fundamental requirements and the other relevant terms of the 1999/5/EG Guideline. Complete declarations of conformity are available under www.medion.com/conformity. Touch Pad Light pressure with the tip of your finger is all that is required to operate the touch pad. -
Page 17: Battery Operation
Battery Operation To extend the life and power of your battery and guarantee secure operation, the instructions below should be followed: Never expose the battery to direct sunlight or heat for long periods. Do not dispose of the battery by fire. ... -
Page 18: Views & Handling
Chapter 2 Views & Handling Subject Page Included with your notebook ..........13 Views .................. 14 Open notebook ............. 14 Left side ................. 15 Right side ..............16 Rear side ................ 16 Power and status indicators ........... 17 Sensor keys ..............18 Getting started .............. - Page 19 Included with Your Notebook...
-
Page 20: Included With Your Notebook
Included with Your Notebook Please check that the contents are complete and notify us within 14 days of purchase if any of the following components are missing: Notebook Battery Power adapter with connection cable (Model: LiteOn 120W PA-1121-04) ... -
Page 21: Views
Views Open Notebook (Diagram the same) - Webcam (optional) ..............( p. 55) - TFT Display ................( p. 34) - Sensor keys ................( p. 18) - Device Indicators ..............( p. 17) - Touchpad ................( p. 39) - Keyboard ................ -
Page 22: Front View
Front View (Diagram the same) - Stereo Speaker Left Side 12 13 (Diagram the same) ® - Kensington Lock ..............( p. 59) - LAN Port (RJ-45) ..............( p. 49) - USB Port ................( p. 56) - Optical Drive ................ ( p. 42) - Emergency Ejection .............. -
Page 23: Right Side
Right Side 15 11 17 19 20 21 (Diagram the same) - USB Port ................( p. 56) - Multimedia Card Reader ............( p. 52) - Express CardSlot ..............( p. 54) - e-SATA / USB Port ..............( p. 57) - IEEE 1394 ................ -
Page 24: Device Indicators
Device Indicators LED's indicate the power and operating system states of the Notebook. The meaning of each LED is: Power Indicator This LED lights, when the notebook is turned on. Num Lock This LED lights when NUM-Lock has been activated (NumLk). Capital Lock This LED lights when CAPS-Lock has been activated. -
Page 25: Sensor Keys
Sensor Keys User-defined key A key adjusted by the user, in order to enable a fast start of a preferred program User-defined key A key adjusted by the user, in order to enable a fast start of a preferred program Internet The standard Internet browser will be started with this sensor key. -
Page 26: Getting Started
Getting Started Before you get started using your notebook, first take a few moments to read the important section on Safety. This notebook comes with software fully pre-installed. You do not have to install any of the discs supplied. How to start: Step 1 ... - Page 27 Connect the supplied power adapter to the notebook at the notebook power socket (21). Connect the power adapter via a power cable to a free AC power outlet. (Diagram the same) Open the display to the required position with your thumb and index fingers. To avoid damage to the TFT Display, never open it more than 120º.
-
Page 28: Step 2
The operating system is loaded from the hard disk. During the initial set-up, the loading process takes slightly longer than normal to register the operating system and the individual components completely. Your operating system is finished loading when a welcome screen is shown on your display. Note The initial installation may take up to 30 minutes to complete. -
Page 29: Short Description Of The Windows Desktop
® Short Description of the Windows Desktop Start Button Clicking the Start button brings up a menu where you can access help, software programs, files, and settings All Programs All of the software programs installed on your notebook are ordinarily listed here. Click All Programs to reveal an extensive menu. - Page 30 Control Panel You can use the icons in Control Panel to change the appearance and functionality of Windows®7. These icons represent options for configuring your notebook. You should, however, consult “Help and Support“ on the potential effects of certain changes. ...
- Page 31 Getting Started...
-
Page 32: Main Components
Chapter 3 Main Components Subject Page Power Supply ..............27 Display ................34 Data entry ................38 Hard Drive ................40 Optical Drive ............... 42 Sound Card ................. 46 Network ................49 The Multi Card Reader ............52 Express Card ..............54 Webcam (optional) ............ - Page 33 Power Supply...
-
Page 34: Power Supply
Power Supply On/Off Button Power on or off your notebook by pressing the on/off button briefly. The operational indicator will inform you about the operational status of the notebook. The notebook will always be switched off, if the main switch is pressed for more than 4 seconds. -
Page 35: Power Adapter
Power Adapter Your notebook is supplied with a universal AC power adapter, which automatically adjusts to the available power source. The following levels are supported: AC 100-240V~/ 50-60 Hz. Please follow the power supply safety instructions found on page 5. The power adapter is connected via a power cord to an AC outlet. -
Page 36: Battery Operation
Battery Operation Note Please charge and discharge the new battery completely two to three times in succession, so that it will achieve its full performance! Batteries store electrical energy in their cells and then deliver it when needed. The useful life and performance of your battery depend on careful handling. The battery should be completely discharged before a charging process and completely charged again, in order to optimize its useful life and its performance. -
Page 37: Removing The Battery
Removing the Battery 1. Please ensure that the notebook is switched off and that it is not connected to a power outlet. 2. Turn the notebook upside down. 3. Unlock the battery by pushing the lock outwards into the Unlock position. 4. -
Page 38: Charging The Battery
Charging the Battery The battery is charged via the power adapter. If the power adapter is connected, it charges the battery automatically, whether the notebook is turned on or not. When the notebook is switched off, full charging takes a few hours. If the notebook is switched on, the charging process takes a significantly longer time. -
Page 39: Checking The Battery Level
Checking the Battery Level In order to check the current level of the battery, move the cursor over the power symbol in the taskbar. The symbol of a battery is displayed during battery operation. You will receive additional information about settings if you double click on this symbol. -
Page 40: Power Management
Power Management Your notebook offers automatic and modifiable power saving functions that you can use to maximize battery life and reduce overall operating costs. The power saving modes are known as sleep mode and hibernate mode. Sleep Mode When in sleep mode, the contents of the RAM of your notebook are preserved while practically all other components of your notebook are shut down, reducing your power consumption to a minimum. -
Page 41: Display
Display Opening and Closing the Display The display is locked by means of a special construction of the display hinge so that an additional lock is not necessary. 1. To open, lift the display with your thumb and index finger and position it as desired. -
Page 42: Appearance And Personalization
Appearance and Personalization This program offers you the possibility of adjusting the presentation on your display. This includes the background image, the screensaver, Active Desktop (web) and additional settings of your display and your graphics card, for example. The program can be started in the following way: ... -
Page 43: Connecting An External Monitor
Connecting an External Monitor The notebook has a Display port (23) for connecting an external monitor. 1. Shut down your notebook. 2. Connect the video signal cable of the external monitor to the Display port of the notebook (23) or use the optional adapter (Display port to VGA). Alternatively, you will be able to use the digital HDMI (High Definition Multimedia Interface) connection (22) for the transmission of image and sound signals, provided that your output device (a monitor or LCD TV) has a... -
Page 44: Duplicate The Desktop
3. Select from the following options under Multiple displays Duplicate these displays Extend these displays Show desktop only on 1 Show desktop only on 2 Duplicate the Desktop This Mode duplicates the display of the notebook on an external monitor. Information The same screen resolution must have been set on both devices in the case of this mode. -
Page 45: Data Entry
Data Entry The Keyboard By dual assignment of certain keys you have the same range of functions available to you as with a normal Windows® keyboard. Some functions are input using the Fn key, which is normal on notebook computers. Notebook-Specific Key Combinations Combination Description... -
Page 46: Touch Pad
Touch Pad The touchpad is positioned in front of the keyboard. The mouse pointer (cursor) follows the direction pre-determined on the touchpad by the movement of your finger in the normal mode. Caution! Do not use a ball-point pen or other object on the touch pad, as this could damage or cause a malfunction of your touch pad. -
Page 47: The Hard Drive
The Hard Drive The hard drive is the main storage medium combining large storage capacity and rapid data access. The hard drive contains the operating system of the computer, other application programs and backup files. These programs and files are pre-installed on your notebook, so you may note that some of the space on your hard drive is already taken. -
Page 48: Important Directories
Important Directories In the following we have listed the most important directories and described their content. Attention! Do not delete or modify these directories or their contents since data could be lost or the functionality of the system could be at risk. The master directory of drive C: includes important files required to start Windows®. -
Page 49: The Optical Drive
The Optical Drive Loading a Disc Unlike optical drives of desktop PC’s optical drives of notebooks retain discs with the help of a locking mechanism. When inserting the disc, you should take care to push the disc right onto the locking mechanism so that it can lock in position. - Page 50 1. Press the eject button at the optical drive to open the tray. 2. Remove the disc from its case without touching the unprinted side if possible. 3. Place the disc on the tray so that it lays flat with the label facing upward and gently push the tray in to close it.
-
Page 51: Emergency Ejection Of A Blocked Disc
Emergency Ejection of a Blocked Disc If the tray fails to open automatically, the tray can be opened manually provided there is an opening for emergency ejection. Restart your notebook and if the tray is still locked proceed as follows: 1. -
Page 52: Subjects Concerning The Cd/Dvd-Rewriter
Subjects Concerning the CD/DVD-Rewriter This Section only relates to devices that have been supplied with a CD-RW, a combination drive or a DVD-RW drive. First of all, you receive information on the so-called blank discs. Recordable/Rewriteable Discs Normal Discs are pressed from a digital, glass master and then sealed. In the case of blank disc, the information is burnt onto the disc with the laser of the Rewriter. -
Page 53: The Sound Card
The Sound Card Your notebook has an integrated stereo sound card (on-board) with 16-bit and 3D spatial sound effects (3D). The sound card is compatible with the industry standard Sound Blaster and Microsoft Sound System Version 2.0. This guarantees optimal support for all popular programs and games. -
Page 54: External Audio Ports
External Audio Ports Your notebook has a loudspeaker, so you can always playback sounds without additional equipment. The use of the external connections gives you a good opportunity to connect your notebook to external devices. Caution! The use of earphones with a high volume can lead to lasting damage to your hearing. -
Page 55: Setting The Recording Level
Setting the Recording Level To set the desired recording level, go to System control Sound Recording and select the source. The button Digital Mic is intended for the integrated microphone. If you want to use an external microphone or another recording source (Line In), select the relevant option. -
Page 56: The Network
The Network What is a network? A network means connecting your notebook to one or several other computers. Users can transfer data between computers and share resources such as printers, modems and hard disk drives. Here are some practical examples: ... -
Page 57: Wireless Lan
Wireless LAN Wireless LAN is an optional feature. This function allows you to create a wireless network link with an access point or directly with another wireless-enabled PC. Using the sensor key you can enable or disable the wireless LAN function. A corresponding LED will light. -
Page 58: Troubleshooting Within The Network
Troubleshooting within the Network Why does an error message appear when I click on the network environment? The computer name must be unique on the network and may not be the same as the task group. It appears that the network boards are unable to communicate. What might be the problem? Maybe one of the used network boards works with a different speed (e. -
Page 59: Bluetooth (Optional)
Bluetooth (optional) Bluetooth wireless technology is designed to replace cables between devices, such as your printer, keyboard, and mouse. Bluetooth wireless technology operates over a short distance. Bluetooth devices use radio transmission, which enables your computer, mobile phone, printer, keyboard, mouse, and other devices to communicate with each other without cables. -
Page 60: The Multimedia Card Reader
The Multimedia Card Reader Memory cards are media that are being used for a variety of purposes, especially in digital photography. They are increasingly replacing the floppy disk. The form and capacity of a memory card can vary according to the manufacturer. Your notebook supports the following formats: ... -
Page 61: Express Card
Express Card Your notebook supports the Express standard. Both Express/34 and Express/54 cards (the naming refers to the sizes of the cards) are available on the market. Your notebook supports both card formats. Installing Express Card Note Please always read the instructions that come with your Express card before installation. -
Page 62: Webcam (Optional)
Webcam (optional) Various services like calling online can be used with the built in webcam. The Webcam will be activated or deactivated by touching the sensor key Actual example using Windows Messenger 1. Start Windows Messenger and create a user account if you do not already have one. -
Page 63: Universal Serial Bus (Usb) Port
Universal Serial Bus (USB) Port USB ports provide an easy way to connect many peripheral devices to your notebook (11). You can use any USB device with any USB port. Your notebook has 3 USB 2.0 connection sockets (USB 1.1 compatible). Some USB devices require that you reinstall software drivers when you connect the device to a different USB port than the one originally used. -
Page 64: Esata/Usb Port
eSATA/USB Port eSATA stands for "external Serial ATA" and is used for connecting external hard disks. Unlike common USB standards, the transmission speed of an eSATA connection is higher than that of external USB hard disks. This connection is a "combo slot", to which both USB and S-ATA devices can be connected. -
Page 65: Ieee 1394 (Fire Wire)
IEEE 1394 (Fire Wire) The IEEE 1394 connector, also known as iLink® or Fire Wire, is a serial bus standard used for rapid digital data exchange. Application Options for IEEE1394 Connection of digital devices of the entertainment industry, such as set-top speakers, digital video and camcorder, ‘Digital Versatile Disk’... -
Page 66: Securing The Notebook
Securing the Notebook Unauthorized access to software and hardware solutions will be made available to you with your new Notebook. Startup Password You can protect your notebook against unauthorized use with a switching on password. Then, an invitation to enter the password will appear on the screen when the notebook is switched on. -
Page 67: Software
Software This section concerns itself with software. We make a distinction between the operating system, the software (application program), Windows activation, BIOS and the security package BullGuard, which is delivered with the device. Getting to Know Windows® 7 With Windows® 7, is launching the new operating system and successor to Vista®. Windows®... -
Page 68: Improved Desktop
past, could only be retrieved from the program itself, such as the command to create a new e-mail message. Improved Desktop Windows® 7 simplifies working with the windows on the Desktop. This provides you with more intuitive possibilities for opening and closing, as well as for changing the size and for rearranging. -
Page 69: Windows ® 7 - Help And Support
Homegroup With homegroups, a new function of Windows® 7, the linking of home computers is really simple. A home network group is created automatically, for example, when you link the first notebook under Windows® 7 with the home network. The addition of additional PCs with Windows®... -
Page 70: Windows ® 7 - Getting Started
® Windows 7 – Getting Started Learn everything you need to know about the features of the notebook. It is the aim of this feature to enable both beginners and experienced users to make additional setting for the optimal use of Windows®7 after first bringing the Notebook into operation. -
Page 71: Windows ® 7 - User Account Control
Getting Started has been subdivided into many small groups of subjects, so that the user will have the possibility of adjusting the content optimally to his or her knowledge. There are some of the links in the following: Go online to find out what’s new in Windows®7 ... -
Page 72: Windows ® 7 - Control Panel
® Windows 7 – Control Panel You can change Windows settings using the control panel. The settings control almost everything relating to Windows displays and functionalities, and they enable you to organise Windows according to your requirements. When you first open the Control Panel, a few of the most frequently used elements of the Control Panel are displayed by category. -
Page 73: Windows Media Center
Windows Media Center The Windows Media Center is the platform for your individual home entertainment in Windows®7. You will be able to record television, TV broadcasts, DVDs and music, look at photos and much more by a remote (not included in the scope of the delivery) or by a click of the mouse, with the Windows Media Center. - Page 74 Main menu Sub-menu Tasks Settings Adapt the Windows Media Center to your requirements and needs here. For example, make the settings for the protection of children here. Stand by You will not only close the Windows Media Center but you will be able to put the whole operating system in stand-by through this sub-menu.
- Page 75 Main menu Sub-menu Music Music library All the music titles stored in your notebook will be located in the music library. You will be able to start the selected playback of an album, an artist or a selected title here. Play back everything You will start the playback of all the files stored in your music library by means of this sub-menu.
-
Page 76: Installation Of Software
Installation of Software Note If your operating system is configured so that the installation procedure accepts only signed drivers (default) and software an information screen will appear. The software included in delivery is already pre-installed in the factory. Attention! You may find that during the installation procedure important files may be changed or even cancelled. -
Page 77: Software Uninstallation
An example for the manual installation without the autorun function: 1. Click on Start 2. Click on All Programs. 3. Open the Accessories program point. 4. Select the item Run. 5. Now enter the letter of the CD-ROM drive followed by a colon and the program name setup: 6. -
Page 78: Windows Activation
Windows Activation Microsoft is committed to the protection of intellectual property rights and the reduction of software piracy. Therefore Windows® 7 contains software-based product activation technology. Your copy of Windows® 7 has already been activated for your notebook. Product activation is needed if some components of your notebook have been replaced or you use a non-authorized BIOS. -
Page 79: The Bios Set-Up-Program
The BIOS Set-up-Program In BIOS setup (Basic Configuration) there are a number of configurable parameter settings available for your notebook. For example, you can change the operating mode of the interfaces, security features or power management. Warning! The notebook is factory pre-set to guarantee optimum operation. Only modify the parameters if necessary and if you are familiar with the configuration options. -
Page 80: First Aid
Chapter 4 First Aid Subject Page Data and System Security ............ 75 System Restore ..............76 FAQ ..................81 Customer Service ............... 81 Upgrades and Repairs ............87 Recycling and Disposal ............88... - Page 81 Software...
-
Page 82: Data And System Security
Data and System Security The programs described below are part of your Windows operating system. You can find additional information on these programs in the Windows Help file. Please also read the notes on page 4. Data Security Back up data regularly on external media such as a CD-R or CD-RW. Windows offers Backup Status and Configuration. -
Page 83: System Restore
System Restore Windows® 7 provides a useful function (System Restore) enabling the storage of the so-called Recovery points. The system remembers the current configuration as a snapshot and returns to this, if necessary. The advantage is that an unsuccessful installation can be cancelled. Recovery points are created automatically by the system, but they can also be set manually. -
Page 84: Windows® Update
Windows® Update Windows Update is the online updating of Windows. Use Windows Update to download elements such as security updates, important updates, the newest help files, drivers and Internet products from the Internet. The website is regularly augmented by new content, so that you can download the newest updates and error corrections at any time, to protect the notebook and guarantee its functioning. -
Page 85: Windows Update Information For Data Security
Windows Update Information for Data Security Windows Update needs certain information about the respective notebook, so that a suitable list with updates can be provided for you. This information will include the following: Version number of the operating system ... -
Page 86: System Restore
System Restore If your system is not functioning properly, you should use the Application Support Disc to restore your system. Limits of the Recovery Changes made to the original configuration (RAS, Desktop or Internet settings) and installed Software will be ignored by this Recovery and will not be reloaded. -
Page 87: Carrying Out A Restore
Carrying out a Restore 1. Remove any mass storage devices you may be using (memory cards, USB sticks, etc.). 2. Switch on the notebook. 3. Press the corresponding key when you see the message "Press F11 to run recovery" or "Press F12 to run recovery". After a few seconds, the message "Windows is loading files"... -
Page 88: Faq - Frequently Asked Questions
FAQ – Frequently Asked Questions Do I still have to install the enclosed discs? No. Basically all programs are already preinstalled. The discs are only intended as backup copies. Where will I find the necessary drivers for my laptop? The drivers are on the second partition of the hard drive in the Drivers and Tools folders. -
Page 89: Customer Service
Customer Service Localize the Cause Errors can have simple causes, but sometimes they are caused by faulty equipment. We would like to give you some tips to help solve common problems. Should these instructions not lead to success, please feel free to contact us. Check Cables and Connections Visibly check all cables and connections. -
Page 90: Errors And Possible Causes
Errors and Possible Causes The screen is black: This error can have different causes: 1. The operational display (On /Off switch) does not shine and the notebook is busy with 'file swapping'. Solution: Press the On /Off switch. 2. The sleep LED is flashing. The notebook is in the sleep mode. Solution: Press the On /Off switch. -
Page 91: Additional Support
Additional Support If the suggestions in the above section have not solved your problem, please contact customer care and we will attempt to help you solve the problem. Before you call, however, please have the following information available: How is your computer configured? ... -
Page 92: Transporting The Notebook
Transporting the Notebook Please use the following guidelines when transporting the notebook: Switch off the notebook. This will prevent damage to the hard disk. When the notebook is turned off, the hard disk heads are moved into a safe area. ... -
Page 93: Maintenance
Maintenance Warning! There are no user-serviceable or user-cleanable parts inside the notebook housing. Never open the notebook housing. Following these measures can extend the lifetime of your notebook: Before cleaning, always remove the power adapter plug and all connecting cables. -
Page 94: Upgrades And Repairs
Upgrades and Repairs Only a qualified Service Engineer should perform upgrades and repairs to your notebook. If you do not have the necessary qualifications, go to an appropriate Service Engineer. Please contact the Service Centre if you are experiencing technical problems with your notebook. -
Page 95: Recycling And Disposal
Recycling and Disposal Device At the end of its life, the appliance must not be disposed of in household rubbish. Enquire about the options for environmentally-friendly disposal Batteries Do not dispose of used batteries in the household rubbish! They must be deposited at a collection point for used batteries. -
Page 96: Appendix
Chapter 5 Appendix Subject Page Information about conformity ..........91 Conditions of Warranty ............94 Index ................... 99 Recycling and Disposal... - Page 97 Recycling and Disposal...
-
Page 98: Information About Conformity
Information about conformity The device fulfils electromagnetic compatibility and electricity safety requirements. Your device complies with the basic requirements and the relevant guidelines of the 2004/108/EU EMV Guidelines [electromagnetic compatibility] and the 2006/95/EU Guideline for low voltage devices. This device fulfils the basis requirements and the relevant regulation of the Ecodesign Guideline 2009/125/EG (Commission Regulation 1275/2008). - Page 99 Pixel structure Rows Blue Green Types of Pixel Failures: Type 1: A constantly lit pixel (a bright, white spot), even though it is not addressed. A white pixel is caused when all three sub-pixel are lit. Type 2: A pixel that does not light up (dark, black spot), although it is addressed ...
-
Page 100: Fcc Compliance Statement
FCC Compliance Statement This equipment has been tested and found to comply with the limits for a Class B digital device, pursuant to Part 15 of FCC Rules. These limits are designed to provide reasonable protection against harmful interference in a residential installation. -
Page 101: Restricted Warranty
MEDION must be in accordance with the following terms in order to be considered eligible: Is effective from the date of purchase or receipt of the MEDION product from an authorised seller of MEDION products; and ... - Page 102 MEDION for the reasonable costs of postage and packaging before MEDION will return the product to you. If so and you would still like MEDION to repair or replace the product, MEDION may do so but you will be charged MEDION’s standard rates for repair and replacement for this service.
- Page 103 If it is found during repair or assessment that the defect concerned is not covered under warranty, MEDION reserves the right to invoice you for all reasonable costs incurred by MEDION. These costs will be in relation to the return of the product, including reasonable administration costs, plus reasonable costs for materials used and labour provided when repairing or replacing the product.
- Page 104 90 days from the date of purchase of the MEDION product from an authorised seller of MEDION. MEDION will replace defective data media free of charge.
- Page 105 It may be necessary to delete all data in the product in order to repair the MEDION product. PLEASE MAKE SURE THAT YOU HAVE A BACKUP COPY OF ALL DATA ON THE PRODUCT BEFORE RETURNING THE PRODUCT TO MEDION. To the extent...
-
Page 106: Index
Index Data Security ........4 A Directories ........41 All programs ......... 22 Disc-Drive ........42 Ambient Temperature ..... 5 Discharging the battery ....31 Appearance and Personalization ... 35 Discs Autorun ........69 Loading ........42 Removing Blocked Discs .... 44 B ... - Page 107 Removing the Battery ....30 K Repairs .......... 87 Kensington-lock ......59 Running the Bios Setup ....72 Keyboard ........38 S L Safety and maintenance ....1 Laser radiation ....... 87 Safety instructions ......3 License agreement ......21 Care of the display ....
- Page 108 Upgrades and Repairs ....87 Webcam ........14 Using a safety lock ......59 W V Webcam........55 Views Windows activation ....... 71 Audio Out ......... 16 Windows Media Center ....66 ® Device Indicators ....... 14 Windows Disc Ejet Button ......16 User account control ....
- Page 109 Index...
Need help?
Do you have a question about the AKOYA X7811 and is the answer not in the manual?
Questions and answers