
Subscribe to Our Youtube Channel
Related Manuals for CTC Union IPCAM-8309F

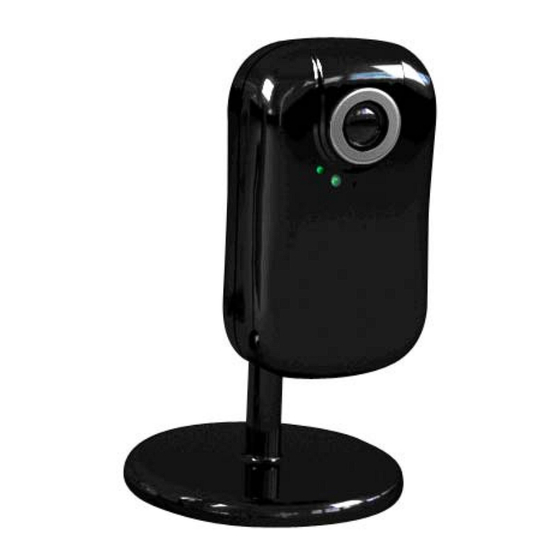
Summary of Contents for CTC Union IPCAM-8309F
-
Page 1: User Manual
USER MANUAL IPCAM-8309F IP Camera, CMOS, with Dual Stream CTC Union Technologies Co., Ltd. - Page 3 CTC Union Technologies makes no warranty, representation, or guarantee regarding the suitability of its products for any particular purpose, nor does CTC Union assume any liability arising out of the application or use of any product and specifically disclaims any and all liability, including without limitation any consequential or incidental damages.
-
Page 4: Before Using This Product
BEFORE USING THIS PRODUCT This CTC Union product has been designed with safety in mind. However, if not used properly, electrical products can cause fires which may lead to serious bodily injury. To avoid such accidents, be sure to heed the following. -
Page 5: Table Of Contents
CHAPTER#1 INSTALLATION CHAPTER#2 USING IP CAMERA VIA MOBILE PHONE CHAPTER#3 USING IP CAMERA VIA WEB BROWSER CHAPTER#4 HOW TO USE 4.1. I NITIAL ACCESSING THE CAMERA 4.2. C ONFIGURATION OF 4.2.1 Setting 4.2.2 Client Setting 4.2.3 Image Setup 4.2.4 Live View 4.3. - Page 6 CHAPTER 4 How to Use...
-
Page 7: Chapter#1 Installation
CHAPTER 1 Installation CHAPTER 1 Installation Installation Steps Follow these steps to install the CTC Union IPCAM-8309F on your LAN: 1. Check the package contents against the list below. 2. Setup the device. See IP Installer User Manual on the available methods. -
Page 8: Chapter#2 Using Ip Camera Via Mobile Phone
CHAPTER 2 Using IP Camera via Mobile Phone CHAPTER 2 Using IP Camera via Mobile Phone To use IP cameras via mobile phones, please make sure your RTSP is set to “ON”. (Default is “ON”) To change the settings of IP cameras, please see “Settings” for details. 3G Mobile Phone viewing For 3G mobile phone viewing, type “rtsp://<IP>:<PORT>/video.3gp”... -
Page 9: Chapter#3 Using Ip Camera Via Web Browser
CHAPTER 3 Using IP Camera via Web Browser CHAPTER 3 Using IP Camera via Web Browser System Requirement To use the product normally, we strongly recommend your computer follows our minimum system requirement (Computer level lower than this might cause some problems) Item Requirements Pentium 4 1600MHz (or equivalent AMD) -
Page 10: Chapter#4 How To Use
Intelligent IP Installer in Windows operation systems. The recommended browser for Windows is Internet Explorer 6.0. If you want to know how to use CTC Union IP camera with Intelligent IP Installer, please check the Intelligent IP Installer User’s Manual for Windows operation systems. -
Page 11: Initial Accessing The Ip Camera
CHAPTER 4 How to Use 4.1. Initially accessing the IP camera 1. Start your web browser, and enter the IP address or host name of the CTC Union IP camera in the Location / Address field of your browser. Note:... -
Page 12: Setting
CHAPTER 4 How to Use 4.2. Configuration of Main Screen Language You can click the pull-down box to select the system language, including English, Traditional Chinese, Simplified Chinese, German, Japanese or Spanish. 4.2.1 Setting This function is only for the Administrator. Click this button to get into the Basic and Advance settings screen pages. -
Page 13: Client Setting
CHAPTER 4 How to Use 4.2.2 Client Setting Mode: Click the pulldown box to choose between MPEG-4 and M-JPEG (Motion JPEG) video compression mode. Note:M-JPEG streaming is unavailable if RTSP mode is ON. View Size: Select the desired display image resolution to 640X480 (4CIF) or 320X240 (CIF). Protocol: Select the transferring protocol from TCP, UDP, HTTP and Multicast. - Page 14 CHAPTER 4 How to Use Zoom in / out the image via the monitor window 1. Click to display the digital zoom in window. 2. Pull the to adjust the digital zoom range, and it will be shown on the above window. 3.
-
Page 15: Basic Setting
CHAPTER 4 How to Use 4.3. Basic SETTING Click the “Basic” menu item to display the sub menus, including System, Camera, Network, and Security. 4.3.1 System 4.3.1.1 Information The Information page provides you with product information, including Product name, Firmware version, and Web version. - Page 16 CHAPTER 4 How to Use 4.3.1.2 Date & Time Setting Current date & time:This displays the current date and time of the device. PC clock:This displays the date and time of the monitoring PC clock. Date & time format:Click the pull-down box to select among different time display formats, including yyyy-mm-dd hh:mm:ss (year-month-day hour:minute:second), mm-dd-yyyy hh:mm:ss (month-day-year hour:minute:second), and dd-mm-yyyy hh:mm:ss (day-month-year hour:minute:second).
- Page 17 CHAPTER 4 How to Use 4.3.1.3 Initialization Reboot:Click this button to reboot the device. A confirmation dialogue will appear. Click OK to proceed. It takes about two minutes to reboot the device. Factory default:Click this button to reset the device to the factory default settings. A confirmation dialogue will appear.
-
Page 18: Camera
CHAPTER 4 How to Use 4.3.2 Camera 4.3.2.1 General RTSP: Switch the RTSP streaming On/Off. Note: • RTSP: Real Time Streaming Protocol. RTSP is supported by most media clients. (RealPlayer, Media Player, QuickTime, etc…) Image Rotate:Enables user to mirror or flip the display screen. Night Mode:Turn Night Mode ON/OFF. -
Page 19: Mpeg4
CHAPTER 4 How to Use 4.3.2.2 MPEG-4 Computer View RTSP (If RTSP mode is ON) RTSP port: Specify the transmission port number for RTSP streaming video. Default value is 554. Viewer authentication: If the viewer authentication is ON, users viewing through RTSP will be requested to key-in username and password. - Page 20 CHAPTER 4 How to Use MPEG-4 viewer port (If RTSP mode is OFF) Unicast streaming Video/Audio port number : Specify the transmission port number of the video data. It is initially set to 8090. Specify an even number from 1024 to 65534. Image Size:Specify the image size the network camera transmits.
-
Page 21: Mobile View
CHAPTER 4 How to Use Mobile View RTSP (If RTSP mode is ON) RTSP port: Specify the transmission port number for RTSP streaming video. Default value is 8554. RTP (If RTSP mode is ON) Unicast streaming: Unicast streaming Video/Audio port range: Specify the transmission port range of RTP streaming video. -
Page 22: Mjpeg
CHAPTER 4 How to Use 4.3.2.3 M-JPEG Note: • Motion JPEG settings are unavailable if the RTSP mode is ON, which means the M-JPEG streaming is closed. MJPEG viewer port Unicast streaming Video/Audio port number : Specify the transmission port number for the video data. -
Page 23: Network
CHAPTER 4 How to Use 4.3.3 Network 4.3.3.1 Information MAC address:Displays the MAC address of the device. Obtain an IP address automatically (DHCP):If a DHCP server is installed on the network, select this so the IP address is assigned by the DHCP server. Note:... -
Page 24: Pppoe
CHAPTER 4 How to Use 4.3.3.2 PPPoE Use this when you connect the device through PPPoE (Point -to- Point Protocol over Ethernet). PPPoE connection is a protocol that is widely used in xDSL (digital subscriber line such as ADSL, VDSL or SHDSL) as the authentication and connection system. IP address:The IP address obtained from the PPPoE connecting to network. -
Page 25: Ddns
CHAPTER 4 How to Use 4.3.3.3 DDNS DDNS or Dynamic DNS allows this device to register its IP address with a DDNS service provider. This allows accessing this device by using a real name, rather than having to remember the device's IP address. Server name:Choose the DDNS Server from the list. -
Page 26: Upnp
CHAPTER 4 How to Use 4.3.3.4 UPnP This device includes support for UPnP (Universal Plug 'n Play), which is enabled by default. If also enabled on your computer, the device will automatically be detected and a new icon will be added to “My Network Places.” It provides port forwarding for opening a port in a router or firewall in a private network in order to let a party from the outside world contact a user device inside the firewalled network. -
Page 27: Ip Notification
CHAPTER 4 How to Use 4.3.3.5 IP Notification When IP Notification is set to On, you can send an e-mail notification of the completion of the network setting. Notify type:Select type of DHCP, Static IP and PPPoE will notify. SMTP server name:Type the SMTP server name up to 64 characters, or the IP address of the SMTP server used to relay the email notification messages. - Page 28 CHAPTER 4 How to Use Note: • When you set to On, be sure to select either or both SMTP or/and POP before SMTP. POP server name : It is necessary when the POP before SMTP is selected in Authentication. Type the POP (receiving mail) server name up to 64 characters, or type the IP address of the POP server.
-
Page 29: Security
CHAPTER 4 How to Use 4.3.4 Security 4.3.4.1 Accounts The device default account and password setting is “admin/admin”. That means anyone might gain access the device, including the configuration, as long as the IP address is known. It is necessary to assign a password if the device is intended to be accessed by others. Use this menu to set the user names and passwords of Administrator and up to 9 different users (User 1 to User 9), and the access right of each user. -
Page 30: Https
CHAPTER 4 How to Use 4.3.4.2 HTTPS HTTPS is a URI scheme used to indicate a secure HTTP connection. It is syntactically identical to the http:// scheme normally used for accessing resources using HTTP. Using an https: URL indicates that secure HTTP is to be used, but with a different default TCP port (443) and an additional encryption/authentication layer between the HTTP and TCP. -
Page 31: Advance Setting
CHAPTER 4 How to Use 4.4 Advanced Settings 4.4.1 FTP Client Use this menu to set up the capturing and sending of images to an FTP server. By using FTP client function, you can send an image and audio file which has been shot and recorded triggered by an external sensor input or with the built-in motion detection function to FTP server. -
Page 32: Alarm Sending
CHAPTER 4 How to Use 4.1.1.2 Alarm sending This function is used to forward the image and audio file to the specified FTP server when an alarm is detected by an external sensor input or by the built-in motion detection function. Select On to send the image and audio file to FTP server triggered by the alarm detection. -
Page 33: Periodical Sending
CHAPTER 4 How to Use 4.1.1.3 Periodical sending You can setup to send an image file to FTP server periodically by selecting On to send the image file to FTP server triggered with setting period. Remote path:Type the remote path, up to 64 characters. Image file name:Type the file name of the image sent to FTP server, up to 10 alphanumeric characters, - (hyphen) and _ (under score). -
Page 34: Smtp
CHAPTER 4 How to Use 4.4.2 SMTP Use the SMTP setting page when you want to send an image via e-mail. By using the Mail (SMTP) function, you can send a mail with attached image which has been shot triggered by the external sensor input or with the built-in motion detection function. - Page 35 CHAPTER 4 How to Use SMTP server name:Type the SMTP server name, up to 64 characters, or the IP address of the SMTP server. Authentication:Select the authentication method required when you send an email. Off: Select if no authentication is necessary when an email is sent. On: When authentication is necessary, to send an e-mail, select one of the authentication methods from the following.
-
Page 36: Alarm Sending
CHAPTER 4 How to Use 4.4.2.2 Alarm sending Use this setting to send the mail in response to the alarm detection by the external sensor input or by the built-in motion detection function. Alarm sending:Select On to setup send mail in response to the alarm detection. File attachment:Set whether an image file is attached to the mail sent or not. -
Page 37: Periodical Sending
CHAPTER 4 How to Use 4.4.2.3 Periodical sending You can setup to send an image file by SMTP server periodically by selecting On to send the image file by SMTP server linked with setting period. Image file name:Type the file name of the image sent by SMTP up to 10 alphanumeric characters, - (hyphen) and _ (under score). -
Page 38: Http Event
CHAPTER 4 How to Use 4.4.3 HTTP Event Use this menu to setup capturing and sending images to an HTTP server. By using HTTP client function, you can send the image and audio file which has been shot and recorded linked with the external sensor input or with the built-in motion detection function to HTTP server. -
Page 39: Alarm Sending
CHAPTER 4 How to Use 4.4.3.2 Alarm sending Use this setting page to trigger the email sending in response to an alarm detected by the external sensor input or by the built-in motion detection function. Alarm sending:Select On to set the alarm detection action. Motion Detection:Click On to use Motion Detection function as a trigger. -
Page 40: Schedule
CHAPTER 4 How to Use 4.4.4 Schedule When you click Schedule on the Advanced mode menu, the Schedule setting menu appears. This is the same menu as the setting menu which is displayed when you click Schedule to set Effective period and Schedule in FTP client setting menu, e-Mail (SMTP) setting menu, Alarm out setting menu and so on. -
Page 41: Motion Detection
Chapter#4 How to Use 4.4.5 Motion Detection When you click Motion Detection on the Advance mode menu, the Motion Detection setting menu appears. There are three Motion Detection functions which act as sensors and can be set for different detecting zones. Each one has Threshold and Sensitivity inputs which you can adjust to specific zone sequentially. -
Page 42: System Log
Chapter#4 How to Use 4.4.6 System Log The System Log function allows users to review any changes and events that have happened. The system starts logging automatically after started. Remote Log: Enables user to send the log data to a specified log server. - Page 44 DVS Series CTC Union Technologies Co., Ltd. Far Eastern Vienna Technology Center (Neihu Technology Park) 8F, No.60, Zhouzi Street Neihu District, Taipei, Taiwan Phone:(886) 2.2659.1021 Fax:(886) 2.2799.1355 E-mail: info@ctcu.com Url:http://www.ctcu.com...
Need help?
Do you have a question about the IPCAM-8309F and is the answer not in the manual?
Questions and answers