Advertisement
Available languages
Available languages
For customer care
Email us at: info@xenasecurity.com
Replacement batteries and XENA accessories,
visit: www.xenasecurity.com
Don't forget to register your XENA lock at
www.xenasecurity.com
Disclaimer:
XENA SECURITY ASSUMES NO RESPONSIBILITY OR LIABILITY
FOR DAMAGES OR INJURIES RESULTING FROM THE USE OR
MISUSE OF OUR PRODUCTS.
XENA JAPAN
Copyright © XENA Security. All rights reserved
please
PJ0904-1001-1383
USER MANUAL for
, XX10,
XX6
XX14
Alarmed Disc-Locks
www.xenasecurity.com
Advertisement
Table of Contents

Related Manuals for Xena XX6


Summary of Contents for Xena XX6
- Page 1 For customer care Email us at: info@xenasecurity.com Replacement batteries and XENA accessories, please visit: www.xenasecurity.com Don’t forget to register your XENA lock at www.xenasecurity.com USER MANUAL for , XX10, XX14 Disclaimer: XENA SECURITY ASSUMES NO RESPONSIBILITY OR LIABILITY Alarmed Disc-Locks FOR DAMAGES OR INJURIES RESULTING FROM THE USE OR MISUSE OF OUR PRODUCTS.
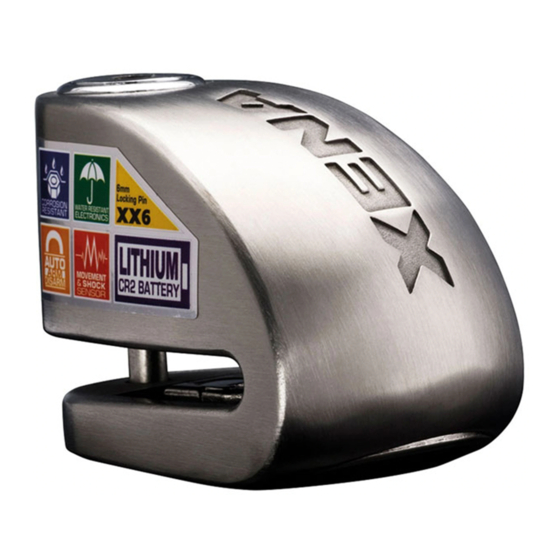
- Page 2 • For double-locking locks (XX10, XX14) turn the key counter-clockwise to lock; 9. Flat coded key for push-down locks (XX6), simply push until the barrel clicks in place. For more information on fitting XENA locks to your bike, go to www.xenasecurity.com/faqs.
-
Page 3: Battery Life
ENGLISH ENGLISH Your new XENA lock is shipped with the battery uninstalled. Please insert the CR2 battery supplied. To open lid and remove module Battery installation (See fig.B & fig.C) • Use CR2 3v Lithium Battery. • To release the lid, insert flat coded key provided (8) into slot on lid and push toward the back of the lock. -
Page 4: Troubleshooting
• Ideally, carry your XENA underneath the seat of your bike. • Once locked in place, the alarm will sound its arming beep approximately 5 • CAUTION: Do not carry your XENA in or attach it to your clothing, as this can seconds after “locked”. - Page 5 7 mm sur la majorité des 2 roues info@xenasecurity.com. 2. Diamètre de l’axe de verrouillage: Pour plus d’informations sur ce produit et le reste de la gamme XENA, les XX6-6mm / XX10-10mm / XX14-14mm accessoires et les actualités de nos produits, visitez www.xenasecurity.com.
- Page 6 Hors Service. • Une pile déchargée affectera les performances de votre bloque disque XENA. Remplacez-la dès les premiers signes de faiblesse. * Pour plus de détails sur le produit merci de contacter votre revendeur XENA ou visitez le site www.xenasecurity.com...
-
Page 7: Entretien
• Chaque antivol est livré avec 3 clés et une plaque sur laquelle figure le numéro de • Rangez votre bloque disque alarme XENA dans la sacoche de transport fournie. la clé à 7 caractères (par ex. X123456). Ce numéro vous permettra de commander Idéalement, le bloque disque devra être rangé... - Page 8 • Voor de sloten met een dubbel sluitsysteem (XX10, XX14) draai de sleutel tegen 7. Module bescherming de klok in om het slot te sluiten. Bij het slot met het enkel sluitsysteem (XX6) druk 8. Gecodeerde sleutel je het slothuis naar beneden om het slot te sluiten.
-
Page 9: Levensduur Batterij
• Onder normale omstandigheden moet de batterij minstens 8 maanden voldoende capaciteit hebben om goed te functioneren. Regelmatig alarm en/of extreme temperaturen kunnen de levensduur ongunstig beïnvloeden. * Meer informatie betreffende het product bezoek uw locale XENA dealer of ga naar www.xenasecurity.nl... - Page 10 • Er is geen aan/uit schakelaar. Het slot zal automatisch de aanwezigheid van een • U kunt hiervoor terecht bij iedere locale erkende XENA dealer of stuur een mail remschijf herkennen. (BELANGRIJK: zorg dat de spiegel bedekt is door de remschijf ).
- Page 11 • Soms kan het echter noodzakelijk zijn om het slot te wekken door het slot een paar keer te openen en te sluiten. Hoe weet ik wanneer mijn XENA remschijfslot is geactiveerd • Zodra het slot om de remschijf zit zal er na 5 seconden een activeringssignaal te horen zijn.
Need help?
Do you have a question about the XX6 and is the answer not in the manual?
Questions and answers