Table of Contents
Advertisement
Advertisement
Table of Contents

Subscribe to Our Youtube Channel
Related Manuals for Digital Dream L'espion mini


Summary of Contents for Digital Dream L'espion mini
- Page 1 User's Manual...
- Page 2 Copyright © 2002 All rights reserved. Trademarks Windows is a trademark of Microsoft corporation. Adobe , Acrobat , and ® ® ® Photoshop are registered trademark of Adobe Systems Incorporated. Ulead ® PhotoExpress are registered trademarks of Ulead Systems Inc. All other ®...
-
Page 3: Table Of Contents
Utility Software Installation ..............12-13 A. Installing Camera Driver ..............12 B. Installing Other Bundled Software ............13 Using the l'espion mini as a Digital Camera ..........14 l'espion mini Digital Camera interface ............ 14 Zoom ....................14 Acquire .................... 14 Acquire All .................. - Page 4 Using Ulead PhotoExpress ..............15 Frequently asked questions and technical support..........16...
-
Page 5: Package Contents
Package Contents AAA Battery (Alkaline recommended) l'espion mini digital camera Key chain Special USB cable CD-ROM l'espion mini Quick Reference (Contains digital camera software and user's manuals) and other inserts... -
Page 6: Features
With USB, download of images to your PC is accomplished at higher speed. • Software package bundle Ulead Photo Express (Digital Still camera software) Digital Dream Video Mail (PC/Web camera software) Adobe Acrobat Reader (Software for reading the user's manual) -
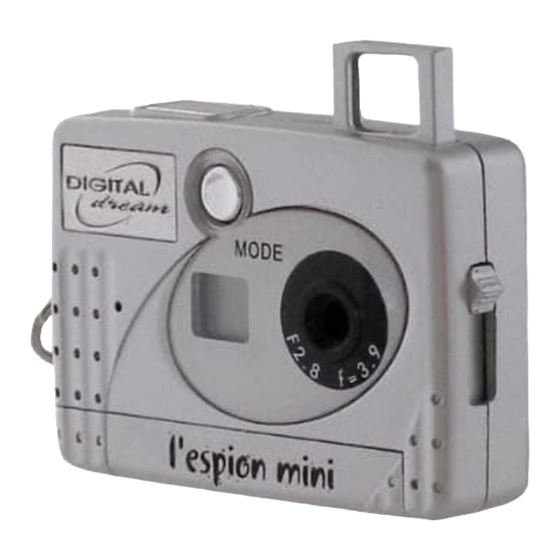
Page 7: Camera Components
Camera Components VIEWFINDER POWER AND FUNCTION MODE SELECTION BUTTON LCD DISPLAY PANEL LENS GRIP SHUTTER BUTTON USB PORT BATTERY COMPARTMENT... -
Page 8: Getting Ready
Getting Ready A. Loading the Battery (1 AAA size battery) 1 Open the battery compartment cover, by slightly pushing the bottom of the battery coverto the left, and then smoothly pushing the cover away from the rail. 2 Insert a battery into its chamber making sure that the positive (+) and negative (-) ends are properly oriented with the polarity indicated on chamber. -
Page 9: Basic Picture Taking Operation
B . Basic Picture Taking Operation NOTE: The camera is designed without a power switch. It uses energy-saving or “Sleep” mode to control its power. If the camera is off, press the Function Mode button to turn the camera back on. 1 Pop up the Viewfinder and hold the camera steady. -
Page 10: Other Modes Of Operation
Other Modes of Operation A . 80 Shots Mode This mode of operation allows you to take 80 shots of lower-resolution images in QCIF (176 x 144) format. To set your camera into 80 Shots mode 1 Repeatedly press the Function Mode button until the “ ” icon is displayed on the LCD Display Panel. -
Page 11: 20 Shots Mode
B . 20 Shots Mode This mode of operation allows you to take 20 shots of images at higher resolution CIF (352 x 288) format. The camera default to this mode. To set your camera back to 20 Shots mode after operating in 80 Shots mode- 1 Repeatedly press the Function Mode button until the “... -
Page 12: Continuous Shooting Mode
C . Continuous Shooting Mode This mode of operation allows you to Continuous Shooting mode is ON take multiple frames of images when when this LCD Panel displays the holding down the Shutter button while “ ” icon aiming at your subject. A maximum of 20 or 80 shots can be taken depending on which shooting mode you are in. -
Page 13: Self-Timer Mode
D . Self-Timer Mode The Self-Timer mode of operation allows a 10 seconds shutter release delay after pressing the Shutter button. 1 Set camera into Self-Timer mode by repeatedly pressing the Function Mode select button until the “ ” icon is displayed on the LCD Display Panel. 2 Then press the Shutter to start the 10 second countdown. -
Page 14: Erasing All Images From Camera
Erasing All Images from Camera Whenever you wish to discard the images you have already taken, you can erase them from the camera. Take note that this erase feature functions only as “All- Frame Erase.” No partial erasure is allowed. 1 Enable the “All-Frame-Erase”... -
Page 15: Connecting The Camera To Your Pc
Connecting the Camera to PC NOTE: It is assumed that you have already installed the bundled software into your computer. If not, install software as instructed in the section on “Utility Software Installation” of this manual. To transfer (download) the images data from the camera to your PC, connect the camera to your PC with the supplied USB cable. -
Page 16: Utility Software Installation
Utility Software Installation The Utility CD that accompanies your camera contains the l'espion Mini Digital Camera Driver bundled with valuable image-editing software. A . Installing Digital Camera Driver Click to start camera driver 1 Insert the utility CD into the CD- installation ROM drive. -
Page 17: Installing Other Bundled Software
B . Installing Other Bundled Software 1 From the l'espion mini Software Click the software Installer screen, click each software components to start in the order that it appears on the the installation screen, follow the on-line instructions to complete the... -
Page 18: Using The L'espion Mini As A Digital Camera
Using the l'espion mini as a Digital Camera The l'espion mini Digital Camera interface will be launched, when you start downloading images from your digital camera to any of your image-editing software. Acquire All Click the Acquire All button to send... -
Page 19: Downloading Images To Your Pc
Select Data Source dialog box will appear, choose l’espion mini digital camera from the list, and then click the Acquire button. 4 The l'espion mini Digital Camera interface appears. Please refer to the previous page for a description of this. -
Page 20: Frequently Asked Questions
Frequently asked questions Why does the LCD display flash on my camera? A The battery on your camera needs replacing. Q I am using the camera as a webcam and the display has A The display will change while using the camera as a gone strange and I have lost my images.
Need help?
Do you have a question about the L'espion mini and is the answer not in the manual?
Questions and answers